Category: DIY Page 2 of 3

Tips on how to refinish furniture.

Transforming Old Furniture Through Simple Refinishing Techniques

I was halfway through a massive, dusty pile of thrifted mid-century sideboards when I realized something: most people make furniture restoration way more complicated than it actually needs to be. I used to think you needed a professional-grade workshop and a decade of carpentry experience just to fix a scratched tabletop, but that’s honestly just gatekeeping. Learning how to refinish furniture isn’t about mastering complex woodworking; it’s about having a reliable system so you don’t end up with a sticky, uneven mess that looks worse than when you started.

In this guide, I’m stripping away the fluff and giving you the actual, unpolished steps to transform your tired old pieces without losing your mind. We aren’t going to talk about expensive, specialized machinery that takes up half your apartment; instead, I’m focusing on the essential tools and the repeatable workflow I use in my own space. You’ll learn how to prep surfaces properly, choose the right finishes, and avoid the common mistakes that turn a fun weekend project into a total headache. Let’s get into it.

Table of Contents

Guide Overview

Total Time: 1-2 days
Estimated Cost: $40-80
Difficulty: Beginner

Tools & Supplies

  • Sandpaper (various grits for smoothing)
  • Screwdriver (for removing hardware)
  • Paintbrush or foam roller (for application)
  • Microfiber cloth (for dust removal)
  • Wood filler (small container for cracks)
  • Primer (1 quart for base coat)
  • Paint or stain (1 quart for finish)
  • Degreaser or TSP (small amount for cleaning)

Step-by-Step Instructions

  • 1. First, you need to clear your space and get your gear ready. I’m talking about a well-ventilated area—ideally a garage or a spot near an open window—because the fumes from strippers and stains are no joke. Grab some drop cloths to protect your floors, a few different grits of sandpaper (start with 80 and work your way up to 220), some tack cloths, and your chosen finish. Having everything laid out before you start prevents that mid-project panic where you realize you’re missing a crucial tool.
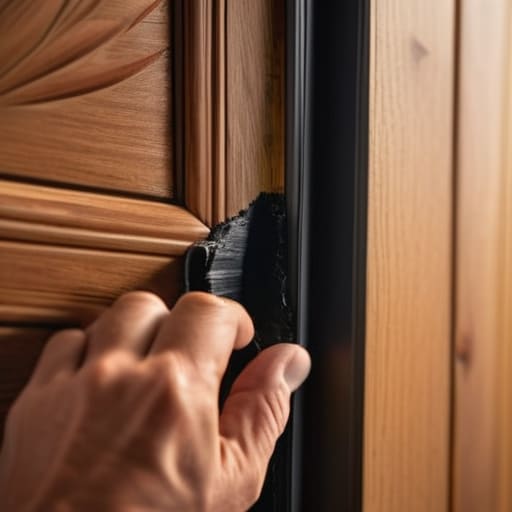
  • 2. Next, you have to strip the old finish. If the piece has layers of thick, old varnish or paint, don’t even bother trying to sand it all off immediately; you’ll just burn out your sander and waste your afternoon. Use a chemical stripper to melt away the old gunk. It’s a bit messy, but it’s the most efficient way to get down to the raw wood without doing a mountain of manual labor. Just follow the product instructions carefully and scrape the residue off with a putty knife once it starts bubbling.
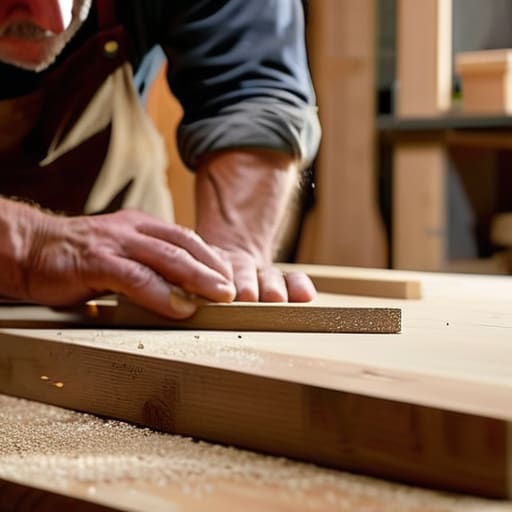
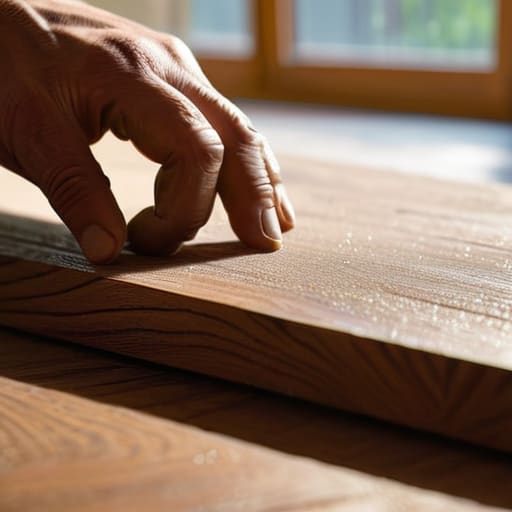
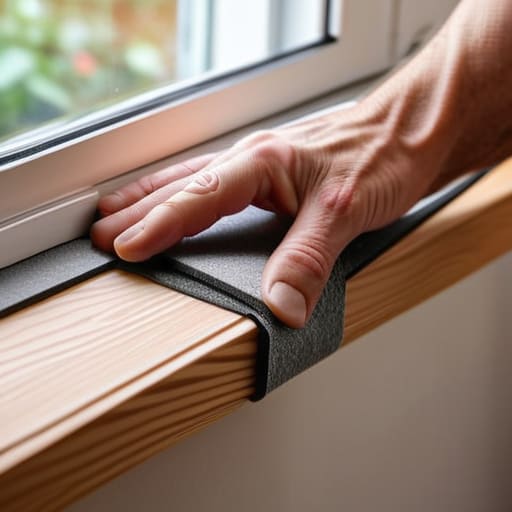
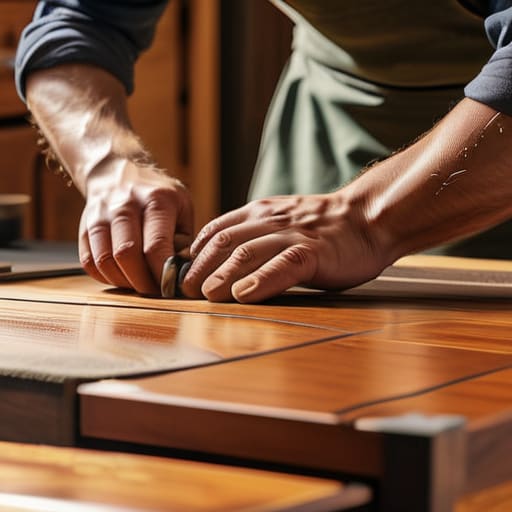
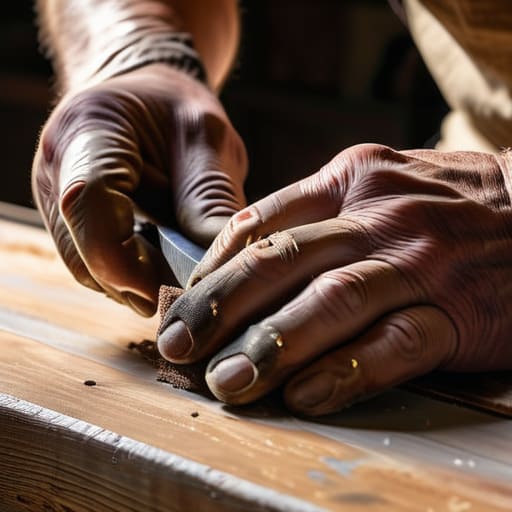
  • 3. Now comes the sanding phase, and this is where most people try to cut corners. Don’t. You need to sand in the direction of the wood grain, not across it, or you’ll leave these permanent swirl marks that will show up even more once you apply the stain. Start with a coarser grit to level everything out and gradually move to finer grits. By the time you hit 220, the surface should feel as smooth as silk.
  • 4. Once you’re done sanding, you have to clean the hell out of the piece. Even a tiny bit of dust left behind will turn your final finish into a sandpaper-textured mess. Use a vacuum first, then wipe the whole thing down with a tack cloth or a microfiber cloth dampened with mineral spirits. I always do a double check here; if you see a single speck of dust, keep wiping until it’s spotless.
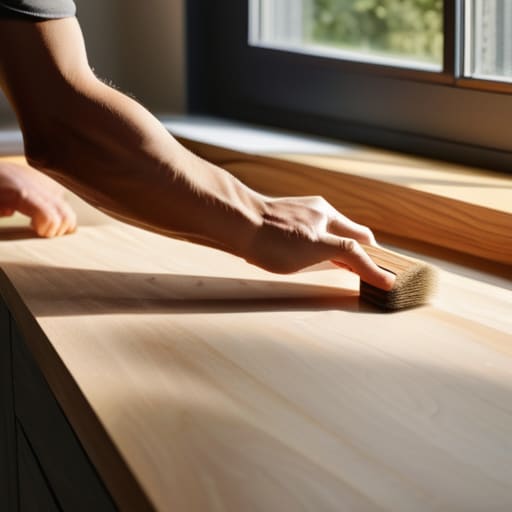
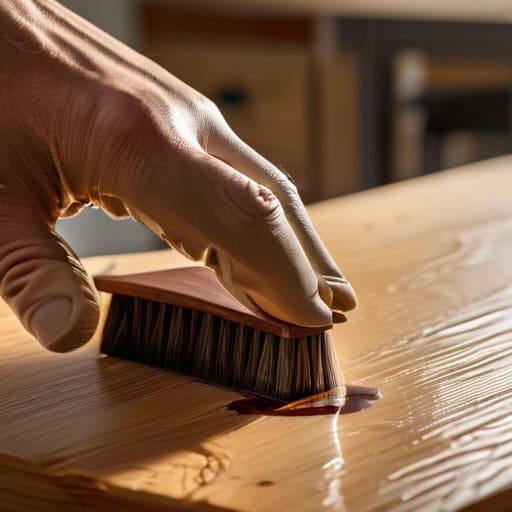
  • 5. Now you can apply your stain or your new topcoat. If you’re using a stain, apply it with a lint-free rag or a foam brush, working in even strokes. If you want a darker look, you can do multiple light coats rather than one heavy, gloopy one. If you’re going for a more modern, natural look, you might skip the stain and go straight to a clear wax or poly. Just remember to work quickly to avoid lap marks where the wet edges meet.
  • 6. Finally, let it cure. This is the hardest part for me because I want to see the finished product immediately, but patience is literally the most important tool in your kit. If you apply a topcoat too soon or start using the piece before the finish has actually hardened, you’ll end up with sticky spots or a ruined surface. Give it at least 24 to 48 hours in a dust-free environment before you even think about putting a lamp or a book on it.

Understanding How to Refinish Furniture

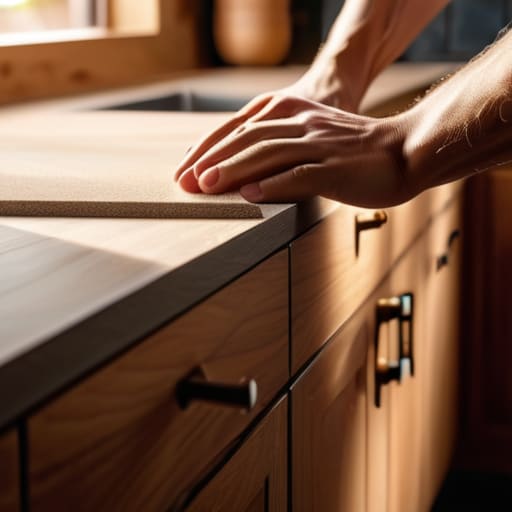
Understanding How to Refinish Furniture: Wood Prep

Before you dive into the actual labor, you need to understand that you aren’t just changing a color; you’re essentially performing surgery on the piece. The biggest mistake I see people make is rushing the prep work because they want to get to the “fun” part of seeing a new color. If you don’t prioritize wood grain preparation, you’re going to end up with a finish that looks blotchy and amateur. You have to respect the material. If the piece has layers of heavy, old-school buildup, you might need to look into specific wood stripping techniques rather than just trying to sand through it all. Sanding through thick layers of old finish is a recipe for a burnt-out arm and a ruined project.

Think of this stage as setting the foundation for your entire system. If you’re working with a piece that has a deep, beautiful pattern, your goal is to strip away the damage without erasing the character. Whether you’re removing old varnish or dealing with a stubborn shellac, the goal is a clean, naked surface. Take your time here. If the base isn’t smooth, no amount of expensive stain is going to save you from a mediocre result.

Key Things to Know

Key Things to Know: Wood Stripping.

Before you dive in, let’s talk about the stuff people usually gloss over until it’s too late. First, you need to be realistic about what you’re actually working with. If you’re dealing with a piece that has layers of thick, heavy-duty buildup, don’t try to brute-force it with just sandpaper. You’ll end up exhausted and with a finish that looks patchy. This is where wood stripping techniques actually save your sanity; using a chemical stripper to get the bulk of that old gunk off first makes the subsequent sanding much more manageable.
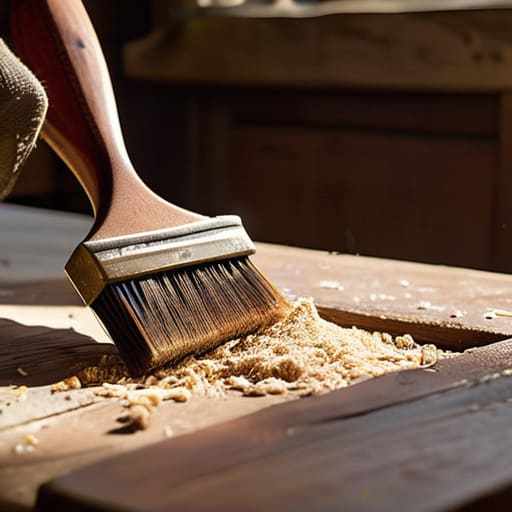
Also, please, for the love of all things functional, pay attention to your abrasives. I see so many people grab one random sheet of sandpaper and call it a day, but you really need a solid furniture sanding grits guide to follow. You can’t just jump from a coarse grit straight to a fine one and expect a smooth surface. If you skip the middle steps, you’ll see swirl marks under your final coat that will drive you crazy. Lastly, keep an eye on your environment—dust is the ultimate enemy of a clean finish, so try to work in a space where you can actually control the airflow.

Five things I wish I knew before my first project

  • Don’t cheap out on sandpaper. I used to think a basic pack from the grocery store would do the trick, but you’ll end up fighting the wood for hours. Invest in a decent variety of grits—you’re going to need them.
  • Test your finish on a hidden spot first. Seriously. I once finished an entire thrifted nightstand only to realize the stain turned out a weird muddy purple because of how it reacted to the original sealant. Check a corner or the underside first so you aren’t blindsided.
  • Prep your workspace like your sanity depends on it. This is messy work. If you aren’t covering your floors with drop cloths and taping off your walls, you’re going to be finding wood dust in your coffee for the next three weeks.
  • Work in small, controlled sections. It’s tempting to try and slap the stain or paint on all at once to get it over with, but that’s how you get those annoying lap marks and uneven patches. Take your time and do one side at a time.
  • Embrace the “ugly” phase. There is a middle point in every project where the piece looks absolutely trashed—the old finish is half-gone and the wood looks raw and weird. Don’t panic and quit; just keep going, because the final result is worth the mid-project crisis.

The Bottom Line

Don’t rush the prep work; spending extra time sanding and cleaning now is the only way to avoid a finish that looks like a DIY disaster later.

Invest in decent tools rather than the cheapest options you can find, because bad equipment just turns a simple project into a frustrating, long-winded mess.

Accept that it won’t be perfect on the first try, and focus more on building a repeatable process than obsessing over every tiny imperfection.

The Final Polish

Applying The Final Polish to furniture.

At the end of the day, refinishing furniture isn’t about achieving some Pinterest-perfect, magazine-ready masterpiece on your very first try. It’s about the system: prepping the surface properly, staying patient through the drying phases, and not cutting corners on the sanding. If you follow the steps—even when you’re tempted to skip the primer or rush the topcoat—you’re going to end up with a piece that actually lasts. Remember, the goal is to build something durable that fits your space, rather than just slapping some paint over old mistakes and hoping for the best.

I know it can feel overwhelming when you’re staring at a stripped-down piece of wood and a messy workspace, but trust me, the payoff is so worth the chaos. There is something incredibly grounding about taking something that was headed for a landfill and giving it a second life through your own hands. Don’t let the fear of a little dust or a failed stain stop you from starting. Once you get that first successful project under your belt, you’ll realize that mastering these small systems is what actually makes adulthood—and DIY—feel manageable. Now, go grab your multi-tool and get to work.

Frequently Asked Questions

Is it actually worth the effort to refinish cheap particle board or IKEA furniture, or should I just stick to solid wood?

Honestly? For particle board or IKEA pieces, don’t bother with a full refinish. It’s usually just a thin veneer or laminate, and once you sand it, you’re basically hitting raw sawdust. It’s a massive headache that rarely looks good. Instead, skip the heavy lifting and just use chalk paint or contact paper. Save your energy and your multi-tool for the solid wood pieces—that’s where the real payoff actually lives.

How do I know if I'm dealing with real wood veneer or if the whole piece is solid, and does that change my approach?

This is the million-dollar question, and honestly, it changes everything. To check, look at the edges or the underside. If you see a seam or a thin layer meeting a different wood grain, it’s veneer. If the grain pattern wraps perfectly around the corner, you’re likely looking at solid wood. If it’s veneer, be incredibly careful with sanding—you can sand right through that thin layer in seconds, which is a total nightmare to fix.

What’s the best way to deal with that weird, lingering smell of chemical strippers or strong stains in a small apartment?

Honestly, that chemical funk is the absolute worst, especially when your living room is also your bedroom. First, crack every window you have—airflow is your best friend. If you can, set up a box fan facing out to pull the air through. For the lingering scent, skip the fake floral sprays; they just make it smell like “chemical flowers.” Instead, set out bowls of white vinegar or activated charcoal. They actually absorb the odor rather than masking it.

How to build a desk under $100.

Building a Solid, Budget-friendly Desk for Under $100

I was sitting on my floor at 2:00 AM, surrounded by a sea of particleboard scraps and those tiny, soul-crushing Allen wrenches, wondering why I thought I could “save money” by following a generic flat-pack manual. My old setup was wobbly, cramped, and frankly, a total productivity killer, but I quickly realized that learning how to build a desk isn’t actually about having a master carpenter’s toolkit or a pristine workshop. It’s about understanding the basic physics of a stable surface so your laptop doesn’t end up face-planting during a Zoom call.

I’m not here to give you a lecture on fine woodworking or suggest you buy a $500 table saw just to get started. Instead, I’m going to walk you through a streamlined, repeatable system for constructing a solid workspace using materials you can actually find at a local hardware store. We’re going to focus on the structural essentials—the stuff that actually matters—so you can stop fighting your furniture and finally create a setup that actually supports your workflow.

Table of Contents

Guide Overview

Total Time: 4-6 hours
Estimated Cost: $100-200
Difficulty: Beginner

Tools & Supplies

  • Power drill and bits for driving screws
  • Circular saw or hand saw for cutting wood
  • Tape measure for precise sizing
  • Sandpaper for smoothing surfaces
  • Level to ensure a flat workspace
  • Wood planks (e.g., 2x4s or plywood) for frame and top
  • Wood screws for assembly
  • Wood glue for extra stability
  • Sandpaper (various grits) for finishing
  • Wood stain or paint for protection

Step-by-Step Instructions

  • 1. First, stop scrolling through Pinterest and actually get your measurements right. Grab a tape measure and decide exactly how much space this thing is going to take up in your room. If you’re working in a small apartment, every inch counts. Measure your height too—you don’t want to build a desk that leaves you hunched over like a gargoyle by the end of a work session. Write these numbers down in a physical notebook so you aren’t squinting at your phone screen while you’re at the hardware store.
  • 2. Next, let’s talk materials without the gatekeeping. You don’t need exotic hardwoods to make this work. For a solid, budget-friendly starter desk, I usually go for a pre-cut butcher block or a thick piece of plywood from the home improvement store. Grab some heavy-duty metal hairpin legs or even those modular trestle legs if you want to keep it simple. Just make sure you have a sturdy screwdriver or a cordless drill—don’t try to do this manually unless you really enjoy forearm cramps.
  • 3. Once you have your pieces, it’s time to prep the surface. If you bought raw wood, it’s going to feel a bit gritty. Grab some medium-grit sandpaper and smooth out the edges until they don’t feel like they’re going to snag your sweater. If you’re feeling extra, you can go in with a finer grit for a polished look, but the goal here is functionality over perfection. You want a surface that feels good under your palms when you’re deep in a flow state.
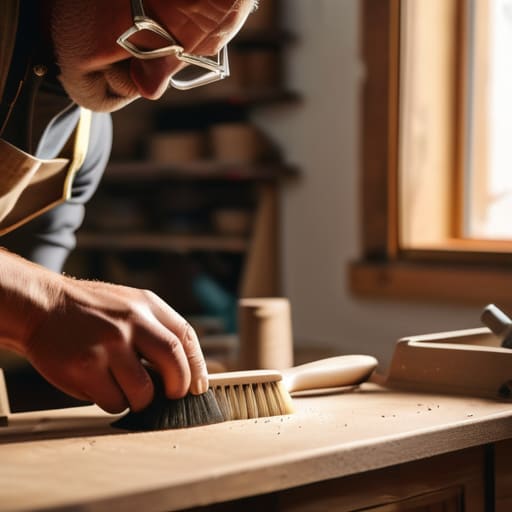
  • 4. Now, let’s get the legs attached. Flip your desktop upside down on a rug or some cardboard so you don’t scratch the finish. Line up your legs with the corners, and here’s the trick: double-check your alignment before you drive any screws in. If you’re off by even a fraction, the whole thing is going to wobble like a loose tooth. Use a level if you have one, or just trust your eyes and make sure the pre-drilled holes actually line up with the frame.
  • 5. Drive those screws in, but for the love of everything, don’t over-tighten them. If you crank them in too hard, you risk cracking the wood or stripping the screw head, and then you’re in a real mess. Just tighten them until they’re snug and secure. Once the legs are on, flip the desk right-side up. Give it a little shake—if it’s steady, you’ve officially passed the vibe check.
  • 6. Finally, we need to tackle the “cable chaos” problem before it even starts. A desk isn’t really a desk if it’s a graveyard of tangled wires. Pick up a cheap pack of adhesive cable clips or a simple under-desk tray. Route your power strips and chargers through a system so they aren’t dangling near your feet. This is the part that actually makes the desk usable for the long haul rather than just looking pretty for five minutes.

Understanding How to Build a Desk

Understanding How to Build a Desk guide.

Before you start hacking away at lumber, you need to get intentional about the space you’re actually occupying. Most people jump straight into buying wood without realizing that a desk that’s even two inches too high can turn a productive afternoon into a literal backache. I always suggest looking up a custom desk dimensions guide before you even hit the hardware store. You want to measure your chair height, your monitor level, and even how much room you need for your legs to move freely. It’s about designing for your body, not just for the aesthetic.

When it comes to materials, don’t feel pressured to go out and buy expensive hardwoods right away. If you’re focused on building a workspace on a budget, a solid plywood core with a nice veneer or even a thick butcher block from a big-box retailer works wonders. The goal isn’t to create a museum piece; it’s to create a functional surface that can handle your coffee spills and laptop heat. Just keep your design simple—minimalism is your best friend when you’re trying to avoid unnecessary structural headaches.

Key Things to Know

Key Things to Know: Best desk woods.

Before you start making sawdust, let’s talk about the materials. If you’re looking for something that feels high-end but won’t break the bank, I always suggest looking into the best wood for office desks based on your specific vibe. Pine is super affordable and easy to work with if you’re just starting out, but it can be a bit soft and prone to dents. If you want something more durable that can handle years of coffee spills and heavy monitors, walnut or oak are the gold standards—they just cost a bit more upfront.

Also, please don’t skip the measurement phase. I know it’s tempting to just grab some boards and start drilling, but checking a custom desk dimensions guide before you buy your lumber is a total game-changer. You need to account for your chair clearance and how much legroom you actually need when you’re sitting down. There is nothing worse than finishing a project only to realize your knees are hitting the underside of the frame. Measure twice, cut once isn’t just a cliché; it’s the difference between a functional setup and a frustrating mistake.

Pro-Tips to Save Your Sanity (and Your Back)

  • Don’t eyeball the height. Measure yourself sitting in your favorite chair first; if the desk is too high or too low, you’re going to be dealing with shoulder tension and a massive headache by Tuesday.
  • Buy a decent drill, not the cheapest one at the hardware store. A weak driver will strip your screws halfway through, and nothing kills my productivity faster than fighting with a tool that won’t do its job.
  • Level your floor before you trust your desk. If you’re working on an old apartment floor that slopes, don’t blame your construction—just grab some adjustable leveling feet so your coffee doesn’t slide off the edge.
  • Sand everything twice. It feels like extra work, but unless you want splinters ruining your favorite sweater or scratching your laptop, you need to go from coarse to fine grit until it feels like silk.
  • Leave a little breathing room for cables. I always drill a small notch or a hole near the back for cord management; otherwise, you end up with a “cable nest” that makes your workspace look like a disaster zone.

The TL;DR on Your New Workspace

Don’t overcomplicate the build; focus on a solid, level foundation first, because a wobbly desk will ruin your productivity faster than a bad WiFi connection.

Measure twice, cut once, and actually double-check your hardware—there is nothing more frustrating than being halfway through a build and realizing you’re one screw short.

Build for your actual life, not an aesthetic Pinterest board; make sure the dimensions actually fit your setup and your physical comfort, not just your “vibe.”

The Final Piece of the Puzzle

The Final Piece of the Puzzle desk.

At the end of the day, building your own desk isn’t about achieving some level of master craftsmanship or having a workshop that looks like a Pinterest board. It’s really just about the fundamentals: picking a sturdy top, ensuring your legs are level, and making sure you didn’t skip the crucial step of pre-drilling your holes to avoid splitting the wood. If you followed the system we laid out, you’ve moved past the overwhelming “how do I even start” phase and into the reality of having a functional workspace. You’ve turned a pile of raw materials into a reliable anchor for your daily productivity, and honestly, that’s a massive win for your setup.

Don’t sweat the small stuff, like a slightly uneven screw head or a minor scratch in the finish. Those little imperfections are just proof that you actually did the work yourself instead of just clicking “buy now” on a mass-produced piece of particle board. My goal is always to help you reduce the friction in your life, and having a desk that you built with your own hands is a huge step toward taking ownership of your environment. Now that the heavy lifting is done, go clear off your new surface, grab a coffee, and actually get to work. You earned this.

Frequently Asked Questions

Do I really need a power drill for this, or can I get away with a basic screwdriver?

Look, I’ll be real with you: you can do it with a manual screwdriver, but you’re going to pay for it in wrist fatigue and frustration. If you’re just driving a few small screws into a light shelf, go ahead. But if you’re building a full desk, get the drill. Life is too short to spend two hours doing something that a power tool can finish in ten minutes. Save your energy for the actual design.

How do I make sure the desk doesn't wobble like crazy once I actually put my computer on it?

The “wobble factor” is the absolute worst, especially when you’re mid-meeting and your monitor starts dancing. First, check your floor—if you’re on carpet, you almost certainly need adjustable leveling feet. If it’s a hard floor and still shaky, don’t just shove a folded piece of cardboard under it; that’s a temporary fix that’ll fail. Instead, tighten every single bolt one last time, and if it’s still acting up, look into adding a small cross-brace or a stabilizer bar to the back. Stability is all about structural tension.

What’s the best way to finish the wood so it doesn't look like a middle school shop project?

Look, the difference between “DIY disaster” and “boutique furniture” is all in the prep. If you just slap some stain on raw wood, it’s going to look blotchy and amateur. You need to sand it like your life depends on it—start with a coarse grit and work your way up to at least 220. Once it’s smooth, use a wood conditioner before staining. It levels out the absorption so the color actually looks intentional, not accidental.

How to build a garden trellis.

How to Construct a Trellis for Your Climbing Plants

I was standing in my backyard last July, staring at a pathetic, tangled mess of tomato vines that were basically just suffocating each other on the dirt. I had spent way too much money on those flimsy, plastic lattice kits from the big-box store, and they had already snapped under the weight of a single heavy rainstorm. It was a total waste of time and money. Most people think you need a degree in carpentry or a massive budget to fix this, but the truth is that learning how to build a garden trellis is actually way simpler than the DIY influencers make it look. You don’t need a workshop full of power tools; you just need a system that actually works with the plants, not against them.

In this guide, I’m stripping away the gatekeeping and showing you how to construct something sturdy using basic materials you can find anywhere. I’m going to walk you through a few different methods—from the quick-and-dirty scrap wood approach to something a bit more intentional—so you can stop worrying about your plants collapsing and start actually enjoying your garden. We’re focusing on functional, low-maintenance builds that won’t break the bank or your spirit.

Table of Contents

Guide Overview

Total Time: 1-2 hours
Estimated Cost: $30-60
Difficulty: Beginner

Tools & Supplies

  • Measuring tape for accurate cuts
  • Handsaw or miter saw for wood processing
  • Drill with bits for making holes
  • Screwdriver or drill driver for fastening
  • Cedar or pressure-treated wood stakes (4-5)
  • Wooden garden lattice panels (1)
  • Wood screws (1 box)
  • Garden staples or landscape nails (1 pack)

Step-by-Step Instructions

  • 1. First, let’s talk supplies so you aren’t running back and forth to the hardware store mid-project. You’ll need some untreated cedar or redwood stakes (they resist rot way better than cheap pine), some heavy-duty garden twine or zip ties, a pair of sturdy wire cutters, and a drill if you’re feeling fancy. Honestly, if you want to keep it even simpler, you can just use repurposed wooden pallets from a local shop, but let’s stick to the stakes for a cleaner look.
  • 2. Once you have your materials, grab your stakes and decide on your layout. I usually space them about three feet apart, depending on how much room your plants actually need to breathe. Don’t just eyeball it; use a piece of string to mark a straight line so your trellis doesn’t end up looking like a leaning tower of garden debris.
  • 3. Now, it’s time to get those stakes into the ground. If your soil is super dry or packed hard, you might want to soak the area with a hose first to make it more manageable. Drive the stakes deep—at least 8 to 12 inches—so they don’t budge when a heavy summer storm hits or your climbing vines start getting unreasonably heavy.
  • 4. This is where the actual “trellis” part happens. You’re going to create a grid pattern by running your twine or wire between the stakes. Start at the bottom and work your way up, tying the string securely to each stake. I find that a criss-cross pattern works best because it gives the plants multiple points of contact to grab onto as they grow.
  • 5. If you’re using a heavier plant, like cucumbers or small melons, I highly recommend adding a few horizontal support bars across the vertical stakes. You can use scrap wood or even thick bamboo poles for this. It adds a layer of structural integrity that prevents the whole system from sagging once the fruit starts to weigh everything down.
  • 6. Finally, give your new trellis a quick “stress test.” Grab the stakes and give them a gentle shake to make sure everything is anchored firmly. If it feels solid, you’re good to go. Now, just tuck your seedlings in at the base and let them do the rest of the work—you’ve already done the hard part.

Understanding How to Build a Garden Trellis

Understanding How to Build a Garden Trellis

Before you start hammering nails, you need to figure out what you’re actually trying to accomplish. Not all plants are created equal, and treating a delicate sweet pea the same way you treat a heavy, woody wisteria is a recipe for a collapsed mess. If you’re working with lightweight annuals, a simple lattice will do fine, but for anything with real weight, you’re going to need heavy duty plant supports that won’t buckle under the pressure. I always tell people to look at their plants first and build for their weight, not just for the aesthetic.

When I’m browsing for wooden trellis design ideas, I try to avoid anything that looks too precious or high-maintenance. The goal here is functionality. You want something that integrates into your space without looking like a cluttered eyesore. Think about your specific layout—are you trying to create a privacy screen, or do you just need some vertical gardening solutions to save space in a tiny balcony garden? Once you decide on the “why,” the “how” becomes a lot less intimidating.

Key Things to Know

Key Things to Know: Heavy-duty supports.

Before you start hammering things together, you need to think about what’s actually going to be living on this thing. Not all vines are created equal. If you’re planting something lightweight like sweet peas, a basic frame is fine, but if you’re eyeing something massive like wisteria or heavy climbing roses, you’re going to need heavy duty plant supports. I’ve learned the hard way that a flimsy structure won’t hold up once the summer growth kicks in; it’ll just buckle under the weight and end up in a heap on the dirt.

Another thing to keep in mind is your long-term vision for the space. When looking at different vertical gardening solutions, consider how much sunlight your chosen spot gets and how much room you have to move around. You don’t want to build a massive, permanent fixture only to realize it’s blocking your walking path or casting a shadow over your vegetable patch. My best advice? Plan for the plant’s mature size, not just how it looks in the nursery pot. It saves you a massive headache (and a lot of wasted wood) down the road.

Pro-Tips to Keep Your Trellis from Becoming a Total Mess

  • Don’t overthink the wood choice; if you aren’t planning on this being a permanent garden centerpiece, cedar or even pressure-treated pine works perfectly fine to handle the moisture without breaking the bank.
  • Check your soil’s vibe before you start digging—if you’re planting heavy climbers like wisteria or jasmine, you need to make sure your trellis is anchored deep enough so the whole thing doesn’t tip over once the plants actually get heavy.
  • Leave a little breathing room between your trellis and your house or fence; you don’t want to trap moisture against your siding and end up with a mold problem just because you wanted some greenery.
  • Use zip ties or soft garden twine to attach your vines early on, but don’t tie them too tight—plants need to grow and thicken up, and you don’t want to accidentally strangle them as they expand.
  • Think about your “future self” by building the trellis slightly taller than you think you need; there is nothing more frustrating than having a beautiful plant that has nowhere to go after just one season.

The Bottom Line

Don’t overthink the materials; as long as your structure is sturdy enough to handle the weight of growing vines, you’re winning.

Prioritize deep anchoring—if your trellis isn’t secured well into the ground, a single heavy rainstorm will turn your hard work into a pile of scrap wood.

Build for the plant, not the aesthetic—always check what kind of climbing habit your specific plant has before you commit to a design.

Bringing It All Together

Building a trellis, bringing it all together.

At the end of the day, building a trellis isn’t about achieving some Pinterest-perfect architectural masterpiece; it’s about creating a functional structure that actually holds up when your plants start getting heavy. We’ve covered everything from picking out the right scrap wood to making sure those stakes are driven deep enough to survive a summer storm. Just remember that the goal is to minimize future headaches by getting the foundation right now. If you’ve followed the steps, you’ve moved past the “hoping it works” phase and into the “it’s actually going to work” phase. You’ve got the materials, you’ve got the layout, and most importantly, you have a system that works for your specific space.

I know that starting a DIY project can sometimes feel like just one more thing on an already overflowing to-do list, but there is something incredibly grounding about working with your hands. There is a specific kind of peace that comes from seeing a plant you nurtured finally have a sturdy place to climb. Don’t let the fear of a slightly crooked line stop you from getting started. Perfection is overrated, but intentionality is everything. Go out there, get a little dirt under your fingernails, and build something that makes your garden—and your daily routine—just a little bit easier to manage.

Frequently Asked Questions

Do I really need to treat the wood, or can I just use whatever I find in the garage?

Honestly? If you grab random scrap from the garage, you’re probably setting yourself up for a headache. If the wood isn’t pressure-treated or sealed, it’ll rot and collapse by next season, and then you’re back at square one. If you really want to use what you have, just grab a can of exterior sealant or some leftover deck stain. It takes ten minutes, but it saves you from rebuilding the whole thing in six months.

How do I make sure the whole thing doesn't just tip over once my plants actually start growing?

This is exactly where most DIY projects go to die—the moment the weight of the plant hits the structure. To keep it from tipping, you need to anchor the base. Don’t just stick the posts in the dirt; drive them at least 12 inches deep, or better yet, use heavy-duty garden stakes or even small concrete pavers to weight the bottom. If it’s a free-standing trellis, tie the top to a sturdy fence or a nearby post. Stability is everything.

What’s the best way to attach the trellis to the wall without making a mess of my siding?

Honestly, if you’re worried about ruining your siding, skip the direct drilling. I usually go with heavy-duty command hooks if it’s a lighter trellis, or better yet, use a freestanding frame that just leans against the wall. If you absolutely have to attach it, use standoff spacers. They create a tiny gap between the trellis and the house, so you aren’t grinding hardware directly into your siding. It keeps things clean and much easier to fix later.

Tips on how to sharpen tools.

Keep Your Equipment Sharp: Maintenance Tips for Your Tools

I was halfway through a weekend DIY project, trying to prune some overgrown hedges, when my shears gave a pathetic, metal-on-metal screech and just… died. I spent the next twenty minutes hacking away, sweating and getting increasingly frustrated, only to realize that the problem wasn’t my technique—it was my gear. Most people think you need to drop hundreds on professional-grade whetstones or some high-tech electric grinder just to get a decent edge, but that’s a total myth. Learning how to sharpen tools doesn’t have to be this intimidating, expensive ritual that requires a degree in metallurgy.

I’m stripping away all the gatekeeping and the overly complicated “pro” tutorials that make you feel like you’re doing something wrong. In this guide, I’m sharing the exact, low-stress system I use to keep my kitchen knives, garden shears, and workshop tools in peak condition using stuff you probably already have in your junk drawer. We’re going to focus on the actual, unpolished steps to getting a razor-sharp edge without the headache, so you can stop fighting your equipment and actually start working.

Table of Contents

Guide Overview

Total Time: 30-60 minutes per tool
Estimated Cost: $30-80
Difficulty: Beginner

Tools & Supplies

  • Kitchen knives (Steel or carbon blades)
  • Garden shears (Bypass style)
  • Sharpening stones/Whetstones (1 set, dual-grit)
  • Honing rod (1 unit)
  • Honing oil or water (1 bottle)
  • Microfiber cloth (1 unit)

Step-by-Step Instructions

  • 1. First things first, you need to get your gear in order. Don’t just wing this with a random rock you found in the garden. You’ll need a whetstone (a double-sided one is best for beginners), some water or honing oil depending on what kind of stone you have, and a clean rag. I always keep a small microfiber cloth handy because nobody wants a greasy mess all over their workbench.
  • 2. Before you even touch the stone, give your tools a good clean. If there’s dried gunk, rust, or old grease on the blade, you’re just going to be sharpening the dirt instead of the metal. Use some warm soapy water and a scrub brush to get them looking decent. Once they’re dry, you’re actually ready to start the real work.
  • 3. Now, let’s talk about the stone. If you’re using a water stone, soak it for about 10 minutes until the bubbles stop rising. This is non-negotiable if you want to avoid scratching your tools. Lay the stone on a flat, stable surface—I personally use a damp paper towel underneath to keep it from sliding around like crazy while I’m working.
  • 4. This is the part where most people mess up: finding your angle. You want to hold the tool at a consistent angle—usually about 15 to 20 degrees for most household blades. A good hack is to use a penny as a guide; stack two pennies under the spine of your blade to roughly estimate the tilt. The key is consistency over speed; if your angle wobbles, you’re just making the edge uneven.
  • 5. Start with the coarse side of the stone. Using light, even pressure, push the blade across the stone in a smooth, sweeping motion. You aren’t trying to grind the metal away; you’re just realigning the edge. Keep going until you feel a “burr” forming—that’s a tiny, microscopic lip of metal curling over the edge. Once you feel that, you know you’re on the right track.
  • 6. Flip the tool over and repeat the process on the other side. You want to match that same angle you used on the first side to ensure the edge is perfectly centered. It’s a bit of a rhythmic thing, so try to find a steady pace. If you feel yourself getting frustrated or your hand is shaking, take a five-minute breather. Precision requires a calm hand.
  • 7. Finally, switch to the fine-grit side of your stone to polish everything out. This step is what turns a “working” edge into a razor-sharp edge. Run the tool through a few light strokes on the fine side to smooth out any imperfections left by the coarse grit. To test it, try slicing through a single sheet of paper; if it glides through without snagging, you’ve officially mastered the system.

Understanding How to Sharpen Tools

Understanding How to Sharpen Tools with bevels.

Before you actually start grinding away at a blade, you need to understand the “why” behind the movement. Most people think sharpening is just about rubbing metal against a stone until it feels pointy, but it’s really about managing sharpening bevel angles. Every tool has a specific angle designed by the manufacturer to balance strength and sharpness. If you go too shallow, you’ll roll the edge; if you go too steep, you’ll end up with a blunt, heavy-duty blade that can’t slice through a tomato. It’s a fine line, but once you get the muscle memory down, it becomes second nature.

It’s also worth clearing up the confusion between honing steel vs sharpening stone. I see so many people trying to “fix” a nicked blade with a honing rod, and it just doesn’t work. Think of a honing steel as a maintenance tool to realign the edge during use, whereas a stone actually removes metal to repair the edge itself. If you want to focus on maintaining edge retention over the long haul, you have to treat the stone as your primary tool and the steel as your quick daily check-in.

Key Things to Know

Key Things to Know: sharpening vs honing.

Before you dive in, there are a few little nuances that separate a “functional” edge from one that actually feels effortless to use. First, don’t get caught in the trap of thinking a honing steel is a replacement for a real stone. While it’s great for daily maintenance, there is a massive difference between honing steel vs sharpening stone; the steel just realigns the edge, while the stone actually removes metal to create a new one. If you want to get serious about maintaining edge retention, you really need to focus on your consistency with those sharpening bevel angles. If you’re too steep or too shallow, you’re basically just wasting your time and your grit.

Another thing I wish someone had told me earlier is that the work doesn’t end once the blade is sharp. If you’re working with carbon steel, you need to be obsessive about preventing tool rust by wiping them down immediately after use. I also highly recommend investing in a few best sharpening accessories, like a simple honing guide or a decent honing oil, to keep things from getting messy or uneven. It’s all about building the habit.

Five ways to avoid making a total mess of your tools

  • Don’t go overboard with the pressure. I used to think more force meant a better edge, but you’re actually just grinding away the metal and ruining the geometry of the blade. It’s all about consistent, light strokes.
  • Keep your cooling station ready. If you’re using an electric sharpener, the metal gets hot fast. If it’s too hot to touch, you’re risking warping the steel. Keep a bowl of water nearby to dip the tool in between passes.
  • Check your angle constantly. This is where most people fail. If you’re inconsistent with the angle, you’re just creating a rounded, useless edge instead of a sharp one. Pick an angle, stick to it, and don’t wander.
  • Test on something soft first. Before you go hacking away at a piece of wood or a vegetable, test the edge on a scrap piece of cardboard or a piece of paper. It’s a low-stakes way to see if you actually achieved a cut or if you just made it shiny.
  • Clean up the metal dust immediately. Those tiny little metal shavings (the “swarf”) are annoying and can actually get into your skin or mess up your workspace. Wipe everything down with a rag as soon as you’re done so you aren’t cleaning it up later.

The Quick Cheat Sheet

Don’t wait until your tools are useless; a quick, five-minute touch-up every few months prevents the frustration of fighting with a blunt blade.

Consistency beats intensity—you don’t need a professional workshop, just a decent whetstone and a steady, repeatable angle.

Safety isn’t optional; if you aren’t respecting the edge, you’re going to end up with a slip that turns a quick task into a trip to the ER.

The Bottom Line

The Bottom Line: sharpening tools for efficiency.

At the end of the day, sharpening your tools isn’t about achieving some level of professional perfection; it’s about respect for the work you’re doing. We’ve covered the essential mechanics—from choosing the right grit on your whetstone to maintaining that consistent angle that makes or breaks the edge. Remember, it’s much better to spend ten minutes every few months doing a quick touch-up than to spend an hour fighting with a blunt blade that’s actively making your job harder. Once you get the hang of the rhythm and the feel of the metal against the stone, it stops feeling like a chore and starts feeling like a necessary part of your workflow.

I know that diving into DIY maintenance can feel a little intimidating at first, especially if you didn’t grow up with a toolkit always within reach. But honestly? Taking ownership of your gear is one of the quickest ways to feel like you actually have your life together. There is a specific kind of quiet satisfaction that comes from pulling a tool out of your bag and knowing it’s going to perform exactly how it’s supposed to. Don’t let the fear of a messy workspace or a slightly uneven edge stop you from starting. Just embrace the learning curve, keep your systems simple, and trust that you’re building a foundation that will make everything else run a little bit smoother.

Frequently Asked Questions

How do I know if my tool is actually sharp or if I'm just imagining it?

The “paper test” is my go-to, but honestly, the real way to tell is by how much effort you’re putting in. If you’re hacking away at a tomato or forcing a blade through cardboard, it’s dull. A truly sharp tool should glide through material with almost zero resistance. If you feel any catching, dragging, or—worst of all—you have to apply extra muscle just to get the job done, stop. It’s not sharp.

Is it safe to sharpen my tools if they have a little bit of rust on them already?

Honestly, yeah, it’s totally safe, but don’t just dive straight into the sharpening stone. If you try to sharpen over rust, you’ll just gum up your equipment and end up with a jagged, uneven edge. Think of it as a two-step process: clean first, then sharpen. Use a bit of steel wool or a wire brush to knock that oxidation off. Once it’s smooth and shiny again, you’re good to go.

At what point do I stop trying to fix it myself and just buy a new one?

Honestly, it’s all about the math and the “frustration tax.” If the time and cost of the repair outweigh the price of a replacement—or if fixing it feels like a constant battle against a losing system—just let it go. I have a rule: if I’ve spent more than two hours troubleshooting or if the tool feels unsafe to use, I stop. Don’t let “sunk cost fallacy” turn a simple task into a weekend-long headache.

How to fix a squeaky door quickly.

The Two-minute Fix for That Annoying Squeaky Door

I was sitting in my home office last Tuesday, finally hitting a flow state with a client’s content calendar, when that piercing, metallic screech cut right through my focus. Every time my cat brushed against the bedroom door, it sounded like a literal horror movie jump scare. I realized then that I’d been letting that tiny annoyance live rent-free in my head for weeks, just assuming I’d eventually need to call someone to figure out how to fix a squeaky door. But honestly? That’s just gatekeeping the solution. You don’t need a professional contractor or a massive toolkit to stop the madness; you just need to stop overcomplicating the friction.

In this guide, I’m stripping away the DIY intimidation and giving you the actual, unpolished steps to silence your house. I’ll show you how to use things you likely already have in your kitchen or junk drawer to get the job done in under five minutes. No expensive specialized lubricants or unnecessary hardware store runs—just a few simple, repeatable systems to get your home feeling calm and functional again.

Table of Contents

Guide Overview

Total Time: 15-30 minutes
Estimated Cost: $5-20
Difficulty: Beginner

Tools & Supplies

  • Screwdriver (to tighten loose hinge screws)
  • Microfiber cloth (to wipe away excess lubricant)
  • Lubricant (1 can of silicone spray or 1 tube of white lithium grease)
  • Paper towels (a few sheets for cleanup)

Step-by-Step Instructions

  • 1. First, you need to figure out if it’s actually the hinge or something else. Walk through the door and move it slowly to pinpoint the exact spot where the noise is coming from. If it’s definitely the hinge, grab a screwdriver and a hammer—it’s time to get to work.
  • 2. Most people try to just spray lubricant into the cracks, but that’s a temporary fix that usually just makes a massive, greasy mess on your door frame. Instead, you want to pull the hinge pin out entirely. Place a heavy object like a sturdy book or a small towel on the floor right under the hinge so you don’t accidentally drop the pin or scratch your flooring.
  • 3. Use the claw end of your hammer to gently tap the bottom of the hinge pin upward until it pops out. If it’s being stubborn, don’t force it too hard; just give it a few steady, rhythmic taps until it starts to slide. Once it’s out, set it aside in a safe spot (like a small bowl) so you don’t lose it in the carpet.
  • 4. Now, take a paper towel and wipe down the pin and the inside of the hinge sleeve. Over time, these parts collect a disgusting mix of dust and old, dried-out grease that actually contributes to the friction. You want a clean surface before you apply anything new.
  • 5. This is where you choose your lubricant. If you have a can of WD-40, that works for a quick fix, but if you want this to actually stay quiet for months, I highly recommend using a silicone spray or even a bit of white lithium grease. If you’re in a total pinch and don’t want to run to the hardware store, a tiny drop of cooking oil from the kitchen will do the trick in a pinch, though it’s not the most permanent solution.
  • 6. Apply a thin, even layer of your lubricant to the pin. You don’t need to go overboard here; less is definitely more when it comes to preventing drips. Once it’s coated, slide the pin back into the hinge and tap it all the way down with your hammer until it’s flush with the hinge head.
  • 7. Finally, grab a clean rag and wipe away any excess oil that might have squeezed out when you reinserted the pin. Open and close the door a few times to work the lubricant into the mechanism. If it’s still making a tiny bit of noise, just repeat the process with a slightly heavier hand on the lubricant.

Understanding How to Fix a Squeaky Door

Understanding How to Fix a Squeaky Door.

Before you dive into the actual work, it helps to understand why your door is acting like a haunted house. Most of the time, it’s just simple friction—metal rubbing against metal because the factory grease has dried up or collected a layer of dust. If the sound is a high-pitched screech, you’re likely just looking at a surface issue. But if it’s a deep, grinding noise, you’re probably dealing with a pin that’s actually worn down or misaligned.

When choosing your tools, you’ll run into the classic debate of WD-40 vs silicone spray for doors. Here’s the real tea: standard WD-40 is a great solvent to break up gunk and stop a noise instantly, but it evaporates quickly. If you want a long-term fix, I always recommend a silicone-based spray or a lithium grease. These actually stay on the metal longer. If the quick spray doesn’t cut it, you’ll eventually need to try removing the hinge pin to grease it directly. It’s a bit more effort, but it’s the only way to ensure the internal mechanism is actually coated and protected.

Key Things to Know

Key Things to Know: stopping door squeaks.

Before you dive in, there are a few things I wish someone had told me when I first started tackling random house stuff. First off, let’s talk about the stuff in your pantry versus the stuff in your toolbox. If you’re in a pinch, there are plenty of household items to stop door squeaks, like a bit of Vaseline or even some cooking oil, but keep in mind these are usually just temporary Band-Aids. They work for a week or two, but they tend to collect dust and eventually get messy.

If you want a solution that actually lasts, you really need to consider the difference between WD-40 vs silicone spray for doors. I used to think WD-40 was the holy grail for everything, but it’s actually more of a cleaner and a water displacer. It’ll stop the noise for a minute, but it evaporates fast. For long-term door hinge maintenance tips, I always suggest grabbing a silicone-based spray or a lithium grease. It stays where you put it and keeps things moving smoothly without that gross, sticky buildup.

Pro-tips to keep the silence lasting longer

  • Don’t just spray and pray. If you’re using a lubricant, try to get it actually into the hinge mechanism rather than just coating the outside. If you can, pull the hinge pin out slightly (or all the way if you’re feeling ambitious) to coat the pin itself. That’s where the real friction is happening.
  • Avoid the vegetable oil trap if you can help it. I know, it’s in the kitchen and it’s easy, but cooking oil can get gummy and attract dust over time, which basically turns your hinge into a sticky mess. Stick to a dedicated silicone spray or a lithium grease if you want a long-term fix.
  • Check for more than just lubrication. Sometimes a squeak isn’t about dryness; it’s about a loose screw. If the hinge feels wobbly when you move the door, grab a screwdriver and tighten everything up first. A loose hinge creates uneven pressure, and that’s a recipe for noise.
  • Keep a “maintenance kit” in your junk drawer. I keep a small can of WD-40 and a tiny screwdriver in my utility kit so I don’t have to go on a scavenger hunt every time a new noise pops up in the house. Being proactive saves so much mental energy.
  • Listen to the rhythm. If the squeak is high-pitched and sharp, it’s likely just dry metal. If it’s a low, grinding sound, you might have a deeper issue with the door alignment or a hinge that’s actually bending. Identifying the “flavor” of the noise tells you if you need a quick spray or a real repair.

The Quick Cheat Sheet

Don’t overthink it—most squeaks are just friction, so a little bit of lubricant (even kitchen oil in a pinch) is usually all you need to solve the problem.

Clean the hinge before you lube it; if you just slap oil on top of old, crusty gunk, you’re just making a messy, sticky situation that’ll eventually attract more dust.

Keep a small maintenance kit handy—having a spray can or a tiny oil dropper in your “junk drawer” means you can fix the annoyance in thirty seconds instead of letting it drive you crazy for weeks.

Peace and Quiet Restored

Peace and Quiet Restored with silent hinges.

At the end of the day, fixing a squeaky door isn’t about becoming a master carpenter; it’s just about identifying the friction point and applying the right solution. Whether you went the classic route with some WD-40, used a bit of petroleum jelly, or even reached for some cooking oil in a pinch, you’ve successfully removed a tiny but constant irritant from your environment. Just remember to clean off any excess so you don’t end up with a greasy mess on your door frame, and keep an eye on those hinges every few months to make sure the fix holds. It’s these small, intentional maintenance wins that keep your home feeling like a sanctuary rather than a source of frustration.

I know that sometimes these tiny household annoyances can feel like the “last straw” when you’re already overwhelmed with work or life. But honestly? There is something incredibly grounding about taking ten minutes to fix something that’s broken. It’s a way of telling yourself that you are in control of your space. Don’t let the little things pile up and create mental clutter. Once you realize that most “emergencies” are actually just simple systems waiting to be applied, the world feels a lot less chaotic. Now, go enjoy the silence—you’ve earned it.

Frequently Asked Questions

I tried spraying WD-40 but the squeak came back after a week; what am I doing wrong?

Honestly, I’ve been there. Here’s the thing: WD-40 is actually a solvent, not a long-term lubricant. It’s great for loosening things up, but it evaporates fast and can actually strip away the existing grease, leaving your hinges even drier. To make it stick, you need something thicker. Grab some lithium grease or even a bit of sewing machine oil. Apply it, work the door back and forth, and it’ll actually stay quiet.

Is there a way to fix this without taking the whole door off the hinges?

Honestly, you totally can. You don’t need to go full DIY-disaster and unscrew the entire door just to get some peace and quiet. If you want to avoid the heavy lifting, just use a lubricant spray—like WD-40 or a silicone spray—and aim it directly into the gaps of the hinge joints while you swing the door back and forth. It’s a bit messy, so keep a paper towel handy, but it works.

Can I use something from my kitchen, like olive oil, or will that just make a mess and gunk up the mechanism?

Look, I get it—you’re already in the kitchen and don’t want to run to the hardware store. You can use olive oil, but honestly? It’s a temporary fix. It’ll stop the noise for a bit, but eventually, it tends to get gummy and actually attracts dust, which can make the hinge even grittier. If you’re in a pinch, go for it, but grab some actual lubricant as soon as you can.

Guide on how to build a workbench.

Build a Custom Garage Workbench With This Guide

I was halfway through trying to solder a vintage radio I’d picked up at a thrift store when my “workspace”—which was really just a wobbly folding card table—decided to give up on life. My tools slid everywhere, my coffee spilled, and I spent more time chasing a screwdriver across the floor than actually fixing anything. It was a total mess, and it hit me: you can’t build a system for your life if your foundation is literally shaking. Most people think you need a massive garage and a thousand dollars in professional-grade equipment to get started, but honestly, learning how to build a workbench is less about the fancy gear and more about creating a stable, reliable zone where you can actually focus.

Forget those over-complicated, expensive blueprints that assume you own a CNC machine. I’m going to show you how to build a solid, no-nonsense workbench using basic materials you can grab at any hardware store. We’re skipping the gatekeeping and focusing on a functional, durable setup that won’t break the bank or your spirit. By the end of this, you’ll have a dedicated spot that actually supports your projects instead of fighting against them.

Table of Contents

Guide Overview

Total Time: 4-6 hours
Estimated Cost: $80-150
Difficulty: Beginner

Tools & Supplies

  • Circular saw or miter saw for cutting lumber
  • Power drill/driver for assembly
  • Tape measure for precise marking
  • Speed square for ensuring 90-degree angles
  • 2×4 lumber (approx. 8-10 boards)
  • 4×8 plywood sheet (for tabletop)
  • 2.5-inch wood screws (one large box)
  • Wood glue (one bottle)

Step-by-Step Instructions

  • 1. First things first, you need to grab your materials. Don’t go overboard with expensive hardwoods; you’re building a workspace, not a dining room table. I usually go for standard 2x4s and a thick sheet of plywood for the top. It’s cheap, it’s sturdy, and if you accidentally gouge it with a screwdriver later, it’s not a tragedy. Grab a box of 2.5-inch wood screws and a drill—and please, double-check that your drill is actually charged before you head to the hardware store.
  • 2. Map out your frame on the floor. This is where most people mess up by not accounting for the thickness of the wood. I like to lay everything out to make sure my dimensions actually fit the footprint of my room. Once you’ve confirmed the math, start by building two identical rectangular frames using your 2x4s. This creates the “skeleton” of your bench, and keeping them identical is crucial if you want the whole thing to stop wobbling later.
  • 3. Connect your frames with your vertical legs. This is where the bench actually gets its height. I recommend cutting four sturdy posts and screwing them into the corners of your rectangular frames. If you want a bench that feels actually solid, use more screws than you think you need here. A little extra effort in the structural phase means you won’t be fighting a shaky table every time you try to hammer something.
  • 4. Secure the top to the frame. This is the most satisfying part, but it can be tricky if you don’t want the plywood to split. I always pre-drill pilot holes through the plywood and into the 2×4 frame. It takes an extra thirty seconds, but it prevents the wood from cracking and makes the whole surface feel much more seamless. If you have a scrap piece of wood, use it to check that your top is completely level before you finish driving the screws.
  • 5. Add a lower shelf for storage. Since my goal is to reduce friction, I can’t stand having my tools scattered all over the floor. About a foot or two from the bottom, add another set of 2×4 supports and slide a second piece of plywood underneath. This gives you a dedicated spot for your heavy stuff—like power tool cases or bins of hardware—so your main workspace stays clear and functional.
  • 6. Sand the edges and call it a day. You don’t need a professional finish, but you definitely don’t want a splintered edge catching your sleeve while you’re working. Take a bit of medium-grit sandpaper and smooth out the corners and any rough spots on the top. It’s a small, low-effort step that makes the whole experience feel a lot more intentional and less like a construction site accident.

Understanding How to Build a Workbench

Understanding How to Build a Workbench guide.

Before you start sawing through expensive lumber, you need to decide what kind of “work” you’re actually doing. There is a huge difference between a light-duty table for assembling small electronics and a heavy duty workbench design meant for heavy hammering or sanding. If you try to use a flimsy desk for real projects, you’re going to end up frustrated by the wobble. I always tell people to prioritize stability over aesthetics; it doesn’t matter how pretty it looks if it shifts every time you apply pressure.

Another thing people usually overlook is the “future you” factor. When I’m looking at different woodworking workbench plans, I’m not just looking at the tabletop; I’m looking at the footprint. You need to think about workshop organization tips from day one. If you don’t integrate some form of workbench tool storage ideas into the build, your workspace will quickly turn into a graveyard of loose screwdrivers and stray bolts. Plan for your tools to have a home, otherwise, the whole system breaks down the second you actually start working.

Key Things to Know

Key Things to Know: Heavy-duty workbench.

Before you start cutting anything, you need to think about the “why” behind your build. If you’re just planning to assemble some small electronics or do some light crafts, a basic setup is fine. But if you’re planning on doing actual repairs or heavier DIY projects, you really need to prioritize a heavy duty workbench design. There is nothing more frustrating than trying to sand something down only to have your entire table wobble like it’s on a boat. Stability is everything; if the surface isn’t rock solid, you’ll end up fighting the furniture instead of focusing on your project.

I also highly recommend thinking about your workflow before you even buy the lumber. It’s easy to get caught up in the construction, but if you don’t integrate some workbench tool storage ideas into the initial build, you’re just going to end up with a cluttered mess six months from now. I’m a huge advocate for keeping your most-used tools within arm’s reach. Whether that’s adding a pegboard to the back or building shallow drawers into the frame, a little bit of foresight now saves a massive amount of headache later.

Pro-Tips for a Workbench That Won't Fall Apart in a Week

  • Don’t overthink the dimensions. Before you buy a single screw, measure your actual workspace and your own height. You don’t want a bench that’s too low, forcing you to hunch over every time you’re trying to fix something, or too high that you can’t get any leverage.
  • Prioritize stability over aesthetics. It doesn’t matter if the wood looks pretty if the whole thing wobbles every time you use a hammer. Use heavy-duty bracing or even bolt it to the wall studs if you have the space; a rock-solid base is the difference between a tool and a headache.
  • Plan for your “messy” future. I learned this the hard way with my old electronics projects—if you don’t build in a way to manage cords or have a spot for small parts, your workbench will just become a graveyard of clutter. Think about where the power strip is going before you finish the frame.
  • Invest in a decent top. You can get creative with the base, but don’t skimp on the surface you’re actually working on. A thick layer of plywood or even a reclaimed piece of butcher block will take much more beating than a thin, flimsy sheet that’s going to dent the first time you drop a screwdriver.
  • Leave room for growth. If you’re building this in a corner, make sure you aren’t boxing yourself in so tightly that you can’t actually move around it. You need enough clearance to stand comfortably and, ideally, enough room to tuck a small rolling cart underneath for extra storage later.

The Bottom Line

Don’t overthink the aesthetics; a workbench is a tool, not a piece of showroom furniture, so prioritize stability and surface area over everything else.

Invest in decent fasteners and solid wood—it’s much easier to build it right once than to spend your weekend fixing a wobbly table that ruins your projects.

Build for your actual workflow, not a Pinterest dream; make sure it’s at a height that won’t kill your back and has enough room for the specific tools you actually use.

Final Thoughts Before You Get to Work

Final Thoughts Before You Get to Work

At the end of the day, building this workbench isn’t about achieving some level of professional woodworking perfection or having a workspace that looks like a Pinterest board. It’s really just about creating a reliable foundation where you can actually get things done without constantly tripping over clutter or fighting a wobbly surface. We covered the essentials—from choosing the right lumber and ensuring your base is sturdy to making sure your height doesn’t wreck your back—so now you have the blueprint. Just remember that the most important part of the process is consistency over complexity; you don’t need a high-tech workshop, you just need a space that respects your workflow and stays out of your way.

Once that last screw is tightened and you wipe away the sawdust, I want you to take a second to actually appreciate what you’ve built. There is something incredibly grounding about knowing that the surface you’re working on was constructed by your own hands. This workbench is more than just wood and hardware; it’s a physical manifestation of your commitment to improving your own environment. Don’t let it sit empty or become a graveyard for half-finished projects. Use it, mess it up, and let it evolve with you. You’ve officially built the system for your success, so now go out there and actually start creating.

Frequently Asked Questions

Do I really need power tools for this, or can I pull this off with just a basic hand saw and a drill?

Honestly? You can definitely pull this off with just a hand saw and a drill. I’ve built a few things using nothing but manual tools, and it just takes a little more patience and a steady hand. If you’re okay with spending extra time on the cuts, you don’t need a table saw or a circular saw to get a solid result. Just go slow, measure twice, and don’t rush the process.

What kind of wood should I actually buy if I'm on a budget but don't want the whole thing to wobble in six months?

Look, if you’re trying to save money without building a glorified wobbly table, skip the expensive hardwoods. You don’t need oak or maple. Honestly, the sweet spot is construction-grade pine or Douglas fir from a big-box store. It’s cheap, easy to find, and surprisingly sturdy if you use thicker dimensions (think 2x4s for the frame). Just grab a sheet of 3/4″ plywood for the top—it’ll handle the weight and won’t sag immediately.

How do I make sure my workbench stays level if my garage or basement floor is uneven?

This is the reality of most basements—nothing is ever actually flat. Don’t try to fight the floor; instead, build the bench to accommodate it. I swear by adjustable heavy-duty leveling feet. You screw them into the legs, then just twist them until the bubble in your level stays dead center. If you’re on a tighter budget, shim the low spots with scraps of plywood or even some hard plastic wedges. Just get it level now so you aren’t fighting it later.

Fun and easy kids craft ideas.

Fun and Easy Crafts to Keep Kids Busy on Rainy Days

Let’s be real: most of the time, “craft time” feels less like a bonding experience and more like a slow-motion descent into household chaos. I’ve spent way too many afternoons staring at a mountain of glitter and half-empty glue sticks, wondering why I ever thought this would be a relaxing way to spend a Tuesday. We’ve all been there, scrolling through Pinterest for endless kids craft ideas only to realize that most of them require a degree in engineering and a house that doesn’t mind being covered in neon acrylic paint. The problem isn’t the creativity; it’s the lack of a functional system to keep the mess from becoming a permanent part of your decor.

I’m over the over-complicated, expensive kits that end up in the trash after twenty minutes. Instead, I want to show you how to set up a few low-stakes, high-reward activities that actually work within the reality of a busy schedule. I’ve narrowed it down to five specific projects that focus on minimal cleanup and maximum engagement. By the end of this, you’ll have a toolkit of streamlined kids craft ideas that allow your little ones to create something cool without you feeling like you need a total lifestyle reset to clean up the aftermath.

Table of Contents

The Low-Mess Command Center

The Low-Mess Command Center tray system.

Most craft setups fail because they’re too hard to clean up, which is why I never recommend those massive, expensive art kits that promise the world. Instead, I’m a huge fan of the tray system. Grab a couple of cheap plastic cafeteria trays or even just baking sheets from your kitchen. By confining the glue, the glitter, and the scraps to a defined boundary, you’re essentially creating a containment zone for the chaos.

Edible Art Experiments

Edible Art Experiments using colorful food dyes.

If you’re feeling particularly cautious about spills or toxic materials, stop looking at the craft aisle and start looking in your pantry. I’ve found that using food as a medium is the ultimate low-stakes hack for keeping kids engaged without the cleanup headache. Think about things like colored salt (just mix salt with a drop of food coloring) or even making “painting” supplies out of yogurt and natural dyes like crushed berries.

The Upcycled Cardboard Station

The Upcycled Cardboard Station crafting supplies.

Before you go out and buy a mountain of new supplies, look at your recycling bin. I have a habit of hoarding clean cardboard boxes because they are the most versatile, zero-cost tool in any creative arsenal. A cereal box can become a stencil, a delivery box can become a miniature castle, and toilet paper rolls are basically free building blocks if you have enough tape.

Tape-Based Geometry

If you want to avoid the “glue-stick-is-missing-under-the-couch” drama, switch to washi tape or painter’s tape. I use this all the time when I need to keep a project contained but still want it to look intentional. You can use the tape to create outlines on paper for them to color within, or even tape long lines directly onto the floor to create temporary obstacle courses or geometric shapes for them to follow.

Nature's Color Palette

Sometimes the best way to manage a craft session is to move it entirely outside. I’m a big believer in “foraging” as a precursor to creating. Instead of buying a pack of thirty different colored markers, grab a few baskets and head to the backyard or a local park. Have the kids collect things that match specific colors—green leaves, grey stones, yellow petals, or brown twigs.

The Bottom Line

Stop chasing the perfect, Pinterest-ready masterpiece; the goal is low-friction engagement that doesn’t leave your kitchen looking like a disaster zone.

Set up a dedicated, permanent station so you aren’t wasting mental energy (or half an hour) digging through bins every time they get a burst of creativity.

Focus on process over product—if they’re experimenting and building something, the system is working, regardless of how it looks in the end.

Lowering the Bar for Creativity

At the end of the day, the goal here wasn’t to turn your living room into a professional art studio or to produce something that belongs in a museum. It was about moving away from those high-stress, expensive craft kits that end up gathering dust in a closet. By setting up a dedicated low-mess station, utilizing basic pantry staples, and keeping the activities low-stakes, you’ve effectively removed the biggest barrier to entry: the fear of the mess. Whether it’s salt dough or simple recycled collage work, the focus is on the system of play rather than the perfection of the final product.

I know how it feels when you’re staring at a pile of glitter and feeling an immediate sense of dread about the cleanup, but I promise you, it is worth it. When we stop gatekeeping “creativity” and treat it like just another manageable part of our daily routine, something shifts. Your kids get to explore, you get to breathe, and the house stays relatively intact. Don’t worry about being the “Pinterest Parent”—just focus on creating a little bit of intentional space for them to make a mess. That’s where the real magic happens.

Frequently Asked Questions

How do I keep the mess contained so I'm not scrubbing glitter out of my rug for the next three weeks?

The secret is a “contained zone” system. First, ditch the dining table; use a cheap plastic shower curtain liner or a dedicated silicone mat on the floor to catch the fallout. If you’re using glitter or tiny beads, do it inside a rimmed baking sheet—it acts as a tiny fortress for the mess. Most importantly, keep a handheld vacuum or a damp microfiber cloth nearby to grab spills immediately before they become permanent rug features.

What can I do when my kid gets bored halfway through a project and just wants to go back to their iPad?

Honestly? Let them go. I used to think I had to fight the iPad battle to “save” the creative moment, but that just creates friction for everyone. Instead, treat the project like a low-stakes system. If they check out, pack the supplies into a single bin and call it a “pause.” It’s not a failure; it’s just a pivot. They’ll come back to it when the screen gets boring, and you won’t have a meltdown.

Are there ways to do these crafts without spending a fortune on specialized supplies every single time?

Honestly, if you’re buying a new kit for every project, you’re doing too much. I’m a huge believer in the “scavenger system.” Before you hit the craft store, raid your recycling bin. Cardboard, egg cartons, and empty toilet paper rolls are basically free building blocks. I also keep a “utility bin” of basics—washable markers, glue, and masking tape—so I’m never scrambling. The goal is to use what you have, not collect more clutter.

Learn how to make wall art.

Create Store-bought Quality Wall Art on Your Own

I was staring at a blank, white wall in my apartment last Tuesday, feeling that familiar surge of “adulting” anxiety because my space felt sterile and soulless. I scrolled through Pinterest for hours, convinced that I needed a massive budget and a degree in fine arts just to figure out how to make wall art that didn’t look like a middle school project. But here’s the truth: you don’t need a studio or a curated collection of expensive oils to fix this. Most of the “aesthetic” decor you see online is just cleverly packaged simplicity that you can replicate with things you probably already have in your junk drawer or at a local thrift store.

I’m tired of the gatekeeping that makes DIY feel like a high-stakes performance. In this guide, I’m breaking down my personal, low-friction system for creating pieces that actually look intentional and professional. I’ll show you how to skip the expensive supplies and focus on effective composition instead. We’re going to walk through a few specific, repeatable methods—from textured minimalism to curated collage—so you can finally stop staring at that empty wall and start building a home that actually feels like yours.

Table of Contents

Guide Overview

Total Time: 3-5 hours
Estimated Cost: $30-60
Difficulty: Beginner

Tools & Supplies

  • Paintbrushes (various sizes for application)
  • Painter's tape (for creating clean geometric lines)
  • Sandpaper (to smooth surface before starting)
  • Canvas or wooden panel (1 piece)
  • Acrylic paint (set of multiple colors)
  • Gesso or primer (1 small jar)
  • Water container (1 jar for cleaning brushes)

Step-by-Step Instructions

  • 1. First, you need to decide on a vibe so you don’t end up with a random pile of junk. Don’t go to a store and buy everything in sight; instead, scroll through Pinterest or your saved Instagram posts to find a recurring color palette or texture. I usually look for a common thread—like “minimalist line art” or “earthy textures”—so the final piece actually feels like it belongs in your space rather than looking like a random craft project.
  • 2. Next, gather your supplies, but let’s keep it realistic. You don’t need a professional studio; you just need the basics like canvas, heavy-weight paper, or even some thrifted wooden frames from my favorite secondhand shop. I always make sure to have a good quality set of brushes and some acrylic paint, because cheap, chalky paint is the fastest way to make your art look amateur.
  • 3. Before you touch the canvas, do a “dry run” on some scrap paper. This is where most people skip ahead and immediately regret it. I like to test my color combinations and brush strokes on a small piece of paper first to see if the colors turn into a muddy mess when mixed. It’s much easier to fix a mistake on a scrap piece of paper than on the actual piece you’re trying to hang.
  • 4. Now, start with your background. I’m a huge fan of the “layering” method, so I usually lay down broad, sweeping strokes of color to create a base. Don’t worry about being precise here; the goal is to create depth through texture. If you’re feeling bold, this is the stage where you can add some grit with a sponge or even a bit of sand mixed into the paint to give it that high-end, tactile feel.
  • 5. Once your base is dry (and yes, you actually have to wait for it to dry), it’s time for the details. This is where you add the lines, the shapes, or the focal points that define the piece. I tend to work from the largest shapes down to the smallest details, using a fine-liner brush for the final touches. Remember, less is usually more—you don’t need to fill every single inch of the canvas to make it look intentional.
  • 6. The final step is the most underrated: the framing and hanging. A beautiful piece of art can look totally lost if it’s just leaning against a wall. If you’ve gone for a minimalist look, a simple, thin black or wood frame works wonders. I always use a level tool (or a leveling app on my phone) to make sure it’s straight, because nothing kills the “calmly efficient” vibe of a room faster than crooked decor.

Understanding How to Make Wall Art

Understanding How to Make Wall Art easily.

Before you dive into the actual making part, you need to get out of your own head about what “art” even means. Most people freeze up because they think they need a studio or a degree, but I see this as just another way to customize your space. When I’m looking for budget friendly wall decor projects, I’m not looking for perfection; I’m looking for something that matches the vibe of my room without costing a month’s rent. Think of it as a way to fill empty space with something that actually feels like you.

The secret to not feeling overwhelmed is choosing a method that fits your current skill level. If you’re feeling chaotic, look into abstract canvas painting techniques—they are incredibly forgiving because there is no “wrong” way to move a brush or a palette knife. If you want something more tactile, you can experiment with different textured wall art methods using joint compound or even just thick acrylics. The goal isn’t to create a museum masterpiece; it’s to build a system where you can create something decent with minimal stress and zero gatekeeping.

Key Things to Know

Key Things to Know: budget decor projects.

Before you dive in, there are a few reality checks I wish someone had given me when I first started. First, don’t let the “Pinterest perfection” trap get in your head. Most of the professional-looking pieces you see online are actually just a series of controlled accidents. If you’re looking for budget friendly wall decor projects, focus more on the composition than the cost of the supplies. You don’t need a $200 set of professional oils; a decent acrylic set and some leftover scraps from a hardware store can work wonders if you know how to layer them.

Another thing to keep in mind is the environment where the art will live. If you’re working on modern home decor DIY for a high-traffic area like a hallway, think about durability. I personally love experimenting with textured wall art methods using joint compound or even modeling paste, but just make sure you seal your work so it doesn’t collect dust or peel over time. It’s all about setting up a system that lasts longer than the initial dopamine hit of finishing the project.

My Low-Friction Rules for Not Ruining Your Walls

  • Don’t buy the expensive stuff first. Before you drop $50 on a fancy canvas, test your layout with cheap printer paper or even just masking tape on the wall. It helps you see if the scale is actually right for the room so you don’t end up with a tiny piece of art drowning in a massive empty space.
  • Embrace the “ugly” phase. Whether you’re painting, sketching, or collage-making, there is always a middle point where it looks like a total mess. Don’t scrap the project just because it doesn’t look like a Pinterest board halfway through; just keep moving through the system.
  • Texture is your best friend. If a piece feels flat or boring, add some dimension. I love using heavy-body acrylics, or even just layering some scraps of fabric or textured paper. It makes even the simplest DIY look intentional and high-end rather than just “crafty.”
  • Limit your color palette. One mistake I made early on was trying to use every color in the box. It ends up looking chaotic and stressful. Pick three main tones—maybe two neutrals and one pop of color—and stick to them. It makes the final result look cohesive and much more professional.
  • Think about the lighting, not just the art. A beautiful piece of wall art is useless if it’s sitting in a dark corner or getting hit by a harsh glare from a window. Once you hang it, step back and check how the light hits it at different times of the day. If it looks washed out, you might need to adjust the placement.

The TL;DR on Making It Work

Stop waiting for “inspiration” to hit; just pick a medium you actually enjoy and start experimenting with the tools you already have.

Focus on the system, not perfection—it’s better to have a finished, slightly messy piece on your wall than a “perfect” idea stuck in your head.

Keep your setup modular and easy to clean up so that the friction of starting a new project doesn’t stop you from actually doing it.

Final Thoughts on Your New Space

Final Thoughts on Your New Space.

At the end of the day, making your own wall art isn’t about achieving some unattainable Pinterest perfection or having a studio full of expensive supplies. It’s really just about applying a few simple systems—choosing a cohesive color palette, picking a medium that doesn’t stress you out, and actually committing to the process without overthinking the outcome. Whether you ended up with a textured canvas or a collection of thrifted frames, the goal was to move from “empty wall anxiety” to a space that actually feels like yours. Just remember to keep your tools organized and your expectations low; it makes the whole experience much more manageable and fun.

I know that starting something creative can feel a little intimidating when you’re used to just buying something pre-made from a big-box store, but I promise the friction is worth it. There is a specific kind of quiet satisfaction that comes from looking at a blank wall and knowing you were the one who filled it. Don’t let the fear of a “mistake” stop you from picking up a brush or a glue gun. Your home is a living, breathing project, and it’s okay if your decor evolves as you do. Just start where you are with what you have, and let the rest fall into place.

Frequently Asked Questions

I don't have a huge budget—can I actually make this look good using stuff I already have around the house?

Absolutely. Honestly, the “expensive materials” crowd is mostly just gatekeeping. I’ve spent way too many weekends digging through thrift store bins and my own junk drawer to find gems. Grab some old magazines for collage, use leftover acrylics from a half-finished project, or even repurpose some scrap wood from that DIY shelf you never finished. The goal is the vibe, not the price tag. If it looks intentional, it looks high-end.

How do I actually hang these without turning my rental walls into a total disaster zone?

The rental struggle is real. I used to be terrified of losing my security deposit, but you don’t need to drill holes everywhere to make a space feel like home. Honestly? Just grab some Command strips—they’re a lifesaver. If you’re going heavier, look into monkey hooks; they leave tiny pinpricks rather than gaping wounds. Just remember to clean the wall with rubbing alcohol first so they actually stay up. Small systems, zero damage.

What’s the best way to figure out which pieces actually look good together so my room doesn't end up looking cluttered?

The trick is to stop treating your walls like a random scrapbooking project. I use the “anchor” method: pick one piece you actually love—maybe a vintage print or a textured canvas—and let that dictate the vibe. From there, stick to a consistent color palette or a shared medium. If everything feels too chaotic, try grouping them in a tight gallery wall. It creates a single visual unit instead of a dozen tiny distractions.

Guide on how to install a shelf.

The Right Way to Install Shelving So It Stays Secure

I was standing in my living room last Tuesday, staring at a pile of expensive oak planks and a set of instructions that might as well have been written in ancient hieroglyphics. My floor was covered in drywall dust, my coffee was cold, and I was about ten seconds away from just living with the clutter on the ground. Most people will tell you that learning how to install a shelf requires a specialized toolkit and a level of spatial awareness you just aren’t born with, but honestly? That’s a total lie. You don’t need to be a carpenter; you just need to stop guessing where the studs are and actually follow a logical system.

I’ve spent way too many hours trial-and-erroring my way through DIY projects, so I’m stripping away the fluff for you. This guide isn’t going to give you some overly polished, “perfect” home renovation montage; instead, I’m giving you the unfiltered, step-by-step reality of getting those brackets into the wall securely. We’re going to talk about the tools you actually need, how to avoid the dreaded “shelf sag,” and how to make sure your stuff actually stays off the floor without a single unnecessary trip to the hardware store.

Table of Contents

Guide Overview

Total Time: 30-60 minutes
Estimated Cost: $20-50
Difficulty: Beginner

Tools & Supplies

  • Drill/Driver for creating pilot holes and driving screws
  • Level to ensure the shelf is straight
  • Measuring tape for precise placement
  • Pencil for marking drill points
  • Shelf board 1 unit
  • Shelf brackets 2 units
  • Wall anchors and screws 1 set
  • Wall screws 1 set

Step-by-Step Instructions

  • 1. First things first, you need to figure out what you’re actually putting on this shelf. If it’s just a single succulent, you can wing it, but if you’re planning on stacking heavy hardcover books, you need to locate your studs. Grab a stud finder (or just knock on the wall and listen for that solid thud) because if you don’t hit a stud, you’re basically just hanging decor on a prayer.
  • 2. Once you know where the strength is, grab a pencil and level your shelf. This is the part where people usually mess up and end up with a tilted shelf that looks like it’s sliding into a sinkhole. Hold the bracket up, place your level on top, and mark your holes with a pencil once it’s perfectly straight.
  • 3. Now, grab your drill. If you’re drilling into drywall without hitting a stud, you’re going to need to use drywall anchors. Don’t skip this step—trying to screw directly into plain drywall is a one-way ticket to a collapsed shelf and a very messy floor. Drill your pilot holes, then tap those anchors in until they’re flush with the wall.
  • 4. Line up your brackets with the holes you just made and start driving the screws in. I usually do this by hand for the last few turns just to make sure I don’t strip the screw head or crack the bracket. It’s a little more tedious, but it saves you from having to go back to the hardware store for replacements.
  • 5. Slide the shelf onto the brackets and secure it from underneath. Most kits come with tiny little screws to lock the wood to the metal, and you definitely want to use them. This keeps the shelf from sliding forward every time you reach for something.
  • 6. Finally, do the “weight test.” Before you go full Pinterest and decorate the whole thing, give it a gentle push to make sure everything feels solid. If it wobbles, something isn’t seated right, so re-tighten your screws before you commit your favorite ceramics to it.

Understanding How to Install a Shelf

Understanding How to Install a Shelf correctly.

Before you even pick up a drill, you need to understand what’s actually happening behind your walls. The biggest mistake I see people make is treating every wall like it’s the same, but there is a massive difference between drilling into drywall vs studs. If you just screw into the plaster or gypsum without hitting a wooden stud, your shelf is going to end up in a pile on the floor within a week. If you’re planning on anything more than a single succulent, you really need to invest in a decent wall stud finder to locate that solid structural support.

Once you know where the strength is, you have to match your hardware to your vision. There are various shelf bracket types out there—from chunky industrial metal to sleek, hidden supports—and each one dictates how much weight you can actually trust. If you’re going for that clean, minimalist look with a floating shelf, the stakes are even higher because you’re relying entirely on internal mounting. Just remember: the heavier the object, the more you need to prioritize heavy duty shelf mounting techniques over aesthetics.

Key Things to Know

Key Things to Know: Drywall vs studs.

Before you even pick up a drill, you need to play detective with your walls. The biggest mistake I see people make is assuming they can just screw into whatever they want, but there is a massive difference between drilling into drywall vs studs. If you’re trying to hang something substantial—like a row of heavy cookbooks or a collection of ceramic plants—you absolutely cannot rely on drywall anchors alone. You need to find those wooden studs behind the plaster. If you don’t have a decent tool for this, I highly recommend looking up a quick wall stud finder guide before you start making holes you’ll regret later.

Also, let’s talk about the hardware. Not all supports are created equal, and choosing the right shelf bracket types will determine if your setup looks intentional or just cluttered. If you’re going for that seamless, modern look, you’ll likely be leveling a floating shelf, which requires a bit more precision and a steady hand. If you’re opting for industrial metal brackets, make sure they are rated for the weight you’re planning to add. It’s all about matching the strength of the hardware to the actual weight of your stuff.

Pro-Tips to Keep Your Shelves From Becoming a Pile of Debris

  • Don’t trust your eyes; trust a stud finder. I know it’s tempting to just screw into the drywall to save time, but if you aren’t hitting a stud, that shelf is going to end up in pieces on your floor within a week.
  • Level it twice, drill once. I used to think “eyeballing it” was a valid strategy until I realized my books were slowly sliding toward the floor. Use a real level, not just a phone app, to make sure things are actually straight.
  • Account for the weight before you buy. If you’re planning to display a heavy collection of vintage ceramics, a flimsy floating shelf isn’t going to cut it. Match the hardware and the shelf material to what you’re actually putting on it.
  • Grab a vacuum before you start. Drywall dust is a nightmare—it gets everywhere and stays there. I always keep a small handheld vac or even just a damp rag nearby so I can clean up the debris the second I’m done drilling.
  • Use anchors if you have to, but use the good ones. If you can’t find a stud, don’t just use those cheap plastic plugs that come in the box. Go to the hardware store and get the heavy-duty toggle bolts; they’re a total game-changer for stability.

The Bottom Line

Don’t skip the stud finder; if you don’t anchor your shelf into something solid, it’s only a matter of time before your stuff ends up in a pile on the floor.

Measure twice, drill once—it sounds like a cliché for a reason, and I’ve definitely learned the hard way that eyeballing it is a recipe for disaster.

Invest in a decent set of tools early on because trying to DIY this with a cheap, flimsy screwdriver is just going to add more friction to your day.

You’ve Got This

Installing a shelf: You’ve Got This.

At the end of the day, installing a shelf isn’t about being a master carpenter; it’s just about respect for the tools and the wall you’re working with. Just remember to double-check your stud locations, keep your level handy, and don’t go overboard with the weight until you’re sure your anchors are actually holding. If you take the time to do the prep work right—measuring twice and checking for wires—you won’t end up with a lopsided mess or a hole in your drywall that you’ll regret later. It’s all about having a solid system in place so you can move from chaos to organization without the unnecessary headache.

I know that staring at a pile of hardware and a blank wall can feel a little intimidating, but I promise that the sense of control you get once everything is mounted is totally worth the effort. Once these shelves are up, your space stops feeling like a cluttered storage unit and starts feeling like a home that actually functions for you. Don’t let the fear of a single crooked screw stop you from reclaiming your space. Grab your drill, trust your process, and enjoy the feeling of finally getting your life—and your stuff—off the floor.

Frequently Asked Questions

What do I do if I can't find a stud exactly where I want my shelf to go?

Honestly, this is the most common roadblock, so don’t panic. If the stud isn’t where you need it, you have two real options. You can either shift your design slightly to hit that stud, or—and this is what I actually do—grab some high-quality heavy-duty drywall anchors. Just make sure you get the toggle bolt kind, not the cheap plastic twisty ones. They’re a total lifesaver when you refuse to compromise on your layout.

How much weight can these actually hold before they start sagging or pulling out of the wall?

Honestly, it depends entirely on what you’re anchoring into. If you’re just hitting drywall with plastic anchors, don’t expect much—maybe 10-15 lbs before things get sketchy. But if you actually take the time to find a stud and screw directly into the wood, you can usually hang a decent stack of books without a meltdown. My rule of thumb? Always over-engineer it. If you’re unsure, aim for the studs. Better safe than a pile of broken ceramics.

Is it worth buying a stud finder, or is there a way to figure this out without extra gear?

Honestly? If you’re only doing one project, don’t waste the money. You can totally skip the stud finder by using the “knock test”—tap along the wall until the sound goes from hollow to a solid thud. You can also check for outlet alignment, since studs are usually vertically aligned with them. Just be careful; if you’re hanging something heavy, a $15 stud finder is a lot cheaper than a patched-up hole in your drywall.

Learn how to paint a room professionally.

Achieve a Professional Finish When Painting Your Next Room

I was standing in the middle of my living room last Tuesday, staring at a massive, accidental splatter of “eggshell white” on my floor, wondering why I thought I could wing this. I’d skipped the prep work because I was in a rush, and within twenty minutes, my “quick weekend project” had turned into a chaotic, sticky disaster that felt like a total emergency. Most people will tell you that learning how to paint a room is all about the color choice or the brand of brush you use, but they’re lying. The truth is, if you don’t have a solid system for the boring stuff—the taping, the cleaning, and the laying down of drop cloths—you aren’t painting; you’re just making a mess that’s going to haunt you for weeks.

I’m not here to give you some aesthetic, Pinterest-perfect fantasy that requires a professional crew. Instead, I’m going to walk you through my unpolished, step-by-step system for tackling a wall without losing your mind (or your security deposit). We’re going to cover everything from the essential tools you actually need to the specific workflow that prevents those dreaded drip marks. My goal is to help you master how to paint a room so efficiently that you can get back to your life without the lingering stress of a DIY fail.

Table of Contents

Guide Overview

Total Time: 1-2 days
Estimated Cost: $75-200
Difficulty: Beginner

Tools & Supplies

  • Paintbrush (for cutting in edges)
  • Paint roller (for large surfaces)
  • Paint tray (to hold and distribute paint)
  • Extension pole (to reach high areas)
  • Interior paint (1-2 gallons per room)
  • Painter's tape (1-2 rolls)
  • Drop cloths (1-2 sheets)
  • Sandpaper (1 pack for smoothing walls)

Step-by-Step Instructions

  • 1. First, you need to clear the decks. Move your furniture to the center of the room and cover it with old sheets or plastic drop cloths. I’ve learned the hard way that paint splatter is surprisingly aggressive, so don’t just move the couch—tuck it away. Grab a trash bag and toss any random clutter that doesn’t belong in the room so you aren’t tripping over stuff halfway through the process.
  • 2. Next up is the prep work, which is honestly the most important part if you actually want a professional finish. Wipe down your walls with a damp cloth to get rid of dust and cobwebs, and use a bit of sandpaper to smooth out any weird bumps or old paint chips. If you have holes from old nails, grab some spackle, fill them in, and let it dry completely before you even think about touching a brush.
  • 3. Now, grab your painter’s tape and get intentional. Run it along the baseboards, the ceiling edges, and around any window frames or light switches. I usually take a tiny bit of the existing wall color and dab it over the edge of the tape to seal the line; this prevents your new color from bleeding underneath and keeps everything looking sharp.
  • 4. Before you start rolling, you have to “cut in.” This means using a smaller angled brush to paint the perimeter of the room—the corners, the edges near the ceiling, and around the trim—where a big roller can’t reach. It’s a little tedious, but doing this first creates a buffer zone so you can roll the main sections without leaving awkward unpainted gaps.
  • 5. Time to get the heavy lifting done with the roller. Dip your roller into the tray, making sure it’s evenly coated but not dripping, and work in small, manageable sections. I like to use a “W” or “M” motion to distribute the paint, then fill in the gaps to ensure an even coat. Don’t try to cover the whole wall in one massive, heavy pass; two thinner coats are always better than one thick, gloopy one.
  • 6. Let the first coat dry completely. This is where most people fail because they get impatient and try to rush the second coat while the first is still tacky. If you don’t let it set, you’ll end up pulling the paint right off the wall and creating a textured mess. Grab a coffee, check your emails, or go for a walk—just give the walls time to do their thing.
  • 7. Once the first coat is totally dry, repeat the rolling process for the second coat. This second layer is what gives the color its true depth and makes it look intentional rather than accidental. Once you’re finished and the paint is dry to the touch, peel off the painter’s tape while it’s still slightly damp to avoid any peeling, and finally, enjoy your new space.

Understanding How to Paint a Room

Understanding How to Paint a Room prep.

Before you even crack open a can of paint, you need to realize that the actual “painting” part is actually the easiest bit. The real work—and where most people mess up—is in the setup. I always tell my friends to treat it like a recipe; if your prep is sloppy, the final result will be too. This means knowing exactly how to prep walls for painting by cleaning off dust and filling those annoying little nail holes. If you skip this, you’re basically just painting over imperfections, which is a recipe for a headache later.

I’m also a huge believer in having an essential painting supplies checklist ready to go before you start. There is nothing more frustrating than being mid-project and realizing you’re out of painter’s tape or your roller is bone dry. I’ve learned the hard way that investing in the best paint brushes and rollers actually saves you time in the long run. Cheap brushes leave those tiny, annoying bristles behind in your fresh coat, and honestly, life is too short to struggle with low-quality tools when you’re just trying to refresh your space.

Key Things to Know

Key Things to Know: Best painting tools.

Before you even crack open a can of pigment, you need to get real about your gear. I’ve learned the hard way that cheap tools are a massive time sink. If you’re using low-grade rollers, you’ll end up with annoying texture that looks more like orange peel than a professional finish. Investing in the best paint brushes and rollers is probably the single most important thing you can do to ensure the job actually looks good when it’s done. It’s not about being fancy; it’s about making sure you aren’t fighting your equipment for three hours straight.

Also, let’s talk about the prep work that people usually try to skip. If you want to avoid that dreaded “patchy” look, you really have to master how to prep walls for painting by cleaning off dust and filling those annoying tiny holes first. A little extra time spent sanding and wiping down the surface now means you won’t be staring at imperfections for the next five years. Trust me, doing it right the first time is way more efficient than trying to fix a botched job on a Sunday evening when you’re already exhausted.

Pro Tips to Save Your Sanity (and Your Floors)

  • Don’t skimp on the tape. I know the cheap stuff is tempting, but spend the extra few bucks on a high-quality painter’s tape. There is nothing more soul-crushing than peeling back the tape only to realize you’ve just ripped a jagged line through your brand-new wall color.
  • Test your colors on more than one spot. Lighting is a total liar. A shade that looks like a dreamy, soft beige in the store might look like a depressing muddy yellow once it’s under your living room’s warm LED lights. Grab some sample pots and paint large swatches on different walls before you commit.
  • Work from the top down. It sounds obvious, but if you start with the baseboards and then move to the ceiling, you’re going to end up with drips all over your clean work. Start with the ceiling, move to the trim, and save the main walls for last.
  • Keep a wet rag in your pocket. Seriously. I always keep a damp microfiber cloth tucked into my waistband or sitting on my tray. If you catch a drip while it’s still wet, it’s a five-second fix; if you wait until it dries, you’re looking at a whole new project of sanding and repainting.
  • Clean your tools immediately. If you’re taking a break or finishing for the day, don’t just leave your brushes in a cup of water and hope for the best. Wash them thoroughly or wrap them tightly in plastic wrap to keep them from drying out. It’s a small system that saves you from buying new brushes every single time you want to touch up a corner.

The TL;DR for a Stress-Free Paint Job

Don’t skip the prep work; spending time on taping edges and cleaning walls is the only way to avoid a messy, patchy finish that you’ll regret in a week.

Invest in decent tools rather than the cheapest possible rollers and brushes—it’s the difference between a smooth, professional coat and a streaky, frustrating disaster.

Work in systems, not sprints; take your time with the layers and let things dry properly so you aren’t fighting against wet paint all afternoon.

The Final Layer

Applying The Final Layer to a wall.

At the end of the day, painting a room isn’t about being a professional contractor; it’s about having a solid system so you don’t end up staring at a messy floor and a half-finished wall at 10 PM. If you remember to prep your surfaces properly, invest in decent painter’s tape, and actually follow your drying times, you’ve already won half the battle. It’s those small, intentional steps—the ones that feel a little tedious in the moment—that prevent the massive headaches of drips, streaks, and ruined furniture later on. Stick to the process, keep your tools organized, and don’t rush the finish.

I know that staring at a blank, beige wall can feel a little overwhelming, especially when you’re trying to transform a space to actually feel like home. But remember, the goal isn’t perfection; it’s progress. You’re building a space that reflects your vibe and gives you a sense of control over your environment. Once that last coat is dry and you’re sitting there with a coffee, looking at a room that you literally built with your own hands, I promise you’ll realize that the effort was worth it. You’ve got this.

Frequently Asked Questions

How do I figure out exactly how much paint I actually need so I'm not stuck halfway through a wall?

Nothing kills my momentum like running out of paint when I’m halfway through a second coat. To avoid that, grab a measuring tape and find your total square footage: multiply the width of each wall by its height, then add them all up. Subtract about 15 square feet for every standard door or window. A good rule of thumb? One gallon usually covers 350–400 square feet. Always buy one extra quart; trust me, you’ll want it for touch-ups later.

Is it really necessary to use a primer, or can I just go straight in with the color?

Look, I get the temptation to skip a step when you just want the room done, but honestly? Skipping primer is how you end up repainting three weeks later. If you’re going over a dark color with something light, or if the walls are patchy, you absolutely need it. It creates a uniform surface so your color actually looks like the swatch. Think of it as the foundation—do it once, do it right, and save yourself the headache.

How do I fix those annoying little drips or uneven spots without starting the whole wall over?

Don’t panic—you don’t need to repaint the whole room just because of a few hiccups. If it’s a drip, wait for it to dry completely, sand it down until it’s flush with the wall, and then dab a tiny bit of paint over it. For uneven spots, check if you just missed a patch; a light “feathering” motion with a small roller or brush usually blends it right in. Small fixes, zero chaos.

Page 2 of 3

Powered by WordPress & Theme by Anders Norén