Category: Food Page 1 of 3

Pantry staples to always have for cooking.

Must-have Pantry Essentials for Effortless Cooking

We’ve all been there: it’s 7:00 PM on a Tuesday, you’re exhausted from a long day of freelance calls, and the realization hits that you have absolutely nothing to eat. You stare into the fridge like it’s going to perform a miracle, only to end up spending forty dollars on mediocre takeout because you didn’t have the right pantry staples to always have on hand. I used to treat mealtime like a constant state of emergency, but I’ve realized that most of my “cooking crises” were actually just system failures. Adulthood is stressful enough without making your kitchen feel like a desert every time you’re actually hungry.

I’m not here to tell you to buy a hundred niche ingredients or follow some aesthetic, hyper-organized pantry trend that takes three hours to maintain. Instead, I’ve narrowed it down to the absolute essentials that actually do the heavy lifting. In this post, I’m sharing the five specific items that act as my personal safety net. These are the versatile, low-effort building blocks that will help you stop the frantic grocery runs and finally start making quick, decent meals without the mental burnout.

Table of Contents

The "I Forgot to Shop" Grain Base

The "I Forgot to Shop" Grain Base.

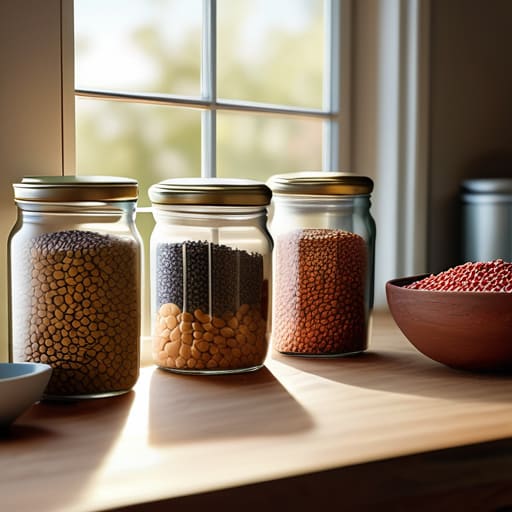
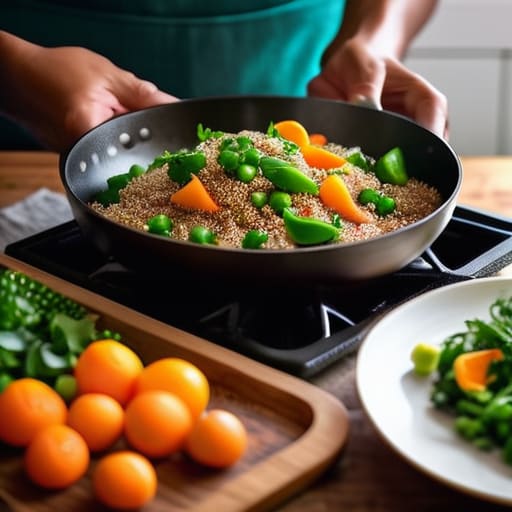
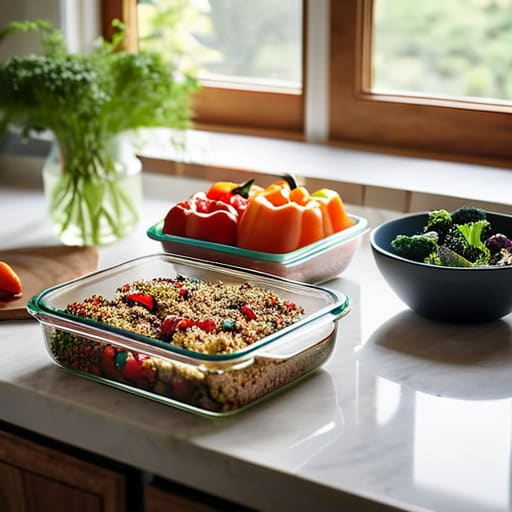
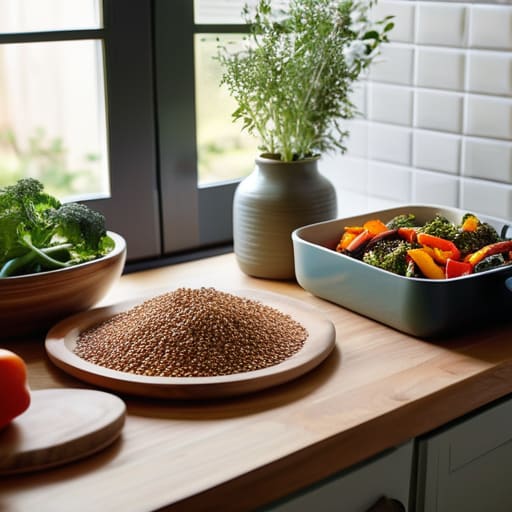
Honestly, if you don’t have a bag of jasmine rice or some quick-cooking quinoa in the back of your cupboard, you’re basically inviting a takeout order to drain your bank account. I used to think I needed a million different grains to be “culinary,” but really, you just need one reliable base that can absorb whatever flavor you throw at it. Whether it’s a quick stir-fry or just a bowl of rice with a fried egg on top, having a solid grain foundation is the ultimate safety net for those nights when your brain is too fried to plan a real meal.

Liquid Gold (The Good Olive Oil

Liquid Gold (The Good Olive Oil) bottle.

I know, I know—it feels a bit cliché to suggest oil, but please don’t buy that cheap, plastic-bottled stuff that tastes like nothing. If you’re going to use something as a primary cooking medium, invest in a decent extra virgin olive oil. It’s not just about the flavor; it’s about the versatility. A high-quality oil can be your cooking fat for sautéing, but it can also be your dressing if you’re just tossing a salad with some lemon and salt.

The Flavor Lifesavers

Essential spices called The Flavor Lifesavers.

You can have the freshest produce in the world, but if your spice cabinet is just a collection of dusty, expired packets from 2019, your food is going to taste sad. I don’t advocate for a massive, overwhelming spice rack that takes up half your kitchen, but you absolutely need the “holy trinity”: garlic powder, smoked paprika, and some decent sea salt. These are the items that bridge the gap between “bland mush” and “actually delicious.”

Canned Beans (The Protein Shortcut)

Let’s be real: some days, the idea of prepping a protein from scratch feels completely impossible. That is exactly where canned chickpeas or black beans come in to save your life. They are shelf-stable, incredibly cheap, and require zero prep time beyond opening the lid and rinsing them off. I keep at least three cans of various beans in my pantry at all times so I never feel stuck.

The Acid Component

This is the one thing most people forget, and it’s usually why their home cooking feels like it’s “missing something.” I’m talking about vinegar or citrus. Whether it’s a bottle of apple cider vinegar or a couple of lemons that you keep in the fridge, acid is the secret weapon that cuts through heaviness and wakes up your taste buds. Without it, even the most expensive ingredients can end up tasting heavy and one-dimensional.

The Bottom Line

Stop trying to build a “perfect” kitchen; just focus on these five basics to kill the decision fatigue during the week.

A well-stocked pantry isn’t about hoarding food, it’s about buying yourself time and mental energy when you’re too tired to shop.

Use these staples as your foundation so you can actually be creative with whatever random leftovers or veggies you have on hand.

Building Your Safety Net

At the end of the day, building a solid pantry isn’t about having a perfectly curated, aesthetic kitchen that looks like a Pinterest board. It’s about having those core building blocks—your grains, oils, aromatics, and canned goods—ready to go so you aren’t staring blankly into an empty cupboard at 7:00 PM. When you have these five categories covered, you’ve essentially created a buffer against chaos. You move from “what am I going to eat?” to “what can I throw together with what I have?” which is a massive win for your mental energy.

Don’t feel like you have to overhaul your entire kitchen in one afternoon. Start small; grab one or two of these items on your next grocery run and let the system build itself over time. Adulthood is heavy enough as it is, so why make deciding on dinner even harder? My goal is for you to look at your pantry and feel a sense of quiet competence rather than a sense of overwhelm. You’ve got this, and honestly, once you start seeing how much time these little systems save you, you’ll wonder why you didn’t do it sooner.

Frequently Asked Questions

How do I know when these staples are actually going bad if they're shelf-stable?

Honestly, the “best by” dates are usually more about quality than safety, but I still play it smart. For dry goods like pasta or rice, if it smells musty or you see tiny movement (looking at you, pantry moths), toss it. For oils or canned goods, trust your nose—if it smells rancid or metallic, it’s done. If a can is bulging or dented, don’t even risk it. When in doubt, throw it out.

Is it worth buying the name brands, or can I just grab the generic store versions to save money?

Honestly, don’t overthink it. For things like salt, sugar, or canned beans, the store brand is literally the exact same stuff—just without the fancy marketing budget. Save your money there. However, I do swear by name brands for a few specific things, like certain spices or high-quality oils, where the flavor difference is actually noticeable. My rule of thumb? If it’s a base ingredient, go generic. If it’s the star of the show, splurge a little.

What are some quick meals I can make using only these items when I really don't feel like cooking?

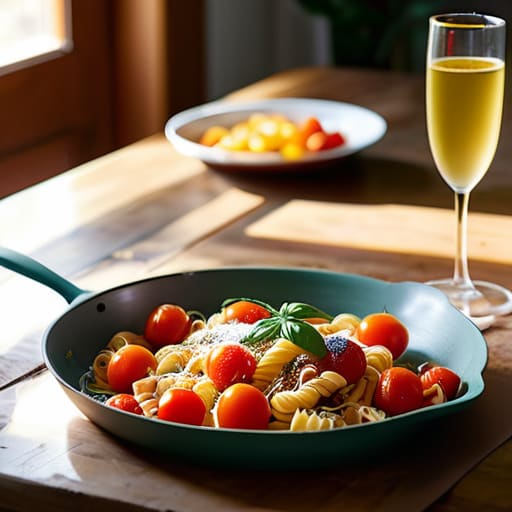
Honestly, when I’m hitting a wall, I lean on the “assembly method” rather than actual cooking. If you’ve got those staples, just toss some pasta with olive oil, garlic, and red pepper flakes for a quick aglio e olio. Or, if you’re feeling slightly more ambitious, a quick grain bowl with canned beans and whatever spices you have on hand works wonders. It’s not gourmet, but it keeps the “what am I going to eat?” panic at bay.

Chef tips on how to season food.

Pro Secrets for Seasoning Your Food Like a Chef

I still remember standing in my mom’s kitchen as a kid, watching her toss handfuls of spices into a pan like she was performing some kind of culinary magic trick. I used to think you needed a massive, expensive spice rack and a degree in chemistry to make anything taste decent, but honestly? Most of those “gourmet” cooking tutorials are just gatekeeping. They make you feel like you’re failing if you don’t have twenty different artisanal salts on hand, when the truth is that learning how to season food is actually much simpler—and much more intuitive—than the internet wants you to believe.

I’m not here to give you a lecture on flavor profiles or teach you how to use terms you’ll never say out loud. Instead, I want to give you the actual, unpolished steps to making your meals taste like they actually came from a kitchen and not a cardboard box. We’re going to strip away the fluff and focus on the repeatable systems that work, whether you’re throwing together a quick weeknight pasta or trying not to ruin a steak. My goal is to help you stop guessing and start building confidence with every single bite.

Table of Contents

Stop Guessing My No Nonsense System for How to Season Food

Stop Guessing My No Nonsense System for How to Season Food.

Look, I used to stare at my spice rack like it was a math equation I couldn’t solve. I’d throw things in randomly, hoping for the best, only to end up with something that tasted either incredibly bland or aggressively salty. The shift happened when I stopped treating seasoning like a chore and started seeing it as a system of layering flavors in cooking. Instead of dumping everything in at once, I started building in stages. I begin with the heavy hitters—salt and pepper—right at the start to ensure the base is actually flavorful, rather than just coating the surface.

The real game-changer for me was learning about balancing salt and acid. If a dish tastes “flat” but you’ve already added plenty of salt, don’t reach for the shaker again; reach for a lemon or a splash of vinegar. That brightness cuts through the heaviness and wakes everything up. I also keep a few essential spice pantry staples on hand, like smoked paprika or cumin, so I’m never scrambling. It’s not about following a recipe to the letter; it’s about tasting as you go and adjusting until the flavors actually make sense to you.

Building Your Arsenal Essential Spice Pantry Staples You Actually Need

Building Your Arsenal Essential Spice Pantry Staples You Actually Need

Look, you don’t need a massive, expensive spice rack that looks like a prop from a cooking show just to make dinner edible. Most of those specialty blends are just overpriced filler. Instead, focus on building a collection of essential spice pantry staples that actually work together. I’m talking about the heavy hitters: kosher salt (don’t even bother with table salt), cracked black pepper, garlic powder, smoked paprika, and maybe some cumin or dried oregano. If you have these, you can pivot from a taco night to a roasted chicken way more easily than you think.

One thing that tripped me up early on was the difference between spices and herbs. Spices come from seeds, bark, or roots (think cinnamon or cumin), while herbs are the leafy parts (like basil or thyme). Generally, you want to hit your spices early in the cooking process to let them bloom in the oil, whereas herbs are often better added toward the end so they don’t lose their brightness. If you really want to level up, keep some umami flavor enhancers like nutritional yeast or dried mushroom powder on hand. It’s the easiest way to add depth when a dish feels like it’s missing “something” but you can’t quite put your finger on it.

The Flavor Blueprint Layering Flavors in Cooking Without the Chaos

The Flavor Blueprint Layering Flavors in Cooking Without the Chaos.

Think of seasoning like building a playlist; you don’t just throw every song into a shuffle and hope for the best. You need a flow. Most people make the mistake of dumping everything in at once, which just leads to a muddy, confusing mess. The secret to layering flavors in cooking is timing. You want to start with your heavy hitters—the dried spices that can handle heat—right at the beginning to build a foundation. Save your delicate dried herbs or fresh garnishes for the very end, otherwise, they’ll just turn bitter or lose their personality in the pan.

Once you have that base, you have to manage the “vibe” of the dish. This is where most home cooks get stuck. If a dish feels heavy or “flat,” you probably don’t need more salt; you likely need to focus on balancing salt and acid. A squeeze of lemon or a splash of vinegar acts like a volume knob for your other flavors, making everything pop without making it salty. If you’re still missing that “something,” look toward umami flavor enhancers like soy sauce, parmesan, or even a tiny bit of tomato paste to give the meal some actual depth.

The Secret Fix Balancing Salt and Acid for Instant Results

If you’ve ever finished a dish and thought, “It tastes fine, but it’s just… missing something,” you probably don’t need more salt. You likely need acid. This is the part of balancing salt and acid that most people overlook because it feels a bit more technical, but it’s actually the easiest way to rescue a flat meal. Salt acts as a volume knob—it turns the intensity of the ingredients up—but acid is what provides the brightness and clarity. If your soup or sauce feels heavy and dull, a squeeze of lemon or a splash of vinegar acts like a reset button for your palate.

Think of it as a chemical tug-of-war. If a dish is too salty, you don’t always need to dilute it; sometimes, adding a hit of acidity can actually help mask that harshness by providing a counterpoint. I always keep a bottle of apple cider vinegar and a few limes in my kitchen for this exact reason. It’s not about following a strict recipe; it’s about trusting your taste buds to tell you when the brightness is finally hitting the right note.

Mastering the Details When to Season Meat and Using Umami Enhancers

Timing is everything when it comes to protein. If you’re wondering when to season meat, the short answer is: earlier rather than later. I’ve learned the hard way that if you wait until the meat is already in the pan to start grabbing your salt, you’re just seasoning the surface, not the actual food. For something like a steak or chicken breasts, I try to salt them at least thirty minutes before they hit the heat. This allows the salt to penetrate the fibers, making the whole thing more flavorful and helping it retain moisture. If you’re in a massive rush, even five minutes helps, but don’t skip this step if you want that deep, savory profile.

Once you’ve got your base seasoning down, you can start playing with umami flavor enhancers to really drive that “savory” feeling home. If a dish feels like it’s missing a soul, don’t just reach for more salt—try adding a splash of soy sauce, a bit of tomato paste, or even some grated parmesan. These little additions act like a cheat code for depth. It’s all about that final push of richness that makes your meal feel intentional rather than just “functional.”

Pro-Tips to Keep in Your Back Pocket (So You Don't Ruin Dinner)

  • Season as you go, not just at the end. If you wait until the food is already on the plate to add salt, you’re just coating the surface; if you season in layers while cooking, the flavor actually gets into the ingredients.
  • Taste your food more often than you think you should. Seriously, grab a clean spoon and try a tiny bit of your sauce or base every few minutes. It’s the only way to know if you’re actually getting closer to that “perfect” flavor or if you’re just spinning your wheels.
  • Don’t be afraid of the “heavy hand” with dried herbs. Unlike fresh herbs, which are delicate and best added at the very end, dried spices need heat and moisture to wake up. Toss them in early so they actually have time to infuse the dish.
  • Learn the difference between salt and “salty.” If a dish tastes flat but you’ve already added salt, don’t just keep dumping more in—you’ll end up with a salt bomb. Usually, that means you’re missing acid (like lemon or vinegar) or heat, not more sodium.
  • Keep your spices away from the stove. I know it looks cute to have them all lined up right next to the heat, but the temperature fluctuations kill their potency. Store them in a cool, dark cupboard so they actually taste like something when you need them.

The TL;DR: How to Stop Overthinking Your Seasoning

Stop treating spices like a math equation and start treating them like a system; layer your flavors from the base up and always taste as you go.

Keep your pantry lean with the essentials—you don’t need fifty exotic blends, just a solid foundation of salt, acid, and versatile aromatics.

If a dish tastes “flat” or boring, don’t just throw more salt at it; reach for an acid like lemon juice or vinegar to actually wake the flavors up.

Don't Overthink It, Just Taste It

At the end of the day, seasoning isn’t some mystical art form reserved for people with Michelin stars; it’s just a series of small, logical adjustments. We’ve covered the essentials: building a pantry that actually works, layering your flavors from the ground up, and using that crucial salt-and-acid balance to fix a dish that feels “flat.” Remember that meat needs its own dedicated timing, and umami is your secret weapon when a recipe feels like it’s missing a soul. If you stick to these systems, you’ll stop staring at a recipe like it’s a math equation and start trusting your own palate instead.

My biggest piece of advice? Stop being afraid to make mistakes. You are going to over-salt a soup or accidentally go too heavy on the cumin at some point, and honestly, that’s how you actually learn. Cooking shouldn’t feel like a high-stakes exam; it should be a repeatable process that gets easier every single time you step into the kitchen. Once you strip away the intimidation, you realize that seasoning is just about making things taste good for you. So, grab your salt, keep your multi-tool (or at least a good tasting spoon) handy, and just start experimenting. You’ve got this.

Frequently Asked Questions

How do I know if I've gone too far with the salt and how do I fix it without ruining the whole dish?

We’ve all been there—you take a bite and it’s a salt bomb. First, don’t panic. If it’s a liquid-based dish like a soup or sauce, try adding a splash of acid (lemon juice or vinegar) or a bit of unsweetened cream to mask the sting. If it’s a solid dish, I usually add more unseasoned bulk—like more veggies or grains—to dilute the salt. Whatever you do, don’t just add water; it’ll just make everything bland and sad.

Is there a difference between using dried spices versus fresh herbs, and when should I actually bother with the fresh stuff?

Think of dried spices as your foundation and fresh herbs as the finishing touch. Dried spices are concentrated and need heat to wake up, so toss them in early while you’re sautéing. Fresh herbs, though, are delicate; if you cook them too long, they just turn into sad, brown bits. Save the fresh stuff for the very end to add brightness and that “just made this” pop. Use dried for depth, fresh for life.

Can you give me a quick cheat sheet for which spices go best with specific proteins like chicken versus beef?

Think of your spices like a capsule wardrobe—certain combinations just work every time. For chicken, keep it light and aromatic: rosemary, thyme, garlic powder, or a hit of smoked paprika. For beef, you want heavy hitters that stand up to the richness: think cracked black pepper, cumin, onion powder, or even a little dried oregano for a steak vibe. If you’re doing seafood, pivot to lemon zest and dill. Don’t overthink it; just match the intensity.

Healthy meal prep ideas for the week.

Meal Prep Strategies for a Healthy Week Ahead

I used to think that “meal prepping” meant spending my entire Sunday afternoon hunched over a kitchen island, staring at a mountain of Tupperware while feeling like I was losing my only day of rest. We’ve all been there: it’s 7:00 PM on a Tuesday, you’re exhausted from work, and suddenly the only thing standing between you and a mental breakdown is the realization that you have nothing edible in the fridge. Instead of ordering expensive, salty takeout, I realized I needed a system that actually worked for a real life—not some aesthetic, Pinterest-perfect fantasy. Finding sustainable healthy meal prep ideas shouldn’t feel like a second job; it should be about reducing the friction of your daily routine so you can actually breathe.

In this post, I’m stripping away the gatekeeping and sharing the five specific components that changed everything for me. I’m not going to give you complicated, five-star recipes that require a culinary degree; instead, I’m walking you through five versatile building blocks that make assembly effortless. By the time you finish reading, you’ll have a repeatable framework to help you stop treating every weeknight like a crisis and start reclaiming your time.

Table of Contents

The "Base Component" Method

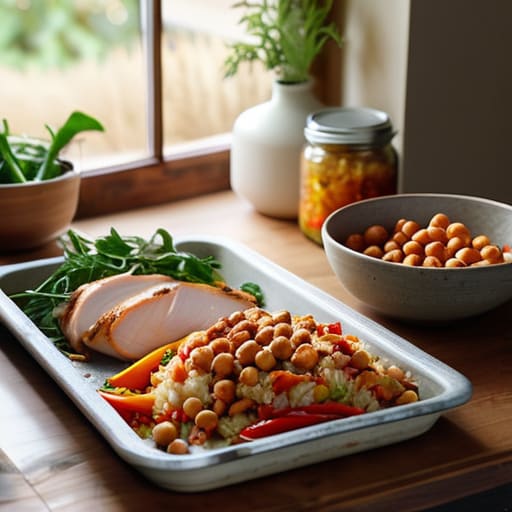
Meal prepping using The "Base Component" Method.

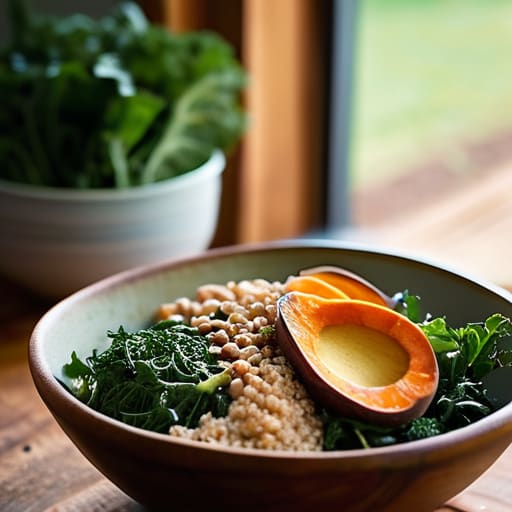
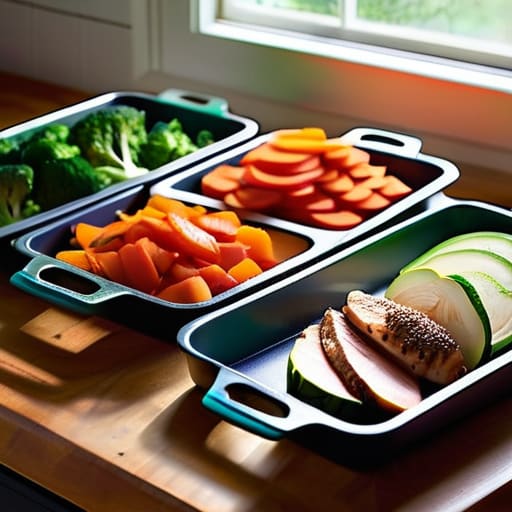
Instead of trying to build five identical, depressing Tupperware meals, just prep your foundational building blocks. I’m talking about one big batch of a grain like quinoa or farro, a tray of roasted sweet potatoes, and a container of washed greens. When you have these ready to go, you aren’t “cooking” on a Tuesday night; you’re just assembling.

One-Pan Roasted Everything

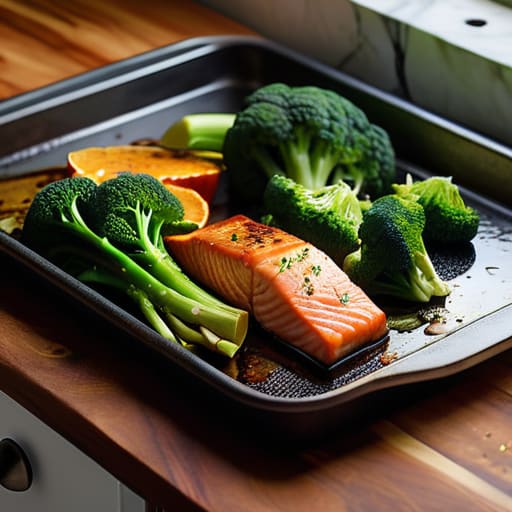
One-Pan Roasted Everything with salmon and vegetables.

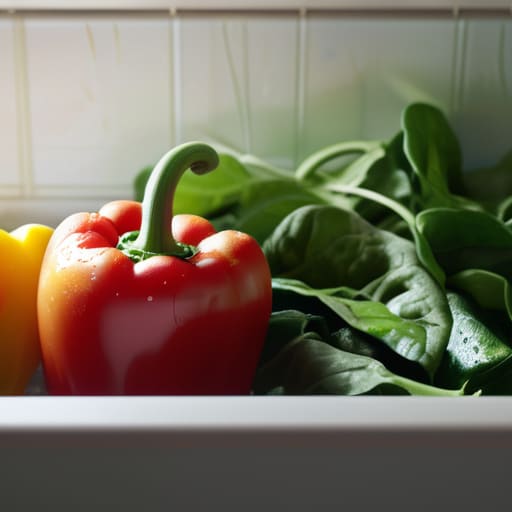
If the thought of washing five different pots makes you want to quit adulthood entirely, this is your new best friend. Throwing a protein, some sturdy veggies, and a bit of seasoning onto a single sheet pan is the ultimate low-friction hack. I usually go for salmon or chicken thighs paired with broccoli and bell peppers because they all cook at roughly the same rate.

The Protein Batch-Cook

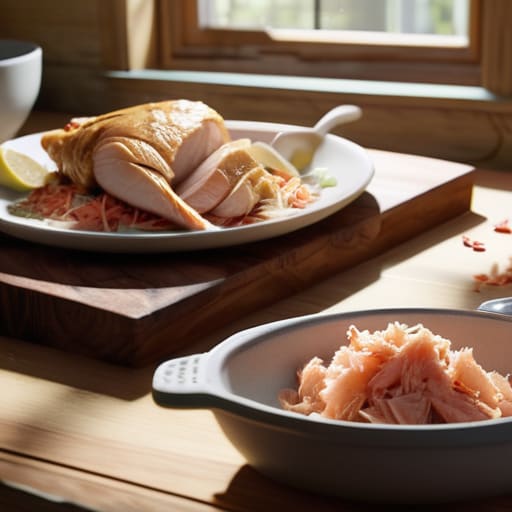
Meal prepping with The Protein Batch-Cook.

Protein is usually the most expensive and time-consuming part of a meal, so stop making it a daily task. I like to dedicate one afternoon to prepping a massive amount of protein—think a slow cooker batch of shredded chicken or a big tray of hard-boiled eggs. Having these ready to grab means you can add substance to a salad or a wrap without having to actually turn on the stove.

Sauce is the Secret Weapon

The reason most meal preps fail is that they get boring by Wednesday. To prevent the inevitable “food fatigue,” you need to invest in a few high-quality sauces that can completely transform the same base ingredients. I keep a jar of pesto, a spicy tahini dressing, and some good soy sauce in my fridge at all times for this exact reason.

Breakfast on Autopilot

We often spend so much time worrying about lunch and dinner that we completely neglect breakfast, which usually leads to a mid-morning caffeine crash and a frantic search for a pastry. I swear by overnight oats or chia pudding because they are essentially “set it and forget it” systems. You prep them in small mason jars the night before, and they’re ready to grab as you’re heading out the door.

The Bottom Line

Don’t aim for Pinterest perfection; just prep enough to stop the mid-week takeout impulse.

Focus on versatile building blocks—grains, proteins, and greens—rather than rigid, complex recipes.

Invest in good containers early so your fridge stays organized and your food actually stays fresh.

Don't Overcomplicate the Process

At the end of the day, meal prepping isn’t about becoming a gourmet chef or spending your entire Sunday staring at a steaming pot of quinoa. It’s really just about building a safety net for your future, hungrier self. Whether you’re focusing on batch-cooking a versatile protein, prepping a massive tray of roasted veggies, or just getting your grains ready in advance, the goal is the same: reducing the number of decisions you have to make when you’re tired and stressed. If you try to do all five of these things at once, you’ll probably burn out by week two. Just pick one single system that feels manageable for your current schedule and master that first.

I know that looking at a fridge full of empty Tupperware can feel overwhelming, but I promise that the mental clarity you get from knowing lunch is already handled is worth the initial effort. Adulthood is messy, and some weeks your “prep” might just be a bag of pre-washed spinach and some rotisserie chicken, and that is perfectly okay. Don’t let the pursuit of a “perfect” aesthetic get in the way of actually eating well. Focus on the consistency over perfection mindset, and eventually, these small habits will stop feeling like chores and start feeling like just another part of your seamless routine.

Frequently Asked Questions

How do I keep my prepped veggies from getting all mushy and gross by Wednesday?

The “mushy vegetable” struggle is real, and honestly, it’s usually a moisture issue. If you’re washing your veggies right before they go into the containers, you’re basically inviting rot. Dry them completely—use a salad spinner or even just paper towels—before storing. Also, skip the airtight seal if they’re still warm. I usually line my containers with a dry paper towel to soak up excess condensation. It keeps everything crisp until Friday.

Is it actually worth the time to portion everything into individual containers, or can I just keep big batches in the fridge?

Honestly, it depends on your level of decision fatigue. If you’re someone who hits a wall by Wednesday, portioning everything into individual containers is a lifesaver—you just grab, heat, and go. But if you prefer variety, keep the big batches in larger containers and just scoop out what you need. Personally, I do a hybrid: big batches for grains and proteins, but individual portions for things like salads or overnight oats.

What’s the best way to meal prep if I have zero counter space or a tiny kitchen?

If you’re working with a kitchen the size of a closet, stop trying to do everything at once. You can’t have five cutting boards and three bowls out simultaneously. My system? The “One-Board Rule.” Prep everything on a single large board, then clear it before moving to the next ingredient. Also, ditch the bulky containers for stackable glass ones, and prep in stages—chop your veggies while your pasta water is boiling so you aren’t fighting for surface area.

Learn how to make a smoothie.

How to Craft a Truly Nutritious Smoothie

I am so over the “wellness influencer” version of breakfast, where you need a $600 blender and twenty different expensive superfood powders just to get started. Honestly, most of the tutorials online make learning how to make a smoothie feel like a high-stakes chemistry experiment rather than a quick morning task. You don’t need a curated aesthetic or a pantry full of exotic dragon fruit to get something decent in a glass; you just need a functional system that doesn’t leave you cleaning up a mountain of dishes before your first meeting.

I’m not here to sell you on a lifestyle overhaul or some complicated recipe book. Instead, I’m going to give you the actual, unpolished framework I use to fuel my freelance days without the morning chaos. We’re going to talk about the basic ratios, the best way to prep your ingredients for speed, and how to avoid that weird, watery texture that ruins everything. This is about making your breakfast efficient and repeatable so you can stop overthinking it and just get on with your day.

Table of Contents

Stop Guessing the No Nonsense System on How to Make a Smoothie

Stop Guessing the No Nonsense System on How to Make a Smoothie

The problem with most recipes is that they’re too rigid. If you follow a blog post to the letter and you’re out of spinach, the whole thing feels like a failure. Instead, I use a modular system. Start with your liquid base options for smoothies—I usually go with unsweetened almond milk or coconut water—and add about one to one-and-a-half cups. From there, you need your bulk. This is where the frozen fruit vs fresh fruit debate comes in: I always lean toward frozen. Using frozen berries or mango chunks acts like built-in ice, giving you a much thicker consistency without watering everything down.

Once you have your liquid and fruit, it’s time to layer in the functional stuff. I treat my smoothies like a formula: liquid + fruit + greens + a fat or protein. To avoid a grainy mess, I throw in some protein smoothie boosters like chia seeds, hemp hearts, or a scoop of collagen. If you find your drink is too thin, just toss in more frozen elements; if it’s too thick, a splash more liquid fixes it instantly. It’s about adjusting on the fly, not following a script.

Mastering Your Liquid Base Options for Smoothies Without the Chaos

Mastering Your Liquid Base Options for Smoothies Without the Chaos

The biggest mistake I see people making is treating the liquid like an afterthought. If you just splash some water in and hope for the best, you’re going to end up with a thin, watery mess that tastes like nothing. To avoid that, you need to treat your liquid base options for smoothies as the foundation of the entire flavor profile. I usually stick to unsweetened almond milk or oat milk because they add a creamy weight without a massive sugar spike. If you’re feeling a bit more indulgent, coconut water is a solid choice for hydration, especially if you’re using a lot of greens.

The real secret to getting that cafe-quality consistency, though, lies in the ratio. If you want to avoid the dreaded “brain freeze” texture or a drink that’s too thick to actually sip through a straw, keep a few smoothie texture tips in mind: always start with more liquid than you think you need. You can always add more, but you can’t exactly “un-sludge” a smoothie once it’s too thick. If you’re using heavy frozen components, lean into a slightly thinner base to keep things moving.

The Real Truth About Frozen Fruit vs Fresh Fruit

The Real Truth About Frozen Fruit vs Fresh Fruit

Here’s the deal: if you’re still buying fresh berries every single time you want a smoothie, you’re making life harder than it needs to be. In my experience, the frozen fruit vs fresh fruit debate isn’t even a contest when you’re looking for efficiency. Frozen fruit is basically a cheat code. It’s pre-chopped, it’s cheaper, and most importantly, it acts as your built-in ice replacement. Using frozen chunks gives you that thick, cafe-style consistency without having to deal with watered-down ice cubes that ruin the flavor.

That said, don’t totally abandon the produce aisle. I usually keep a stash of fresh greens or a banana on hand to mix in. Fresh fruit is great for adding specific nutrients or a hit of brightness, but if you want to master your smoothie texture tips, lean heavily on the frozen stuff. It prevents that dreaded “soup” consistency and keeps everything chilled. If you’re trying to turn a basic drink into a meal replacement, adding frozen blueberries or mangoes alongside some protein smoothie boosters is the fastest way to get a creamy, satisfying result without any extra prep work.

Unlocking Creamy Results With Pro Smoothie Texture Tips

If you’ve ever ended up with a smoothie that felt more like a chunky, icy soup than a silky treat, I’ve been there. The secret isn’t some expensive gadget, though having a decent best blender for smoothies definitely helps the process along. The real magic happens in how you layer your ingredients. I always start with my liquid base at the very bottom to create a vortex, then add my powders and frozen items on top. This prevents that annoying situation where your blades just spin in an air pocket while the frozen chunks sit stubbornly at the top.

To get that cafe-style consistency, you need to think about fats and fibers. If your mixture feels too thin, don’t just add more ice—that’ll just make it watery. Instead, lean into some smoothie texture tips like adding half an avocado or a spoonful of Greek yogurt. These act as natural emulsifiers that create a velvety mouthfeel without needing a mountain of sugar. If you’re looking for a more substantial meal, throwing in some chia seeds or hemp hearts works as great protein smoothie boosters while adding a subtle thickness that keeps you full longer.

High Efficiency Upgrades Best Blender for Smoothies and Protein Boosters

Let’s talk gear, because nothing ruins a morning vibe faster than a blender that sounds like a jet engine but leaves you with chunks of unblended kale. If you’re serious about making this a daily system, you need to find the best blender for smoothies that actually has the torque to handle frozen fruit without stalling. I used to settle for cheap, single-serve plastic cups, but I eventually upgraded to a high-speed blender with a dedicated pulse function. It’s a bit more of an investment, but it’s the difference between a gritty mess and a silky, cafe-quality texture every single time.

Once you have the hardware sorted, it’s all about the fuel. To keep things efficient, I always keep a stash of protein smoothie boosters in my pantry so I don’t have to think when I’m running late. Think collagen peptides, hemp seeds, or even a scoop of high-quality pea protein. These are easy to toss in without changing the flavor profile too much, making it simple to turn a basic fruit drink into something that actually keeps you full until lunch.

My Low-Friction Hacks for Better Smoothies

  • Stop washing your blender every single morning. As soon as you pour your smoothie into a glass, fill the blender halfway with warm water and a drop of dish soap, then pulse it for ten seconds. It’s a tiny system that saves you from scrubbing dried-on fruit chunks later.
  • Prep your “smoothie packs” on Sunday night. I use reusable silicone bags to portion out my greens, fruit, and seeds so that on a Tuesday morning when I’m running late, I just grab a bag, dump it in, and go. No measuring, no mess.
  • Layer your ingredients in a specific order to save your blender motor. Always put your liquids in first, followed by powders, then solids, and finally your frozen items on top. This prevents that annoying “air pocket” stall where the blades just spin without actually grabbing anything.
  • Don’t fear the healthy fats. If your smoothie feels like it’s just “fruit water” that leaves you hungry an hour later, add a tablespoon of chia seeds, almond butter, or half an avocado. It stabilizes your energy so you aren’t crashing by mid-morning.
  • Keep a “flavor emergency kit” in your pantry. If a smoothie tastes too much like nothing or is slightly too bitter from the greens, a tiny squeeze of lemon juice or a dash of cinnamon usually fixes the profile without needing a ton of extra sugar.

The TL;DR: Your Smoothie Cheat Sheet

Stop overthinking the recipe; just pick a liquid base, a frozen fruit, and a creamy element to create a repeatable system that actually works.

Use frozen fruit as your default—it’s cheaper, lasts longer in the freezer, and gives you that perfect texture without needing a mountain of ice.

Invest in a decent blender and keep your protein boosters on hand so you can turn a quick drink into a legitimate, meal-replacing breakfast.

The Bottom Line

At the end of the day, making a great smoothie isn’t about following some complicated, aesthetic recipe you saw on a curated social media feed. It’s about having a reliable system that works for your schedule. Once you’ve mastered the balance of a solid liquid base, the right mix of frozen versus fresh fruit, and a few texture-boosting tricks, you’ve essentially automated your breakfast. You don’t need to overthink the protein powders or the expensive gadgets every single morning; you just need to lean on the framework we’ve built here to ensure you’re getting something nutritious without the usual kitchen chaos.

I know that when life gets hectic, even something as simple as breakfast can feel like another chore on an endless to-do list. But that’s exactly why I’m such a nerd for these little systems. When you take the guesswork out of the small things, you reclaim a bit of mental energy for the stuff that actually matters. So, grab your blender, stick to the formula, and stop treating your morning nutrition like a high-stakes science experiment. You’ve got this—make it simple, make it fast, and just get after your day.

Frequently Asked Questions

How do I stop my smoothies from turning into a watery mess by the time I actually get to drink them?

The “watery mess” issue usually comes down to ice melting or using too much liquid upfront. If you aren’t drinking it immediately, stop using ice cubes—they just turn into water as they thaw. Instead, use frozen fruit as your base and swap some of your liquid for a thickener like Greek yogurt or chia seeds. If you’re prepping ahead, keep your ingredients frozen and only add the liquid right before you blend.

Is it actually worth buying expensive protein powders, or can I get the same results with regular food?

Honestly, if you’re on a budget, don’t feel pressured to drop $60 on a fancy tub of protein powder. You can absolutely get the same results using real food—think Greek yogurt, hemp seeds, or even a bit of silken tofu for texture. I usually view protein powder as a convenience tool, not a magic fix. Use it when you’re rushing, but don’t let the marketing convince you that “real food” isn’t enough.

How can I prep my smoothie ingredients ahead of time without them getting gross in the fridge?

The trick is to stop thinking about “prepping” and start thinking about “portioning.” Don’t mix everything in a big bowl; that’s how you end up with mush. Instead, use reusable silicone bags or mason jars to create individual “smoothie packs.” Toss your fruit, greens, and seeds in there, then freeze them. When you’re ready, just dump the pack in the blender, add your liquid, and you’re done. No sogginess, no waste.

How to cook without a recipe guide.

How to Cook Delicious Meals Without Following a Recipe

I used to think that if I didn’t have a printed list of measurements and a timer set to the exact second, I was basically asking for a kitchen disaster. I spent way too many Tuesday nights staring at a screen, paralyzed by the fear that missing one teaspoon of cumin would ruin my entire life. But honestly? The idea that you need a rigid manual for every single meal is such a gatekept myth. Learning how to cook without a recipe isn’t about being some culinary prodigy; it’s just about understanding how flavors actually interact so you can stop treating your stovetop like a high-stakes exam.

I’m not here to give you some flowery, “trust your soul” nonsense that leaves you with a burnt pan and an empty stomach. Instead, I want to give you the actual, unpolished systems I use to turn random fridge scraps into real food. We’re going to break down the logic of flavor and the basic mechanics of heat, so you can finally ditch the cookbook and actually enjoy the process. No fluff, no expensive equipment required—just the practical steps to making your kitchen run smoothly and intuitively.

Table of Contents

Stop Being a Cookbook Slave How to Cook Without a Recipe

Stop Being a Cookbook Slave How to Cook Without a Recipe

The biggest mistake people make is treating a recipe like a legal contract. If you’re staring at a list of ingredients and panicking because you’re out of shallots, you’ve already lost the battle. Instead, you need to start thinking in terms of understanding cooking ratios. Most great dishes are just a balance of components: a base (starch or protein), a fat, an acid, and a seasoning. Once you realize that a splash of vinegar or a squeeze of lime is just doing the same job as a recipe’s “lemon juice” requirement, the fear of deviating disappears.

I like to view my kitchen through the lens of pantry staple cooking. If you have an onion, some garlic, a can of chickpeas, and a tin of spices, you have a meal. The secret isn’t memorizing measurements; it’s mastering the art of balancing acid and fat. If a sauce feels heavy or dull, don’t reach for more salt—reach for something bright. This kind of kitchen improvisation is what turns cooking from a stressful chore into a repeatable, low-friction system that actually works when you’re tired.

Mastering the Math Understanding Cooking Ratios for Total Control

Mastering the Math Understanding Cooking Ratios for Total Control

If you want to stop staring blankly at a list of measurements, you have to start understanding cooking ratios. Think of it like a cheat code: once you realize that most vinaigrettes are just three parts oil to one part acid, or that a standard roux is always equal parts fat and flour, you stop needing a manual. It’s not about memorizing a thousand different recipes; it’s about learning the underlying logic that connects them. When you grasp these fundamental proportions, you move from following instructions to actually directing the process.

This is where your pantry staple cooking really levels up. Instead of worrying if you have the exact amount of heavy cream for a specific pasta sauce, you look at what you have and adjust based on the ratio of liquid to fat. If a dish feels heavy or “flat,” you don’t reach for more salt; you look at balancing acid and fat. A squeeze of lemon or a splash of vinegar can cut through richness and wake the whole pan up. It’s less about math and more about finding that sweet spot where everything just clicks.

The Pantry Staple Cooking System That Ends Decision Fatigue

The Pantry Staple Cooking System That Ends Decision Fatigue.

The biggest drain on my energy after a long day of client calls isn’t the cooking itself—it’s the “what should I eat?” loop. To kill that decision fatigue, I stopped viewing my kitchen as a collection of random items and started seeing it as a modular system. I rely on pantry staple cooking to do the heavy lifting, meaning I always have a base (grains or pasta), a protein (canned beans or frozen shrimp), and a way to make it interesting. When you have these layers ready, you aren’t “making a meal” from scratch; you’re just assembling components.

The real magic happens when you move past just adding salt and start focusing on flavor profiling techniques. Instead of following a list of ingredients, I look at what my dish is missing. If it feels heavy or dull, I’m looking at balancing acid and fat—maybe a squeeze of lemon or a splash of vinegar to cut through some olive oil. Once you understand how these elements interact, you can stop staring at the pantry door and start building meals based on what your body actually craves in the moment.

Flavor Profiling Techniques to Build Better Meals From Scratch

Once you’ve got your ratios down, the real magic happens when you start playing with flavor profiling techniques to actually make a dish taste like something. I used to think a meal was “done” just because it followed the instructions, but now I realize that’s just the baseline. To move from following a blueprint to actually cooking, you need to understand the tug-of-war between different elements. Most of the time, when a dish feels “flat” or boring, it’s not because it lacks salt; it’s usually because it’s missing an acid or a bit of heat to wake everything up.

My go-to move is always balancing acid and fat. If you’ve made a rich, creamy pasta that feels a bit too heavy or “muddy” on the palate, don’t reach for more cream—reach for a squeeze of lemon or a splash of vinegar. That brightness cuts through the weight and makes the flavors pop. Think of it like adjusting the lighting in a room; the acid provides the clarity. Learning these little tweaks is how you build true kitchen improvisation skills that allow you to fix a meal on the fly without needing to start over.

Beyond the Manual Using Kitchen Improvisation Skills and Smart Substitution

At some point, you’re going to realize you’re halfway through a sauce and realize you’re missing that one specific herb the recipe called for. This is where most people freeze up and order takeout, but this is actually where your kitchen improvisation skills should kick in. Instead of seeing a missing ingredient as a failure, view it as a prompt to pivot. If a recipe asks for lemon juice and you’re out, don’t panic—reach for apple cider vinegar or even a splash of white wine. It’s all about understanding the function of what you’re replacing, whether it’s for brightness, moisture, or texture.

The real secret to staying calm when things go sideways is having a mental substitution guide for ingredients ready to go. If you understand the core components of a dish, you can swap things out on the fly without ruining the vibe. If a dish feels “heavy” or one-note, you probably just need to work on balancing acid and fat. A squeeze of lime or a tiny drop of vinegar can cut through a rich, fatty sauce like magic. Once you stop treating ingredients like sacred relics and start seeing them as tools, the kitchen stops being a place of stress and starts feeling like a playground.

5 Small Systems to Stop the Recipe Dependency

  • Trust your nose and your eyes, not just the timer. If a sauce looks too thick, add liquid; if it smells raw, give it more time. Your senses are better sensors than any printed instruction.
  • Keep a “flavor kit” within arm’s reach. Having your acid (lemon/vinegar), salt, heat (chili flakes), and fat (olive oil/butter) right there makes it easy to tweak a dish on the fly without hunting through cupboards.
  • Learn the “base” logic. Most great meals start with the same pattern: aromatics (onion/garlic) + fat + protein + liquid. Once you recognize the pattern, you aren’t following a recipe; you’re just filling in the blanks.
  • Stop aiming for perfection and start aiming for “good enough.” If you’re improvising, don’t stress about exact measurements. A splash of soy sauce or a pinch of cumin is a low-stakes experiment, not a permanent mistake.
  • Keep a “cheat sheet” of your own wins. When you accidentally make a killer pasta sauce without looking at a book, jot down what you actually did. Building your own mental library is more useful than any cookbook.

The TL;DR on Building Your Own Kitchen Intuition

Stop treating recipes like legal documents; once you understand basic ratios and flavor profiles, you can start cooking with what you actually have on hand instead of what the book says you should have.

Build a reliable pantry system so that “making something from nothing” becomes a repeatable process rather than a stressful scavenger hunt through your cabinets.

Trust your senses over the timer—learn to taste, smell, and adjust as you go, because the most important ingredient isn’t in a jar, it’s your ability to pivot when a dish needs more acid or salt.

Trust Your Gut (And Your Pantry)

At the end of the day, cooking without a recipe isn’t about being a master chef or having some innate, magical connection to ingredients. It’s just about building a better system. Once you stop treating every meal like a high-stakes exam and start leaning on ratios, flavor profiles, and a well-stocked pantry, the anxiety starts to fade. You don’t need to memorize a thousand different instructions when you understand the fundamental logic of how salt, fat, acid, and heat interact. When you stop being a slave to the manual and start focusing on the actual mechanics of flavor, you turn a chore into something that feels intuitive and, dare I say, actually fun.

I know that the first few times you try to improvise, it might feel like you’re one wrong move away from a kitchen disaster. But here’s the secret: even the professionals mess up sometimes, and most mistakes are totally fixable with a little extra acid or a pinch of salt. Don’t let the fear of a “failed” meal keep you stuck in a cycle of decision fatigue and takeout orders. Embrace the mess, trust your senses, and remember that cooking is a skill you build, not a test you pass. You’ve got this—now go see what you can make with what’s already in your fridge.

Frequently Asked Questions

What do I do if I accidentally over-season something while I'm experimenting?

Don’t panic—it happens to the best of us. If you’ve gone overboard on salt, hit it with something acidic like lemon juice or vinegar to balance it out. If it’s too spicy, reach for dairy (think Greek yogurt or heavy cream) or something sweet to dull the heat. If the whole thing just tastes “too much,” try increasing the volume by adding more unseasoned bulk, like more grains, veggies, or broth, to dilute the intensity.

How do I know when a dish is actually "done" if I'm not following specific timing instructions?

This is where you stop looking at the clock and start using your senses. It’s honestly a game-changer. For proteins, get a digital thermometer—it’s the only way to be certain without the guesswork. For veggies, it’s all about texture; you want them tender but with a little bite left. Use your nose, too. If the smell shifts from “raw” to “fragrant,” you’re usually right on the money. Trust your gut.

Is there a specific way to practice this without wasting a bunch of expensive ingredients?

Honestly, the “trial and error” phase is where most people quit because they’re scared of wasting a $15 steak. Don’t do that. Start with your “low-stakes” ingredients—think rice, pasta, or eggs. Practice your flavor balancing on a basic bowl of noodles or a simple omelet. Once you can intuitively know if a sauce needs more acid or salt without ruining a main course, you’ll have the confidence to move on to the expensive stuff.

Useful kitchen tips and tricks for cooking.

Smart Kitchen Hacks to Speed Up Your Cooking

I am so tired of seeing those aesthetic “organization porn” videos where people spend three hundred dollars on matching glass jars just to store their pasta. Honestly, most of those viral kitchen tips and tricks are just expensive ways to make your life more complicated. You don’t need a custom-built spice rack or a color-coded pantry to be a functional adult; you just need a system that actually works when you’re tired and hungry at 7:00 PM. I grew up watching my mom navigate a professional kitchen and my dad fix everything from leaky sinks to broken toasters, so I learned early on that real efficiency isn’t about how pretty your countertop looks—it’s about reducing the friction of the task at hand.

I’m not here to sell you a lifestyle or a specific brand of minimalist containers. Instead, I’m going to give you the unpolished, actual steps to streamlining your space so you stop treating every meal like a high-stakes emergency. We’re going to focus on high-impact, low-effort changes that make sense for a real person with a real schedule. Consider this my no-nonsense contract: no gatekeeping, no fluff, just practical systems that actually stick.

Table of Contents

Stop the Kitchen Chaos Real Kitchen Tips and Tricks for Sanity

Stop the Kitchen Chaos Real Kitchen Tips and Tricks for Sanity.

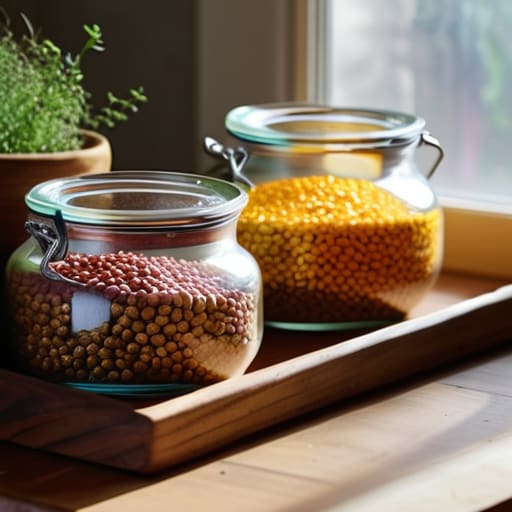
First off, let’s talk about the “doom pile” of Tupperware and half-used jars that usually lives in the back of my fridge. If you’re constantly digging through clutter just to find a snack, you need better food storage solutions. I stopped buying those mismatched plastic containers and switched to a uniform set of glass jars. It sounds small, but seeing exactly what I have at a glance prevents that “what’s for dinner?” panic at 6:00 PM. Pair that with some basic pantry organization ideas—like grouping your grains together and keeping your oils front and center—and you’ve already won half the battle.

The other thing that saved my sanity was realizing that my “cooking” was actually just a series of frantic, messy movements. I started focusing on a few culinary time-saving techniques, like the “clean as you go” rule. If you’re waiting for the water to boil, don’t just stand there scrolling; wash the cutting board you just used. It sounds tedious, but it turns a massive post-dinner cleanup into a five-minute task, which is the ultimate hack for keeping your kitchen from feeling like a disaster zone.

Mastering Meal Prep Efficiency Without the Sunday Scaries

Mastering Meal Prep Efficiency Without the Sunday Scaries

Look, I used to spend my entire Sunday afternoon hunched over a cutting board, feeling like I was running a marathon just to eat on Tuesday. That’s not meal prep; that’s a chore. To actually achieve meal prep efficiency without losing your entire weekend, you have to stop thinking about individual recipes and start thinking about components. Instead of cooking five specific meals, prep “building blocks”—a big batch of roasted veggies, a protein, and a grain. When you have these ready to go, assembly takes five minutes, and you aren’t staring blankly at the fridge at 7:00 PM.

Another thing that saved my sanity was investing in actual food storage solutions that work. If you’re still using mismatched plastic containers that leak or don’t stack, you’re just adding more friction to your life. Get a set of uniform, airtight glass containers. They stack perfectly in the fridge, which keeps things visually calm, and they actually keep your food fresh. It’s a small system, but it prevents that “emergency” feeling of discovering a science experiment in the back of your crisper drawer.

Ditch the Clutter With Smarter Food Storage Solutions

Ditch the Clutter With Smarter Food Storage Solutions

Honestly, nothing kills my motivation to actually cook more than opening a pantry and feeling like I’m digging through a junk drawer. If you’re still using those mismatched plastic containers that leak every time you move them, we need to talk. Investing in a cohesive set of food storage solutions—think glass containers with airtight lids—isn’t just about the aesthetic; it’s about knowing exactly what you have so nothing goes to waste. When everything is visible and stacked neatly, you stop buying duplicates of things you already own.

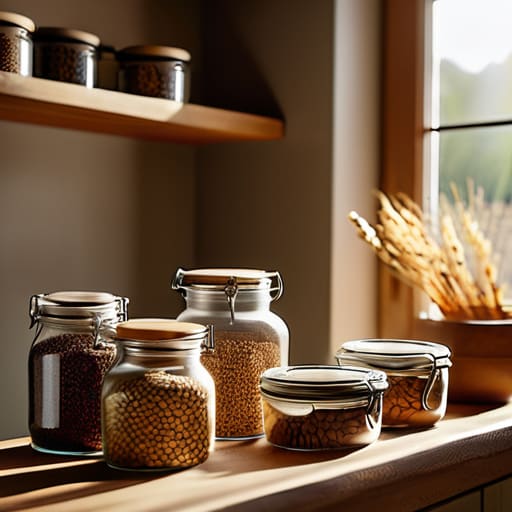
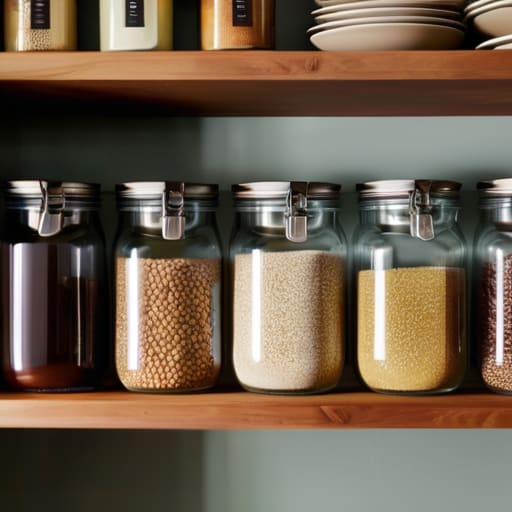
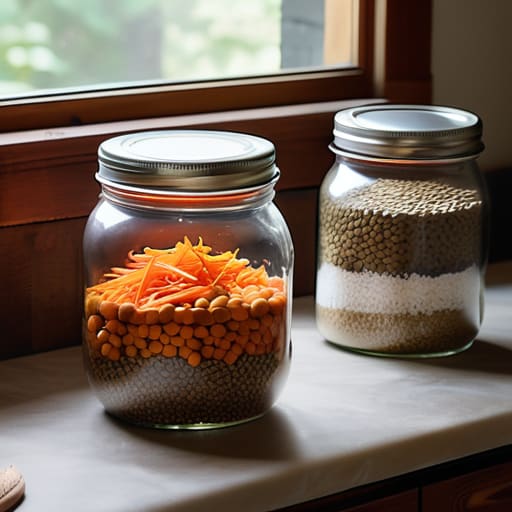
I’m a huge advocate for using clear bins for your dry goods, too. It’s one of those simple pantry organization ideas that actually works because it removes the mental friction of searching for that one specific bag of lentils. If you can see your inventory at a glance, you can plan your week much more effectively. Stop letting your ingredients hide in the dark corners of your cabinets; once you bring everything into the light, managing your kitchen feels less like a chore and more like a system that actually supports you.

Pantry Organization Ideas to End the Constant Food Scramble

The biggest mistake I see people make is treating their pantry like a junk drawer where things just go to die. We’ve all been there: you’re halfway through a recipe, only to realize you’re out of cumin, or worse, you find three half-empty bags of flour hiding in the back. To fix this, you need to stop thinking about “decorating” and start thinking about visibility. I’m a huge advocate for using clear, airtight containers for your staples like pasta, rice, and grains. It’s one of those simple pantry organization ideas that actually works because you can see exactly when you’re running low before it becomes an emergency.

Another thing that changed the game for me was implementing a “first in, first out” system. When you bring home new groceries, don’t just shove them in the front; move the older stuff forward so it actually gets used. I also swear by using tiered risers or lazy Susans for those awkward corner spots. It’s all about creating a flow that supports your meal prep efficiency rather than fighting against it. If you can see it and reach it, you’ll actually use it.

Sharp Tools and Better Knife Skills for Beginners

Look, I used to think that a dull knife was just part of the struggle, but it’s actually a massive safety hazard and a huge time sink. If you’re struggling to slice through a tomato without crushing it, your blade is crying for help. I learned the hard way that kitchen tool maintenance isn’t just for professional chefs; it’s a baseline requirement for anyone who wants to stop dreading prep work. Investing in a decent honing steel and learning how to use it will keep your edges crisp, making the whole process feel less like a workout and more like a flow state.

Once your tools are actually functional, you can start working on your actual knife skills for beginners. You don’t need to master fancy French julienne right away, but learning a proper grip and how to use the “claw” technique with your non-cutting hand is non-negotiable. When you aren’t fighting your equipment or worrying about slicing a finger off, your meal prep efficiency skyrockets. It turns a chaotic chore into a predictable, rhythmic system that actually feels sustainable.

Small Tweaks to Save You from Kitchen Burnout

  • Stop relying on your memory for leftovers; grab a roll of painter’s tape and a Sharpie to label everything with a date. There is nothing worse than digging through the fridge only to realize that “mystery container” has been haunting you for two weeks.
  • Set up a “prep station” before you even turn on the stove. Get a big cutting board, your knife, and a single large bowl for scraps. If you try to cook and clean at the same time, you’ll end up with a sink full of dishes and a burnt dinner.
  • Invest in a decent digital thermometer if you haven’t already. Stop guessing if the chicken is done by cutting into it and letting all the juices out; just check the temp and move on with your life. It takes the anxiety out of the whole process.
  • Create a “landing zone” for your grocery hauls. Instead of putting things away one by one as you unpack, group everything by category on the counter first. It makes the actual putting-away part way faster and keeps you from getting distracted halfway through.
  • Keep your most-used tools—like your salt, pepper, and good olive oil—within arm’s reach of the stove. If you have to walk across the kitchen every time you need to season something, you’re just adding unnecessary friction to your workflow.

The Bottom Line: Making It Stick

Stop trying to overhaul your entire kitchen in one weekend; just pick one small system—like a dedicated snack drawer or a better knife sharpening routine—and master it first.

Focus on reducing friction, not achieving perfection, by organizing your space around how you actually move and cook, rather than how an aesthetic Pinterest board says you should.

Remember that good kitchen systems are meant to serve you, so if a certain organizational hack feels like more work than it’s worth, scrap it and try something more functional.

The Bottom Line

Look, I know it feels like a lot when you first look at the mountain of things you need to change, but you don’t have to overhaul your entire life by Monday. We’ve covered everything from sharpening your knives to actually making meal prep feel like a tool rather than a chore. The goal isn’t to turn your kitchen into a sterile, Pinterest-perfect showroom; it’s about building a space where you aren’t constantly fighting against your own environment. Whether it’s finally organizing that chaotic pantry or just getting your food storage situation under control, these small shifts are designed to remove the friction from your daily routine so you can actually enjoy the process of making something delicious.

At the end of the day, your kitchen should serve you, not the other way around. If a system isn’t working, toss it and try something else—there is no “correct” way to live, only the way that makes your life run smoother. Adulthood is messy, and your kitchen will inevitably get chaotic again, but that’s okay. As long as you have these basic frameworks in place, you’ll be able to reset without it feeling like a total emergency. Now, go grab that multi-tool or a sharp knife and start small. You’ve got this.
Frequently Asked Questions

How do I actually keep my knives sharp without buying a bunch of expensive professional gear?

Honestly, you don’t need a $200 whetstone set to keep your knives from feeling like butter knives. If you’re just starting out, grab a decent honing rod—it’s the easiest way to realign the edge while you’re actually cooking. For when they’re truly dull, a simple pull-through sharpener works in a pinch, but just don’t go overboard. My rule of thumb? Treat your tools well, and they’ll stop making your prep work a chore.

I have a tiny kitchen with zero counter space—how am I supposed to implement these systems?

I feel this in my soul. When your kitchen is basically a hallway with a stove, traditional advice is useless. You have to stop thinking horizontally and start thinking vertically. Get a magnetic knife strip, use over-the-sink drying racks, and invest in stackable containers. If you can’t find space on the counter, use the walls and the insides of your cabinet doors. It’s all about reclaiming every inch of unused air space.

What are the best ways to organize my fridge so things don't just rot in the back every single week?

The “black hole” at the back of the fridge is where good intentions go to die. To stop the rot, you need a “First In, First Out” system. Use clear bins to group things like “breakfast” or “snacks,” and keep a “Eat Me First” bin right at eye level for anything nearing its expiration. If you can’t see it, you won’t eat it. Stop burying leftovers behind a giant jar of pickles.

Easy simple sheet pan dinners for cleanup.

Low-maintenance Sheet-pan Dinners for Easy Cleanup

Let’s be real: the “what’s for dinner” panic at 6:00 PM is one of the most unnecessary stressors in adult life. I used to spend my evenings staring at a cluttered fridge, feeling like I was failing at basic survival because I didn’t have the energy to manage four different pots and pans. But I’ve realized that most of our kitchen chaos comes from overcomplicating things. Instead of aiming for a five-course meal every night, I’ve started leaning into simple sheet pan dinners to reclaim my sanity. It’s not about being a gourmet chef; it’s about building a system that feeds you without turning your kitchen into a disaster zone.

In this post, I’m breaking down five of my absolute go-to setups that actually work for a busy, low-maintenance lifestyle. I’m not going to give you anything fancy or gatekeep the “perfect” technique; I’m just sharing the exact combinations I use to get a solid meal on the table with minimal cleanup. You’re going to walk away with five reliable blueprints that prove you can eat well without losing your entire evening to the sink full of dishes.

Table of Contents

The Sausage and Pepper Standard

The Sausage and Pepper Standard sheet pan.

This is my absolute baseline for when I’ve had a day that felt like a marathon. I grab a pack of pre-cooked Italian sausages, some bell peppers, and an onion, chop them into roughly the same size, and toss them onto a tray with olive oil and dried oregano. The beauty of this is that the sausages get that perfectly crispy casing while the veggies soften up in all the rendered fat, creating a built-in sauce that makes everything taste intentional rather than rushed.

Lemon-Garlic Salmon and Asparagus

Sheet pan Lemon-Garlic Salmon and Asparagus.

There are days when I want to feel like I actually have my life together, and this is the meal that does it. I lay out salmon fillets and a bunch of trimmed asparagus on a sheet pan, then hit them with plenty of lemon slices, minced garlic, and a heavy hand of black pepper. It’s incredibly hard to mess this up because the salmon stays moist from the steam of the veggies, and the lemon adds that bright, fresh acidity that makes it feel like a restaurant dish.

Mediterranean Chicken and Veggie Medley

Roasted Mediterranean Chicken and Veggie Medley.

When I’m craving something that feels a bit more substantial, I go for a Mediterranean-style tray bake. I use chicken thighs—never breasts, because they dry out way too fast—and surround them with chunks of zucchini, red onion, and cherry tomatoes. I season everything with smoked paprika and dried thyme, which gives the whole tray a deep, earthy aroma that fills the kitchen while it’s roasting.

The Roasted Gnocchi Hack

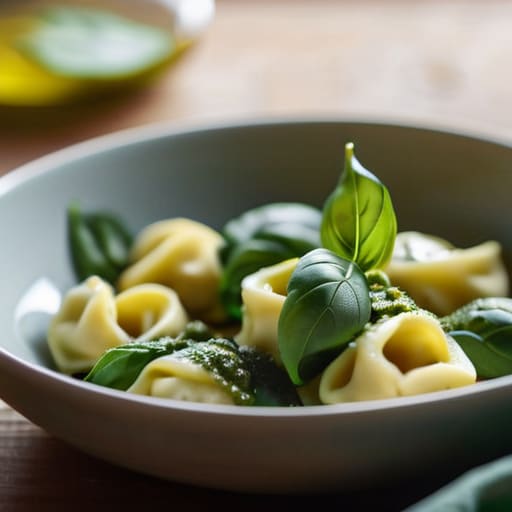
Okay, this one is a bit of a curveball, but hear me out. Instead of boiling shelf-stable or refrigerated gnocchi, you toss them straight onto a sheet pan with some halved cherry tomatoes, garlic cloves, and chunks of bell pepper. Roasting the gnocchi transforms them from soft and pillowy to something with a crispy, golden exterior and a chewy center that is honestly life-changing.

Beef and Broccoli Stir-Fry Style

I know, I know—usually stir-fry happens in a wok, but doing it on a sheet pan is a massive time-saver. I use thin strips of flank steak or even just frozen beef strips, along with broccoli florets and sliced carrots. I toss it all in a mixture of soy sauce, sesame oil, and a bit of ginger, then spread it out so nothing is overcrowded.

The Lowery Logic: Making it Stick

Don’t aim for gourmet; aim for “done.” The goal isn’t a five-star meal, it’s clearing your mental load so you can actually relax after work.

Invest in your tools, not the recipes. A high-quality, heavy-duty sheet pan is the difference between a crispy dinner and a soggy mess.

Build a mental template. Once you realize you can throw almost any protein and veggie combo on a tray, you stop needing a recipe and start just living.

The Low-Effort Win

At the end of the day, these sheet pan dinners aren’t about becoming a gourmet chef or following some complicated culinary ritual. It’s really just about the math: less prep time, fewer dishes to scrub, and more time to actually unwind after work. Whether you’re leaning into a classic roasted veggie medley or a high-protein salmon tray, the goal remains the same—minimizing the friction between being hungry and being fed. Once you have a few of these reliable templates in your mental rotation, you stop viewing Tuesday nights as a logistical hurdle and start seeing them as a solved problem.

I know that feeling of staring into a fridge at 7:00 PM and feeling that immediate sense of dread, but I promise you, it doesn’t have to be that way. Adulthood is heavy enough as it is; your dinner shouldn’t add to the mental load. Start small, pick one recipe from this list, and just see how it feels to have a clean kitchen and a full stomach without the usual chaos. You’re building a system here, one tray at a time, and honestly? That’s a massive win for your sanity.

Frequently Asked Questions

Can I use frozen veggies on a sheet pan, or will they turn into a soggy mess?

Honestly, you can, but you have to be intentional about it. If you just toss them in frozen, they’ll definitely steam and get that sad, soggy texture. My rule of thumb: don’t crowd the pan. Give them space to breathe so the moisture can actually evaporate. I also like to preheat the tray in the oven for a few minutes first—it helps sear the outside immediately so you get some actual roast instead of mush.

How do I make sure the meat is actually cooked through without burning the vegetables?

This is the classic sheet pan struggle. My trick? Timing is everything. If you’re doing something heavy like chicken thighs, toss them in first. Give them a ten-minute head start before adding your veggies. If you’re working with delicate stuff like shrimp or asparagus, wait until the very end. Also, cut your denser veggies (like carrots or potatoes) smaller than the meat so they actually finish at the same time.

Are there specific types of sheet pans I should avoid if I don't want my food sticking?

Honestly, stay away from those super cheap, thin aluminum pans you find at the dollar store. They warp the second they hit high heat, which creates uneven hot spots and makes everything stick. Also, if you’re looking at old, scratched-up non-stick pans, toss them. Once that coating starts peeling, your food is going to cling to it like crazy. Stick to a heavy-duty rimmed baking sheet—it’s a much better long-term system.

Delicious healthy snack ideas for everyone.

Deliciously Healthy Snacks That Don’t Taste Like Diet Food

We’ve all been there: it’s 3:30 PM, your brain feels like it’s running on a low battery, and suddenly that bag of processed chips in the pantry looks like the only thing that can save your life. I used to treat my afternoon hunger like a total emergency, which usually resulted in a massive sugar crash that ruined my entire evening. The problem isn’t your willpower; it’s that you don’t have a system for healthy snack ideas that actually satisfy you without requiring a culinary degree. When you’re staring down a deadline or a long commute, you need food that works as hard as you do, not something that just fills the void for twenty minutes.

I’m done with the gatekeeping and the overly complicated “superfood” recipes that take an hour to prep. In this post, I’m breaking down five of my personal go-to snacks that are genuinely low-effort and easy to keep on hand. These aren’t just random suggestions; they are functional fuel systems designed to keep your energy stable and your brain sharp. Let’s get into the actual, unpolished ways I keep myself fed so I can stay focused on what actually matters.

Table of Contents

The "No-Brainer" Greek Yogurt Bowl

The "No-Brainer" Greek Yogurt Bowl.

I used to think healthy snacking meant something complicated, like making a smoothie bowl from scratch every morning. In reality, I just keep a big tub of plain Greek yogurt in the fridge and grab a handful of whatever is in the pantry. The key is the protein-to-fiber ratio; if you just eat yogurt alone, you’ll be hungry again in twenty minutes, so you have to add some texture.

Adult Lunchables (The Charcuterie Hack)

Adult Lunchables (The Charcuterie Hack) snack tray.

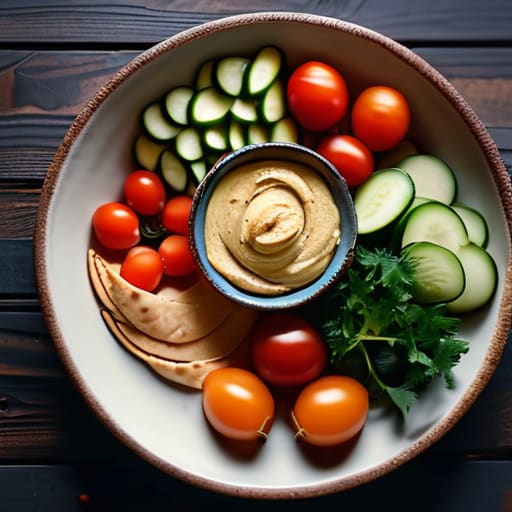
There is something deeply satisfying about eating off a little tray, and honestly, it’s the easiest way to hit multiple food groups without actually “cooking.” I call these my emergency kits. I prep a container with some sliced deli turkey or hard-boiled eggs, a handful of almonds, and some cucumber slices. It’s basically a deconstructed meal that you can graze on while you’re working through your inbox.

Apple Slices with a Nut Butter Buffer

Apple Slices with a Nut Butter Buffer.

If you’re like me and you crave something sweet and crunchy when you’re stressed, apples are your best friend. But eating an apple by itself is a mistake—it’s mostly just sugar and water, which leads to a quick spike and an even quicker crash. You need a fat source to slow down that digestion. I always keep a jar of almond or peanut butter right on my desk for this exact reason.

The Savory Roasted Chickpea Fix

Sometimes you just need something salty and savory, and I refuse to believe that “healthy” has to mean “bland.” I started roasting chickpeas in my oven because it’s a massive batch job that lasts all week. You just toss them in olive oil and whatever spices you have—sea salt, smoked paprika, or even garlic powder—and let them get crispy. They are the ultimate replacement for greasy potato chips.

Edamame for Easy Protein

If you haven’t tried keeping a bag of frozen edamame in your freezer, you are seriously missing out on the easiest snack on the planet. You don’t even need to “prep” them in the traditional sense; you just microwave a bowl for a couple of minutes and you’re good to go. It’s one of those minimalist food wins that requires almost zero mental load.

The bottom line

Stop waiting for a “hunger emergency” to happen; the goal is to have your snacks ready before your brain starts spiraling.

Focus on high-protein, low-effort combinations so you actually stay full instead of just chasing a quick sugar high.

Build a system that works for your actual life, not some aesthetic Pinterest version of eating healthy that takes an hour to prep.

The Bottom Line

At the end of the day, having a snack system isn’t about being a health guru or following some rigid, aesthetic meal plan you saw on TikTok. It’s just about reducing the friction between you and feeling human again. Whether you’re grabbing a handful of almonds when you’re stuck in a meeting or keeping Greek yogurt in the fridge for those post-gym crashes, the goal is to have something ready so you don’t end up face-first in a bag of chips at 9 PM. If you can keep even just two of these options stocked in your pantry or bag, you’ve already won half the battle against the mid-afternoon slump.

Don’t feel like you have to overhaul your entire kitchen overnight to make this work. Start small—maybe just pick one snack from this list and make sure it’s always part of your weekly rotation. Adulthood is basically just a long series of small decisions, and choosing to fuel yourself properly is one of the easiest ways to stop the chaos before it starts. You don’t need a perfect diet; you just need a system that actually fits into your real, messy, busy life. You’ve got this.

Frequently Asked Questions

How do I prep these snacks ahead of time without them getting soggy or gross by Wednesday?

The trick is to stop thinking about “prepping” as one big bowl of mush. For anything crunchy, keep the wet and dry stuff separate until the moment you eat it—I swear by those tiny reusable condiment containers. If you’re doing veggie sticks, put a little hummus at the bottom of a jar and stand the veggies upright in it. It keeps them crisp and prevents that sad, soggy texture by mid-week.

Are there any budget-friendly swaps if I can't find all these specific ingredients at my local grocery store?

Look, I totally get it. Not everyone has a boutique grocery store around the corner, and honestly, some of these “superfoods” are just overpriced marketing. If a specific nut or seed is too pricey, don’t sweat it. Swap expensive almonds for peanuts or sunflower seeds—the protein hit is basically the same. If organic berries are breaking your budget, just grab whatever fruit is on sale. The goal is the system, not the specific brand name.

What should I do if I'm a sweet tooth person—can I still stick to these systems without constantly craving sugar?

Look, I’m a sucker for something sweet too, so I get it. You don’t have to white-knuckle your way through life without sugar, you just need a better system for it. Instead of fighting the craving, lean into “smart sweets.” Keep things like dark chocolate, frozen grapes, or Greek yogurt with a drizzle of honey in your rotation. It satisfies the itch without that massive glucose spike and crash that ruins your productivity.

Learn how to make coffee at home.

Brew Better Coffee at Home Than Your Local Barista

I’m so tired of seeing $80 pour-over kits and “essential” espresso machines that take up half your counter space just to tell you that you need a PhD in fluid dynamics to get a decent cup. Honestly, the gatekeeping in the specialty coffee world is exhausting; you don’t need a laboratory setup to figure out how to make coffee at home that actually tastes good. Most of those influencers are just selling you a lifestyle of complicated gadgets, but for the rest of us who just want to function before 9:00 AM, that’s just unnecessary friction.

I’m not here to lecture you on bean acidity or the precise atmospheric pressure of your kitchen. Instead, I’m going to give you the actual, unpolished systems I’ve spent years testing to make my morning routine seamless. We’re going to skip the hype and focus on the low-effort, high-reward setups that actually work when you’re running late. My goal is to help you master the basics so you can stop overthinking it and start enjoying a better cup of coffee without the constant state of emergency.

Table of Contents

Understanding How to Make Coffee at Home

Understanding How to Make Coffee at Home

Before we get into the actual steps, we need to clear something up: making great coffee isn’t about owning a $1,000 espresso machine or mastering some complex science experiment. It’s really just about managing a few variables so you don’t end up with a cup that tastes like battery acid. Most of the time, when people struggle, it’s because they’re treating the process like a chore rather than a simple system.

The first thing you need to realize is that your gear matters less than your ingredients. If you aren’t using freshly ground coffee beans, you’re essentially fighting a losing battle from the start. Once those beans sit in a bag for months, they lose the oils that actually make them taste good.

Beyond the beans, you’ll want to look into the best coffee brewing methods that actually fit your lifestyle. Are you someone who wants a quick pour-over while checking emails, or do you prefer the slow ritual of a French press? Once you pick a method, we’ll focus on the small tweaks—like water temperature and grind size—that actually move the needle on flavor without making it feel like a second job.

Key Things to Know

Key Things to Know: beginner coffee equipment.

Before you go out and drop two hundred dollars on a fancy espresso machine, let’s get one thing straight: you don’t need a lab-grade setup to avoid a mediocre cup. The biggest mistake I see people make is overcomplicating the gear before they even understand the basics. If you’re just starting out, focus on coffee brewing equipment for beginners that actually serves a purpose—think a simple French press or a pour-over dripper. These are low-maintenance, easy to clean, and they won’t take up your entire kitchen counter.

The real secret to improving your coffee flavor profile isn’t actually the machine; it’s the ingredients. If you’re using pre-ground, stale stuff from a grocery store tin, you’re fighting a losing battle. You really want to invest in freshly ground coffee beans and grind them right before you brew. It’s a tiny extra step in your morning routine, but it’s the single most effective way to stop your coffee from tasting like burnt cardboard. Once you nail the beans, everything else just falls into place.

Practical Tips and Steps

Practical Tips and Steps for coffee brewing.

If you’re just starting out, don’t feel like you need to drop a paycheck on a professional espresso machine. Honestly, the best way to begin is by focusing on the basics of coffee brewing equipment for beginners, like a simple French press or a pour-over dripper. The real secret, though, isn’t the gear—it’s the freshness. I can’t stress this enough: buy whole beans and grind them right before you brew. Using freshly ground coffee beans is the single fastest way to stop your morning cup from tasting like bitter cardboard.

Once you have your gear, it’s all about the workflow. If you’re using a pour-over, pay attention to your water; if it’s boiling hot, you’ll scorch the grounds, but if it’s too cool, you won’t get any flavor out of them. Aiming for a perfect coffee water temperature—usually around 195°F to 205°F—is a total game changer. It’s a small tweak, but it makes the difference between a drink that’s just “fine” and one you actually look forward to.

Common Mistakes to Avoid

The biggest mistake I see people make—and I’ve definitely been guilty of this—is treating coffee like an afterthought. If you’re using pre-ground, stale stuff that’s been sitting in your pantry for three months, you’re basically fighting a losing battle. To actually see a difference, you need to invest in freshly ground coffee beans and grind them right before you start. It sounds like an extra step, but it’s the single most effective way to stop your morning cup from tasting like bitter sawdust.

Another thing that trips people up is getting too obsessed with expensive gear before they even know what they like. You don’t need a $500 espresso machine to get started; you just need to understand the basics of coffee brewing equipment for beginners, like a decent French press or a pour-over dripper. Also, watch your water. If you’re using boiling water straight off the stove, you’re likely scorching the grounds. Aiming for that perfect coffee water temperature—just off the boil—is the difference between a smooth cup and one that tastes like burnt rubber.

Final Thoughts

At the end of the day, don’t let the gear or the “science” of it all intimidate you. You don’t need a kitchen full of expensive gadgets to get started; honestly, some of the best coffee brewing methods are the ones that require almost zero setup. My biggest piece of advice is to just start experimenting. If your cup tastes a little off, don’t scrap the whole routine—just tweak one thing, like the grind size or the water temp, and see what happens.

The real secret to improving your coffee flavor profile isn’t some gatekept secret; it’s usually just the basics. Using freshly ground coffee beans and paying attention to your water temperature will do more for your morning ritual than any high-tech machine ever could. Adulthood is chaotic enough as it is, so treat your coffee routine as a small, reliable win rather than another chore on your to-do list. Get your system down, find what works for your palate, and just enjoy the quiet moment before the day gets loud.

5 Small Tweaks for a Much Better Morning Brew

  • Stop using pre-ground coffee if you can help it. I know, it’s an extra step, but grinding your beans right before you brew is the single biggest way to stop your coffee from tasting like bitter cardboard.
  • Get a decent scale. You don’t need a lab-grade setup, but eyeballing scoops is how you end up with a cup that’s either way too watery or way too intense. Consistency is everything.
  • Watch your water temperature. If you’re using boiling water straight off the stove, you’re basically scalding the beans and ruining the flavor. Let it sit for about a minute after it boils before you pour.
  • Clean your gear like you actually mean it. Old coffee oils build up in your carafe or French press and start tasting rancid. A quick rinse with soap after every use saves your next batch from being gross.
  • Store your beans in a cool, dark spot—not the freezer. I see people doing this all the time, but the moisture fluctuations in a freezer can actually mess with the beans. A simple airtight container in the pantry is plenty.

The TL;DR of your new morning routine

Stop overcomplicating it—you don’t need a $500 espresso machine to enjoy a good cup; you just need fresh beans and a consistent method.

Focus on the variables you can actually control, like water temperature and grind size, rather than stressing over expensive gear.

Build a system that works for your actual life, whether that’s a quick pour-over or a reliable French press, so you aren’t fighting your kitchen every morning.

Final Thoughts on Your Morning Routine

At the end of the day, making better coffee isn’t about owning a thousand-dollar espresso machine or mastering complex extraction ratios that require a lab coat. It’s really just about the basics: getting decent beans, using the right water temperature, and actually following a consistent process instead of just winging it every morning. We talked about everything from avoiding those bitter mistakes to setting up a workflow that doesn’t feel like a chore. If you can nail those few core pillars, you’ve already bypassed 90% of the struggle. You don’t need to be a professional barista to have a cup that actually tastes like something worth waking up for; you just need to stop treating your morning caffeine like an afterthought.

I know that when life feels chaotic, even a simple kitchen task can feel like one more thing on an endless to-do list. But that’s exactly why I’m so obsessed with these little systems. When you master your coffee routine, you aren’t just making a drink; you’re reclaiming a small, predictable moment of peace before the world starts demanding things from you. Don’t feel pressured to be perfect right out of the gate. Just pick one thing to improve tomorrow—maybe it’s just buying fresher beans or timing your pour—and build from there. You’ve got this, and honestly, your future, well-caffeinated self will definitely thank you.

Frequently Asked Questions

Is it actually worth buying a burr grinder, or can I just stick to the cheap blade ones for now?

Look, I get the temptation to save a few bucks with a blade grinder, but if you’re serious about the ritual, the burr grinder is non-negotiable. Blade grinders basically just smash your beans into uneven chunks—some powder, some boulders—which makes your coffee taste both bitter and sour at the same time. It’s frustrating. If you can swing it, get a burr grinder. It’s the single biggest way to stop wasting good beans.

How do I know if my water is actually the problem if my coffee still tastes weird?

If your coffee tastes “off,” your water is a huge suspect. Here’s the quick test: grab a glass of filtered water and brew a cup using a different, high-quality bottled water (like spring water) just once. If the taste shifts from “weird” to “actually good,” your tap water is likely too hard or chlorinated. It’s a frustrating variable, but honestly, if your water tastes like a swimming pool, your expensive beans won’t save you.

What’s the easiest way to clean my equipment without spending an hour scrubbing it every single morning?

Honestly, the secret is to stop treating cleaning like a weekend chore and start treating it like a quick reset. Don’t let the grounds sit; rinse your carafe and filter immediately after you pour your first cup. If you use a French press, a quick swirl with hot water and a drop of soap takes ten seconds. If you clean as you go, you’re looking at a 30-second rinse, not an hour of scrubbing.

Easy slow cooker recipes for dinner.

Set-and-forget Slow Cooker Dinners

Let’s be real: the “5 PM panic” is a very specific kind of hell. You finish your workday, your brain is fried, and then you realize you have zero plan for dinner other than staring blankly into a fridge full of raw ingredients. I used to think that eating well meant spending my entire evening hovering over a stove, but I’ve realized that’s just a recipe for burnout. Instead of treating cooking like a second job, I started leaning into easy slow cooker recipes to do the heavy lifting for me. It’s not about being a gourmet chef; it’s about setting a system in place so you can actually relax when you get home.

In this post, I’m breaking down five of my absolute go-to meals that require almost zero brainpower to prep. These aren’t those overly complicated, “Pinterest-perfect” recipes that require twenty different spices you’ll never use again. I’m sharing five low-friction staples that are filling, actually delicious, and—most importantly—designed to fit into a chaotic schedule. By the time you’re done reading, you’ll have a foolproof rotation of meals that will help you stop stressing about dinner and start reclaiming your evenings.

Table of Contents

The "Dump and Go" Salsa Chicken

The "Dump and Go" Salsa Chicken recipe.

If you’re having one of those days where your brain is basically mush, this is the recipe you need. You literally just grab a pack of chicken breasts, a jar of your favorite salsa, and maybe a can of black beans if you’re feeling fancy. Throw it all in the slow cooker, turn it on low, and walk away from your kitchen for a few hours.

Lazy Sunday Pot Roast

Homemade Lazy Sunday Pot Roast with vegetables.

There is something incredibly grounding about a pot roast, but I used to avoid it because I thought it required too much prep. Now, I realize that a good roast is basically just a set-it-and-forget-it miracle. Grab a chuck roast, toss in some baby carrots, halved potatoes, and an onion, then pour in a bit of beef broth and some Worcestershire sauce.

Creamy Pesto Tortellini

Creamy Pesto Tortellini in a crockpot.

This one is for when you want something that feels a little more “adult” and intentional but you have zero energy to actually cook. You just layer refrigerated tortellini, a jar of pesto, a splash of heavy cream, and some parmesan cheese into the crockpot. It’s not a recipe you need to obsess over; it’s more of a vibe you create with a few pantry staples.

No-Stress Vegetarian Chili

I’ve found that a good vegetarian chili is the best way to clear out that random assortment of cans sitting in the back of your pantry. Grab some kidney beans, black beans, crushed tomatoes, and whatever frozen corn you have lying around. Season it heavily with cumin and chili powder because flavor is non-negotiable, even when you’re being lazy.
Honey Garlic Chicken Thighs

If you’re tired of the same old chicken recipes, this one is a total game changer. You just whisk together some honey, soy sauce, garlic, and a little ginger, then pour it over bone-in, skinless chicken thighs. The sauce reduces into this glossy, addictive glaze that makes even the simplest side dish like steamed broccoli taste like a restaurant meal.

The Low-Stress Slow Cooker Philosophy

Don’t aim for perfection; the goal is just to have a hot, decent meal waiting for you so you aren’t scrolling through delivery apps at 7 PM.

Batch cook whenever you have the energy, because having two nights of leftovers is the ultimate hack for a chaotic work week.

Invest in a few versatile staples like bone broth or aromatics that you can throw into almost any recipe to instantly level up the flavor without extra effort.

The Low-Stress Dinner Strategy

At the end of the day, these recipes aren’t about becoming a gourmet chef or spending your entire evening hovering over a stove. It’s about the simple math of dumping ingredients into a pot in the morning so you aren’t staring blankly at a takeout menu at 6 PM. Whether you’re leaning into the hearty comfort of a beef stew or the hands-off ease of a salsa chicken, the goal is the same: eliminating decision fatigue. By setting up these small, repeatable meal systems, you’re essentially buying back your evening time and ensuring you actually eat something decent instead of just grazing on snacks.

I know adulthood can feel like a relentless cycle of “what’s for dinner?” and “how am I going to get everything done?” but it doesn’t have to be that chaotic. Using a slow cooker is just one way to build a buffer between your busy schedule and your basic needs. Don’t feel like you have to master every recipe on this list right away; just pick one that looks easy and start there. Once you realize that feeding yourself can be a streamlined process rather than a chore, everything else starts to feel a little more manageable. You’ve got this.

Frequently Asked Questions

Can I use frozen meat directly in these recipes, or do I really need to thaw everything first?

Honestly, it depends on the recipe, but for most of these, I’d stick to thawing first. Throwing a solid block of frozen meat into a slow cooker can be risky because it stays in the “danger zone” temperature for too long while it defrosts, which isn’t great for food safety. If you’re in a time crunch, just pop the meat in a sealed bag in a bowl of cool water—it thaws way faster than you’d think.

How do I keep the food from turning into mush if I end up being stuck at work longer than planned?

The “mush factor” is real, and it’s usually because things keep cooking even after the timer hits zero. If you know you’re stuck at the office, try undercooking your proteins and veggies by about 20%. Also, if you can, pull the heavy ceramic pot out of the heating base as soon as you get home to stop the residual heat. It’s a small tweak, but it keeps the texture from turning into baby food.

Is it worth investing in a high-end slow cooker, or can I just make these work with whatever cheap one I found at a thrift store?

Honestly? Don’t sweat the high-end stuff. Since I spend half my weekends thrifting vintage electronics, I’ve learned that a machine is only as good as the system you use with it. A $20 thrifted crockpot will heat up just fine. Save your money for better ingredients or a solid multi-tool. As long as the lid fits tight and it actually stays on, it’ll do the job. Just keep an eye on it.

Page 1 of 3

Powered by WordPress & Theme by Anders Norén