Month: April 2026 Page 1 of 3

Learning how to make homemade pizza.

Better Than Takeout: Making Incredible Homemade Pizza

You don’t need a $500 stone oven or a degree in culinary arts to figure out how to make homemade pizza that actually tastes good. I used to think I needed all that specialized gear, but after one disastrous Friday night involving a burnt crust and a mountain of expensive, unused gadgets, I realized the truth: it’s all about the system, not the equipment. Most recipes make it sound like a high-stakes science experiment, but honestly? If you can follow a basic workflow, you can master this.

I’m stripping away the gatekeeping and the intimidating “chef-speak” to give you the actual, unpolished steps to a perfect crust and even better toppings. I’m not here to sell you on a lifestyle; I just want to show you how to integrate this into your week without it feeling like another massive chore on your to-do list. We’re going to focus on low-friction methods and smart prep so you can stop settling for mediocre delivery and start enjoying a reliable, delicious dinner every single time.

Table of Contents

Recipe Details

Total Time: 35 minutes
Difficulty: Medium

Ingredients

  • 2 cups All-purpose flour
  • 1 teaspoon Active dry yeast
  • 3/4 cup Warm water
  • 1 teaspoon Salt
  • 1/2 cup Tomato sauce
  • 1.5 cups Shredded mozzarella cheese
  • 1/4 cup Fresh basil leaves

Recipe Instructions

Step 1

First, we need to tackle the dough, because if your base is a disaster, nothing else matters. Grab about 3.5 cups of flour, a packet of yeast, some warm water (not hot, or you’ll kill the yeast!), and a pinch of salt. Mix it until it’s a shaggy mess, then knead it on your counter for about ten minutes until it actually feels supple and smooth. If you have the patience, let it rise in a greased bowl for an hour, but if you’re in a rush, just make sure it’s not sticking to your hands like glue.

Step 2

While the dough is doing its thing, let’s prep the sauce so you aren’t scrambling at the last second. Don’t go out and buy a complex, pre-seasoned jar; that’s just extra waste. Just grab a can of crushed tomatoes and stir in some dried oregano, a smashed garlic clove, and a tiny bit of olive oil. The goal is a simple, bright flavor that tastes like actual food, not a science experiment.

Step 3

Now, let’s talk heat. This is where most people mess up. You want your oven screaming hot—turn it up to its highest setting, ideally around 500°F (260°C). If you have a pizza stone, put it in now. If you don’t, don’t sweat it; just use a clean baking sheet. The key is to get that surface preheated so the bottom of your crust gets a decent crunch instead of turning into a soggy cracker.

Step 4

Time to assemble. Grab a piece of parchment paper if you want to keep your counters clean (I always do), stretch your dough out—don’t use a rolling pin if you can help it, your hands are better for keeping the air in the crust—and spread that sauce thin. Add your cheese and toppings, but please don’t overload it. I see people pile on toppings until the crust collapses, and it’s a total mess to eat. Keep it light so the heat can actually reach the dough.

Step 5

Slide that thing into the oven and set a timer for about 10 to 12 minutes. You’re looking for the cheese to be bubbly and the edges of the crust to have those golden-brown charred spots. Once it looks right, pull it out, let it sit for just a minute so the cheese sets, and then slice it up. You just made a legit pizza without needing a degree in culinary arts.

Understanding How to Make Homemade Pizza

Understanding How to Make Homemade Pizza dough.

Look, I know it’s tempting to just throw everything in a bowl and hope for the best, but if you want that bakery-quality texture, you have to respect the yeast dough fermentation process. It’s not just about making the dough rise; it’s about developing flavor. If you have the patience, letting your dough sit in the fridge overnight (cold fermentation) is a total game-changer. It makes the crust more digestible and gives it that slightly tangy, professional profile that you usually only get from a high-end pizzeria.

When it comes to the actual bake, most people struggle because their home oven isn’t a wood-fired brick kiln. To combat this, I rely on a few crispy pizza crust tips: use a preheated pizza stone or even a heavy baking sheet, and crank your oven as high as it will go. Heat is your best friend here. Also, don’t go overboard with the moisture. If you’re using fresh mozzarella, pat it dry first. There’s nothing worse than a soggy center ruining a perfectly good slice.

Key Things to Know

Key Things to Know: Pizza dough fermentation.

One thing I’ve learned from trial and error is that the secret isn’t in a fancy stone; it’s in the patience you give the dough. If you’re rushing the yeast dough fermentation process, you’re going to end up with a heavy, dense slab instead of something airy. I usually let mine sit in the fridge overnight—it’s a low-effort system that develops way more flavor than a quick rise. Also, don’t be afraid to experiment with your homemade pizza toppings ideas. I love a classic Margherita, but once you master the base, you can throw literally anything on there.

If you’re struggling with texture, most of the issues come down to heat and moisture. For those looking for crispy pizza crust tips, make sure your oven is as hot as it can possibly go before you even think about sliding the tray in. You want that intense, immediate heat to set the structure. Also, try not to overload the center with sauce; a heavy hand with the moisture is the fastest way to get a soggy middle. Just keep it light and balanced.

Small Tweaks for Maximum Pizza Efficiency

  • Don’t skimp on the heat. If you aren’t preheating your stone or steel for at least 45 minutes, you’re basically just making warm bread. You want that oven screaming hot so the crust gets that instant structure.
  • Stop using fresh mozzarella straight from the tub. It’s a moisture bomb that will turn your pizza into a soup. Slice it and let it drain on a paper towel for a bit before it even touches the dough.
  • Less is always more with your toppings. I know it’s tempting to load it up, but too much stuff weighs down the dough and prevents it from crisping up. Keep it light so the crust can actually do its job.
  • Give your dough some breathing room. If you try to stretch a cold ball of dough, it’s going to snap back like a rubber band and drive you crazy. Let it sit at room temperature for an hour so it actually behaves.
  • Use way more flour than you think you need on your work surface. If the dough sticks to the counter even a little bit, the whole system breaks down and you end up with a torn mess. Keep it moving and keep it dry.

The Bottom Line

Don’t let the “perfect” dough intimidate you; as long as it’s hydrated and given enough time to rest, it’s going to work.

High heat is your best friend here—treat your oven like a tool, not an appliance, and get it as hot as it can go before the dough even touches the pan.

Keep your toppings intentional rather than excessive so you aren’t fighting a soggy, heavy mess halfway through the bake.

The Final Slice

Perfect pizza preparation: The Final Slice.

At the end of the day, making great pizza isn’t about having a professional-grade stone oven or sourcing flour from a specific village in Italy. It’s really just about managing the variables you can control: getting your dough to rise properly, making sure your oven is screaming hot, and not overthinking your toppings. If you remember to let the dough rest and you don’t overload it with wet ingredients, you’ve already won half the battle. It’s a simple system of heat and hydration that works every single time, provided you trust the process and don’t let the technicalities paralyze you.

I know that sometimes the idea of “cooking from scratch” feels like another massive task on an already overflowing to-do list, but I promise it’s worth the extra twenty minutes of prep. There is something incredibly grounding about taking raw ingredients and turning them into something delicious with your own hands. Don’t sweat it if your first crust isn’t a perfect circle or if the bottom gets a little too charred; that’s just part of the learning curve. The goal isn’t perfection, it’s about reducing the friction of a busy week by mastering a skill that actually feeds your soul. Now, grab a slice and enjoy the payoff.

Frequently Asked Questions

Can I use store-bought dough if I’m totally short on time, or will it ruin the vibe?

Honestly? Use the store-bought dough. If the goal is to reduce friction and actually eat dinner instead of spending three hours wrestling with yeast, the pre-made stuff is a total win. It won’t “ruin the vibe”—it just changes the workflow. Just make sure you let it sit at room temperature for a bit before stretching it, otherwise, it’ll fight you. Life is too short to stress over dough when you’re hungry.

How do I stop my crust from turning out like a soggy, sad cracker?

The “soggy middle” is usually a heat or moisture issue. First, crank your oven as high as it goes—we need that instant sear. Second, stop overloading the center with heavy toppings; if you pile on too much sauce or cheese, the dough just steams instead of baking. Lastly, if you’re using fresh mozzarella, pat it dry with a paper towel first. Getting rid of that extra water is a total game-changer.

Do I really need a pizza stone, or can I just use a regular baking sheet?

Honestly? You don’t need a pizza stone. I used to think they were essential, but they’re just another thing to store in a crowded kitchen. A standard baking sheet works totally fine—just flip it upside down so the dough sits on a flatter surface. If you want that extra crisp, preheat the sheet in the oven first. It’s not quite as professional, but it gets the job done without the extra clutter.


Tips on how to extend laptop battery life.

Tips and Tricks to Make Your Laptop Battery Last Longer

I was halfway through a freelance strategy call at a tiny corner cafe last week when the dreaded “10% remaining” notification popped up, and I realized I’d left my power bank in my other tote. There is nothing quite like that sudden, cold spike of panic when you’re tethered to a wall outlet in a crowded room, praying your charger cable actually reaches the socket. I used to think that knowing how to extend laptop battery life meant buying expensive, proprietary accessories or constantly hovering over settings menus like a tech nerd, but I was wrong. It’s actually much more about managing your digital footprint and setting up a few small, repeatable habits that prevent that mid-task meltdown.

I’m not here to give you a lecture on the chemistry of lithium-ion cells or some overly technical manual that reads like a textbook. Instead, I want to share the exact, unpolished systems I use to keep my gear running all day without being a slave to a power strip. We’re going to strip away the fluff and focus on the actual, high-impact tweaks—from killing background drainers to optimizing your display—so you can stop letting your battery dictate your schedule.

Table of Contents

Stop the Panic a Realistic Guide on How to Extend Laptop Battery Life

Stop the Panic a Realistic Guide on How to Extend Laptop Battery Life.

First things first, let’s talk about the biggest energy thief in your setup: your screen. It sounds obvious, but I used to keep my brightness at 100% because I liked the crispness, even though it was killing my uptime. If you want to stop the constant hunt for an outlet, you need to reduce screen brightness for battery efficiency immediately. It’s the single easiest tweak to make, and honestly, your eyes will probably thank you too.

Beyond the screen, you have to get aggressive with what’s running under the hood. I’ve realized that so many of us have dozens of processes running that we don’t even realize are active. Those sneaky background apps battery drain your juice without you ever seeing a window pop up. Take five minutes to audit your startup items and kill anything that doesn’t actually need to be running. It’s not about being extra; it’s about making sure your hardware is working for you, not against you. If you can manage those small leaks, you’ll find your laptop actually lasts through that entire coffee shop session without a meltdown.

Master Your Laptop Power Management Settings Without the Technical Gatekeep

Master Your Laptop Power Management Settings Without the Technical Gatekeep

Look, you don’t need a computer science degree to figure out why your battery is tanking. Most of us just leave everything on “default” and wonder why we’re hunting for an outlet by 2:00 PM. The first thing I do is dive into my laptop power management settings to stop the bleeding. If you’re on a PC, look for the “Power & Battery” menu; if you’re on a Mac, it’s under “Battery” in System Settings. My go-to move is switching from “Best Performance” to “Balanced” or “Power Saver.” It’s not going to make your laptop a snail, but it stops it from working harder than it actually needs to.

Next, let’s talk about the silent killers: those rogue processes. I always check my activity monitor to see which background apps are causing battery drain without my permission. Apps like Spotify, Discord, or even a random Chrome tab can sit there sipping power in the background while you’re doing something else entirely. Also, please, just reduce your screen brightness. It sounds basic, but your display is easily the biggest energy hog you have. Dimming it just a few notches makes a massive difference in how long you can stay productive away from a wall.

How to Optimize Power Settings Windows Mac for Actual Efficiency

How to Optimize Power Settings Windows Mac for Actual Efficiency

Whether you’re running a MacBook or a Windows machine, the goal is the same: stop the system from working harder than it needs to. On a Mac, I usually head straight to System Settings > Battery to toggle on “Low Power Mode.” It’s not as drastic as it sounds; it just throttles the background processes that don’t actually need to be running while you’re just answering emails. For Windows users, don’t just settle for the default slider. Go into your power plan settings and look for ways to optimize power settings Windows Mac users alike by adjusting when your screen turns off and how much energy your processor uses during idle times.

The biggest silent killer, though, is those rogue processes you forgot were even running. I always check my activity monitor to see which background apps battery drain is eating my juice in real-time. If you see a random browser tab or a cloud sync tool hogging 20% of your power, kill it. Also, a quick pro-tip: if your laptop feels hot to the touch, you’re preventing battery overheating by simply giving it some breathing room. Don’t work with it flat on a duvet; use a hard surface so the fans can actually do their job.

Kill the Background Apps Battery Drain Stealing Your Productivity

If you’re like me, you probably have twenty-seven Chrome tabs open, a Slack window pinging, and Spotify running in the background—all while you’re “working” on a single Google Doc. It feels like multitasking, but your hardware knows the truth. Those silent, hungry processes are the primary cause of background apps battery drain, slowly siphoning off your percentage points while you aren’t even looking. It’s not just about closing windows; it’s about auditing what is allowed to run when you aren’t actively using it.

I’ve learned the hard way that even if you aren’t clicking on an app, it might still be “awake” and fighting for resources. To fix this, I make it a habit to check my Activity Monitor (Mac) or Task Manager (Windows) at the end of every session. If you see a rogue process hogging CPU cycles, kill it. It’s a small, five-minute habit that makes a massive difference in preventing battery overheating and keeping your machine from feeling sluggish. Think of it as a digital declutter—if you aren’t using it, don’t let it eat your juice.

Real Lithium Ion Battery Health Tips to Prevent Battery Overheating

Let’s talk about heat, because it is basically the silent killer of your hardware. If your laptop feels like a literal stovetop against your thighs, your battery is screaming for help. One of my most important lithium-ion battery health tips is to stop using your device on soft surfaces like blankets, pillows, or even your bed. It sounds simple, but those fabrics act like insulation, trapping heat and preventing the vents from doing their job. If you’re working from a couch, please, just grab a hard book or a flat tray to act as a makeshift desk.

Beyond physical airflow, how you actually use the machine matters for preventing battery overheating. If you’re running heavy software while your charger is plugged in, you’re essentially creating a heat sandwich. I try to avoid heavy rendering or gaming in stuffy rooms without a breeze. If you notice the fans starting to sound like a jet engine, take a second to reduce screen brightness for battery efficiency and close down any unnecessary tabs. Keeping the internal temperature stable is the best way to ensure your battery doesn’t degrade before you’re even ready to upgrade.

The low-effort hacks for when you're too busy to dive into settings

  • Stop keeping your brightness at 100% just because you can; dimming your screen even just a little bit is the easiest way to stop the juice from draining instantly.
  • Unplug all those random USB dongles and peripherals when you aren’t using them, because even if they’re “idle,” they’re still sipping power from your battery.
  • Ditch the heavy tabs—if you have twenty Chrome tabs open that you haven’t looked at in an hour, close them or use a memory saver extension to stop them from eating your battery in the background.
  • If you’re working in a spot with decent light, turn off your keyboard backlight; it’s a tiny detail, but those little LEDs add up when you’re trying to make a single charge last through a long session.
  • Stop letting your laptop sit on a bed or a pillow; if the vents are blocked, the heat spikes, and heat is the absolute fastest way to kill your battery’s long-term health.

The TL;DR on keeping your laptop alive

Stop treating your battery like it’s infinite; manage your brightness and kill those rogue background apps to stop the immediate drain.

Protect the long-term health of your hardware by keeping things cool and avoiding that constant 0% to 100% cycle.

Set up your OS power settings once so you can actually focus on your work instead of hunting for the nearest outlet.

Making it Stick

At the end of the day, extending your battery life isn’t about following some complex, high-tech manual; it’s just about building better habits. We’ve covered the essentials: managing your screen brightness, hunting down those resource-hungry background apps, and actually paying attention to how your laptop handles heat. Whether you’re tweaking your power settings on Mac or Windows, or just making sure you aren’t letting your device bake on a pillow, these small shifts add up. It’s about moving away from that frantic search for a wall outlet every two hours and moving toward a setup that actually supports your workflow instead of interrupting it.

I know that setting up these little systems can feel like just one more thing on your to-do list, but I promise the payoff is worth the five minutes of effort. When you stop fighting your hardware and start managing it, you regain a sense of control over your day. You shouldn’t have to be tethered to a desk just because your battery is acting up. Take these tips, pick the two or three that feel the most doable for you right now, and start reclaiming your mobility. Adulthood is complicated enough; your tech shouldn’t be.

Frequently Asked Questions

Does keeping my laptop plugged in all the time actually damage the battery long-term?

The short answer? It’s not a death sentence, but it’s not ideal either. If you’re constantly at 100%, you’re keeping the battery under high voltage stress, which can wear it down faster over time. I try to follow a “sweet spot” rule: if I’m near an outlet, I’ll let it drop to 20% before plugging back in. It keeps the cells happier and prevents that long-term capacity rot.

Is it worth buying a specialized battery calibration tool, or is that just marketing fluff?

Honestly? It’s mostly marketing fluff. Unless your laptop is giving you wildly inaccurate percentage readings—like jumping from 40% to 5% in two minutes—you don’t need to drop money on a specialized tool. Most modern OSs handle calibration pretty well on their own. If you’re feeling glitchy, just do a manual cycle: charge it to 100%, let it drain naturally, then top it back up. Save your cash for a better charger instead.

How do I know if my battery is actually dying or if it's just my software being heavy?

It’s the million-dollar question. To figure it out, run a quick diagnostic. If you’re on a Mac, check your “System Settings > Battery > Battery Health”—it’ll literally tell you if your capacity is tanking. On Windows, run a “powercfg /batteryreport” in Command Prompt to see the actual numbers. If your capacity is still high but the drain is sudden, it’s likely a rogue app or a messy OS update, not your hardware failing you.

Introvert networking tips for social success.

Networking for People Who Hate Networking

I used to think networking meant wearing a stiff blazer, clutching a lukewarm cocktail, and forcing myself through “meaningful” small talk with people I had zero interest in. It felt incredibly performative, like I was playing a character in a corporate training video rather than actually building a career. Honestly, most of the networking tips you find online are just glorified instructions on how to be a professional suck-up, and they completely ignore the fact that most of us find that kind of social gymnastics exhausting.

I’m not here to teach you how to work a room or memorize elevator pitches that sound like they were written by a robot. Instead, I want to show you how to build a low-maintenance system for staying connected that actually fits into a real, busy life. I’m sharing the unpolished, practical methods I use to maintain professional relationships without it feeling like a second job. We’re going to strip away the gatekeeping and focus on building genuine connections through small, repeatable habits that won’t leave you feeling socially burnt out.

Table of Contents

Stop Treating Every Meeting Like a Crisis Low Stress Networking Tips

Stop Treating Every Meeting Like a Crisis Low Stress Networking Tips

The biggest mistake I see people making is walking into a room thinking they need to perform a monologue. If you approach every interaction like you’re auditioning for a lead role, you’re going to burn out before you even get to the appetizers. Instead of trying to master a rehearsed, robotic effective elevator pitch, try treating these moments as simple information exchanges. The goal isn’t to impress everyone with your resume; it’s about finding common ground. When you shift your focus from “How do I look?” to “What can I learn from this person?”, the entire energy of the room changes.

I also highly recommend setting a “low-stakes” goal for yourself before you even arrive. Instead of trying to master complex LinkedIn networking strategies on the fly, just aim to have three meaningful conversations. Once you hit that number, you’ve won. This small system prevents that overwhelming feeling of needing to meet everyone in the room. By treating these connections as incremental steps rather than life-altering opportunities, you actually end up expanding your professional circle much more naturally.

Ditch the Script Mastering Your Effective Elevator Pitch Without Faking It

Ditch the Script Mastering Your Effective Elevator Pitch Without Faking It

We’ve all been there: someone asks, “So, what do you do?” and suddenly your brain turns into a blank spreadsheet. You try to deploy that polished, rehearsed effective elevator pitch you practiced in the mirror, but it comes out sounding like a robot reading a LinkedIn bio. It feels fake because it is fake. When you rely on a rigid script, you aren’t actually connecting with a person; you’re just performing a monologue.

Instead of memorizing a speech, try building a “modular” pitch. Think of it as three tiny, interchangeable pieces: what you actually do, the problem you solve, and a hint of what you’re currently obsessed with. This keeps things conversational rather than transactional. By focusing on the value you provide rather than just your job title, you’re actually building professional relationships that have a foundation of real interest. It’s much easier to expand your professional circle when you’re talking like a human being instead of a marketing brochure. Just keep it loose, keep it honest, and let the conversation breathe.

Building Professional Relationships Through Systems Not Just Small Talk

Building Professional Relationships Through Systems Not Just Small Talk

The biggest mistake I see people making is thinking that building professional relationships requires you to be the loudest person in the room or a master of constant, performative small talk. That’s exhausting, and frankly, it’s not sustainable. Instead of trying to “work a room,” I treat my connections like a low-maintenance garden. I don’t need to talk to everyone at a conference; I just need to find three people I actually vibe with and set a reminder to check in with them in three months.

I’ve found that the most effective LinkedIn networking strategies aren’t about sending mass connection requests to strangers. It’s about the small, intentional touchpoints—like leaving a thoughtful comment on a former colleague’s post or sending a quick DM when you see an article relevant to their niche. By shifting your focus from “collecting contacts” to “maintaining a system,” you stop treating every interaction like a high-pressure sales pitch. You’re just building a digital ecosystem that grows quietly in the background while you actually focus on your work.

Linkedin Networking Strategies for People Who Hate Performing Online

I get it—the idea of “performing” your professional life on a digital stage feels incredibly performative and, frankly, exhausting. If the thought of posting a “humbled and honored” update makes you want to close your laptop for good, you aren’t alone. But here’s the thing: LinkedIn networking strategies don’t have to involve dancing for the algorithm or sharing fake deep realizations. You can actually use the platform as a quiet tool for expanding your professional circle without ever feeling like you’re auditioning for a role you didn’t sign up for.

Instead of trying to become a “thought leader,” I treat LinkedIn like a low-stakes filing system. My approach is simple: I focus on meaningful, small-scale interactions. Instead of posting a monologue, I spend ten minutes a week leaving thoughtful comments on posts from people in my field. It’s a much more sustainable way of building professional relationships because it feels like a conversation rather than a broadcast. You aren’t performing; you’re just showing up and adding a tiny bit of value to the existing noise.

Expanding Your Professional Circle Without Losing Your Mind or Dignity

The biggest mistake I see people make when expanding their professional circle is thinking they need to be the loudest person in the room to be successful. If you’re an introvert or just someone who values their personal space, the idea of a room full of strangers feels less like an “opportunity” and more like a sensory nightmare. But here’s the thing: you don’t have to be a social butterfly to grow. Instead of trying to work the entire room, pick two or three people who actually seem interesting and focus on quality over quantity.

I’ve found that the best way to handle this is to treat these interactions like small research projects rather than performances. Instead of worrying about perfect social skills for career growth, just focus on being a decent listener. Ask one follow-up question that shows you actually heard them, and suddenly, you aren’t “networking”—you’re just having a conversation. It’s much easier to maintain your dignity when you aren’t trying to sell a version of yourself that doesn’t exist. Stick to a system of small, intentional connections, and you’ll find your circle grows without the burnout.

The Low-Maintenance Toolkit: 5 Tiny Systems to Keep Your Network Alive

  • Set a “Connection Cadence.” Instead of panic-messaging people when you need a job, pick one Friday a month to send three quick “thinking of you” texts or emails to people in your circle. It keeps the relationship warm without the sudden, awkward intensity.
  • Create a “Digital Rolodex” that actually works. Stop relying on your memory or a messy LinkedIn inbox. Keep a simple Notion page or even just a dedicated Note on your phone with names, where you met, and one specific thing you talked about. It makes follow-ups feel human, not transactional.
  • Use the “Low-Stakes Ask” method. If you want to learn about someone’s career, don’t ask for a “formal informational interview”—that sounds like homework. Ask if they have 15 minutes for a quick virtual coffee or if you can send over two specific questions via email. Lower the barrier to entry for them.
  • Curate your “Social Proof” folder. Whenever someone gives you a compliment on a project or a quick shout-out in a Slack channel, screenshot it and toss it in a folder. When you’re reaching out to someone new, you’ll have actual, concrete context to share about what you’ve been up to.
  • Automate your follow-up reminders. The biggest mistake is meeting someone great and then letting the momentum die because you forgot. As soon as you walk away from a conversation, set a calendar reminder for two weeks out to check in. It turns “networking” into a scheduled task rather than a mental burden.

The TL;DR on Stress-Free Networking

Stop viewing networking as a series of high-pressure performances and start seeing it as a low-stakes habit of staying curious and organized.

Focus on building repeatable systems—like a simple follow-up tracker or a monthly check-in cadence—so you aren’t scrambling to remember people when you actually need something.

Prioritize authenticity over an optimized persona; people connect with real humans, not polished, robotic versions of themselves that feel impossible to maintain.

The Long Game

At the end of the day, networking isn’t about collecting a stack of business cards or pretending to be a “people person” when you’d actually rather be home with a book. It’s about moving away from those high-stress, performative bursts of energy and moving toward sustainable, repeatable systems. Whether you’re refining a pitch that actually sounds like you, setting up a low-maintenance LinkedIn rhythm, or just learning how to approach a conversation without feeling like you’re under a microscope, the goal is the same: reducing the friction of connection. If you stop viewing every interaction as a high-stakes audition and start seeing it as just another way to build your ecosystem, the whole process becomes significantly less draining.

I know it can feel overwhelming when you’re staring at a blank calendar or a daunting industry event, but remember that you don’t have to reinvent your entire personality to be successful. Adulthood is a lot easier when you stop fighting against your natural temperament and start building frameworks that work for you. Take it one small, intentional step at a time. You don’t need to be the loudest person in the room to be the most connected; you just need to be consistently present in your own way.

Frequently Asked Questions

How do I actually follow up with someone without feeling like a total pest or a salesperson?

The secret is to stop treating follow-ups like a sales pitch and start treating them like a continuation of a conversation. Instead of “just checking in” (which is basically code for “please notice me”), send something with actual value. If they mentioned a book, send a link to a relevant article. If you talked about a project, share a quick update. It shifts the vibe from “I need something from you” to “I actually remembered what we talked about.”

What do I do if I'm in a room full of people and I realize I have absolutely nothing to contribute to the conversation?

First, take a breath. You don’t need to be the person driving the conversation to be “good” at networking. If your brain goes blank, pivot to being a professional listener. Ask a follow-up question like, “How did you get into that?” or “What’s the most challenging part of your week?” People love talking about themselves, and it buys you time to actually process the room without the pressure of performing.

Is it actually possible to maintain these professional connections long-term without it becoming a second full-time job?

Honestly, it is—if you stop trying to “manage” people and start just being a person. The mistake is thinking you need a monthly formal check-in with everyone. That’s exhausting and feels fake. Instead, I use a low-lift system: if I see an article or a meme that actually reminds me of someone, I send it. No pressure to reply, no heavy lifting. It’s about micro-interactions that keep the pilot light on without the burnout.

Guide on how to cook eggs.

Master Every Style of Egg Cooking

Can we please stop pretending that learning how to cook eggs requires a $500 copper pan and a culinary degree? I am so tired of seeing these overly polished, aesthetic videos where someone spends ten minutes talking about “flavor profiles” just to fry a single egg. It’s honestly exhausting. Growing up with a chef for a mom, I learned pretty quickly that the kitchen shouldn’t be a place of high-stakes performance; it should be about functional efficiency. If you’re staring at a carton of eggs feeling like you’re about to fail a chemistry exam, you’re doing it wrong.

I’m not here to give you a lecture or gatekeep some secret technique. My goal is to give you the actual, unpolished systems for mastering the basics so you can stop stressing and start eating. I’m going to break down exactly how to cook eggs using the minimal gear you already own and the repeatable steps that actually work when you’re running on four hours of sleep. No fluff, no expensive gadgets—just straightforward methods to make sure your breakfast is the easiest part of your day.

Table of Contents

Stop Treating Breakfast Like an Emergency How to Cook Eggs

Stop Treating Breakfast Like an Emergency How to Cook Eggs

Look, the biggest mistake I see people making is thinking they need a culinary degree just to get protein on their plate. Most of the stress comes from trying to multitask when you should be focusing on heat management. If you’re aiming for those silky, cafe-style results, you need to master a few specific scrambled egg texture tips—the main one being to pull them off the heat before they look fully done. Residual heat is going to finish the job while they sit on your plate, so if they look perfect in the pan, they’ll be rubbery by the time you take a bite.

If you’re more of a “set it and forget it” person, stop guessing. Instead of hovering over a pot, use a simple boiled egg timing guide to take the anxiety out of the process. It’s all about the math: six minutes for jammy yolks, nine for a standard hard boil. Once you stop treating every breakfast like a high-stakes kitchen crisis and start relying on these tiny, repeatable systems, you’ll realize that getting fed shouldn’t be a chore.

The No Nonsense Boiled Egg Timing Guide for Busy Mornings

The No Nonsense Boiled Egg Timing Guide for Busy Mornings

Look, I get it. You want protein, you want it fast, and you definitely don’t want to stand there staring at a pot of water for ten minutes wondering if you’ve gone too far. Most people fail at this because they treat boiling eggs like a guessing game, but it’s actually just a matter of math and a reliable boiled egg timing guide. If you’re looking for that jammy, soft-boiled center that feels like something from a high-end cafe, aim for exactly six and a half minutes. If you need something solid for a quick salad or to prep for the week, go for twelve.

The real trick to making this a repeatable system—and not a morning headache—is the ice bath. As soon as your timer goes off, plunge those eggs into a bowl of ice and water. This stops the cooking process instantly so you don’t end up with that weird, unappealing gray ring around the yolk. It’s one of those small, low-effort steps that makes a massive difference in your results. Once you master this, you’ve officially conquered one of the most basic breakfast egg methods without any of the stress.

Mastering Scrambled Egg Texture Tips Without the Culinary Gatekeeping

Mastering Scrambled Egg Texture Tips Without the Culinary Gatekeeping

Look, if you’ve ever ended up with a plate of dry, rubbery yellow clumps, I promise you aren’t a bad cook—you’re just fighting the heat. Most people treat a pan like a battlefield, but the secret to actual scrambled egg texture tips is realizing that less is almost always more. You don’t need a whisking machine or a culinary degree; you just need to stop treating your stove like it’s on high alert.

The biggest mistake I see is cranking the heat to “max” because you’re in a rush. High heat turns eggs into spongey bits in seconds. Instead, aim for medium-low and keep things moving. If you want that creamy, cafe-style consistency, pull the pan off the heat while the eggs still look slightly wet. They’ll finish cooking on the plate from their own residual heat. It sounds counterintuitive, but it’s the easiest way to master different breakfast egg methods without the stress. Just keep a spatula handy, stay present for three minutes, and stop overthinking the process.

The Foolproof Poached Egg Technique for Real Life

Look, I get it. Poaching an egg feels like a high-stakes science experiment that usually ends with a sad, grey blob drifting aimlessly in a pot of water. It’s intimidating, and most recipes make it sound way more complicated than it actually is. But if you want to move past basic scrambled egg texture tips and actually master a cafe-style breakfast, you just need a system that accounts for physics rather than luck.

The secret isn’t some fancy culinary degree; it’s about managing the vortex and the temperature. First, ditch the rolling boil—that’s how you shred the whites. You want a gentle simmer, just enough to see tiny bubbles rising from the bottom. Crack your egg into a small ramekin first (this is non-negotiable for speed), then drop it into a slow-moving swirl of water. This poached egg technique relies on the water movement to wrap the whites around the yolk before they can scatter. If you can nail this, you’ve officially unlocked one of the best ways to prepare eggs without needing a sous-chef or a panic attack.

Decoding Egg Cooking Temperatures for the Best Ways to Prepare Eggs

Look, the biggest mistake I see people making isn’t about the eggs themselves—it’s about the heat. We’ve all been there: you’re trying to whip up a quick breakfast, you crank the burner to high because you’re in a rush, and suddenly you’re staring at a rubbery, grey mess. Understanding egg cooking temperatures is really the secret sauce to making sure your food actually tastes like food and not a science experiment gone wrong.

If you’re looking for the best ways to prepare eggs, you have to match the heat to the vibe. For something delicate like a soft scramble, you want low and slow—think of it as a gentle simmer rather than a boil. On the flip side, if you’re following a specific poached egg technique, you need that water just below a rolling boil so you don’t shred the whites into nothingness. It’s all about controlling the energy in the pan. Once you stop treating the stove like a race track, you’ll realize that most breakfast egg methods are actually pretty forgiving if you just respect the temperature.

The Small Systems That Actually Save Your Breakfast

  • Stop using cold eggs straight from the fridge if you’re poaching; let them sit out for a few minutes or run them under warm water so they don’t shock the pan and mess up your timing.
  • Invest in a decent non-stick pan—not because you’re fancy, but because scrubbing burnt egg residue off a cheap pan is a massive waste of your morning energy.
  • Always keep a jar of flaky sea salt and some black pepper right next to the stove; seasoning as you go is way more efficient than hunting through your spice cabinet while your eggs are already overcooking.
  • Use a timer for everything. Even if you think you “know” when a soft boil is done, your brain is lying to you when you’re tired, so just trust the clock.
  • Keep a small bowl of ice water nearby when boiling eggs; it stops the cooking process instantly so you don’t end up with that weird, unappetizing gray ring around the yolk.

The TL;DR for Egg Success

Stop overthinking the heat; whether you’re scrambling or frying, low and slow is almost always your best friend to avoid that rubbery, overcooked texture.

Master one specific style—boiling, scrambling, or poaching—before trying to tackle them all; build a system for one so it becomes muscle memory.

Keep your tools simple and accessible, like a decent non-stick pan and a reliable timer, so you aren’t hunting through drawers when you’re actually hungry.

Getting the System Down

At the end of the day, cooking eggs isn’t about mastering some elite culinary art form; it’s about having a reliable system so you aren’t staring blankly at a pan when you’re already running five minutes late. Whether you’re timing your soft-boiled eggs to perfection, keeping your scramble creamy instead of rubbery, or finally tackling the “scary” poached egg technique, it all comes down to managing your heat and respecting the process. You don’t need a professional kitchen or a degree in gastronomy to get this right. You just need to remember that consistency beats complexity every single time. Once you have these basic frameworks in your mental toolkit, breakfast stops being a chore and starts being just another smooth part of your morning routine.

I know that adulthood can feel like a series of small, overwhelming fires you’re constantly trying to put out, but it doesn’t have to be that way. Learning how to handle the small things—like a simple carton of eggs—is how you start building a life that feels intentionally managed rather than chaotic. Don’t sweat the occasional broken yolk or the slightly overdone white; that’s just part of the learning curve. The goal isn’t perfection, it’s reducing the friction of your daily existence. Grab a pan, try one of these methods tomorrow, and give yourself credit for taking one more small step toward making your life run a little bit smoother.

Frequently Asked Questions

How do I know if an egg is actually still good to eat without cracking it open and risking a mess?

The Float Test is your best friend here. Grab a glass of water and drop the egg in. If it sinks to the bottom and stays flat, it’s fresh. If it stands upright on the bottom, it’s getting older but still fine to use. If it actually floats to the top? Toss it. Don’t even risk it. It’s a two-second system that saves you from a massive, smelly kitchen disaster.

Is there a way to prep these in advance for the week so I’m not standing over the stove every single morning?

Honestly, this is where the “system” really saves your sanity. Don’t cook them daily; batch-prep them. Boil a dozen eggs on Sunday night—keep them in their shells in a sealed container in the fridge. They’ll stay good for a week. If you want scrambled, whisk a batch in a mason jar and keep it chilled. Then, you’re just pouring and heating, not starting from scratch every single morning. Efficiency is everything.

What’s the best way to store leftover cooked eggs so they don't get that weird, rubbery texture by day two?

The secret to avoiding that rubbery, sad-looking texture is all about moisture control. First, let them cool completely at room temperature before you even think about the fridge—putting hot eggs in a container creates steam, and steam equals mush. Once cool, grab an airtight glass container. If they’re hard-boiled, keep them in their shells for as long as possible. If they’re already peeled or scrambled, just keep them tightly sealed so they don’t dry out.

Guide on how to build a workbench.

Build a Custom Garage Workbench With This Guide

I was halfway through trying to solder a vintage radio I’d picked up at a thrift store when my “workspace”—which was really just a wobbly folding card table—decided to give up on life. My tools slid everywhere, my coffee spilled, and I spent more time chasing a screwdriver across the floor than actually fixing anything. It was a total mess, and it hit me: you can’t build a system for your life if your foundation is literally shaking. Most people think you need a massive garage and a thousand dollars in professional-grade equipment to get started, but honestly, learning how to build a workbench is less about the fancy gear and more about creating a stable, reliable zone where you can actually focus.

Forget those over-complicated, expensive blueprints that assume you own a CNC machine. I’m going to show you how to build a solid, no-nonsense workbench using basic materials you can grab at any hardware store. We’re skipping the gatekeeping and focusing on a functional, durable setup that won’t break the bank or your spirit. By the end of this, you’ll have a dedicated spot that actually supports your projects instead of fighting against them.

Table of Contents

Guide Overview

Total Time: 4-6 hours
Estimated Cost: $80-150
Difficulty: Beginner

Tools & Supplies

  • Circular saw or miter saw for cutting lumber
  • Power drill/driver for assembly
  • Tape measure for precise marking
  • Speed square for ensuring 90-degree angles
  • 2×4 lumber (approx. 8-10 boards)
  • 4×8 plywood sheet (for tabletop)
  • 2.5-inch wood screws (one large box)
  • Wood glue (one bottle)

Step-by-Step Instructions

  • 1. First things first, you need to grab your materials. Don’t go overboard with expensive hardwoods; you’re building a workspace, not a dining room table. I usually go for standard 2x4s and a thick sheet of plywood for the top. It’s cheap, it’s sturdy, and if you accidentally gouge it with a screwdriver later, it’s not a tragedy. Grab a box of 2.5-inch wood screws and a drill—and please, double-check that your drill is actually charged before you head to the hardware store.
  • 2. Map out your frame on the floor. This is where most people mess up by not accounting for the thickness of the wood. I like to lay everything out to make sure my dimensions actually fit the footprint of my room. Once you’ve confirmed the math, start by building two identical rectangular frames using your 2x4s. This creates the “skeleton” of your bench, and keeping them identical is crucial if you want the whole thing to stop wobbling later.
  • 3. Connect your frames with your vertical legs. This is where the bench actually gets its height. I recommend cutting four sturdy posts and screwing them into the corners of your rectangular frames. If you want a bench that feels actually solid, use more screws than you think you need here. A little extra effort in the structural phase means you won’t be fighting a shaky table every time you try to hammer something.
  • 4. Secure the top to the frame. This is the most satisfying part, but it can be tricky if you don’t want the plywood to split. I always pre-drill pilot holes through the plywood and into the 2×4 frame. It takes an extra thirty seconds, but it prevents the wood from cracking and makes the whole surface feel much more seamless. If you have a scrap piece of wood, use it to check that your top is completely level before you finish driving the screws.
  • 5. Add a lower shelf for storage. Since my goal is to reduce friction, I can’t stand having my tools scattered all over the floor. About a foot or two from the bottom, add another set of 2×4 supports and slide a second piece of plywood underneath. This gives you a dedicated spot for your heavy stuff—like power tool cases or bins of hardware—so your main workspace stays clear and functional.
  • 6. Sand the edges and call it a day. You don’t need a professional finish, but you definitely don’t want a splintered edge catching your sleeve while you’re working. Take a bit of medium-grit sandpaper and smooth out the corners and any rough spots on the top. It’s a small, low-effort step that makes the whole experience feel a lot more intentional and less like a construction site accident.

Understanding How to Build a Workbench

Understanding How to Build a Workbench guide.

Before you start sawing through expensive lumber, you need to decide what kind of “work” you’re actually doing. There is a huge difference between a light-duty table for assembling small electronics and a heavy duty workbench design meant for heavy hammering or sanding. If you try to use a flimsy desk for real projects, you’re going to end up frustrated by the wobble. I always tell people to prioritize stability over aesthetics; it doesn’t matter how pretty it looks if it shifts every time you apply pressure.

Another thing people usually overlook is the “future you” factor. When I’m looking at different woodworking workbench plans, I’m not just looking at the tabletop; I’m looking at the footprint. You need to think about workshop organization tips from day one. If you don’t integrate some form of workbench tool storage ideas into the build, your workspace will quickly turn into a graveyard of loose screwdrivers and stray bolts. Plan for your tools to have a home, otherwise, the whole system breaks down the second you actually start working.

Key Things to Know

Key Things to Know: Heavy-duty workbench.

Before you start cutting anything, you need to think about the “why” behind your build. If you’re just planning to assemble some small electronics or do some light crafts, a basic setup is fine. But if you’re planning on doing actual repairs or heavier DIY projects, you really need to prioritize a heavy duty workbench design. There is nothing more frustrating than trying to sand something down only to have your entire table wobble like it’s on a boat. Stability is everything; if the surface isn’t rock solid, you’ll end up fighting the furniture instead of focusing on your project.

I also highly recommend thinking about your workflow before you even buy the lumber. It’s easy to get caught up in the construction, but if you don’t integrate some workbench tool storage ideas into the initial build, you’re just going to end up with a cluttered mess six months from now. I’m a huge advocate for keeping your most-used tools within arm’s reach. Whether that’s adding a pegboard to the back or building shallow drawers into the frame, a little bit of foresight now saves a massive amount of headache later.

Pro-Tips for a Workbench That Won't Fall Apart in a Week

  • Don’t overthink the dimensions. Before you buy a single screw, measure your actual workspace and your own height. You don’t want a bench that’s too low, forcing you to hunch over every time you’re trying to fix something, or too high that you can’t get any leverage.
  • Prioritize stability over aesthetics. It doesn’t matter if the wood looks pretty if the whole thing wobbles every time you use a hammer. Use heavy-duty bracing or even bolt it to the wall studs if you have the space; a rock-solid base is the difference between a tool and a headache.
  • Plan for your “messy” future. I learned this the hard way with my old electronics projects—if you don’t build in a way to manage cords or have a spot for small parts, your workbench will just become a graveyard of clutter. Think about where the power strip is going before you finish the frame.

  • Invest in a decent top. You can get creative with the base, but don’t skimp on the surface you’re actually working on. A thick layer of plywood or even a reclaimed piece of butcher block will take much more beating than a thin, flimsy sheet that’s going to dent the first time you drop a screwdriver.
  • Leave room for growth. If you’re building this in a corner, make sure you aren’t boxing yourself in so tightly that you can’t actually move around it. You need enough clearance to stand comfortably and, ideally, enough room to tuck a small rolling cart underneath for extra storage later.

The Bottom Line

Don’t overthink the aesthetics; a workbench is a tool, not a piece of showroom furniture, so prioritize stability and surface area over everything else.

Invest in decent fasteners and solid wood—it’s much easier to build it right once than to spend your weekend fixing a wobbly table that ruins your projects.

Build for your actual workflow, not a Pinterest dream; make sure it’s at a height that won’t kill your back and has enough room for the specific tools you actually use.

Final Thoughts Before You Get to Work

Final Thoughts Before You Get to Work

At the end of the day, building this workbench isn’t about achieving some level of professional woodworking perfection or having a workspace that looks like a Pinterest board. It’s really just about creating a reliable foundation where you can actually get things done without constantly tripping over clutter or fighting a wobbly surface. We covered the essentials—from choosing the right lumber and ensuring your base is sturdy to making sure your height doesn’t wreck your back—so now you have the blueprint. Just remember that the most important part of the process is consistency over complexity; you don’t need a high-tech workshop, you just need a space that respects your workflow and stays out of your way.

Once that last screw is tightened and you wipe away the sawdust, I want you to take a second to actually appreciate what you’ve built. There is something incredibly grounding about knowing that the surface you’re working on was constructed by your own hands. This workbench is more than just wood and hardware; it’s a physical manifestation of your commitment to improving your own environment. Don’t let it sit empty or become a graveyard for half-finished projects. Use it, mess it up, and let it evolve with you. You’ve officially built the system for your success, so now go out there and actually start creating.

Frequently Asked Questions

Do I really need power tools for this, or can I pull this off with just a basic hand saw and a drill?

Honestly? You can definitely pull this off with just a hand saw and a drill. I’ve built a few things using nothing but manual tools, and it just takes a little more patience and a steady hand. If you’re okay with spending extra time on the cuts, you don’t need a table saw or a circular saw to get a solid result. Just go slow, measure twice, and don’t rush the process.

What kind of wood should I actually buy if I'm on a budget but don't want the whole thing to wobble in six months?

Look, if you’re trying to save money without building a glorified wobbly table, skip the expensive hardwoods. You don’t need oak or maple. Honestly, the sweet spot is construction-grade pine or Douglas fir from a big-box store. It’s cheap, easy to find, and surprisingly sturdy if you use thicker dimensions (think 2x4s for the frame). Just grab a sheet of 3/4″ plywood for the top—it’ll handle the weight and won’t sag immediately.

How do I make sure my workbench stays level if my garage or basement floor is uneven?

This is the reality of most basements—nothing is ever actually flat. Don’t try to fight the floor; instead, build the bench to accommodate it. I swear by adjustable heavy-duty leveling feet. You screw them into the legs, then just twist them until the bubble in your level stays dead center. If you’re on a tighter budget, shim the low spots with scraps of plywood or even some hard plastic wedges. Just get it level now so you aren’t fighting it later.

Essential productivity for students hacks.

Essential Productivity Hacks Every Student Needs to Know

I used to think that being a “good student” meant owning every color-coded highlighter set and a $50 leather-bound planner, only to realize I was just spending more time decorating my desk than actually studying. Honestly, the internet has turned productivity for students into this performative, aesthetic nightmare that feels more like a hobby than a way to get through a semester. We’ve been sold this idea that if we just find the “perfect” app or the most expensive stationery, our stress will magically vanish, but that’s just gatekeeping productivity behind a paywall.

I’m not here to sell you on a lifestyle or tell you to wake up at 4:00 AM to meditate. Instead, I want to give you the actual, unpolished systems that work when you’re running on three hours of sleep and a lukewarm coffee. I’m talking about the small, repeatable habits that stop the spiral before it starts. We’re going to strip away the fluff and focus on low-friction methods to manage your workload, so you can actually finish your assignments and reclaim your sanity without feeling like you’re constantly in survival mode.

Table of Contents

Stop Living in Survival Mode Real Productivity for Students

Stop Living in Survival Mode Real Productivity for Students

Most of us treat college like a series of fires we have to put out. You wake up, realize you missed a deadline, panic-study for three hours, and then collapse. That isn’t “working hard”—it’s just running on adrenaline, and it’s a fast track to burnout. To actually get ahead, you need to move away from reactive chaos and toward organizing school assignments before they become emergencies. It’s about building a buffer between your brain and your to-do list so you aren’t constantly playing catch-up.

This doesn’t mean you need to become a robot or spend your entire life in the library. It’s really just about implementing a few low-friction systems that work with your natural energy levels rather than against them. Instead of staring at a massive syllabus and feeling paralyzed, try breaking things down into tiny, non-threatening chunks. If you can master a few simple time management techniques for college—like blocking out specific windows for deep work versus mindless admin—you’ll find you actually have more free time to, you know, actually live your life.

Ditch the Chaos Better Ways of Organizing School Assignments

Ditch the Chaos Better Ways of Organizing School Assignments

Most of us approach our syllabus like a giant, terrifying monolith, hoping if we just stare at it long enough, the deadlines will move. That’s not a plan; it’s a prayer. To actually get ahead, you need to stop treating every assignment like an isolated crisis and start organizing school assignments into a visual hierarchy. I’m not talking about a color-coded masterpiece that takes three hours to maintain. I’m talking about a simple, low-friction system—like a basic Kanban board or a dead-simple digital list—where you can see exactly what’s due, what’s in progress, and what’s actually finished.

The goal is to stop the mental gymnastics of trying to remember everything. When you offload that data into a reliable system, you free up the brainpower you actually need for the work itself. If you’re struggling with the sheer volume, I highly recommend looking into the best productivity apps for learners to automate the reminders. Whether it’s Notion or just a synced Google Calendar, the key is to make the deadline impossible to ignore without it feeling like a chore. Once the “where and when” is settled, the “how” becomes a lot less intimidating.

Mastering Time Management Techniques for College Without the Burnout

Mastering Time Management Techniques for College Without the Burnout

The biggest mistake I see people making is thinking that time management means scheduling every single minute of your day like a robot. That is a one-way ticket to burnout. Instead, I’ve found that the most effective time management techniques for college actually involve working with your energy levels rather than fighting them. If you’re a night owl, don’t force yourself to do heavy reading at 8:00 AM just because a productivity guru said so. Try grouping your hardest tasks during your peak focus windows and saving the mindless stuff—like checking emails or organizing your desk—for when your brain is naturally hitting a wall.

Another thing that saved my sanity was learning how to tackle beating student procrastination through micro-goals. Instead of staring at a massive, intimidating essay prompt, I tell myself I’m just going to write for fifteen minutes. That’s it. Usually, once the friction of starting is gone, the momentum carries me through. It’s about lowering the barrier to entry so your brain doesn’t view the task as a threat. If you can master the art of the small start, you’ll stop feeling like you’re constantly playing catch-up.

Beating Student Procrastination With Systems That Actually Work

Look, I get it. You aren’t actually lazy; you’re probably just overwhelmed by the sheer size of the mountain you have to climb. When a project feels too big, your brain naturally looks for an exit strategy—which usually involves scrolling TikTok for three hours. Beating student procrastination isn’t about finding some magical burst of willpower; it’s about lowering the barrier to entry so your brain doesn’t feel threatened by the task.

Instead of telling yourself you need to “study for four hours,” try the “five-minute rule.” Tell yourself you’ll just open the document and write one sentence. Usually, once the friction of starting is gone, you’ll keep going. If you really struggle to stay on track, I’m a huge fan of using the Pomodoro method or finding the best productivity apps for learners that lock your phone while you work. The goal isn’t to be a robot; it’s to build a tiny bit of momentum so you can actually finish your work and actually enjoy your free time without that nagging guilt hanging over your head.

Unpolished Focus Tips and Best Productivity Apps for Learners

Let’s be real: most “focus” advice feels like it was written by someone who has never actually sat in a library for six hours straight. You don’t need a biohacking routine; you just need to stop your phone from being a constant distraction. I’ve found that my best focus and concentration tips for studying usually involve physical barriers. I put my phone in another room—literally, out of sight—and use a browser blocker to kill the urge to check Reddit mid-essay. It sounds basic, but it’s the only way I stop the mindless scrolling that eats my afternoon.

When it comes to the digital side of things, don’t get bogged down trying to find the perfect, aesthetic setup. I’ve cycled through dozens of tools, but the best productivity apps for learners are usually the ones that do one thing well. For me, Notion is great for organizing school assignments, but for actual deep work, I stick to Forest or a simple Pomodoro timer. Use the tech to build a container for your work, not to create more digital clutter that you’ll just end up ignoring by next Tuesday.

Small Wins: 5 Low-Effort Systems to Keep You From Spiraling

  • Stop relying on your brain to remember everything. I used to think I had a “great memory” until finals week hit and I realized I’d forgotten an entire essay deadline. Use a single, dead-simple digital calendar or a physical planner for every single thing—not just classes, but laundry, gym sessions, and even “do nothing” time. If it’s not in the system, it doesn’t exist.
  • The “Two-Minute Rule” is my absolute lifesaver when the coursework starts piling up. If a task takes less than two minutes—like emailing a professor a quick question, uploading a file, or clearing your desk—do it immediately. It stops those tiny, annoying micro-tasks from snowballing into a mountain of mental clutter.

  • Create a “Low-Power Mode” for your brain. Some days you’re going to be a productivity god, and some days you’re going to be running on three hours of sleep and caffeine. On the bad days, don’t try to tackle the massive research paper. Instead, just commit to one tiny, low-energy task, like formatting your bibliography or reading two pages. It keeps the momentum alive without the burnout.
  • Curate your physical environment to reduce friction. If you study in your bed, your brain thinks it’s time to sleep. If you study at a messy desk, your brain thinks it’s time to clean. Find one specific spot—even if it’s just a specific corner of the library—that is for work only. When you sit there, your brain gets the signal that it’s time to lock in.
  • Batch your “life admin” so it doesn’t bleed into your study sessions. Don’t stop mid-essay to answer a text or check a bank notification. Set aside one specific hour a week to handle all the non-school stuff: grocery shopping, responding to non-urgent emails, or cleaning your room. Keeping your “life” tasks in a dedicated bucket keeps your “study” time actually focused.

The Bottom Line: Systems Over Stress

Stop chasing perfection with aesthetic planners and start building small, repeatable systems that actually handle your workload.

Protect your energy by prioritizing realistic time management over the “hustle culture” grind that leads straight to burnout.

Use tech and tools to reduce friction, not to add more noise, so you can focus on learning instead of just managing the chaos.

The Reality Check

Look, we’ve covered a lot of ground here—from ditching the frantic “survival mode” mentality to actually setting up systems for your assignments and managing your time without hitting a wall. The main takeaway I want you to hold onto is that productivity isn’t about being a robot or color-coding every single minute of your day until you’re exhausted. It’s about reducing the friction in your life. Whether you’re using a new app to fight procrastination or just finally organizing your syllabus, the goal is to build a framework that works for your actual, messy, human life, not some idealized version of a student you saw on TikTok.

At the end of the day, please remember that these systems are meant to serve you, not the other way around. If a specific method feels like a chore or just isn’t clicking, toss it out and try something else. You don’t need to be perfect to be successful; you just need to be consistent enough to keep the chaos at bay. Adulthood—and college is basically just a trial run for adulthood—doesn’t have to feel like one long emergency. Take it one system at a time, be kind to yourself when things get messy, and just focus on making tomorrow a little bit easier than today.

Frequently Asked Questions

How do I actually stay productive when my roommates or living situation are constantly distracting me?

Honestly, the “perfect quiet study space” is a myth when you live with people. Instead of fighting the noise, build a sensory barrier. Invest in decent noise-canceling headphones—they’re a non-negotiable for my sanity. If that’s not enough, try the “library pivot”: leave your apartment entirely for deep work sessions. When you can’t leave, use visual cues like a closed door or even a specific desk lamp to signal to roommates that you’re officially “offline.”

I've tried all these systems before and they never stick—how do I stop the cycle of starting a new planner every two weeks?

Honestly, I’ve been there. I used to buy a new aesthetic planner every time my old one felt “messy,” thinking a fresh start would fix my brain. It doesn’t. The problem isn’t the planner; it’s that you’re trying to adopt a system that’s too rigid for your actual life. Stop looking for the perfect tool and start looking for the lowest barrier to entry. If a system feels like a chore, scrap it.

What do I do when I've set up a system but then I hit a massive burnout wall and can't follow it anymore?

First, stop beating yourself up. Systems are supposed to serve you, not the other way around. When you hit that wall, it’s usually a sign that your current system is too rigid or too demanding for your actual energy levels. Strip everything back to the bare minimum—the “non-negotiables” only. If you can’t do the whole routine, just do one small thing. Lower the bar until it’s impossible to fail, then rebuild slowly.

Fun and easy kids craft ideas.

Fun and Easy Crafts to Keep Kids Busy on Rainy Days

Let’s be real: most of the time, “craft time” feels less like a bonding experience and more like a slow-motion descent into household chaos. I’ve spent way too many afternoons staring at a mountain of glitter and half-empty glue sticks, wondering why I ever thought this would be a relaxing way to spend a Tuesday. We’ve all been there, scrolling through Pinterest for endless kids craft ideas only to realize that most of them require a degree in engineering and a house that doesn’t mind being covered in neon acrylic paint. The problem isn’t the creativity; it’s the lack of a functional system to keep the mess from becoming a permanent part of your decor.

I’m over the over-complicated, expensive kits that end up in the trash after twenty minutes. Instead, I want to show you how to set up a few low-stakes, high-reward activities that actually work within the reality of a busy schedule. I’ve narrowed it down to five specific projects that focus on minimal cleanup and maximum engagement. By the end of this, you’ll have a toolkit of streamlined kids craft ideas that allow your little ones to create something cool without you feeling like you need a total lifestyle reset to clean up the aftermath.

Table of Contents

The Low-Mess Command Center

The Low-Mess Command Center tray system.

Most craft setups fail because they’re too hard to clean up, which is why I never recommend those massive, expensive art kits that promise the world. Instead, I’m a huge fan of the tray system. Grab a couple of cheap plastic cafeteria trays or even just baking sheets from your kitchen. By confining the glue, the glitter, and the scraps to a defined boundary, you’re essentially creating a containment zone for the chaos.

Edible Art Experiments

Edible Art Experiments using colorful food dyes.

If you’re feeling particularly cautious about spills or toxic materials, stop looking at the craft aisle and start looking in your pantry. I’ve found that using food as a medium is the ultimate low-stakes hack for keeping kids engaged without the cleanup headache. Think about things like colored salt (just mix salt with a drop of food coloring) or even making “painting” supplies out of yogurt and natural dyes like crushed berries.

The Upcycled Cardboard Station

The Upcycled Cardboard Station crafting supplies.

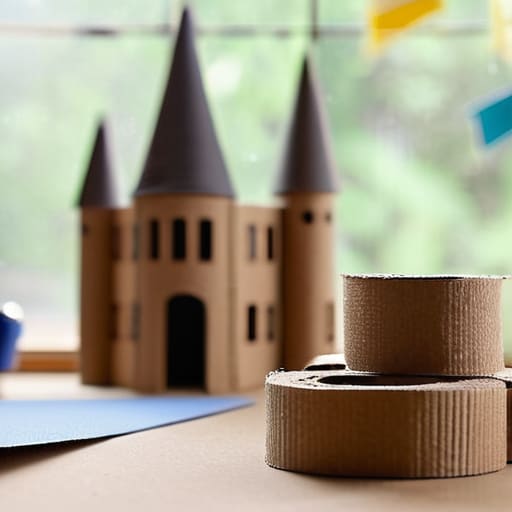
Before you go out and buy a mountain of new supplies, look at your recycling bin. I have a habit of hoarding clean cardboard boxes because they are the most versatile, zero-cost tool in any creative arsenal. A cereal box can become a stencil, a delivery box can become a miniature castle, and toilet paper rolls are basically free building blocks if you have enough tape.

Tape-Based Geometry

If you want to avoid the “glue-stick-is-missing-under-the-couch” drama, switch to washi tape or painter’s tape. I use this all the time when I need to keep a project contained but still want it to look intentional. You can use the tape to create outlines on paper for them to color within, or even tape long lines directly onto the floor to create temporary obstacle courses or geometric shapes for them to follow.

Nature's Color Palette

Sometimes the best way to manage a craft session is to move it entirely outside. I’m a big believer in “foraging” as a precursor to creating. Instead of buying a pack of thirty different colored markers, grab a few baskets and head to the backyard or a local park. Have the kids collect things that match specific colors—green leaves, grey stones, yellow petals, or brown twigs.

The Bottom Line

Stop chasing the perfect, Pinterest-ready masterpiece; the goal is low-friction engagement that doesn’t leave your kitchen looking like a disaster zone.

Set up a dedicated, permanent station so you aren’t wasting mental energy (or half an hour) digging through bins every time they get a burst of creativity.

Focus on process over product—if they’re experimenting and building something, the system is working, regardless of how it looks in the end.

Lowering the Bar for Creativity

At the end of the day, the goal here wasn’t to turn your living room into a professional art studio or to produce something that belongs in a museum. It was about moving away from those high-stress, expensive craft kits that end up gathering dust in a closet. By setting up a dedicated low-mess station, utilizing basic pantry staples, and keeping the activities low-stakes, you’ve effectively removed the biggest barrier to entry: the fear of the mess. Whether it’s salt dough or simple recycled collage work, the focus is on the system of play rather than the perfection of the final product.

I know how it feels when you’re staring at a pile of glitter and feeling an immediate sense of dread about the cleanup, but I promise you, it is worth it. When we stop gatekeeping “creativity” and treat it like just another manageable part of our daily routine, something shifts. Your kids get to explore, you get to breathe, and the house stays relatively intact. Don’t worry about being the “Pinterest Parent”—just focus on creating a little bit of intentional space for them to make a mess. That’s where the real magic happens.

Frequently Asked Questions

How do I keep the mess contained so I'm not scrubbing glitter out of my rug for the next three weeks?

The secret is a “contained zone” system. First, ditch the dining table; use a cheap plastic shower curtain liner or a dedicated silicone mat on the floor to catch the fallout. If you’re using glitter or tiny beads, do it inside a rimmed baking sheet—it acts as a tiny fortress for the mess. Most importantly, keep a handheld vacuum or a damp microfiber cloth nearby to grab spills immediately before they become permanent rug features.

What can I do when my kid gets bored halfway through a project and just wants to go back to their iPad?

Honestly? Let them go. I used to think I had to fight the iPad battle to “save” the creative moment, but that just creates friction for everyone. Instead, treat the project like a low-stakes system. If they check out, pack the supplies into a single bin and call it a “pause.” It’s not a failure; it’s just a pivot. They’ll come back to it when the screen gets boring, and you won’t have a meltdown.

Are there ways to do these crafts without spending a fortune on specialized supplies every single time?

Honestly, if you’re buying a new kit for every project, you’re doing too much. I’m a huge believer in the “scavenger system.” Before you hit the craft store, raid your recycling bin. Cardboard, egg cartons, and empty toilet paper rolls are basically free building blocks. I also keep a “utility bin” of basics—washable markers, glue, and masking tape—so I’m never scrambling. The goal is to use what you have, not collect more clutter.
Tips on how to organize your desktop.

Effective Strategies for a Clutter-free Computer Desktop

Ever had that moment where you’re staring at your screen, ready to crush a project, but you’re actually just paralyzed by the sheer chaos of your icons? I’ve been there—staring at a digital graveyard of “Final_v2_REAL_final.pdf” files, feeling my heart rate spike because I can’t find a single thing. Most productivity gurus will try to sell you some expensive, aesthetic Notion template or a complex coding system to fix it, but honestly, that’s just adding more noise. Learning how to organize your desktop shouldn’t feel like a second job; it should be about stripping away the clutter so you can actually breathe when you log on.

I’m not here to give you a lecture on perfect digital minimalism or tell you to spend three hours color-coding folders you’ll never use. Instead, I’m sharing the actual, unpolished systems I use to keep my freelance workflow from imploding. We’re going to walk through a few low-friction habits that turn your computer from a source of anxiety into a tool that actually works for you. No gatekeeping, no fluff—just the real steps to getting your digital life in order.

Table of Contents

Stop Treating Your Desktop Like an Emergency Room

Stop Treating Your Desktop Like an Emergency Room.

Look, I get it. You open your laptop, and instead of seeing a clean workspace, you’re met with a chaotic sea of random screenshots, half-finished PDFs, and files named “final_v2_ACTUALLY_FINAL.” It feels like a digital emergency room where nothing is where it belongs and everything is a crisis. When your screen is that crowded, your brain follows suit—you’re constantly scanning, searching, and feeling that low-level anxiety before you’ve even started your actual work.

The first step to fixing this isn’t some complex software; it’s about implementing basic digital decluttering techniques that actually stick. You need to move away from the “save everything to the desktop” habit and start building a logical folder hierarchy. I’m talking about a system where a file has a specific home, not just a temporary landing pad on your screen. If you spend more than ten seconds looking for a document, your current setup has failed you. We need to transition from reactive hoarding to a proactive system that works with your brain, not against it.

The No Nonsense Guide on How to Organize Your Desktop

The No Nonsense Guide on How to Organize Your Desktop.

First, we need to talk about the “everything bag” approach. You know, when you just throw every single screenshot, random PDF, and half-finished project onto the screen because it’s easier than actually deciding where it goes? We’re ending that today. The foundation of any decent system is a solid folder hierarchy. Instead of a flat list of fifty files, create three to five “buckets” that represent the main areas of your life—like Work, Personal, and Archive. Everything else is just noise.

Once your buckets are set, you need to get strict with your file naming conventions. I can’t tell you how many times I’ve spent twenty minutes hunting for a document named “Final_v2_REALLY_FINAL.pdf.” It’s a waste of mental energy. I use a simple YYYY-MM-DD_ProjectName_Version format. It sounds a little nerdy, I know, but it makes searching instant. If you combine this with a few basic digital decluttering techniques—like clearing your downloads folder every Friday afternoon—you’ll stop feeling like your computer is actively working against you.

Mastering Digital Decluttering Techniques Without the Overwhelm

Mastering Digital Decluttering Techniques Without the Overwhelm

The biggest mistake I see people make is trying to fix everything in one sitting. You look at a screen covered in hundreds of random screenshots and icons, get a hit of instant anxiety, and immediately close your laptop. That’s not a system; that’s a recipe for burnout. Instead, try breaking your digital decluttering techniques into micro-tasks. Spend just fifteen minutes a day nuking your “Downloads” folder or dragging those stray PDFs into a dedicated archive. It’s much easier to maintain when you aren’t treating it like a massive, weekend-long chore.

Once the visual chaos subsides, you need to actually prevent the mess from returning. This is where most people fail because they don’t have a logic to follow. I’m a huge advocate for strict file naming conventions—think YYYY-MM-DD_ProjectName_Version. It feels a little nerdy at first, but it’s a total game-changer for your future self. If you pair that with a shallow, logical folder hierarchy, you stop hunting for files and start actually working. The goal isn’t perfection; it’s just making sure you don’t need a search party every time you need a specific invoice.

Building Efficient File Management Systems That Actually Work

Once you’ve finished the initial purge, you need a way to prevent the chaos from creeping back in. This is where most people fail—they clean everything up, feel great for two days, and then start dumping random screenshots onto the desktop again. To stop the cycle, you need to implement efficient file management systems that don’t require a PhD to maintain. Instead of having one giant “Work” folder that eventually becomes a graveyard of forgotten PDFs, try building a clear folder hierarchy best practices. Think of it like a kitchen pantry: if everything has a specific, labeled home, you aren’t going to spend twenty minutes hunting for the salt while you’re mid-recipe.

The secret sauce, though, is actually your file naming conventions. If your files are currently named “final_v2_REALLY_FINAL.pdf,” we need to talk. I swear by a simple `YYYY-MM-DD_ProjectName_Version` format. It feels a little rigid at first, but it makes searching your drive a breeze and keeps your timeline intuitive. When your naming is consistent, you spend less time digging through digital junk and more time actually getting stuff done.

Beyond Folders Using Desktop Wallpaper for Productivity

Most people think of their wallpaper as just a pretty aesthetic choice, but I’ve started treating mine like a visual roadmap. If you’re still staring at a sea of random icons, you’re probably losing mental energy just trying to find your place. Instead of a generic mountain range, I use custom-designed backgrounds that act as “zones.” I’ll have one quadrant labeled “Current Projects,” another for “Admin/Invoices,” and a small corner for “To-Do.” It sounds a little extra, but it turns your desktop into a functional dashboard rather than just a messy landing page.

The trick is to use desktop wallpaper for productivity by creating literal boundaries for your digital life. When you have a visual line separating your “active” files from your “reference” files, you stop treating your screen like a dumping ground. It’s one of those small, repeatable systems that makes a massive difference in managing computer clutter without having to manually move files every single hour. It’s not about being perfect; it’s about giving your eyes a place to rest so you can actually get to work.

5 Small Systems to Keep the Chaos at Bay

  • The “End of Day” Sweep: Every evening before I close my laptop, I spend exactly two minutes dragging stray files from my desktop into their proper folders. It prevents that “Monday morning panic” when you open your computer to a wall of icons.
  • Use a “Temporary Holding” Folder: If you’re in the middle of a project and don’t have time to file things properly, don’t just scatter them. Create one folder named ‘Inbox’ or ‘To Sort’ and dump everything there. It keeps the visual clutter down while you’re working.
  • Color-Code Your Folders: I’m a visual person, so I use different colored tags or icons for different areas of my life—blue for client work, green for personal stuff, and red for urgent tasks. It helps my brain categorize everything before I even read a single file name.
  • The One-Screen Rule: If you have to scroll or click through three pages of icons to find something, your system is broken. Aim to keep only your most essential, active shortcuts on the main view. Everything else should live in a deep folder or the cloud.
  • Purge Your Downloads Regularly: Your Downloads folder is where productivity goes to die. Set a recurring calendar invite for Friday afternoons to empty it out. If you need the file, move it; if you don’t, delete it. No exceptions.

The TL;DR on Keeping Your Digital Life Together

Stop treating your desktop like a junk drawer; build a system of intentional folders and clear visual boundaries so you aren’t hunting for files when you’re already stressed.

Use your desktop wallpaper as a functional tool rather than just an aesthetic choice to help categorize your current projects and keep your focus sharp.

Consistency beats intensity—don’t wait for a massive digital meltdown to clean up; just spend five minutes at the end of each week resetting your workspace so the clutter doesn’t pile up again.

The End of the Digital Chaos

Look, we’ve covered a lot of ground here, from ditching that “emergency room” desktop vibe to actually building a file system that doesn’t fall apart the second you get a new project. We talked about the magic of intentional wallpapers and how to declutter without feeling like you’re deleting your entire life. The goal wasn’t just to make your screen look pretty for a screenshot; it was to create a functional ecosystem where you aren’t wasting twenty minutes every morning just hunting for a PDF. By implementing these small, repeatable systems, you’re essentially removing the friction that turns a simple workday into a stressful scavenger hunt.

At the end of the day, your digital workspace is just an extension of your mental space. If your desktop is a chaotic mess of random screenshots and “final_final_v2” files, your brain is going to feel that same static every time you log on. You don’t need a perfect, aesthetic setup that looks like a Pinterest board; you just need a space that works for you instead of against you. Take it one folder at a time, keep your systems simple, and remember that consistency beats perfection every single time. You’ve got this.

Frequently Asked Questions

How do I handle all those random screenshots and temporary files that I’m too afraid to delete but don't actually need?

Look, I get it. That “Screenshot (24)” file feels like a tiny piece of evidence you might need for a trial that isn’t happening. But those files are just digital clutter stealing your mental bandwidth. My system? Create a “Graveyard” folder. Dump everything suspicious in there. If you don’t touch it for 30 days, it’s gone. No guilt, no hesitation. If it was actually important, you would’ve found it by now.

Is there a way to organize my desktop without spending hours setting up a complicated folder hierarchy that I'll just ignore in a week?

Honestly, don’t do it. If a system feels like a chore, you’re going to abandon it by Tuesday. Instead of a massive hierarchy, try the “Active vs. Archive” method. Keep only what you’re working on this week on your desktop. Everything else? Toss it into one single “Archive [Month]” folder. It’s not perfect, but it clears the visual noise immediately without the mental tax of deciding exactly which sub-folder a random PDF belongs in.

How do I keep my desktop clean when my job requires me to have dozens of different apps and windows open at the same time?

Honestly, I feel this in my soul. When you’re juggling twenty tabs and three different apps, a “clean” desktop is a myth. Instead of fighting the chaos, lean into workspace partitioning. Use virtual desktops—one for deep work, one for comms, and one for “everything else.” It keeps your brain from short-circuiting. Also, try a “triage” system: at the end of every day, close everything. Start tomorrow with a blank slate, not yesterday’s leftovers.

Remote job interview tips for success.

Winning Strategies for Remote Job Interviews

I still remember the sheer, cold panic of sitting in my bedroom three years ago, staring at a frozen Zoom screen while a hiring manager waited in silence. My Wi-Fi had decided to die at the exact moment I was mid-sentence, and instead of looking like a polished professional, I looked like a deer in headlights. Most of the advice you find online regarding remote job interview tips feels like it was written by someone who has never actually had a router glitch or a neighbor start mowing their lawn during a high-stakes call. They tell you to “dress for success” or “maintain eye contact,” but they never talk about the actual chaos of managing your digital environment when you’re working from a tiny apartment.

I’m not here to give you a lecture on corporate etiquette or tell you to buy an expensive ring light you don’t need. Instead, I want to give you the unpolished, realistic systems I’ve built to make sure your tech—and your nerves—don’t fail you when it matters most. We’re going to strip away the fluff and focus on the practical, repeatable steps that actually keep you from spiraling. This is about reducing the friction so you can just show up, be yourself, and land the job.

Table of Contents

Stop the Panic My No Nonsense Remote Job Interview Tips

Stop the Panic My No Nonsense Remote Job Interview Tips tech guide.

First things first, let’s talk about the tech. There is nothing that kills your confidence faster than spending the first five minutes of a high-stakes call apologizing because your audio is clipping or your screen won’t share. I’ve made this mistake, and it’s a total vibe killer. To avoid the scramble, make testing your webcam and microphone a non-negotiable part of your pre-interview ritual. Don’t just assume your laptop will cooperate; run a quick diagnostic on whatever platform they’re using at least twenty minutes before you log on.

Once the tech is solid, focus on your environment. You don’t need a professional studio, but you do need a professional background for video calls that doesn’t include a mountain of laundry or a distracting doorway. A clean, neutral space helps keep the focus entirely on you and your answers. This also goes a long way in overcoming virtual interview anxiety; when you know your surroundings look intentional and controlled, you can actually stop worrying about what’s happening behind your head and start focusing on the person on the screen.

Mastering Your Remote Interview Technical Setup Before the Meltdown

Mastering Your Remote Interview Technical Setup Before the Meltdown

Look, I’ve been there—sitting in front of a laptop, heart racing, only to realize my mic sounds like I’m underwater or my Wi-Fi is about to ghost me. To avoid that, you need a solid remote interview technical setup that you actually trust. Start by testing your webcam and microphone at least twenty minutes before the call. Don’t just check if they work; check how you look and sound. Is there a weird echo? Is your lighting making you look like a shadowy figure in a horror movie? Fix those small glitches early so they don’t become your entire personality during the meeting.

Next, let’s talk about your environment. You don’t need a studio, but you do need a professional background for video calls that isn’t a mountain of laundry or a distracting open doorway. I usually aim for a clean, neutral corner with some soft lighting. It’s less about being fancy and more about removing distractions so the recruiter can actually focus on what you’re saying. When your tech is stable and your space is dialed in, you’ll find that overcoming virtual interview anxiety becomes a whole lot easier.

The Truth About Testing Webcam and Microphone Without the Stress

The Truth About Testing Webcam and Microphone Without the Stress

Look, we’ve all been there: you’re feeling confident, your outfit is on point, and then you realize your audio sounds like you’re broadcasting from inside a tin can. The secret to testing webcam and microphone settings without the pre-interview spiral is to stop treating it like a chore and start treating it like a dry run. I always recommend opening your meeting software—whether it’s Zoom, Teams, or Google Meet—at least twenty minutes early. Don’t just check if the buttons work; actually record a quick thirty-second clip of yourself speaking. This lets you see if your lighting is washing you out or if there’s a weird echo in your room that you didn’t notice before.

It’s also about more than just the hardware; it’s about your digital presence. While you’re checking your levels, take a second to look at your framing. You want to make sure you aren’t just a floating head or buried in a dark corner. Getting your remote interview technical setup dialed in early means you can actually focus on your answers rather than wondering if the recruiters can hear you.

Curating a Professional Background for Video Calls That Actually Works

Look, you don’t need a staged, high-end studio to look like you know what you’re doing. I used to stress about having a perfect home office, but honestly, most recruiters just want to see that you aren’t sitting in front of a pile of laundry or a chaotic kitchen sink. The goal for a professional background for video calls isn’t perfection; it’s about minimizing distractions. Find a spot with a neutral wall or a simple bookshelf, and make sure you aren’t backlit by a bright window, which turns you into a shadowy silhouette.

If you’re stuck in a cramped apartment, don’t sweat it—just lean into the minimalist vibe. A tidy corner with a single plant or a clean desk setup works wonders for projecting competence. Part of mastering your remote interview technical setup is realizing that your environment is a signal of how you organize your work life. If your background is cluttered, it subconsciously suggests your workflow might be, too. Keep it simple, keep it clean, and let your actual answers be the star of the show.

Decoding Digital Body Language and Overcoming Virtual Interview Anxiety

Since we aren’t in the same room, you lose those subtle physical cues like a handshake or a shared glance, which is where digital body language in interviews becomes your secret weapon. It sounds fancy, but it’s really just about being intentional with how you show up on screen. Since you can’t lean in physically, you have to use your eyes and your posture to signal engagement. Try to look directly into the camera lens rather than at your own face on the screen; it feels weirdly unnatural at first, but to the recruiter, it looks like genuine eye contact.

The other hurdle is the internal chaos—the racing heart and the “what if I freeze?” thoughts. I’ve found that overcoming virtual interview anxiety is less about “thinking positive” and more about physical grounding. Keep a glass of water nearby and a small, tactile object like a smooth stone or a fidget ring just out of frame. If you feel a spike of panic, take a slow breath and ground your feet firmly on the floor. It keeps you from looking like a floating head and helps you stay present in the conversation.

The Final Polish: 5 Micro-Systems to Seal the Deal

  • Script your “elevator pitch” but don’t memorize it word-for-word. If you try to recite a script like a robot, you’ll lose that natural flow, and the second you stumble, you’ll spiral. Instead, just jot down three key bullet points on a Post-it note and stick it right next to your webcam lens. It keeps your eyes on the interviewer while giving you a safety net if your brain decides to go blank.
  • Curate your “interview uniform” the night before. I’m not saying you need a full suit, but don’t be that person scrambling to find a clean blouse ten minutes before the link goes live. Pick something that makes you feel capable and professional, and make sure the colors don’t wash you out on camera. Having it ready removes one more layer of morning chaos.
  • Build a “cheat sheet” of questions that actually matter. Most people freeze when they get to the “Do you have any questions for us?” part. Don’t just ask about the benefits or the hours; ask things like, “What does success look like in this role after six months?” It shows you’re actually thinking about the work, not just the paycheck.
  • Master the art of the intentional pause. In a remote setting, there’s often a weird lag, and we tend to rush to fill the silence, which leads to accidental interruptions. If a question is heavy, take a breath. Literally. A two-second pause makes you look thoughtful and composed rather than frantic, and it gives the audio time to catch up.
  • Set up a “pre-flight” ritual to ground yourself. About fifteen minutes before the call, step away from all screens. Grab a glass of water, do a quick stretch, or just sit in silence. If you spend the twenty minutes leading up to the interview scrolling through LinkedIn or obsessing over your resume, you’re going to walk into that call with your nervous system already redlining.

The TL;DR: Your Remote Interview Cheat Sheet

Treat your tech setup like a pre-flight checklist—test the Wi-Fi, mic, and lighting ten minutes early so a glitchy connection doesn’t become your main character.
Curate your space instead of cleaning it; a simple, tidy background does more for your professional vibe than a frantic, last-minute room scrub.

Focus on your digital presence by mastering eye contact with the camera and managing your energy, which helps turn that nervous jitter into calm, intentional confidence.

The Final Checklist

At the end of the day, crushing a remote interview isn’t about having a studio-quality setup or a perfectly curated minimalist bookshelf behind you. It’s about building a system that prevents the small, annoying things—like a dying laptop battery or a sudden Wi-Fi drop—from stealing your focus. We’ve covered the technical essentials, from testing your mic to cleaning up your digital background, and how to manage that nervous energy through better digital body language. If you walk into that call knowing your tech is solid and your space is ready, you’ve already won half the battle. You aren’t just showing up to answer questions; you’re showing up as a prepared, capable professional who knows how to manage their environment.

I know that even with the best systems in place, those pre-interview jitters are still going to show up. That’s okay. The goal isn’t to be a robot; it’s to make sure your anxiety doesn’t become the main character of your interview. Remember, the person on the other side of that screen is just another human looking for a teammate. Use these tools to strip away the chaos so your actual personality and skills can shine through. You’ve done the prep work, you’ve checked your gear, and now it’s time to just be present. You’ve got this.

Frequently Asked Questions

What should I do if my internet actually cuts out in the middle of a question?

First, don’t spiral. It happens to the best of us. If the screen freezes, immediately switch to your phone’s data and try to rejoin via the link. If that fails, jump straight to your email or LinkedIn to message your interviewer. A quick, “Hey, my Wi-Fi just died—reconnecting now!” goes a long way. It shows you can handle a crisis with composure, which is actually a subtle way to ace the interview.

How do I handle eye contact when I'm staring at a screen instead of a person?

This is such a common struggle. It feels weird to stare at a tiny plastic lens when you’re trying to connect with a human, but here’s the hack: look at the camera, not the screen. I usually stick a little colorful post-it note with a smiley face right next to my webcam. It gives me a specific spot to focus on so I’m actually “making eye contact” with them, rather than just looking down at their face on my monitor.

Is it okay to have notes or a cheat sheet visible on my desk, or does that look like I'm cheating?

Honestly? It’s totally fine, as long as you don’t use them as a script. I actually keep a few sticky notes around my monitor for high-level talking points or specific metrics I don’t want to blank on. The key is to keep them at eye level so you aren’t constantly looking down—which makes it obvious you’re reading. Think of them as a safety net, not a teleprompter. Keep it subtle, and no one will notice.

Productivity for ADHD strategies and tips.

Productivity Strategies Tailored for Adhd Brains

I used to spend hours scrolling through aesthetic Notion templates and buying $30 planners, convinced that if I just found the “perfect” setup, my brain would finally stop glitching. It was a total lie. Most of the advice you see online about productivity for ADHD feels like it was written by people who have never actually experienced the paralyzing weight of a mounting to-do list or the sheer chaos of a “quick” task turning into a three-hour rabbit hole. We don’t need more colorful checkboxes and complex digital ecosystems; we need systems that actually survive a dopamine crash.

I’m not here to sell you on a lifestyle overhaul or a magical new app that will suddenly fix your executive dysfunction. Instead, I want to share the unpolished, slightly messy frameworks I’ve built for myself to keep my freelance business and my sanity intact. We’re going to skip the gatekeeping and the “just try harder” nonsense. I’m giving you the real-world hacks and low-friction habits that actually work when your brain wants to do everything except the one thing you actually need to get done.

Table of Contents

Stop Living in Emergency Mode Real Productivity for Adhd

Stop Living in Emergency Mode Real Productivity for Adhd.

The problem with most advice is that it assumes you have a functioning “start” button. We’ve all been there: staring at a mounting pile of laundry or an empty inbox, paralyzed by that heavy, invisible weight that makes even the simplest task feel like climbing Everest. That’s not laziness; it’s executive dysfunction strategies failing you because they were designed for neurotypical brains. When you’re stuck in that loop, your brain starts hunting for anything—a snack, a random Wikipedia rabbit hole, a quick scroll through TikTok—just to feel something. These dopamine seeking behaviors aren’t your enemy, they’re just your brain’s desperate attempt to find the fuel it needs to actually function.

Instead of trying to “discipline” your way out of it, we need to stop fighting your biology and start working around it. Forget the massive, intimidating to-do lists that trigger an immediate shutdown. We need to build systems that account for the fact that time doesn’t always feel linear to us. We aren’t looking for perfection; we’re looking for frictionless momentum.

Hack Your Brain Executive Dysfunction Strategies That Actually Work

Hack Your Brain Executive Dysfunction Strategies That Actually Work

Let’s be real: the hardest part of any task isn’t actually doing the work—it’s the agonizing mental friction of just starting. When executive dysfunction hits, your brain feels like it’s trying to run through waist-deep molasses. Instead of fighting that paralysis with sheer willpower (which never works), I’ve learned to lean into body doubling techniques. Honestly, just having a friend sit on FaceTime with me while I fold laundry or answer emails changes the entire neurochemical landscape. They don’t even have to talk to me; their mere presence acts as an external anchor that keeps me from drifting into a three-hour TikTok rabbit hole.

When the “wall of awful” feels too high, I stop trying to tackle the big, scary project and pivot to micro-wins. If I can’t clean the whole kitchen, I’ll just commit to washing three forks. It sounds silly, but it’s a way to manage those intense dopamine seeking behaviors that usually lead to distraction. By lowering the barrier to entry, you trick your brain into a state of momentum rather than a state of overwhelm. It’s not about being “perfectly organized”; it’s about finding the path of least resistance so you can actually get things done.

Taming the Chaos Adhd Friendly Task Management Without the Guilt

Taming the Chaos Adhd Friendly Task Management Without the Guilt

Most traditional planners are basically just expensive ways to feel guilty. You buy a beautiful, linen-bound notebook, write down twenty tasks, and then stare at the empty pages for three weeks because the sheer sight of the list triggers a shutdown. That’s not a lack of willpower; it’s just a mismatch between the tool and your brain. To make adhd friendly task management actually stick, you have to stop trying to “fix” your focus and start lowering the barrier to entry.

Instead of a massive, intimidating master list, I use a “micro-task” approach. If “Clean the Kitchen” feels like a mountain, my brain will naturally pivot toward dopamine seeking behaviors—like scrolling TikTok for an hour—just to avoid the stress. I break it down into something ridiculously small, like “Put three forks in the dishwasher.” It sounds silly, but it bypasses that initial paralysis. If you’re struggling to start, try the body doubling technique by hopping on a video call with a friend or sitting in a coffee shop; sometimes just having another human in your peripheral vision is the only way to get the gears turning without the meltdown.

Beat the Clock Real World Time Blindness Solutions

Time blindness isn’t just “being late”; it’s that weird, disorienting feeling where twenty minutes feels like five, or an entire afternoon vanishes while you’re staring at a single email. When you struggle with this, standard planners feel like a joke because they rely on a concept of time that your brain literally doesn’t process the same way. Instead of fighting your biology, you need externalized time cues that make the passing minutes visible and physical.

I stopped relying on my phone’s digital clock—which is too easy to ignore—and switched to using analog timers and visual countdown clocks. Seeing the red wedge disappear on a visual timer provides a constant, non-intrusive nudge that helps with sensory regulation for focus. It turns the abstract concept of “later” into something tangible. Another thing that saved my sanity is the body doubling technique. Just having a friend on FaceTime or sitting in a coffee shop creates a sense of shared time that keeps me from drifting into a rabbit hole. It’s not about being watched; it’s about having a rhythmic anchor to keep you tethered to the present moment.

Dopamine Seeking Behaviors and Sensory Regulation for Focus

Let’s be real: most “productivity hacks” fail because they ignore the fact that our brains are literally starving for stimulation. When you’re staring at a spreadsheet and suddenly find yourself deep-cleaning your baseboards or scrolling through vintage tech forums, that isn’t laziness—it’s dopamine seeking behaviors in overdrive. Your brain is just trying to find a spark to jumpstart the engine. Instead of fighting that urge with sheer willpower (which never works), try leaning into it. If you need a high-tempo playlist or a specific fidget toy to stay in your chair, use it. We need to stop viewing these needs as distractions and start seeing them as necessary fuel for our focus.

The same goes for your environment. If the hum of the refrigerator or the texture of your desk feels like it’s screaming at you, your brain is likely hitting a sensory wall. This is where sensory regulation for focus becomes a game changer. I’ve learned that wearing noise-canceling headphones or switching to a specific “work scent” like peppermint can create a sensory bubble that keeps the chaos at bay. It’s about building a physical environment that supports your nervous system rather than constantly overstimulating it.

Low-Friction Wins: 5 Tiny Systems to Stop the Spiral

  • Stop using “To-Do” lists that look like a grocery list for a small country. Instead, pick exactly three things—and only three—that actually need to happen today. If you do more, cool, but if you hit those three, you’ve won. Anything else is just a bonus.
  • The “Body Doubling” hack isn’t just for fancy coworking spaces. If you’re stuck on the couch, hop on a FaceTime call with a friend or even just put on a “Clean With Me” video on YouTube. Having that secondary presence makes the task feel less like a mountain and more like a shared activity.
  • Build a “Launchpad” by the front door. I learned this the hard way after losing my keys three times in one week. Pick a bowl or a specific hook. Your wallet, keys, and multi-tool live there. No exceptions. If it’s not in your hand, it’s in the launchpad.
  • Use “Visual Cues” instead of mental ones. If you need to remember to take a supplement or mail a package, don’t put it in a digital calendar you’ll ignore—put it literally on top of your laptop or right next to your coffee maker. If you can’t see it, it doesn’t exist.
  • Create a “Low-Energy Menu” for your chores. Some days you have the brainpower to deep-clean the kitchen; other days, you can barely brush your teeth. Have a list of “micro-tasks” (like just loading the dishwasher or clearing one surface) so you can still feel productive without burning out.

The Bottom Line: Systems Over Willpower

Stop waiting for “motivation” to strike; instead, build low-friction systems—like visual timers or body doubling—that work even when your brain is refusing to cooperate.

Ditch the shame spiral when you fall off your routine, because perfectionism is just another form of procrastination that keeps you stuck in emergency mode.

Manage your environment, not just your schedule, by using sensory regulation and dopamine-friendly hacks to make focusing feel less like a battle and more like a flow.

The Goal Isn't Perfection

Look, we’ve covered a lot of ground here—from hacking your executive dysfunction to building systems that actually respect your time blindness. If you take anything away from this, let it be that productivity for an ADHD brain isn’t about forcing yourself to act like a neurotypical person; it’s about building a scaffolding that supports the way you actually function. You don’t need more willpower, and you definitely don’t need a more complicated planner. You just need smaller, repeatable systems that reduce the friction between “I should do this” and actually doing it. Stop trying to fix your brain and start fixing your environment.

At the end of the day, please try to be a little kinder to yourself when a system fails. I’ve spent plenty of days where my multi-tool was lost, my power bank was dead, and my entire schedule went up in flames. Some days are for high-performance deep work, and some days are just for surviving the chaos. That’s okay. Adulthood is a lot easier when you stop treating every lapse in focus like a moral failing. Build your systems, use your tools, and remember that progress is rarely a straight line. You’re doing better than you think you are.

Frequently Asked Questions

What do I do when I finally build a system and then immediately lose interest in using it?

The “new system high” is real, and honestly, it’s part of the ADHD experience. You build this beautiful, color-coded Notion setup, and for three days, you’re a god. Then, the dopamine drops and the system feels like a chore.

How do I handle the massive "shame spiral" that happens when I inevitably fall off track for a few days?

Look, the shame spiral is the ultimate productivity killer. When you miss three days of your routine, your brain wants to punish you, but that just makes you want to hide even more. Stop trying to “make up” for lost time—you can’t. Just reset. Pick one tiny, low-stakes thing—like washing three dishes or answering one email—and start there. Forgive the lapse, acknowledge it happened, and just jump back in. No drama, just a reset.

Are there ways to stay productive without relying on high-stress "panic mode" or caffeine to get things done?

Honestly, relying on caffeine and panic is just borrowing energy from tomorrow, and the crash is brutal. Instead, try “low-stakes momentum.” Start with something ridiculously small—like just opening the document or clearing one corner of your desk. It’s about tricking your brain into starting without the adrenaline spike. Also, try body doubling; even having a friend on FaceTime while you both work can provide that steady, calm focus without the cortisol.

Page 1 of 3

Powered by WordPress & Theme by Anders Norén