Month: April 2026 Page 2 of 3

How to prep vegetables safely and efficiently.

Efficient and Safe Vegetable Prep Techniques

I used to think that “meal prepping” meant spending my entire Sunday in a frantic, tear-filled battle with a mountain of kale and a dull knife, only to end up with a fridge full of soggy, depressing containers. There is this massive, gatekept myth that learning how to prep vegetables requires a professional chef’s setup and three hours of uninterrupted time, but honestly? That’s just a recipe for burnout. I’ve realized that if the system is too complicated, I’m just not going to do it, and I’d much rather eat a mediocre salad than spend my weekend performing kitchen surgery.

I’m not here to give you some aesthetic, Pinterest-perfect tutorial that looks great in a time-lapse but fails in real life. Instead, I want to show you how to build a low-friction system that actually works when you’re tired and hungry on a Tuesday night. I’m going to walk you through the exact, unpolished steps I use to keep my produce fresh and my prep time minimal, focusing on actual efficiency rather than perfection. No fluff, no expensive gadgets—just the real way to get it done.

Table of Contents

Stop the Chaos Why You Need a System for How to Prep Vegetables

Stop the Chaos Why You Need a System for How to Prep Vegetables

The reason most of us fail at eating well isn’t a lack of willpower; it’s a lack of systems. We walk into the kitchen after a long day, see a pile of unwashed, whole produce on the counter, and immediately decide that takeout is the only logical option. That’s the friction I’m talking about. When you don’t have a plan, cooking feels like a massive, multi-step chore instead of just a quick assembly job.

By implementing a few efficient kitchen prep methods, you’re essentially buying yourself time and mental energy later in the week. Instead of facing a mountain of chopping on a Tuesday night, you’re just grabbing a container of pre-cut peppers and tossing them in a pan. It turns “I have nothing to eat” into “I can make this in ten minutes.”

Beyond just saving time, a solid routine is about reducing waste. If you learn the right way to handle your produce—from how to wash produce properly to which containers to use—you stop throwing money in the trash every time a bag of spinach turns into green slime in your crisper drawer. It’s about making your food work for you, not the other way around.

Ditch the Panic With Efficient Kitchen Prep Methods

Ditch the Panic With Efficient Kitchen Prep Methods.

The biggest mistake I see people make is trying to do everything at once. They buy a mountain of produce and then realize they don’t actually know how to wash produce properly or how to keep it from turning into a science experiment in the crisper drawer. If you want to master efficient kitchen prep methods, you have to stop thinking about it as a massive chore and start seeing it as a series of tiny, manageable wins.

First, let’s talk about your gear. You don’t need a professional knife set, but you do need to work on your basic knife skills for vegetables. If your blade is dull, you’re going to spend twenty minutes struggling with a bell pepper when it should take thirty seconds. Once you get the rhythm down, the process actually becomes kind of meditative.

Finally, don’t skip the post-prep phase. The real secret to keeping vegetables fresh longer is all in your vegetable storage tips. I’ve learned the hard way that throwing a pre-cut bag of chopped kale into a random container is a recipe for waste. Use airtight glass containers, and you’ll actually have food ready to go when you’re exhausted on a Tuesday night.

Mastering Knife Skills for Vegetables Without the Stress
Mastering Knife Skills for Vegetables Without the Stress

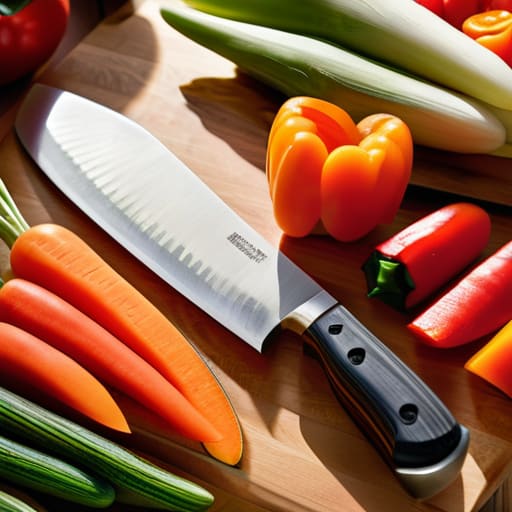
Look, I used to be terrified of my chef’s knife. I’d approach a bell pepper like it was a live bomb, which is exactly how you end up with uneven chunks and a frantic, messy cutting board. But here’s the thing: mastering knife skills for vegetables isn’t about being a Michelin-star pro; it’s about safety and consistency. If your carrots are all different sizes, they’ll cook at different rates, and you’ll end up with some mushy bits and some raw ones. That’s just more friction you don’t need.

Start by investing in a decent, sharp blade and—this is non-negotiable—a stable cutting board. If your board slides around, put a damp paper towel underneath it to lock it in place. When you’re practicing meal prep for beginners, focus on the “claw grip.” Curl your fingertips inward like a claw so your knuckles act as a guide for the blade. This keeps your fingertips away from the edge and lets you work much faster without the constant anxiety of a slip-up. Once you get the rhythm down, the whole process feels less like a chore and more like a mindless, satisfying system.

The Real Way to Wash Produce and Start Meal Prep for Beginners

Look, I used to think washing my veggies meant a quick rinse under the tap and calling it a day, but that’s a one-way ticket to premature wilting. If you want to actually master meal prep for beginners, you have to treat cleaning as the foundation. I like to use a large colander in the sink for a deep soak if things look particularly dusty or sandy, but the real trick is drying them thoroughly before they ever touch a container. If you pack damp greens into a Tupperware, you aren’t prepping; you’re just making a compost bin for next week.

Once they’re dry, it’s all about the transition to storage. This is where most people fail. Instead of just tossing everything in the crisper drawer and hoping for the best, I use a few specific vegetable storage tips to keep things from turning into a slimy mess. For example, wrapping herbs in a damp paper towel or putting leafy greens in containers with a dry paper towel layer works wonders for keeping vegetables fresh longer. It’s a small, extra step, but it’s the difference between a productive Sunday and a frustrated Monday morning.

Proven Vegetable Storage Tips for Keeping Vegetables Fresh Longer

Once you’ve mastered your knife skills for vegetables and finished the actual chopping, the job isn’t done. The biggest mistake I see people make—and I’ve definitely been guilty of this—is just tossing everything into random Tupperware and hoping for the best. If you want to actually succeed with meal prep for beginners, you have to treat storage like a science. Moisture is usually the enemy here. If you pack your chopped peppers or cucumbers into a container while they’re still damp from how to wash produce, they’re going to turn into a slimy mess by Tuesday.

My go-to system for keeping vegetables fresh longer is all about controlled environments. For leafy greens, I use the paper towel trick: tuck a dry paper towel inside the container to soak up excess humidity. For harder veggies like carrots or radishes, try storing them submerged in a jar of water in the fridge; it keeps them incredibly crisp. These little vegetable storage tips might seem extra, but they are the difference between a seamless week of eating and having to scrape wilted, sad scraps into the trash.

My Low-Friction Cheat Sheet for Prep Success

  • Group your prep by “use case” rather than just vegetable type. Instead of chopping a whole bag of carrots, chop everything you need for a specific stir-fry or sheet pan meal at once so you can just grab a container and go.
  • Invest in decent-sized glass containers, not just random Tupperware. Glass stays cleaner, doesn’t hold onto onion smells, and lets you see exactly what you have in the fridge so nothing gets lost in the “vegetable graveyard” at the back of the shelf.
  • Don’t feel obligated to chop everything into tiny pieces. If you’re making a roasted veggie medley, keep the chunks larger. It saves you time upfront and actually improves the texture once they hit the oven.
  • Use paper towels like they’re your best friend. When storing prepped greens or chopped veggies, tuck a dry paper towel into the container to absorb excess moisture—it’s the easiest way to stop your hard work from turning into mush by Tuesday.
  • Keep a “prep station” mindset. Clear your workspace completely before you start, get all your tools out, and keep a damp cloth nearby. If you try to prep in a cluttered kitchen, you’ll end up feeling overwhelmed before you even pick up a knife.

The TL;DR on Keeping Your Kitchen (and Sanity) Intact

Stop overcomplicating the process; you don’t need a professional chef’s setup, just a consistent routine of washing, chopping, and storing as soon as you get home.

Invest a little time in your knife skills and storage systems now so you aren’t wasting money on wilted produce or fighting with a dull blade when you’re actually hungry.

Treat vegetable prep as a low-stakes system rather than a weekly chore to prevent that mid-week “what am I even eating?” panic.

The Bottom Line

Look, at the end of the day, prepping your veggies isn’t about becoming a professional chef or spending your entire Sunday hovering over a cutting board. It’s about the small, repetitive wins—knowing your knife is sharp, having your produce washed and ready, and actually understanding how to store a bunch of kale so it doesn’t turn into a science experiment in your crisper drawer. When you stop treating every meal like a brand-new logistical hurdle and start relying on these simple, repeatable systems, you reclaim so much mental energy. It’s the difference between staring blankly at a fridge at 7:00 PM and having a ready-to-go toolkit that makes cooking feel like a breeze rather than a chore.

My biggest piece of advice? Don’t feel like you have to implement this entire system overnight. If you only have the energy to chop one onion or wash one bag of spinach this week, that is still a win. Adulthood is heavy enough as it is; your kitchen routine should be the thing that lightens the load, not adds to the chaos. Start small, find the rhythm that works for your specific lifestyle, and remember that consistency beats perfection every single time. You’ve got this.

Frequently Asked Questions

Do I really need to wash everything before I chop it, or will that just make my prepped veggies mushy in the fridge?

Honestly, it’s a valid fear because moisture is the enemy of freshness. Here’s my system: wash everything before you chop, but the secret is in the drying. If you put damp, chopped veggies in a container, they’ll turn into mush by Tuesday. Use a salad spinner or pat them bone-dry with paper towels first. Once they’re dry and prepped, toss them in airtight containers with a little extra paper towel to soak up any stray moisture.

How long can I actually keep chopped onions or garlic in a container before they start smelling like a crime scene?

Look, I get it—the smell of old onion in a fridge is a literal nightmare. If you’ve already chopped them, aim to use them within 3 to 5 days. Garlic is a bit more resilient, but I wouldn’t push it past a week. Pro tip: use airtight glass containers instead of plastic. Plastic is porous and will absorb that scent forever, making your entire fridge smell like a crime scene even after the onions are gone.

Is it worth buying those pre-cut containers, or should I just stick to basic Tupperware to save money?

Honestly? Stick to the basic Tupperware. Those specialized pre-cut containers are usually just a way to charge you a premium for a specific shape, and they take up way more space in your cabinet. If you’ve already mastered your prep and storage systems, a standard set of airtight glass or BPA-free plastic containers works just fine. Save your money for better produce—the quality of the veggies matters way more than the shape of the box.

Tips for productivity working from home.

The Real Secret to Being Productive While Working From Home

I used to think that achieving peak productivity working from home required a $500 ergonomic chair, a color-coded digital planner, and a strictly curated “focus” playlist. Honestly? That’s just expensive gatekeeping. For a long time, I was caught in this cycle of buying every productivity gadget on TikTok, only to find myself sitting in a perfectly organized office feeling completely overwhelmed and behind schedule. I realized that all those aesthetic setups were just distractions from the actual problem: I didn’t have any real systems, just a lot of pretty clutter.

I’m done with the polished, unrealistic “day in the life” content that makes you feel like a failure if you aren’t grinding from a sun-drenched marble desk. In this guide, I’m stripping everything back to the unpolished, functional basics that actually work when your laundry is staring you down and your Wi-Fi decides to glitch. I’m going to share the low-maintenance habits and small, repeatable systems I use as a freelancer to keep my head above water. No fluff, no expensive gear—just real ways to reclaim your time and actually get stuff done.

Table of Contents

Stop the Chaos Real Systems for Productivity Working From Home

Stop the Chaos Real Systems for Productivity Working From Home office.

First off, we need to talk about the physical space. If you’re working from your bed or a couch that was meant for Netflix marathons, you’re fighting a losing battle. You don’t need a high-end corporate suite, but you do need a dedicated zone that signals to your brain, “Hey, we are actually working now.” Investing even a little bit of effort into an ergonomic home office setup—even if it’s just a decent chair and a laptop riser—changes the game. When your body isn’t constantly adjusting to find comfort, your brain can actually focus on the task at hand instead of your aching lower back.

Beyond the furniture, the real killer is the “always-on” trap. Without a commute to act as a buffer, the lines between your personal life and your professional life get incredibly blurry. I’ve found that establishing work-life boundaries is the only way to prevent burnout from creeping in by 3 PM. This means having a hard stop time where the laptop closes and stays closed. It’s not about being lazy; it’s about creating a system where you can actually rest without feeling guilty about the emails you aren’t answering.

Mastering Your Daily Routine for Remote Workers Without the Burnout

Mastering Your Daily Routine for Remote Workers Without the Burnout

The biggest mistake I see people making is treating their “home office” like a place where they just happen to sit with a laptop. If you don’t have a structured daily routine for remote workers, your brain never actually gets the signal that it’s time to focus or, more importantly, time to shut down. I used to spend my entire evening feeling “sort of” working, which is the fastest way to hit a wall. You have to create a ritual—even if it’s just making a specific cup of coffee or opening a window—to signal the start of your shift.

Once you’re in the zone, the real battle is minimizing home distractions. It’s not just about the laundry staring at you from across the room; it’s about the mental clutter of being in your “safe space” while trying to meet a deadline. I’ve found that establishing work-life boundaries through physical cues, like closing my laptop and putting it in a drawer at 5:00 PM, is the only way to prevent that creeping burnout. If you don’t decide when work ends, it will simply bleed into your entire life.

Practical Remote Work Time Management Techniques That Actually Stick

Practical Remote Work Time Management Techniques That Actually Stick

Look, we’ve all been there: you sit down at 9:00 AM with every intention of being a powerhouse, and suddenly it’s 2:00 PM, you’ve spent an hour scrolling through a vintage tech forum, and your laundry is staring you down from the corner. The problem isn’t your willpower; it’s that you haven’t built a framework to protect your focus. One of my favorite remote work time management techniques is the “Time Blocking” method, but with a realistic twist. Instead of scheduling every single minute like a robot, I block out specific chunks for deep work and, more importantly, dedicated windows for life admin. If you know you have a fifteen-minute slot at 11:00 AM to throw in a load of laundry, you won’t feel that nagging guilt while you’re trying to write a strategy deck.

Another huge piece of the puzzle is minimizing home distractions by creating physical and digital cues. I’m a big believer in the “out of sight, out of mind” rule. When I’m in deep-work mode, my phone goes into a drawer—not just face down on the desk, but actually out of my line of sight. It sounds simple, but removing that visual trigger stops the reflexive reach for a dopamine hit every time a notification pings. It’s about creating a frictionless environment where the easiest thing to do is the work you actually need to finish.

Minimizing Home Distractions and Building an Ergonomic Home Office Setup

Let’s be real: your couch is a trap. I spent my first three months freelancing trying to work from my sofa, only to realize I was basically paying for a chiropractor with my own spinal health. If you want to actually focus, you need an ergonomic home office setup that doesn’t feel like a punishment. It doesn’t have to be a fancy, expensive studio; even a dedicated corner with a chair that actually supports your lower back and a monitor at eye level makes a massive difference. If your neck is constantly aching, your brain is going to spend more energy managing pain than actually hitting your deadlines.

Beyond the physical stuff, you have to get aggressive about minimizing home distractions. It’s not just about the laundry pile staring you down; it’s about the mental noise. I started using a physical “do not disturb” sign on my door—even when I live alone—just to signal to my brain that the workday has officially begun. Creating that physical and mental separation is one of the most effective ways of establishing work-life boundaries so you aren’t accidentally checking Slack while you’re trying to eat dinner.

Hard Boundaries Establishing Work Life Boundaries and Digital Wellness

The biggest lie we’re told about remote work is that it offers “freedom,” when in reality, it often just means your job has moved into your living room and refused to leave. Without a physical commute to act as a buffer, the lines between “office time” and “me time” get incredibly blurry. I’ve spent plenty of nights answering Slack messages at 9 PM simply because my laptop was sitting right there on the coffee table. To stop this, you have to be intentional about establishing work-life boundaries that aren’t just suggestions. This means having a hard stop time where the laptop lid shuts and stays shut, and more importantly, a mental ritual to signal that the workday is officially over.

It’s also about protecting your brain from the constant ping of notifications. True digital wellness for remote employees isn’t about deleting every app; it’s about reclaiming your focus. I’ve started using “Do Not Disturb” modes religiously after 6 PM to prevent that low-grade anxiety of feeling like you should be checking something. If you don’t set these guardrails now, you’ll eventually find yourself working more hours for less actual output.

Small Tweaks to Stop the Friction and Actually Finish Your To-Do List

  • Stop relying on your brain to remember everything. I used to think I could just “keep it all in my head,” but that’s a recipe for a 2:00 AM anxiety spiral. Use a single, low-stakes digital tool—like Notion or even just a basic Notes app—to dump every single task the second it pops up. If it’s not written down, it doesn’t exist.
  • Batch your “life admin” tasks so they don’t bleed into your deep work hours. I’ve learned that if I try to answer a quick personal text or check a delivery status in the middle of a project, it takes me twenty minutes to get my brain back in the zone. Set specific windows—maybe right after lunch or at 4:00 PM—to handle the non-work stuff all at once.
  • Use the “Two-Minute Rule” for the little things that clutter your mental space. If a task takes less than two minutes—like replying to a quick Slack message or filing a digital receipt—just do it immediately. It prevents those tiny, annoying micro-tasks from piling up into a mountain of “to-dos” that feel overwhelming by Friday.
  • Prep your “startup kit” the night before. Just like I meal prep my lunches to save my weekday self from decision fatigue, I set up my digital workspace before I close my laptop for the evening. Close all the random tabs from yesterday, open the one doc you actually need to work on first thing, and clear your physical desk. It makes hitting “start” the next morning feel way less heavy.
  • Audit your energy, not just your time. We’ve all been told to manage our calendars, but honestly, managing your energy is more effective. If you know you hit a slump around 3:00 PM, don’t schedule your most complex, brain-heavy strategy work for then. Save the mindless admin or easy emails for your low-energy windows so you aren’t fighting your own biology all day.

The Bottom Line: Systems Over Stress

Stop chasing perfection and start building repeatable habits; a messy but functional system beats a “perfect” routine you can’t actually maintain.

Your physical environment and your digital boundaries are your best defense against burnout—protect your space so you can actually switch off when the day is done.

Productivity isn’t about working more hours; it’s about creating enough friction-less structure that you can get your work done and get back to your actual life.

The Bottom Line

Look, I’m not telling you that implementing these systems will magically turn you into a productivity robot overnight. There’s going to be days where your Wi-Fi cuts out, your laundry pile becomes a mountain, or you just plain lose focus. But the point of setting up these boundaries, fixing your ergonomics, and mastering your routine isn’t about achieving perfection; it’s about reducing the friction of your daily grind. By building these small, repeatable habits, you’re moving away from that constant state of “putting out fires” and moving toward a setup where you actually have control over your time and your space.

At the end of the day, your home shouldn’t feel like a secondary office that you’re never truly finished with. It should be your sanctuary. Don’t feel like you have to overhaul your entire life by Monday morning—just pick one system, test it out, and see if it makes your life a little bit easier. Adulthood is messy, and remote work is even messier, but you don’t have to let the chaos run the show. Build the systems that serve you, and stop letting your workspace serve your stress. You’ve got this.

Frequently Asked Questions

How do I actually stay focused when my laundry or the dishes are staring me down from across the room?

The “visual noise” of chores is real, and it’s a total focus killer. My go-to is the “Five-Minute Reset” before I sit down to work. I don’t deep clean; I just clear the immediate line of sight. If the dishes are still staring at me, I use a physical barrier—like a room divider or even just turning my desk away from the kitchen. If you can’t hide it, use noise-canceling headphones to signal to your brain that the “work zone” is closed to domestic chaos.

What do I do if my "work-life boundaries" keep failing because my boss keeps Slacking me at 8 PM?

This is the classic “boundary creep” and it’s exhausting. If your boss is Slacking you at 8 PM, you have to stop rewarding that behavior with instant replies. If you answer, you’re teaching them that you’re available. Try a soft reset: “Hey, I’m offline for the evening, but I’ll jump on this first thing tomorrow.” Set your Slack status to “Away” and actually turn off notifications. You aren’t being rude; you’re just maintaining your system.

I’ve tried every planner out there, but how do I build a system that doesn't feel like another chore on my to-do list?

The problem isn’t you; it’s that you’re treating your planner like a second job. If a system feels like a chore, it’s because it’s too heavy. Stop trying to track every single minute of your day. Instead, try the “Rule of Three”: pick three non-negotiable wins for the day and ignore the rest. Keep your tracking minimal—if it takes more than five minutes to update, ditch it. Build for your actual life, not some idealized version of it.

Learn how to make a stir fry.

The Art of the Improvisational Stir-fry

Can we please stop pretending that you need a professional-grade carbon steel wok and a literal flame ritual just to get a decent meal on the table? I see these recipe blogs acting like you need twenty different specialized sauces and a degree in culinary arts just to figure out how to make a stir fry that doesn’t end up as a soggy, sad mess in a bowl. Honestly, the gatekeeping around “authentic” techniques is exhausting, especially when you’re just trying to eat something nutritious after a ten-hour workday without losing your mind.

I’m not here to give you a lecture on high-heat physics or sell you a $200 pan you’ll never use. Instead, I’m giving you the actual, unpolished system I use to get dinner done in under twenty minutes using whatever is currently wilting in my crisper drawer. I’ll show you the exact order of operations to keep your veggies crisp and your protein juicy, stripping away the fluff so you can master how to make a stir fry that actually works for your life.

Table of Contents

Understanding How to Make a Stir Fry

Understanding How to Make a Stir Fry.

Before you even touch a burner, you need to understand that stir frying isn’t just “fast cooking”—it’s about managing heat and timing so nothing turns into a soggy mess. The whole point is to achieve that slightly charred, crisp-tender texture that makes the dish feel professional. To get there, you have to master high heat cooking methods; if your pan isn’t screaming hot, your veggies will just steam in their own juices, and nobody wants a sad, grey pile of broccoli.

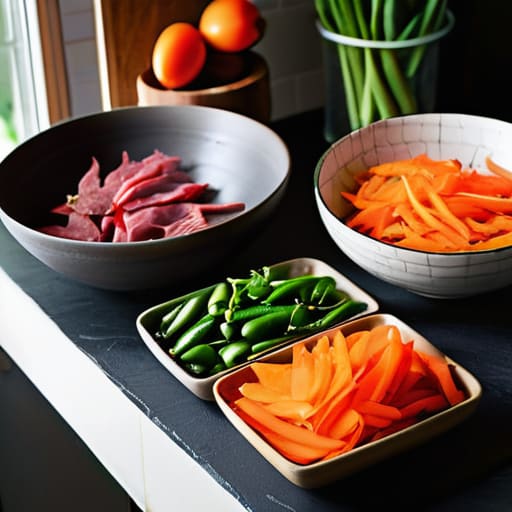
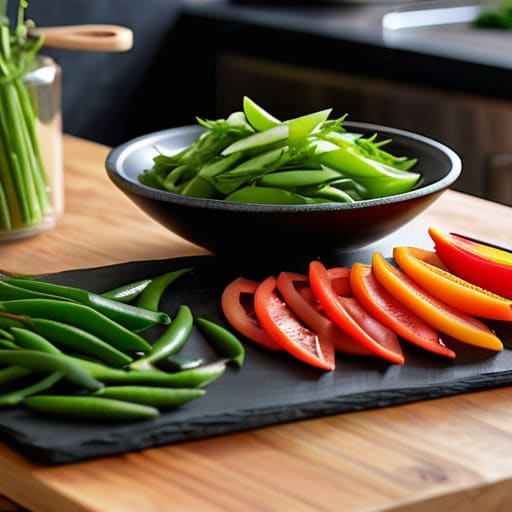
The real secret, though, is that 90% of the work happens before the heat is even on. I’m a huge believer in extreme prep. Because everything moves so fast once the oil hits the pan, you need your vegetable prep for stir fry to be completely finished—chopped, measured, and organized in bowls next to the stove. You also can’t forget the aromatics. Getting your garlic, ginger, and scallions ready to go means you won’t be frantically peeling things while your protein is literally burning in the pan. It’s all about building a system that keeps up with the flame.

Key Things to Know

Key Things to Know: Stir Fry Prep

Before you even turn on the stove, there are two things that will either make this a success or a total kitchen disaster: your prep and your heat. First, let’s talk about vegetable prep for stir fry. You cannot be chopping carrots while your garlic is already burning in the pan. Everything needs to be sliced, measured, and sitting in bowls next to you. If you’re working with protein, I highly recommend looking into the velveting meat technique. It sounds fancy, but it’s basically just a quick marinade with cornstarch that keeps your chicken or beef from turning into rubbery bits once it hits the pan.

The second thing is the temperature. This isn’t a low-and-slow braise; you need to embrace high heat cooking methods. If your pan isn’t screaming hot, you’re just steaming your food, which leads to that sad, soggy texture we’re all trying to avoid. Also, don’t forget your essential stir fry aromatics. A little bit of fresh ginger and smashed garlic goes a long way in making your kitchen smell like a legitimate takeout spot instead of just a random Tuesday night.

Practical Tips and Steps

Practical Tips and Steps for stir fry.

The biggest mistake I see people make is trying to cook while they’re actually standing at the stove. If you wait until the oil is smoking to start chopping, you’ve already lost. You need to nail your vegetable prep for stir fry before you even turn on the burner. Get everything sliced, diced, and organized into little bowls. I’m talking about your proteins, your greens, and those essential stir fry aromatics like garlic and ginger. Once that heat hits the pan, things move incredibly fast, and you won’t have time to hunt for a knife.

When you’re ready to actually cook, remember that this is all about high heat cooking methods. You want that sizzle the second the food hits the pan. If you’re working with chicken or beef and want that restaurant-quality texture, look into the velveting meat technique—it’s a total game-changer for keeping things tender. Just toss your prepped ingredients in, hit them with your sauce, and keep everything moving. It’s not about being a chef; it’s just about having a solid workflow so you aren’t scrambling mid-meal.

Common Mistakes to Avoid

The biggest mistake I see people make is treating a stir fry like a slow-simmered stew. If you crowd your pan with too much stuff at once, the temperature drops, and instead of a crisp sear, you end up with a sad, watery mess. You really need to embrace high heat cooking methods to get that signature char. If you aren’t working in small batches, you’re basically just boiling your vegetables in their own juices, and nobody wants that.

Another thing that trips people up is the “prep panic.” If you’re chopping garlic while your oil is already smoking, you’ve already lost the battle. You need to have all your vegetable prep for stir fry finished and your sauces pre-mixed before you even turn on the stove. I also see a lot of people skipping the aromatics or using low-quality oils that burn too fast. Don’t skimp on the ginger or garlic; those essential stir fry aromatics are what actually make the dish taste like restaurant quality rather than just a pile of warm veggies.

Final Thoughts

At the end of the day, don’t let the fear of a messy kitchen or a ruined meal stop you from trying this. Cooking isn’t about achieving Michelin-star perfection every single night; it’s about having a reliable system that feeds you when you’re tired. Whether you’re mastering high heat cooking methods or just throwing together whatever is left in your crisper drawer, the goal is to make dinner feel less like a chore and more like a win.

If you find yourself getting overwhelmed, just come back to the basics. Focus on your vegetable prep for stir fry ahead of time so you aren’t scrambling while the pan is smoking, and keep your pantry stocked with the essentials. Once you get the rhythm of the heat and the timing down, it becomes muscle memory. You don’t need a fancy culinary degree to make something delicious—you just need a hot pan and a bit of confidence. You’ve got this.

My Non-Negotiable Rules for Stir Fry Success

  • Prep everything before you even touch the stove. Seriously. Once that pan gets hot, you won’t have time to chop a carrot or find the soy sauce while your garlic is burning. Have every single ingredient in little bowls ready to go.
  • Don’t overcrowd the pan. If you dump a mountain of veggies in at once, the temperature drops, they start steaming instead of searing, and you end up with a soggy mess instead of that nice char we’re actually looking for. Work in batches if you have to.
  • Cut everything into uniform, bite-sized pieces. It’s not just about aesthetics; it’s about physics. If your broccoli florets are huge and your snap peas are tiny, one will be raw and the other will be mush by the time you’re done.
  • Dry your proteins and veggies. Excess moisture is the enemy of a good stir fry. If your shrimp or sliced chicken is still dripping with water, it’s going to boil in the pan. Pat them dry with a paper towel first to ensure you get that golden-brown crust.
  • Master the heat. You want your pan screaming hot. If you’re using a standard non-stick pan, keep a close eye on it, but if you’ve got a wok or cast iron, let it get to that point where it’s almost smoking. That high heat is what creates that specific “restaurant” flavor.

The Quick Cheat Sheet

Prep everything before you touch the stove—once that pan gets hot, there’s no turning back, so have your veggies chopped and your sauce mixed.

Don’t crowd the pan; if you dump too much in at once, you’ll end up steaming a soggy mess instead of getting those crispy, delicious edges.

High heat is your best friend, but keep things moving constantly so nothing burns while you’re trying to manage the different textures.

The Bottom Line

At the end of the day, a great stir fry isn’t about following a rigid, complicated recipe from a cookbook; it’s about mastering the rhythm of the pan. Just remember to prep everything before you even turn on the heat, keep your sauce components ready to go, and don’t be afraid to crank up the temperature to get that essential sear. If you manage your ingredients and your heat, you’ve already won half the battle. It’s really just a system of preparation that prevents the mid-cook panic and ensures you aren’t staring at a pile of raw broccoli while your garlic burns in the pan.

I know that sometimes the idea of “cooking from scratch” feels like just another chore on an already overflowing to-do list, but once you have this system down, it becomes a massive time-saver rather than a drain. Stop looking at dinner as a high-stakes performance and start seeing it as a way to fuel yourself without the burnout. You don’t need to be a professional chef to make something that tastes incredible and actually nourishes you. Just trust your instincts, keep your tools handy, and remember that even a slightly charred veggie is better than a takeout bag that leaves you feeling sluggish. You’ve got this.

Frequently Asked Questions

Can I use a regular non-stick skillet if I don't own a wok?

Look, if you don’t own a wok, don’t panic. You can absolutely use a regular non-stick skillet. Just keep in mind that a wok is designed to distribute intense heat quickly, so with a flat pan, you’ll need to work in smaller batches. If you crowd the skillet with too many veggies at once, they’ll steam and get mushy instead of getting that nice sear. Small batches = better texture. You’ve got this.

How do I stop my veggies from turning into a mushy mess?

The secret is all about timing and heat management. Stop throwing everything into the pan at once. Hard veggies like carrots or broccoli need a head start, while leafy greens or peppers only need a minute. Also, don’t crowd the pan—if you pile it too high, the veggies steam in their own moisture instead of searing. Keep the heat high, work in batches if you have to, and pull them off the heat while they still have a bit of a crunch.

What’s the best way to prep everything ahead of time so I'm not scrambling while the pan is smoking hot?

The secret is “mise en place”—which is just a fancy chef way of saying “get your life together before you turn on the stove.” Seriously, don’t even touch the heat until every single thing is in its own little bowl. Chop your veggies, slice your protein, and whisk your sauce in a separate container first. If you’re chopping while the oil is smoking, you’ve already lost the battle. Prep everything, then just execute.

Tips on how to free up phone storage.

Ways to Gain Phone Storage Without Losing Your Photos

I was halfway through filming a quick recipe tutorial for my stories when my screen froze, flashing that dreaded, soul-crushing “Storage Almost Full” notification. It’s that specific brand of digital panic where you realize your entire life is being held hostage by a few thousand blurry screenshots and cached files you haven’t looked at since 2021. Honestly, most of the advice you find online about how to free up phone storage is either incredibly condescending or suggests buying a new device like it’s the only solution. You don’t need a $1,000 upgrade; you just need to stop the digital clutter from suffocating your hardware.

I’m not here to give you a lecture on cloud computing or suggest some expensive subscription service you’ll forget to cancel next month. My goal is to give you the actual, unpolished steps to reclaiming your space using the same systems I use to keep my own freelance life from spiraling. We’re going to dive into the specific, manual ways to nuke the junk and optimize your settings so your phone actually works for you instead of constantly begging for more room.

Table of Contents

Stop the Digital Panic How to Free Up Phone Storage Now

Stop the Digital Panic How to Free Up Phone Storage Now

First things first: stop scrolling through your gallery looking for that one specific meme and just start with the low-hanging fruit. Open your app list and be ruthless. We all have that one fitness app or random photo editor we downloaded for a single project three months ago and never touched again. Go ahead and delete unused apps—honestly, if you haven’t opened it since the last season changed, it’s just taking up precious real estate.

Once you’ve cleared the clutter, we need to talk about the invisible weight dragging your phone down. Apps like TikTok, Instagram, and Spotify are massive data hogs because they constantly hoard temporary files. You don’t need to uninstall them, but you absolutely must clear cache and data periodically to stop them from bloating your system. It’s like cleaning out the crumbs from your keyboard; it doesn’t change the device, it just makes it breathe again. If you’re still seeing that “Storage Almost Full” notification, it’s time to look at your media. Moving your heavy video files to a drive or a cloud service is the fastest way to optimize mobile memory without losing your memories.

The Great Purge Why You Need to Delete Unused Apps

The Great Purge Why You Need to Delete Unused Apps

Let’s be real: we all have that one folder on our home screen filled with apps we downloaded for a single specific purpose three months ago and haven’t touched since. Maybe it was a niche photo editor for a one-time project or a random workout app you used for exactly four days in January. These “ghost apps” are absolute space hogs, and they aren’t just sitting there looking pretty—they are constantly running background processes and eating into your system’s resources. If you want to optimize mobile memory without doing a deep dive into your settings, you have to start by being ruthless.

I know the feeling of wanting to keep them “just in case,” but that’s how you end up with a device that feels sluggish and bloated. Instead of hoarding digital clutter, make it a habit to delete unused apps that haven’t been opened in over a month. If you’re really struggling to let go, look into the “offload” feature on your iPhone; it keeps the data but nukes the actual app size. It’s a small, low-effort system that pays massive dividends in how much breathing room your phone actually has.

Stop Hoarding Clutter How to Remove Duplicate Photos Fast

Stop Hoarding Clutter How to Remove Duplicate Photos Fast

We’ve all been there: you go to take a quick screenshot or a photo of a receipt, and suddenly that dreaded “Storage Almost Full” notification pops up. Most of the time, it’s not because you’re actually out of space, but because your camera roll has become a digital graveyard of near-identical shots. I used to spend way too much time scrolling through fifty slightly different versions of the same sunset, thinking I might actually need all of them. Spoiler alert: you don’t.

The good news is that you don’t have to manually hunt down every single double. If you’re on an iPhone, there’s actually a built-in tool in your Albums folder specifically designed to remove duplicate photos with a single tap. If you’re on Android, Google Photos is your best friend here. Instead of playing whack-a-mole with individual files, use these built-in features to batch-process the clutter. It’s the fastest way to optimize mobile memory without losing the memories that actually matter. Just do a quick scan, merge the duplicates, and get that precious space back.

Unpolished Efficiency Clear Cache and Data Without the Stress

If you’ve ever noticed your phone getting weirdly sluggish or apps crashing right when you need them, it’s probably not a hardware issue—it’s just digital sludge. Over time, apps collect massive amounts of temporary files that sit there eating up space like uninvited guests. Instead of just ignoring it, you need to clear cache and data on your most-used culprits. I’m talking about TikTok, Instagram, and Spotify; these are the heavy hitters that hoard gigabytes of junk without you even realizing it.

Don’t worry, you aren’t going to lose your entire account or your precious playlists. Most of the time, you’re just wiping the temporary “memory” that the app uses to load things faster, which ironically makes your phone feel brand new again. If you’re still feeling the squeeze, it might be time to offload large files or move your heavy media to a drive. It’s a quick, five-minute maintenance task that keeps your device from feeling like a brick. Think of it as a digital deep clean—minimal effort, maximum payoff.

Systemic Freedom Manage Cloud Storage and Offload Large Files

Here’s the thing about cloud storage: it feels infinite until you suddenly hit that dreaded “Storage Almost Full” notification right when you’re trying to film something important. We tend to treat the cloud like a digital junk drawer, tossing everything from blurry screenshots to 4K videos into iCloud or Google Drive without a second thought. To actually manage cloud storage effectively, you need to stop treating it as a bottomless pit. I usually spend twenty minutes once a month auditing my shared folders; if I haven’t opened a file in six months, it’s getting moved to a physical hard drive or just deleted entirely.

If you aren’t ready to commit to a full deletion, the real pro move is to offload large files to an external drive or a secondary service. I keep a small, portable SSD in my bag specifically for my high-res creative projects. This way, I can optimize mobile memory for the apps I actually use daily without constantly fighting my device for space. It’s about creating a hierarchy: keep the essentials on the device, the “maybe” files in the cloud, and the heavy hitters on external hardware.

The Quick-Win Checklist: Small Moves for Immediate Relief

  • Audit your messaging apps. We all have that one group chat where someone is spamming 4K videos and memes, and suddenly your storage is tanking. Go into your WhatsApp or iMessage settings and turn off “Save to Camera Roll”—it’s a total game changer for stopping the accidental hoarding.
  • Tackle the “hidden” heavy hitters: your downloads. Check your Spotify, Netflix, or YouTube apps for offline content you haven’t touched in months. Those downloaded playlists and movies are massive space hogs that are just sitting there collecting digital dust.
  • Clean out your “Recently Deleted” folder. It sounds silly, but when you delete a bunch of photos, they aren’t actually gone; they’re just sitting in a purgatory folder for 30 days. If you actually want that space back right now, you have to go in and empty that trash manually.
  • Check your browser cache. If you’re a Chrome or Safari power user, your browser is likely holding onto gigabytes of temporary files from every site you’ve visited. A quick clear-out of your browsing data can feel like giving your phone a fresh breath of air.
  • Review your “Other” or “System Data” storage. If you see a massive chunk of space taken up by things you can’t identify, it’s usually old update files or cached data from apps you’ve already deleted. Sometimes a simple restart forces the OS to re-index and reclaim that wasted space.

The TL;DR on a Leaner Phone

Stop treating your storage like a junk drawer; if you haven’t opened an app or looked at a photo in six months, it’s just digital noise that needs to go.

Automate the boring stuff by using cloud offloading and scheduled cache clears so you aren’t manually fighting your settings every single week.

Think in systems, not one-off fixes—set a monthly “digital declutter” ritual to keep the clutter from creeping back in and causing that inevitable storage panic.

The Digital Reset

At the end of the day, cleaning out your phone isn’t just about making room for that new app or a few more high-res videos; it’s about removing the invisible friction that makes your tech feel like a burden instead of a tool. We went through the heavy lifting—purging those ghost apps you haven’t touched since 2022, nuking the duplicate photo clutter, and finally getting a handle on your cache and cloud settings. It might feel like a chore in the moment, but once you’ve implemented these small, repeatable systems, you won’t have to deal with that frantic “Storage Almost Full” notification right when you’re trying to capture a memory. Digital maintenance is just part of the upkeep, and honestly, it’s much easier to do in small bursts than to wait for a total system meltdown.

I know the idea of digging through your files can feel overwhelming, especially when it feels like your entire life is tucked away in that little glass rectangle. But remember, your phone should serve you, not the other way around. Don’t let a cluttered device dictate your stress levels or stop you from being present. Once you clear out the digital noise, you’re left with a device that actually works the way it’s supposed to. Take it one step at a time, keep your systems tight, and stop letting your storage hold your daily life hostage. You’ve got this.

Frequently Asked Questions

If I delete my app data to clear cache, will I lose all my saved login info and settings?

That’s a valid fear—the last thing I want is to spend my Sunday re-typing passwords. Here’s the deal: clearing your cache is safe; it just wipes out temporary junk files. But if you hit “Clear Data” (on Android) or delete and reinstall an app, you’re basically factory resetting it. You’ll likely be logged out and lose local settings. My rule of thumb? Stick to clearing cache first. If you must go deeper, make sure your logins are synced to a password manager first.

Is it actually safe to offload my photos to the cloud, or am I just setting myself up for a headache later?

Honestly, it’s a bit of both. If you just dump everything into a random free service and forget your password, yeah, you’re asking for a headache. But if you use a reliable system—like iCloud or Google Photos with Two-Factor Authentication turned on—it’s a lifesaver. My rule of thumb? Never let the cloud be your only home. Keep your absolute essentials on a physical hard drive or a second backup. Don’t put all your digital eggs in one basket.

How do I figure out which specific files are actually eating up my space without scrolling through every single folder?

Stop scrolling through your folders like it’s 2012; that’s a massive waste of energy. Instead, let your phone do the heavy lifting. On iPhone, go to Settings > General > iPhone Storage—it literally breaks down exactly what’s hogging your space. If you’re on Android, hit Settings > Storage. Both will show you a list of the biggest offenders, from massive video files to bloated system data, so you can target the real culprits immediately.

Learn how to make wall art.

Create Store-bought Quality Wall Art on Your Own

I was staring at a blank, white wall in my apartment last Tuesday, feeling that familiar surge of “adulting” anxiety because my space felt sterile and soulless. I scrolled through Pinterest for hours, convinced that I needed a massive budget and a degree in fine arts just to figure out how to make wall art that didn’t look like a middle school project. But here’s the truth: you don’t need a studio or a curated collection of expensive oils to fix this. Most of the “aesthetic” decor you see online is just cleverly packaged simplicity that you can replicate with things you probably already have in your junk drawer or at a local thrift store.

I’m tired of the gatekeeping that makes DIY feel like a high-stakes performance. In this guide, I’m breaking down my personal, low-friction system for creating pieces that actually look intentional and professional. I’ll show you how to skip the expensive supplies and focus on effective composition instead. We’re going to walk through a few specific, repeatable methods—from textured minimalism to curated collage—so you can finally stop staring at that empty wall and start building a home that actually feels like yours.

Table of Contents

Guide Overview

Total Time: 3-5 hours
Estimated Cost: $30-60
Difficulty: Beginner

Tools & Supplies

  • Paintbrushes (various sizes for application)
  • Painter's tape (for creating clean geometric lines)
  • Sandpaper (to smooth surface before starting)
  • Canvas or wooden panel (1 piece)
  • Acrylic paint (set of multiple colors)
  • Gesso or primer (1 small jar)
  • Water container (1 jar for cleaning brushes)

Step-by-Step Instructions

  • 1. First, you need to decide on a vibe so you don’t end up with a random pile of junk. Don’t go to a store and buy everything in sight; instead, scroll through Pinterest or your saved Instagram posts to find a recurring color palette or texture. I usually look for a common thread—like “minimalist line art” or “earthy textures”—so the final piece actually feels like it belongs in your space rather than looking like a random craft project.
  • 2. Next, gather your supplies, but let’s keep it realistic. You don’t need a professional studio; you just need the basics like canvas, heavy-weight paper, or even some thrifted wooden frames from my favorite secondhand shop. I always make sure to have a good quality set of brushes and some acrylic paint, because cheap, chalky paint is the fastest way to make your art look amateur.
  • 3. Before you touch the canvas, do a “dry run” on some scrap paper. This is where most people skip ahead and immediately regret it. I like to test my color combinations and brush strokes on a small piece of paper first to see if the colors turn into a muddy mess when mixed. It’s much easier to fix a mistake on a scrap piece of paper than on the actual piece you’re trying to hang.
  • 4. Now, start with your background. I’m a huge fan of the “layering” method, so I usually lay down broad, sweeping strokes of color to create a base. Don’t worry about being precise here; the goal is to create depth through texture. If you’re feeling bold, this is the stage where you can add some grit with a sponge or even a bit of sand mixed into the paint to give it that high-end, tactile feel.
  • 5. Once your base is dry (and yes, you actually have to wait for it to dry), it’s time for the details. This is where you add the lines, the shapes, or the focal points that define the piece. I tend to work from the largest shapes down to the smallest details, using a fine-liner brush for the final touches. Remember, less is usually more—you don’t need to fill every single inch of the canvas to make it look intentional.
  • 6. The final step is the most underrated: the framing and hanging. A beautiful piece of art can look totally lost if it’s just leaning against a wall. If you’ve gone for a minimalist look, a simple, thin black or wood frame works wonders. I always use a level tool (or a leveling app on my phone) to make sure it’s straight, because nothing kills the “calmly efficient” vibe of a room faster than crooked decor.

Understanding How to Make Wall Art

Understanding How to Make Wall Art easily.

Before you dive into the actual making part, you need to get out of your own head about what “art” even means. Most people freeze up because they think they need a studio or a degree, but I see this as just another way to customize your space. When I’m looking for budget friendly wall decor projects, I’m not looking for perfection; I’m looking for something that matches the vibe of my room without costing a month’s rent. Think of it as a way to fill empty space with something that actually feels like you.

The secret to not feeling overwhelmed is choosing a method that fits your current skill level. If you’re feeling chaotic, look into abstract canvas painting techniques—they are incredibly forgiving because there is no “wrong” way to move a brush or a palette knife. If you want something more tactile, you can experiment with different textured wall art methods using joint compound or even just thick acrylics. The goal isn’t to create a museum masterpiece; it’s to build a system where you can create something decent with minimal stress and zero gatekeeping.

Key Things to Know

Key Things to Know: budget decor projects.

Before you dive in, there are a few reality checks I wish someone had given me when I first started. First, don’t let the “Pinterest perfection” trap get in your head. Most of the professional-looking pieces you see online are actually just a series of controlled accidents. If you’re looking for budget friendly wall decor projects, focus more on the composition than the cost of the supplies. You don’t need a $200 set of professional oils; a decent acrylic set and some leftover scraps from a hardware store can work wonders if you know how to layer them.

Another thing to keep in mind is the environment where the art will live. If you’re working on modern home decor DIY for a high-traffic area like a hallway, think about durability. I personally love experimenting with textured wall art methods using joint compound or even modeling paste, but just make sure you seal your work so it doesn’t collect dust or peel over time. It’s all about setting up a system that lasts longer than the initial dopamine hit of finishing the project.

My Low-Friction Rules for Not Ruining Your Walls

  • Don’t buy the expensive stuff first. Before you drop $50 on a fancy canvas, test your layout with cheap printer paper or even just masking tape on the wall. It helps you see if the scale is actually right for the room so you don’t end up with a tiny piece of art drowning in a massive empty space.
  • Embrace the “ugly” phase. Whether you’re painting, sketching, or collage-making, there is always a middle point where it looks like a total mess. Don’t scrap the project just because it doesn’t look like a Pinterest board halfway through; just keep moving through the system.
  • Texture is your best friend. If a piece feels flat or boring, add some dimension. I love using heavy-body acrylics, or even just layering some scraps of fabric or textured paper. It makes even the simplest DIY look intentional and high-end rather than just “crafty.”
  • Limit your color palette. One mistake I made early on was trying to use every color in the box. It ends up looking chaotic and stressful. Pick three main tones—maybe two neutrals and one pop of color—and stick to them. It makes the final result look cohesive and much more professional.
  • Think about the lighting, not just the art. A beautiful piece of wall art is useless if it’s sitting in a dark corner or getting hit by a harsh glare from a window. Once you hang it, step back and check how the light hits it at different times of the day. If it looks washed out, you might need to adjust the placement.

The TL;DR on Making It Work

Stop waiting for “inspiration” to hit; just pick a medium you actually enjoy and start experimenting with the tools you already have.

Focus on the system, not perfection—it’s better to have a finished, slightly messy piece on your wall than a “perfect” idea stuck in your head.

Keep your setup modular and easy to clean up so that the friction of starting a new project doesn’t stop you from actually doing it.

Final Thoughts on Your New Space

Final Thoughts on Your New Space.

At the end of the day, making your own wall art isn’t about achieving some unattainable Pinterest perfection or having a studio full of expensive supplies. It’s really just about applying a few simple systems—choosing a cohesive color palette, picking a medium that doesn’t stress you out, and actually committing to the process without overthinking the outcome. Whether you ended up with a textured canvas or a collection of thrifted frames, the goal was to move from “empty wall anxiety” to a space that actually feels like yours. Just remember to keep your tools organized and your expectations low; it makes the whole experience much more manageable and fun.

I know that starting something creative can feel a little intimidating when you’re used to just buying something pre-made from a big-box store, but I promise the friction is worth it. There is a specific kind of quiet satisfaction that comes from looking at a blank wall and knowing you were the one who filled it. Don’t let the fear of a “mistake” stop you from picking up a brush or a glue gun. Your home is a living, breathing project, and it’s okay if your decor evolves as you do. Just start where you are with what you have, and let the rest fall into place.

Frequently Asked Questions

I don't have a huge budget—can I actually make this look good using stuff I already have around the house?

Absolutely. Honestly, the “expensive materials” crowd is mostly just gatekeeping. I’ve spent way too many weekends digging through thrift store bins and my own junk drawer to find gems. Grab some old magazines for collage, use leftover acrylics from a half-finished project, or even repurpose some scrap wood from that DIY shelf you never finished. The goal is the vibe, not the price tag. If it looks intentional, it looks high-end.

How do I actually hang these without turning my rental walls into a total disaster zone?

The rental struggle is real. I used to be terrified of losing my security deposit, but you don’t need to drill holes everywhere to make a space feel like home. Honestly? Just grab some Command strips—they’re a lifesaver. If you’re going heavier, look into monkey hooks; they leave tiny pinpricks rather than gaping wounds. Just remember to clean the wall with rubbing alcohol first so they actually stay up. Small systems, zero damage.

What’s the best way to figure out which pieces actually look good together so my room doesn't end up looking cluttered?

The trick is to stop treating your walls like a random scrapbooking project. I use the “anchor” method: pick one piece you actually love—maybe a vintage print or a textured canvas—and let that dictate the vibe. From there, stick to a consistent color palette or a shared medium. If everything feels too chaotic, try grouping them in a tight gallery wall. It creates a single visual unit instead of a dozen tiny distractions.

Successful career change at 50 pivot.

Starting Over at 50: It’s Never Too Late for a Career Pivot

I’m so tired of seeing those glossy, “follow your passion” LinkedIn posts that act like a career change at 50 is just about finding your inner zen and manifesting a new life. Honestly, that kind of toxic positivity is exhausting. If you’re sitting there staring at your laptop, feeling like your professional identity is crumbling while everyone else is just coasting toward retirement, you don’t need a spiritual retreat or a $5,000 “career coaching” seminar. You need a functional roadmap that respects the fact that you actually have bills to pay and a life that doesn’t have time for fluff.

I’m not here to sell you on a dream; I’m here to help you build a system. In this guide, we’re going to strip away the gatekeeping and look at the unpolished reality of pivoting your professional life mid-stream. I’ll show you how to audit your existing skills, retool your digital presence without feeling like a fraud, and manage the logistical chaos of a transition. We’re skipping the vague platitudes and getting straight to the practical steps that actually make a pivot sustainable.

Table of Contents

Stop the Panic Navigating a Career Change at 50

Stop the Panic Navigating a Career Change at 50

First off, let’s address the elephant in the room: the panic is real. When you’re looking at a total pivot in your fifties, it’s easy to feel like you’re running a race against a clock that’s already wound down. You start worrying about whether you’re too “set in your ways” or if the tech gap is too wide to bridge. But here’s the truth—that panic usually comes from a lack of a roadmap, not a lack of ability. Instead of spiraling, I want you to focus on auditing your transferable skills for midlife professionals. You aren’t starting from zero; you’re starting from experience. You have decades of high-level problem-solving and emotional intelligence that a twenty-something simply hasn’t developed yet.

The goal isn’t to pretend you’re twenty-five; it’s to leverage the wisdom you actually have. This means being intentional about reskilling for the digital economy so you can speak the modern language of your new industry without losing your professional edge. It’s about building a bridge between what you’ve mastered and what the current market demands. Once you stop viewing your age as a liability and start seeing it as a specialized toolkit, the whole process feels less like a crisis and more like a calculated upgrade.

Unlocking Your Transferable Skills for Midlife Professionals

Unlocking Your Transferable Skills for Midlife Professionals

The biggest mistake I see people make is thinking they’re starting from zero. You aren’t. You aren’t a blank slate; you’re a seasoned professional with a massive library of experience that just needs a bit of reformatting. When we talk about transferable skills for midlife professionals, I’m not talking about vague buzzwords like “leadership.” I’m talking about the hard-won ability to manage a crisis, navigate complex office politics, or mentor a junior team through a deadline. These are the high-value assets that younger candidates simply haven’t had the time to build yet.

To make this work, you have to learn how to translate your “old world” experience into “new world” language. This is where reskilling for the digital economy comes into play. It’s not about going back to university for four years; it’s about identifying the specific software or methodologies that bridge the gap between what you know and what the current market demands. Think of it like a software update for your resume—you aren’t changing the core OS, you’re just making sure it’s compatible with the latest hardware.

Reskilling for the Digital Economy Without Feeling Overwhelmed

Reskilling for the Digital Economy Without Feeling Overwhelmed

The biggest hurdle isn’t the actual learning; it’s the mental exhaustion of feeling like you’re starting from zero. When you look at a syllabus for a new technical certification, it’s easy to feel like the digital world is a club you weren’t invited to. But here’s the thing: reskilling for the digital economy isn’t about becoming a coding wizard overnight. It’s about layering new tools on top of the massive foundation of experience you already have. Instead of trying to swallow a whole bootcamp in a week, I’m a huge advocate for the “micro-learning” approach. Pick one tool—maybe it’s project management software or a specific CRM—and master it in small, digestible chunks.

You also have to be strategic about where you spend your energy. Don’t waste time on broad, generic courses that don’t move the needle. Focus on high-leverage skills that directly bridge the gap between your past expertise and your new direction. This kind of targeted upskilling for older workers makes you look like a specialist rather than a novice. Think of it as updating your software rather than buying an entirely new computer. It’s much less intimidating when you realize you aren’t replacing yourself; you’re just upgrading your operating system.

Beating Ageism in Job Hunting With Real Systems

Let’s be real: the elephant in the room is ageism. It’s frustrating, it’s unfair, and it can feel incredibly personal when you’re staring at a job description that practically screams “must be a digital native.” But instead of letting that discourage you, we’re going to treat it like a technical glitch that needs a workaround. Overcoming ageism in job hunting isn’t about pretending you’re twenty-something; it’s about reframing your narrative so they see your experience as an asset rather than a liability.

The best way to do this is by building a system for your digital presence. Your LinkedIn shouldn’t look like a dusty archive of everything you’ve ever done; it needs to be a curated, high-impact landing page. Focus on showing, not just telling, how you’ve solved modern problems. When you pair your deep expertise with recent upskilling for older workers, you stop looking like someone who is “out of touch” and start looking like the most reliable person in the room. It’s about proving you have the wisdom of a veteran with the toolkit of a newcomer.

Financial Planning and Finding Purpose in Second Acts

Let’s get real for a second: the “dream job” conversation gets a lot heavier when you actually have a mortgage or a family to consider. You can’t just quit your job on a whim and hope for the best. This is where financial planning for career shifts becomes your best friend. I’m a huge believer in building a buffer before you make any big moves. I’m talking about a “runway fund” that covers your essentials for at least six months. Having that cash cushion isn’t just about math; it’s about the mental clarity you need to make decisions from a place of strength rather than desperation.

Once the math is handled, you can actually focus on the soul stuff. Transitioning isn’t just about a new paycheck; it’s about finding purpose in second acts that actually feel meaningful. After decades of doing what was expected, you finally have the agency to choose what matters. Use this time to audit what makes you feel energized versus what just drains your battery. When you align your experience with something that actually resonates, the pivot stops feeling like a crisis and starts feeling like a deliberate upgrade.

5 Low-Friction Systems to Keep Your Pivot on Track

  • Audit your network before you update your resume. Instead of shouting into the void of LinkedIn, reach out to three people you actually like and grab a coffee (or a Zoom). Most midlife pivots happen through warm introductions, not cold applications, so focus on rebuilding those bridges first.
  • Build a “Skill Stack” instead of a “Skill List.” Don’t just list what you did in 2005. Group your experience into modern, functional categories like “Project Management,” “Stakeholder Communication,” or “Strategic Operations.” It makes you look like a specialist ready for today, not a relic of yesterday.
  • Set a “Micro-Learning” timer. If you’re trying to learn new software or a digital tool, don’t try to do a four-hour marathon. Set a timer for 25 minutes every morning. It keeps the imposter syndrome at bay because you’re making incremental progress without the burnout.
  • Curate your digital footprint. If your online presence is a mess of old, irrelevant info, it’s going to create friction. Spend one weekend cleaning up your profiles so that when a recruiter looks you up, they see the professional you are becoming, not just the one you used to be.
  • Create a “Financial Runway” spreadsheet. Panic usually comes from the unknown. Map out exactly how much you need to live for six months if you transition into a lower-paying role or a freelance stint. Once you see the actual numbers on paper, the “what if” anxiety usually settles down.

The Bottom Line: Making the Pivot Stick

Stop treating your experience like a liability; your decades of soft skills and situational awareness are actually your biggest competitive advantages if you frame them correctly.

Don’t try to learn everything at once—pick one high-leverage digital skill, build a small project to prove you can do it, and let that be your entry point.

Build a financial and professional safety net before you leap, so your career change feels like a calculated move rather than a desperate gamble.

The Bottom Line

Look, I know this whole process feels like you’re trying to rebuild an engine while the car is still moving, but we’ve covered the mechanics of how to actually do it. We talked about auditing your transferable skills, building a digital toolkit that doesn’t feel intimidating, and setting up systems to bypass the usual ageism traps. It’s not about reinventing who you are from scratch; it’s about repackaging the expertise you’ve spent decades accumulating into a format the modern market actually understands. If you focus on the systems—the financial buffers, the targeted reskilling, and the strategic networking—you move from a place of reactive panic to intentional transition.

At the end of the day, a career pivot at 50 isn’t a sign that you’ve failed or fallen behind; it’s a sign that you’re finally in the driver’s seat. You aren’t starting from zero; you’re starting from experience. Don’t let the fear of the unknown keep you stuck in a role that no longer serves you or makes you feel alive. Take the tools we’ve discussed, apply them one step at a time, and build a second act that actually feels like yours. You’ve got the systems in place now—so go out there and make it happen.

Frequently Asked Questions

How do I explain my long employment history on a resume without looking "overqualified" or dated?

The trick is to stop treating your resume like a historical archive and start treating it like a marketing tool. You don’t need to list every job since the 90s; that just invites bias. Instead, focus on the last 10–15 years and group older, relevant experience under a “Prior Professional Experience” heading without dates. This keeps the focus on your current expertise while proving you have the foundation, without looking like you’re stuck in the past.

Is it actually worth investing in a new degree at this stage, or should I stick to shorter certifications?

Honestly? Unless you’re pivoting into a highly regulated field like law or medicine, skip the full degree. At 50, your biggest asset is your time, and spending four years in a lecture hall feels like a massive friction point. I’m a huge fan of the “stackable” approach: grab targeted, high-impact certifications that prove you have the specific skills needed now. It’s faster, cheaper, and keeps your momentum moving without the massive debt.

How do I handle the awkwardness of potentially being managed by someone who is much younger than me?

Honestly, it’s awkward. I get it. But the secret is to stop viewing it as a power struggle and start seeing it as a collaboration. I treat my younger managers like any other stakeholder: I focus on the output, not the age gap. Show up with your systems ready, be the person who solves problems rather than creating them, and lead with curiosity. If you respect their role, they’ll respect your expertise.

Guide on how to install a shelf.

The Right Way to Install Shelving So It Stays Secure

I was standing in my living room last Tuesday, staring at a pile of expensive oak planks and a set of instructions that might as well have been written in ancient hieroglyphics. My floor was covered in drywall dust, my coffee was cold, and I was about ten seconds away from just living with the clutter on the ground. Most people will tell you that learning how to install a shelf requires a specialized toolkit and a level of spatial awareness you just aren’t born with, but honestly? That’s a total lie. You don’t need to be a carpenter; you just need to stop guessing where the studs are and actually follow a logical system.

I’ve spent way too many hours trial-and-erroring my way through DIY projects, so I’m stripping away the fluff for you. This guide isn’t going to give you some overly polished, “perfect” home renovation montage; instead, I’m giving you the unfiltered, step-by-step reality of getting those brackets into the wall securely. We’re going to talk about the tools you actually need, how to avoid the dreaded “shelf sag,” and how to make sure your stuff actually stays off the floor without a single unnecessary trip to the hardware store.

Table of Contents

Guide Overview

Total Time: 30-60 minutes
Estimated Cost: $20-50
Difficulty: Beginner

Tools & Supplies

  • Drill/Driver for creating pilot holes and driving screws
  • Level to ensure the shelf is straight
  • Measuring tape for precise placement
  • Pencil for marking drill points
  • Shelf board 1 unit
  • Shelf brackets 2 units
  • Wall anchors and screws 1 set
  • Wall screws 1 set

Step-by-Step Instructions

  • 1. First things first, you need to figure out what you’re actually putting on this shelf. If it’s just a single succulent, you can wing it, but if you’re planning on stacking heavy hardcover books, you need to locate your studs. Grab a stud finder (or just knock on the wall and listen for that solid thud) because if you don’t hit a stud, you’re basically just hanging decor on a prayer.
  • 2. Once you know where the strength is, grab a pencil and level your shelf. This is the part where people usually mess up and end up with a tilted shelf that looks like it’s sliding into a sinkhole. Hold the bracket up, place your level on top, and mark your holes with a pencil once it’s perfectly straight.
  • 3. Now, grab your drill. If you’re drilling into drywall without hitting a stud, you’re going to need to use drywall anchors. Don’t skip this step—trying to screw directly into plain drywall is a one-way ticket to a collapsed shelf and a very messy floor. Drill your pilot holes, then tap those anchors in until they’re flush with the wall.
  • 4. Line up your brackets with the holes you just made and start driving the screws in. I usually do this by hand for the last few turns just to make sure I don’t strip the screw head or crack the bracket. It’s a little more tedious, but it saves you from having to go back to the hardware store for replacements.
  • 5. Slide the shelf onto the brackets and secure it from underneath. Most kits come with tiny little screws to lock the wood to the metal, and you definitely want to use them. This keeps the shelf from sliding forward every time you reach for something.
  • 6. Finally, do the “weight test.” Before you go full Pinterest and decorate the whole thing, give it a gentle push to make sure everything feels solid. If it wobbles, something isn’t seated right, so re-tighten your screws before you commit your favorite ceramics to it.

Understanding How to Install a Shelf

Understanding How to Install a Shelf correctly.

Before you even pick up a drill, you need to understand what’s actually happening behind your walls. The biggest mistake I see people make is treating every wall like it’s the same, but there is a massive difference between drilling into drywall vs studs. If you just screw into the plaster or gypsum without hitting a wooden stud, your shelf is going to end up in a pile on the floor within a week. If you’re planning on anything more than a single succulent, you really need to invest in a decent wall stud finder to locate that solid structural support.

Once you know where the strength is, you have to match your hardware to your vision. There are various shelf bracket types out there—from chunky industrial metal to sleek, hidden supports—and each one dictates how much weight you can actually trust. If you’re going for that clean, minimalist look with a floating shelf, the stakes are even higher because you’re relying entirely on internal mounting. Just remember: the heavier the object, the more you need to prioritize heavy duty shelf mounting techniques over aesthetics.

Key Things to Know

Key Things to Know: Drywall vs studs.

Before you even pick up a drill, you need to play detective with your walls. The biggest mistake I see people make is assuming they can just screw into whatever they want, but there is a massive difference between drilling into drywall vs studs. If you’re trying to hang something substantial—like a row of heavy cookbooks or a collection of ceramic plants—you absolutely cannot rely on drywall anchors alone. You need to find those wooden studs behind the plaster. If you don’t have a decent tool for this, I highly recommend looking up a quick wall stud finder guide before you start making holes you’ll regret later.

Also, let’s talk about the hardware. Not all supports are created equal, and choosing the right shelf bracket types will determine if your setup looks intentional or just cluttered. If you’re going for that seamless, modern look, you’ll likely be leveling a floating shelf, which requires a bit more precision and a steady hand. If you’re opting for industrial metal brackets, make sure they are rated for the weight you’re planning to add. It’s all about matching the strength of the hardware to the actual weight of your stuff.

Pro-Tips to Keep Your Shelves From Becoming a Pile of Debris

  • Don’t trust your eyes; trust a stud finder. I know it’s tempting to just screw into the drywall to save time, but if you aren’t hitting a stud, that shelf is going to end up in pieces on your floor within a week.
  • Level it twice, drill once. I used to think “eyeballing it” was a valid strategy until I realized my books were slowly sliding toward the floor. Use a real level, not just a phone app, to make sure things are actually straight.
  • Account for the weight before you buy. If you’re planning to display a heavy collection of vintage ceramics, a flimsy floating shelf isn’t going to cut it. Match the hardware and the shelf material to what you’re actually putting on it.
  • Grab a vacuum before you start. Drywall dust is a nightmare—it gets everywhere and stays there. I always keep a small handheld vac or even just a damp rag nearby so I can clean up the debris the second I’m done drilling.
  • Use anchors if you have to, but use the good ones. If you can’t find a stud, don’t just use those cheap plastic plugs that come in the box. Go to the hardware store and get the heavy-duty toggle bolts; they’re a total game-changer for stability.

The Bottom Line

Don’t skip the stud finder; if you don’t anchor your shelf into something solid, it’s only a matter of time before your stuff ends up in a pile on the floor.

Measure twice, drill once—it sounds like a cliché for a reason, and I’ve definitely learned the hard way that eyeballing it is a recipe for disaster.

Invest in a decent set of tools early on because trying to DIY this with a cheap, flimsy screwdriver is just going to add more friction to your day.

You’ve Got This

Installing a shelf: You’ve Got This.

At the end of the day, installing a shelf isn’t about being a master carpenter; it’s just about respect for the tools and the wall you’re working with. Just remember to double-check your stud locations, keep your level handy, and don’t go overboard with the weight until you’re sure your anchors are actually holding. If you take the time to do the prep work right—measuring twice and checking for wires—you won’t end up with a lopsided mess or a hole in your drywall that you’ll regret later. It’s all about having a solid system in place so you can move from chaos to organization without the unnecessary headache.

I know that staring at a pile of hardware and a blank wall can feel a little intimidating, but I promise that the sense of control you get once everything is mounted is totally worth the effort. Once these shelves are up, your space stops feeling like a cluttered storage unit and starts feeling like a home that actually functions for you. Don’t let the fear of a single crooked screw stop you from reclaiming your space. Grab your drill, trust your process, and enjoy the feeling of finally getting your life—and your stuff—off the floor.

Frequently Asked Questions

What do I do if I can't find a stud exactly where I want my shelf to go?

Honestly, this is the most common roadblock, so don’t panic. If the stud isn’t where you need it, you have two real options. You can either shift your design slightly to hit that stud, or—and this is what I actually do—grab some high-quality heavy-duty drywall anchors. Just make sure you get the toggle bolt kind, not the cheap plastic twisty ones. They’re a total lifesaver when you refuse to compromise on your layout.

How much weight can these actually hold before they start sagging or pulling out of the wall?

Honestly, it depends entirely on what you’re anchoring into. If you’re just hitting drywall with plastic anchors, don’t expect much—maybe 10-15 lbs before things get sketchy. But if you actually take the time to find a stud and screw directly into the wood, you can usually hang a decent stack of books without a meltdown. My rule of thumb? Always over-engineer it. If you’re unsure, aim for the studs. Better safe than a pile of broken ceramics.

Is it worth buying a stud finder, or is there a way to figure this out without extra gear?

Honestly? If you’re only doing one project, don’t waste the money. You can totally skip the stud finder by using the “knock test”—tap along the wall until the sound goes from hollow to a solid thud. You can also check for outlet alignment, since studs are usually vertically aligned with them. Just be careful; if you’re hanging something heavy, a $15 stud finder is a lot cheaper than a patched-up hole in your drywall.

Mastering your schedule using time blocking.

Mastering Your Schedule Through Time Blocking

I used to think that if I wasn’t using a color-coded digital planner with custom aesthetic widgets and a $30 subscription fee, I wasn’t actually being productive. I spent months trying to force myself into these hyper-rigid, “perfect” schedules that looked great on a Pinterest board but felt like a total lie the second a single email interrupted my flow. Honestly, most of the advice you see online about time blocking is just a recipe for burnout wrapped in a pretty interface. It makes you feel like a failure if you deviate from your plan by even ten minutes, when in reality, life is messy and unpredictable.

I’m not here to sell you on a lifestyle overhaul or a complex system that requires three hours of prep every Sunday. I want to show you how I actually use time blocking to keep my freelance life from turning into a constant state of emergency. I’m going to give you the unpolished, real-world steps to building a schedule that actually works for a human brain, not a robot. We’re going to strip away the gatekeeping and focus on simple, repeatable systems that help you get your work done so you can actually breathe.

Table of Contents

Stop the Constant Emergency Why Time Blocking Actually Works

Stop the Constant Emergency Why Time Blocking Actually Works

The reason most of us feel like we’re constantly playing catch-up isn’t because we lack willpower; it’s because our brains weren’t built to handle a never-ending stream of notifications and “quick” requests. When you jump from an email to a project to a text message, you aren’t actually being productive—you’re just experiencing a massive amount of mental friction. This constant switching is exactly what leads to preventing multitasking fatigue, because trying to do everything at once is the fastest way to burn out by noon.

Instead of letting your day dictate your energy, this approach lets you dictate the day. By moving toward a more structured daily routine, you stop reacting to whatever fire popped up in your inbox and start acting with intention. It’s the difference between being a passenger in your own life and actually being the one behind the wheel. When you assign specific windows to specific tasks, you give your brain permission to settle into a rhythm, which is the only real way to find that elusive flow state.

Beyond the Chaos Mastering Deep Work Productivity Techniques

Beyond the Chaos Mastering Deep Work Productivity Techniques

Once you’ve got your blocks set up, the real magic happens when you layer in some actual deep work productivity techniques. It’s one thing to carve out an hour on your calendar, but it’s another thing entirely to actually stay focused when your phone is buzzing every thirty seconds. To make this work, you have to treat those blocks like sacred ground. I’ve found that the most effective way to do this is to pair my blocks with task batching vs time blocking logic; I’ll use my time blocks for the big, heavy lifting—like writing a strategy deck—and then use smaller, batched segments for those annoying, low-energy tasks like answering emails or filing receipts.

The goal here isn’t just to be busy; it’s about optimizing daily workflow so you aren’t constantly hitting a wall by 3:00 PM. If you try to jump between high-level creative work and mindless admin, you’re going to trigger massive multitasking fatigue, and honestly, your brain will just want to quit. By sticking to a more structured daily routine, you stop the mental whiplash. You give yourself permission to go deep on one thing, knowing that the “shallow” stuff has its own dedicated slot later.

Task Batching vs Time Blocking Finding Your Real Flow

Task Batching vs Time Blocking Finding Your Real Flow

So, I get a lot of questions about whether I’m actually “time blocking” or if I’m just “batching” my tasks, and honestly? The distinction is where the magic happens. Think of it this way: time blocking is your broad architecture—it’s the big, non-negotiable containers in your calendar, like “9 AM to 11 AM: Client Work.” Task batching, on the other hand, is how you actually fill those containers without losing your mind. Instead of jumping from an email to a spreadsheet to a quick Slack reply, you group similar, low-energy actions together. This is the secret to preventing multitasking fatigue, which is that specific type of brain fry that happens when you switch contexts every five minutes.

When you’re optimizing your daily workflow, you want to use both. I like to use task batching to handle all my “admin” stuff—invoices, scheduling, quick replies—in one go, so it doesn’t bleed into my creative windows. By treating these as two different layers of your structured daily routine, you stop reacting to every little ping and start actually driving your day. It’s less about being a robot and more about creating space to breathe between the chaos.

How to Stop Multitasking Fatigue and Reclaim Your Brain

We’ve all been there: you have seventeen tabs open, your phone is buzzing with notifications, and you’re trying to draft an email while simultaneously deciding what to cook for dinner. It feels like you’re being productive, but in reality, you’re just spinning your wheels. This is exactly how you end up with that heavy, brain-fog feeling by 3:00 PM. When we constantly switch gears, we aren’t actually doing multiple things at once; we are just paying a “switching tax” that drains our mental battery. Preventing multitasking fatigue isn’t about working harder; it’s about realizing that your brain wasn’t built to juggle a million tiny inputs simultaneously.

To fix this, you have to stop treating your attention like an infinite resource. Instead of reacting to every ping, try protecting your focus by creating small, dedicated windows for specific types of brainpower. By integrating these time management strategies into your day, you stop the frantic mental ping-pong and start moving through your list with actual momentum. It’s about moving away from a reactive state and toward a more intentional, steady rhythm.

Optimizing Daily Workflow With a Structured Daily Routine

Once you’ve grasped the theory, the real magic happens when you stop treating your schedule like a suggestion and start treating it like a blueprint. Optimizing daily workflow isn’t about filling every single minute with a task; it’s about building a structured daily routine that actually accounts for how your brain functions. I used to try and tackle my hardest freelance projects at 4 PM, only to realize my brain was essentially fried by then. Now, I map out my high-energy windows for the heavy lifting and save the mindless admin stuff for when I’m hitting that mid-afternoon slump.

The goal here is to create a rhythm that feels automatic rather than forced. Instead of waking up and wondering, “What should I do first?” you should already have a roadmap. By integrating different time management strategies—like pairing your most intense focus sessions with specific times of day—you eliminate that paralyzing decision fatigue. It’s about creating a predictable flow so that when you sit down at your desk, you aren’t wasting energy deciding what to do; you’re just doing it.

5 Ways to Actually Make Time Blocking Stick (Without Losing Your Mind)

  • Stop overstuffing your calendar. I used to try and schedule every single minute from 8 AM to 10 PM, and I failed by Tuesday. Leave “buffer blocks”—at least 30 minutes of nothingness—between big tasks so when a meeting runs long or you just need a coffee refill, your whole day doesn’t collapse.
  • Color-code by energy, not just category. Instead of just labeling everything “Work,” try using one color for “Deep Work” (high brain power) and another for “Admin/Shallow Work” (low brain power). It helps you see at a glance if you’re accidentally scheduling a heavy writing session during your 3 PM afternoon slump.
  • Treat your blocks like non-negotiable appointments. If you have a block scheduled for “Email Catch-up,” don’t let a random Slack notification derail you. You wouldn’t ditch a meeting with your boss to scroll TikTok, so don’t ditch a meeting with your own productivity for the same reason.
  • Use “Themed Days” if your brain feels scattered. If you’re a freelancer like me, I try to dedicate certain days to specific types of brainpower—like “Client Strategy Tuesdays” or “Admin Fridays.” It stops that constant mental switching cost that makes you feel so fried by 5 PM.
  • Do a Sunday Reset (but keep it low-key). Spend 15 minutes on Sunday night just looking at the week ahead and sketching out your big blocks. You don’t need a perfect, aesthetic planner; you just need to know roughly where your time is going so Monday morning doesn’t feel like a jump scare.

The TL;DR on Staying Sane

Stop trying to do everything at once; use time blocking to give your brain permission to focus on one thing at a time so you aren’t constantly stuck in “emergency mode.”

Don’t confuse task batching with time blocking—batching is about grouping similar vibes together, while blocking is about carving out the actual space in your calendar to get them done.

Build a system that actually fits your real life, not some aesthetic productivity guru’s dream; if a schedule is too rigid, you’ll just end up abandoning it by Tuesday.

The Bottom Line

At the end of the day, time blocking isn’t about turning yourself into a robot or squeezing every last drop of “efficiency” out of your soul. It’s about moving away from that frantic, reactive state where you’re just constantly putting out fires. We’ve talked about everything from mastering deep work to understanding why task batching is your best friend when you’re feeling overwhelmed. The goal is to stop the multitasking fatigue from draining your battery and to finally build a sustainable rhythm that actually respects your energy levels. When you stop treating your schedule like a chaotic to-do list and start treating it like a structured roadmap, the mental load of adulthood starts to feel a lot lighter.

Look, some days are going to go sideways. You’ll have a client emergency, or you’ll just wake up feeling totally unmotivated, and your carefully planned blocks will fall apart. That’s fine. The system isn’t there to be perfect; it’s there to give you a home base to return to when things get messy. Don’t let the fear of a “ruined” schedule stop you from even trying. Just pick one small chunk of time tomorrow, protect it fiercely, and see how it feels to actually be in control of your own life again. You’ve got this.

Frequently Asked Questions

What do I do when a "fire" breaks out and ruins my entire schedule for the day?

First, breathe. I used to spiral whenever a random crisis derailed my plan, but now I treat my schedule like a modular system, not a glass sculpture. When a “fire” hits, stop trying to force the old plan. Pivot. Assess what’s actually urgent, triage your remaining tasks, and rebuild a “survival schedule” for the rest of the day. It’s not a failure; it’s just a mid-day recalibration. Move on, don’t dwell.

How much time should I actually leave between blocks so I don't burn out by noon?

Honestly, if you’re scheduling your blocks back-to-back like you’re running a marathon, you’re going to crash. I usually aim for a 10 to 15-minute “buffer” between tasks. Use that time to actually stand up, grab water, or just stare at a wall—don’t just jump straight into scrolling TikTok. Think of it as a palate cleanser for your brain. If you don’t build in that breathing room, your schedule becomes a trap rather than a tool.

Is it better to plan my blocks the night before or first thing in the morning?

Honestly? Plan them the night before. If you wait until morning, you’re already playing defense against your inbox and your brain is still waking up. By mapping out your blocks before you even close your laptop at night, you eliminate that “decision fatigue” first thing in the morning. You can just wake up, grab your coffee, and execute. It turns your morning from a frantic scramble into a smooth, intentional rollout.

Beginner guide on how to cook fish.

A Beginner’s Guide to Cooking Fish Without the Stress

I used to think that learning how to cook fish meant I needed a culinary degree, a $100 cast-iron skillet, and a level of zen I simply didn’t possess. I remember standing in my kitchen last Tuesday, staring at a piece of salmon like it was a ticking time bomb, terrified that one wrong move would leave me with something that tasted like wet cardboard or, worse, a salmonella-filled disaster. There is so much gatekeeping in the food world, acting like if you aren’t poaching something in a specialized broth, you’re doing it wrong. Honestly? It’s exhausting, and it’s why most of us just default to chicken every single time.

I’m over the intimidation factor, and I think you are too. In this guide, I’m stripping away the chef-speak to give you a repeatable system for getting it right every time, regardless of the species. We aren’t going to obsess over fancy gadgets or impossible techniques; instead, I’m sharing the actual, unpolished steps to ensure your protein is flaky, seasoned, and completely stress-free. Let’s get into the mechanics of how to cook fish without turning your kitchen into a chaotic mess.

Table of Contents

Stop Overcomplicating It the Low Stress System for How to Cook Fish

Stop Overcomplicating It the Low Stress System for How to Cook Fish

First off, let’s get one thing straight: you don’t need a culinary degree or a set of expensive copper pans to pull this off. Most people freeze up because they think they need to master complex techniques, but the secret is actually just reducing the variables. If you’re just starting out, stick to the easy types of fish for beginners like salmon or tilapia. These are much more forgiving when you’re still figuring out your timing.

To keep things from turning into a kitchen disaster, my go-to system starts with the prep. I always pat my fillets bone-dry with a paper towel before they even touch the heat; this is the absolute best way for preventing fish from sticking to the pan and ensuring you actually get that crispy skin instead of a sad, gray mess. Once the pan is hot and the oil is shimmering, don’t be afraid to be aggressive with your spices. Finding the best way to season fish usually just means a heavy hand with kosher salt, cracked pepper, and maybe a squeeze of lemon at the very end. Keep it simple, keep it clean, and stop overthinking the process.

Ditch the Decision Fatigue With These Essential Types of Fish for Beginners

Ditch the Decision Fatigue With These Essential Types of Fish for Beginners

The biggest mistake I see people make is walking into the grocery store and staring blankly at the seafood counter like they’re trying to solve a calculus equation. If you’re feeling overwhelmed, ignore the exotic, expensive stuff for now. You want to focus on reliable types of fish for beginners that are forgiving and don’t require a culinary degree to master. Salmon is my absolute go-to because it’s fatty enough to stay juicy even if you slightly overcook it, and tilapia is incredibly cheap and neutral, making it a perfect blank canvas for whatever spices you have in the pantry.

If you want to keep things even simpler, look for cod or halibut. These white fish are sturdy and hold their shape well, which is a lifesaver when you’re still figuring out the mechanics of preventing fish from sticking to the pan. Once you have your protein picked out, don’t stress about complex sauces. Focus on a simple salt, pepper, and lemon combo; honestly, that is often the best way to season fish without masking the flavor or making a mess of your kitchen. Keep your lineup consistent, and the decision fatigue disappears.

The Real Secret to the Best Way to Season Fish Every Time

The Real Secret to the Best Way to Season Fish Every Time

Look, I used to think seasoning fish meant following some complicated spice rub recipe from a cookbook, but that’s just more mental clutter we don’t need. The best way to season fish is actually much more minimalist: salt, pepper, and maybe a squeeze of lemon or a hit of garlic powder. The trick isn’t adding a million ingredients; it’s about not drowning the natural flavor of the seafood. If you pile on too much heavy seasoning, you’re just masking the fact that you might have overcooked it.

My personal system is to pat the fillets bone-dry with a paper towel before you even touch the spices. If the surface is wet, the seasoning won’t stick, and you’ll end up with a soggy mess instead of that crispy skin we’re all after. This is also your first line of defense for preventing fish from sticking to the pan. Once you’ve got that dry surface and a light coating of seasoning, you’re ready to hit the heat. Keep it simple, keep it dry, and let the quality of the fish do the heavy lifting.

No More Kitchen Chaos My Strategy for Preventing Fish From Sticking to Pan

There is nothing that kills my vibe faster than a beautiful piece of fillet turning into a shredded, crusty mess stuck to the bottom of a pan. It’s frustrating, it looks unappealing, and it makes you feel like you’ve failed at a basic skill. But honestly? Most of the time, it’s not your cooking—it’s your physics. The absolute key to preventing fish from sticking to pan is patience and temperature control. You have to let the fish actually release itself. When you first drop it in the pan, it’s going to want to cling to the surface. Resist the urge to poke at it or try to flip it prematurely. If it’s fighting you, it’s not ready.

Once you see those edges turning opaque and slightly golden, it will naturally lift away. I also swear by patting my fish bone-dry with paper towels before it even touches the oil. Moisture is the enemy of a good sear; if there’s water on the surface, you’re essentially steaming it instead of crisping it. If you follow this, you’ll move past the panic and actually start enjoying the process.

Precision Over Guesswork Knowing the Internal Temperature for Cooked Fish

Look, I get it. The “poke it with a fork and hope for the best” method is how you end up with either a piece of salmon that’s basically a leather belt or something so underdone it’s actually concerning. If you want to stop guessing, you need to invest in a digital instant-read thermometer. It is the single most effective tool for how to tell if fish is done without the frantic guesswork.

When you’re working through different types of fish for beginners, like cod or trout, the goal is consistency. For most flaky white fish, you’re aiming for an internal temperature for cooked fish of about 145°F (63°C). However, if you prefer your salmon a little more tender and medium-rare, you can pull it off the heat at 135°F and let the carryover cooking do the rest of the work while it rests. It takes the anxiety out of the process and turns a high-stakes kitchen moment into a simple, repeatable system. No more staring at the pan in a state of panic—just hit the number and move on with your life.

The "Don't Mess This Up" Cheat Sheet: 5 Tiny Habits for Better Fish

  • Pat it dry like your life depends on it. I know, it sounds extra, but if your fish is damp when it hits the pan, you’re basically steaming it instead of searing it. Grab a paper towel and get that moisture off before you even think about seasoning.
  • Stop treating the pan like a crowded elevator. If you crowd the fillets, the temperature drops instantly and you end up with a soggy, sad mess. Give each piece some breathing room so the heat can actually do its job.
  • Invest in a cheap digital thermometer. I used to try and “feel” the firmness of the fish, but that’s how I ended up eating rubbery salmon. Just check the internal temp; it takes two seconds and removes all the guesswork.
  • Let it rest, even if it’s just for a minute. You don’t need to wait twenty minutes like a steak, but letting the fish sit off the heat for a moment helps the juices redistribute so it doesn’t dry out the second you take a bite.
  • Don’t touch it. Seriously. Once you put the fish in the pan, leave it alone. If you keep poking at it or trying to flip it too early, it’s going to tear apart. Wait until it naturally releases from the pan—that’s your signal that it’s ready.

The Cheat Sheet for Stress-Free Fish

Stop guessing and start measuring—use a thermometer to hit that internal temperature so you aren’t stuck choosing between raw and rubbery.

Simplify your grocery run by sticking to beginner-friendly, forgiving fish types until you feel more confident in the kitchen.

Master the prep, not just the cook: get your pan hot, season aggressively, and use the right oil to prevent the dreaded “stuck-to-the-pan” panic.

The Bottom Line

At the end of the day, cooking fish isn’t about mastering some complex culinary art form; it’s just about having a repeatable system that works. We covered how to pick the right beginner-friendly fillets, how to season them without getting lost in a spice cabinet, and most importantly, how to manage your heat so you aren’t fighting a sticking pan or staring at a piece of salmon that’s either raw or rubbery. Once you stop treating every meal like a high-stakes exam and start relying on temperature and technique, the anxiety just evaporates. If you can manage your pan temperature and trust your thermometer, you’ve already won half the battle.

I know that for a lot of us, the kitchen can feel like a place where things just go wrong, especially when you’re trying to eat better on a budget or a tight schedule. But remember, even my mom—who is a literal chef—had to learn the basics before she could make it look easy. Don’t let the fear of a ruined dinner keep you from trying something new. Adulthood is a lot easier when you realize that failure is just part of the system. So, grab a piece of white fish, get that pan hot, and just go for it. You’ve got this.

Frequently Asked Questions

Is it actually safe to buy frozen fish, or should I only ever go for the fresh stuff?

Honestly? Frozen is totally fine. In fact, if you’re looking to reduce friction, frozen is actually better. Most “fresh” fish has spent days in transit, whereas frozen is usually flash-frozen at peak quality right after being caught. It’s cheaper, lasts longer in my freezer, and eliminates that mid-week panic of realizing your protein is expired. Just make sure you thaw it properly in the fridge—don’t leave it on the counter like a rebel.

How do I get rid of that "fishy" smell in my kitchen (and my hands) after I'm done?

The smell is the absolute worst part of cooking fish, but you don’t need fancy scented candles to fix it. For the kitchen, just simmer a small pot of water with lemon slices or a splash of vinegar on the stove—it neutralizes the air instantly. For your hands, skip the harsh soap; rub them with a little lemon juice or stainless steel (like your kitchen sink) under cold water. It breaks down the oils so the scent actually vanishes.

What’s the best way to store leftovers so they don't turn into a rubbery mess the next day?

The biggest mistake is just tossing it in a Tupperware and hoping for the best. To avoid that rubbery, sad texture, let your fish cool slightly before sealing it—trapped steam is the enemy of moisture. I always use airtight glass containers to keep things fresh, and when I reheat, I do it low and slow. A splash of water or a tiny bit of butter in the microwave helps steam it back to life.

Tips on how to keep your laptop cool.

Easy Fixes to Stop Your Laptop From Getting Too Hot

I was halfway through a deep-dive research session for a client last month when my laptop fans started sounding like a jet engine about to take off. I felt that familiar, frantic heat radiating off the keyboard, and my first instinct was to panic-buy one of those $60 RGB cooling pads I saw in a targeted ad. But honestly? Most of that tech-bro marketing is just noise. You don’t need to spend a fortune on flashy accessories to figure out how to keep your laptop cool; you just need to understand how the hardware actually breathes.

I’m not here to sell you on expensive gadgets or complicated software you’ll never use. Instead, I want to give you the actual, unpolished ways to manage your device’s temperature using things you probably already have in your house. We’re going to talk about low-friction habits and simple physical adjustments that actually work. My goal is to strip away the gatekeeping and give you a few reliable systems so you can stop worrying about your hardware melting and get back to your actual life.

Table of Contents

Stop Treating Heat Like a Crisis How to Keep Your Laptop Cool

Stop Treating Heat Like a Crisis How to Keep Your Laptop Cool

First, let’s talk about physics, because your laptop is basically a tiny, enclosed oven. If you’re working from your bed or a plush sofa, you’re effectively suffocating it. Soft surfaces block the vents, which is the fastest way to trigger preventing laptop thermal throttling—or rather, the lack thereof. When the heat has nowhere to go, your system intentionally slows down to save itself, which is why everything starts lagging right when you’re in the middle of something important. If you want to keep things running smoothly, just grab a hard, flat surface or a cheap desk stand to ensure proper laptop airflow optimization.

If you’ve already noticed your fans sounding like a jet engine taking off, it might be time for some maintenance. Dust is the silent killer of electronics; it builds up inside the chassis and acts like a thermal blanket. I usually set aside a little time once a month for some quick laptop fan cleaning tips, like using a can of compressed air to blow out the debris. It’s a five-minute fix that makes a massive difference in reducing CPU temperature without needing to call a repair shop.

The Unpolished Truth About Signs of Laptop Overheating

The Unpolished Truth About Signs of Laptop Overheating

We need to talk about how we usually realize there’s a problem. Most of us don’t check a temperature monitor; we just notice that our computer suddenly feels like a hot plate or the cursor starts lagging like it’s stuck in molasses. That lag is actually a huge red flag—it’s your computer’s way of preventing laptop thermal throttling by intentionally slowing down your processor so it doesn’t literally melt itself. If your fans sound like they’re trying to launch a SpaceX rocket every time you open more than three Chrome tabs, your system is screaming for help.

It’s not just about the noise, either. If you notice your battery is draining at an impossible rate or the bottom of the chassis is too hot to touch, you’re seeing the actual signs of laptop overheating in real-time. I used to ignore these little warnings until my entire system just shut down mid-project, which was a total nightmare. Don’t wait for the sudden black screen of death; if your hardware feels sluggish and loud, it’s time to stop ignoring the heat and actually address it.

Systems for Laptop Airflow Optimization Without the Gatekeeping

Systems for Laptop Airflow Optimization Without the Gatekeeping

Most people think they need to drop $80 on some high-tech, RGB-lit cooling setup to fix the problem, but that’s usually just marketing fluff. If you want real laptop airflow optimization, start with the basics: surface area. If your laptop is sitting directly on a desk, it’s basically breathing through a straw. I always keep a couple of small, sturdy books or even just a dedicated wooden stand nearby to lift the back of the machine up by an inch or two. That tiny gap makes a massive difference in reducing CPU temperature because it actually gives the intake vents room to work.

If you’re feeling a bit more hands-on, don’t sleep on a quick maintenance check. You don’t need to be a tech genius to do some basic laptop fan cleaning tips; usually, a can of compressed air and a steady hand are enough to blast out the dust bunnies that act like a thermal blanket for your hardware. It’s not about being perfect; it’s just about removing the obstacles that prevent your tech from doing its job.

Real Laptop Fan Cleaning Tips for Your Daily Workflow

Okay, let’s talk about the actual maintenance part, because this is usually where people get intimidated and just… don’t do it. Most of us treat our laptops like sealed black boxes that we aren’t allowed to touch, but that’s exactly how dust turns into a literal felt blanket inside your chassis. If you’re seeing a massive spike in fan noise, you’re likely dealing with a buildup that’s actively preventing laptop thermal throttling from being a non-issue.

You don’t need to be a hardware engineer to handle this. Grab a can of compressed air—not the cheap stuff that freezes, but something decent—and some soft-bristled brushes. If you’re comfortable popping the back panel off, do it. Aim the air in short, controlled bursts to dislodge the grit. Pro tip: hold the fan blades still with a toothpick while you spray. If you let them spin wildly from the air pressure, you can actually damage the motor. It’s a small, five-minute system that makes a massive difference in reducing CPU temperature without you having to buy a single new gadget.

Simple Hacks for Preventing Laptop Thermal Throttling and Heat

Once you’ve actually cleaned out the dust, the next step is managing how your machine handles heavy workloads. If you’ve ever noticed your cursor lagging or your video call freezing right when things get intense, you’re likely dealing with preventing laptop thermal throttling—or rather, failing to do so. Throttling is just your computer’s way of panicking and slowing itself down so it doesn’t literally melt. To stop this cycle, I’ve started being way more intentional about my background processes. If I’m doing something heavy like video editing or even just a massive Zoom call, I close out those twenty Chrome tabs I forgot I had open. It sounds basic, but reducing CPU temperature starts with not asking your processor to do ten things at once.

Another thing I’ve realized is that “power mode” settings are a huge factor. If you’re plugged in, don’t just leave it on “Best Performance” if you’re just sitting there reading. Switching to a more balanced mode can keep the heat from spiking in the first place. It’s all about managing the load before the fans start sounding like a jet engine.

My low-effort checklist for a cooler laptop

  • Stop using your laptop on your bed or a duvet. I know it’s cozy, but you’re basically smothering the vents with fabric. If you absolutely have to work from bed, put a large hardcover book or a flat tray underneath it so it actually has a surface to breathe on.
  • Audit your background processes. If your fan is screaming, check your Activity Monitor (Mac) or Task Manager (Windows) to see if some random Chrome tab or a rogue update is eating up your CPU in the background. Close the stuff you aren’t actually using.
  • Keep your workspace dust-free. You don’t need a deep clean every day, but a quick wipe of your desk with a damp cloth once a week prevents that layer of grit from being sucked directly into your laptop’s intake vents.
  • Plug it in when you’re doing heavy lifting. Running on battery often forces the hardware to work harder to manage power distribution, which can actually generate more heat. If you’re editing video or multitasking heavily, stay connected to a power source.
  • Check your ambient temperature. It sounds obvious, but if you’re working in a room that feels like a sauna, your laptop is going to struggle too. If you can, move closer to a window with a breeze or just turn on a small desk fan to keep the air moving around your setup.

The TL;DR on keeping your tech from melting down

Stop using your laptop on soft surfaces like blankets or your lap; get a cheap stand or even just a hard book so the vents can actually do their job.

Don’t wait for the fans to sound like a jet engine before you act—if it’s running hot during basic tasks, it’s time for a quick dust-out.

Manage your background chaos by closing those fifty unused Chrome tabs and heavy apps that are silently eating your CPU and generating unnecessary heat.

The bottom line on keeping things cool

At the end of the day, keeping your laptop from turning into a literal space heater isn’t about buying the most expensive accessories or becoming a hardware expert. It’s really just about small, consistent habits: stop working on your duvet, clear out the dust every few months, and pay attention when your fans start sounding like a jet engine. If you implement even two of the systems we talked about—like getting a basic stand or just being more mindful of your airflow—you’re already ahead of 90% of people who wait until their battery swells to actually care. It’s about reducing the friction between you and your tech so you can actually get your work done without the constant fear of a sudden shutdown.

I know adulthood can feel like a never-ending series of things breaking at the worst possible times, but you don’t have to let your gear be one of them. Managing your tech is just another way of managing your own peace of mind. When your tools work the way they’re supposed to, you can actually focus on the creative stuff instead of troubleshooting a thermal crisis. Stop letting minor hardware issues drain your mental energy. Set up these systems now, let your laptop breathe, and then go back to actually enjoying your life.

Frequently Asked Questions

Is it actually worth buying one of those expensive cooling pads, or is a cheap stand enough?

Honestly? Most of the time, no. Those $60 RGB cooling pads are usually overkill and just add more clutter to your desk. If you’re just looking to stop your laptop from suffocating on your lap or a flat desk, a basic, cheap stand that actually lifts the base is plenty. You just need to create space for the air to move. Save your money for a decent power bank or better coffee.

How often do I actually need to open up my laptop to clean the dust out myself?

Honestly, don’t go opening your laptop just for the sake of it; you’re more likely to snap a delicate ribbon cable than actually help. If you’re using it in a clean office environment, once a year is plenty. But if you’re a “laptop on the couch” person or have pets, check it every six months. If you hear the fans screaming like they’re trying to take off, that’s your sign to open it up.

Can running too many Chrome tabs or background apps actually make my laptop run hotter?

Short answer: absolutely. Think of your CPU like a person trying to multitask—if you’re juggling fifty Chrome tabs and three heavy background apps, it’s going to work harder, sweat more, and generate way more heat. It’s not just about memory, though; it’s about the sheer processing power required to keep all that junk alive. If your fan is screaming, close the tabs you aren’t using. It’s the easiest way to lower the temperature instantly.

Page 2 of 3

Powered by WordPress & Theme by Anders Norén