Month: March 2026 Page 1 of 2

Importance of soft skills for work.

Why Soft Skills Are Often More Valuable Than Your Degree

I used to think that being “good at your job” just meant being the person who actually knew how to use the software or finish the spreadsheet on time. But after a few years of freelancing and navigating some pretty chaotic office environments, I realized that technical ability is only half the battle; if you can’t communicate a deadline or manage a difficult client, your hard skills won’t save you. The corporate world loves to wrap soft skills for work in this incredibly pretentious, expensive-sounding language—calling it “emotional intelligence” or “synergistic leadership”—but that’s just gatekeeping. It makes these essential habits feel like some mystical talent you’re either born with or you aren’t, when really, they’re just practical systems for dealing with people.

I’m not here to give you a lecture on “corporate synergy” or some vague, high-level theory that falls apart the second a real crisis hits. Instead, I want to give you the actual, unpolished steps to mastering the interpersonal stuff that keeps your sanity intact. We’re going to break down how to set boundaries, how to actually listen without zoning out, and how to navigate workplace politics without feeling like a fraud. This is about building a toolkit so you can stop reacting to every professional hiccup and start running your career on autopilot.

Table of Contents

Stop Winging It the Real Soft Skills for Work Success

Stop Winging It the Real Soft Skills for Work Success.

Look, we’ve all been there: sitting in a meeting, nodding along while internally screaming because you have no idea how to voice a disagreement without sounding like a jerk. Most people think being “good at your job” just means hitting your KPIs, but the reality is that your technical skills only get you through the door. To actually stay in the room, you need to master interpersonal communication skills that don’t feel forced or performative. It’s about learning how to read the energy in a room and knowing when to push an idea versus when to listen.

Instead of treating every interaction like a high-stakes performance, I’ve found that leaning into adaptability and problem solving is a much better way to live. When a project pivots or a client gets cranky, don’t spiral. Instead, treat it like a glitch in a piece of vintage tech—it’s just a bug that needs a workaround. If you can stay calm and focus on the fix rather than the chaos, you’re already ahead of 90% of the workforce. It’s not about being a perfect person; it’s about having reliable systems for human connection.

Mastering Emotional Intelligence in the Workplace Without the Drama

Mastering Emotional Intelligence in the Workplace Without the Drama

Let’s be real: nobody actually enjoys the “office politics” side of things, but ignoring how people actually feel is a fast track to burnout. When I first started freelancing, I thought being professional just meant hitting deadlines. I quickly realized that emotional intelligence in the workplace is less about being a therapist and more about reading the room so you don’t accidentally step on a landmine during a Zoom call. It’s about noticing when a teammate is redlining and knowing how to pivot your approach before a minor misunderstanding turns into a full-blown Slack thread war.

Building this muscle doesn’t require a personality transplant; it’s just about refining your interpersonal communication skills to be more intentional. Instead of reacting defensively when you get feedback, try to pause and actually process it. I’ve found that treating every interaction like a system—where you observe, assess, and then respond—takes the heat out of the situation. It turns high-stress friction into something manageable, allowing you to keep your cool even when the project is falling apart around you.

Unpolished Systems for Better Interpersonal Communication Skills

Unpolished Systems for Better Interpersonal Communication Skills.

Most people treat conversation like a performance, but I view it more like a system. If you’re constantly misreading the room or feeling like you’re talking past people, it’s usually not a personality flaw—it’s just a lack of a repeatable process. One of my favorite ways to tighten up my interpersonal communication skills is to implement a “pause and process” rule. Instead of reacting instantly to a Slack message or a sharp comment in a meeting, I take five seconds to digest the intent before I type or speak. It stops the defensive spiral before it even starts.

Another way to reduce friction is to stop assuming everyone is on the same page. I’ve learned that clarity is better than being polite. If a task seems vague, don’t just nod and walk away; ask for the specific “why” and the “when.” This isn’t about being difficult; it’s about using adaptability and problem solving to ensure you aren’t wasting three hours on a project that was never what they wanted in the first place. It turns messy interactions into predictable workflows.

Adaptability and Problem Solving Navigating Chaos Without Cracking

Let’s be real: no matter how much you plan, something is always going to go sideways. A client will pivot mid-project, a software update will crash your workflow, or a teammate will go MIA right before a deadline. This is where most people start spiraling, but the secret to staying sane isn’t having a perfect plan—it’s mastering adaptability and problem solving. Instead of treating every sudden change like a personal attack from the universe, I try to view them as just another glitch in the system that needs a quick patch.

When the chaos hits, I lean on a very specific mental framework: stop reacting and start assessing. If you let panic drive your decisions, you’ll end up making mistakes that take twice as long to fix. This is actually a huge part of maintaining your professionalism and work ethic; it’s about showing up with a level head even when the floor feels like it’s shifting. It’s not about being a superhero who never gets stressed; it’s about having the internal systems to pivot without losing your momentum.

Level Up Your Professionalism and Work Ethic Today

Here’s the thing: most people think “professionalism” is about wearing a blazer or using big words in emails. It’s not. To me, true professionalism and work ethic are actually about reliability and how you handle the boring stuff. It’s the system of showing up when you say you will and actually following through on the small tasks that everyone else forgets. When you build a reputation for being the person who actually does what they say they’re going to do, you stop being a variable and start being a constant. That kind of stability is worth more than any fancy degree.

I also think we need to stop viewing leadership and teamwork abilities as something you only get once you have a manager title. You can practice these every single day by just being mindful of how your output affects the rest of the chain. If you’re late with a file, you’re not just “behind”—you’re creating a bottleneck for someone else. Realizing that your workflow is interconnected with your team is the fastest way to level up. It’s about moving from “how do I do my job?” to “how do I help this system work better?”

The Low-Friction Toolkit: 5 Small Habits to Stop the Professional Bleeding

  • Stop being a “yes” person. Real professional boundaries aren’t about being difficult; they’re about protecting your bandwidth so you actually deliver quality work instead of a dozen half-finished projects.
  • Master the “pre-meeting” check-in. Instead of walking into a Zoom call or a conference room cold, spend two minutes reviewing the agenda or sending a quick Slack to the organizer. It eliminates that frantic, unprepared energy that kills your confidence.
  • Learn to write emails that people actually want to read. Ditch the fluff and the “I hope this finds you well” filler. Use bullet points, bold the action items, and get straight to the point. Respecting people’s time is the ultimate soft skill.
  • Practice the “Pause and Process” method. When you get hit with a piece of critical feedback or a stressful request, don’t react instantly. Take ten seconds to breathe and process it. It prevents you from saying something defensive that you’ll have to apologize for later.
  • Build a “Feedback Loop” system. Don’t wait for your annual review to find out how you’re doing. Every few months, ask a trusted colleague or your manager, “What’s one thing I could be doing more efficiently?” It turns growth into a routine rather than a scary event.

The TL;DR: Systems Over Stress

Stop viewing soft skills as “extra” personality traits and start treating them as repeatable systems; once you have a process for communicating or solving problems, you stop reacting and start managing.

Professionalism isn’t about being a robot or using corporate jargon—it’s about being reliable, managing your own emotions, and showing up with a level of consistency that people can actually count on.

The goal isn’t to be perfect in every meeting or conflict, but to build enough of a toolkit that when things inevitably go sideways, you have a way to navigate the chaos without burning yourself out.

The Bottom Line

Look, we’ve covered a lot of ground, from managing your emotional bandwidth to building actual systems for how you talk to your coworkers. The takeaway isn’t that you need to become a perfect, polished corporate robot overnight. It’s about realizing that soft skills aren’t some vague, mystical concept; they are practical tools you can use to stop the daily friction in your career. Whether it’s staying calm when a project goes off the rails or just learning how to communicate a boundary without feeling guilty, these habits are what actually keep you from burning out while everyone else is busy playing office politics.

At the end of the day, your technical skills might get you the interview, but it’s how you show up as a human being that determines how long you actually thrive in the role. Adulthood is messy, and work is often even messier, but you don’t have to navigate it by pure instinct. If you start implementing even just one small system from this list, you’re already ahead of the curve. Stop waiting for a formal training seminar to teach you how to exist in a professional space and just start building your own toolkit today. You’ve got this.

Frequently Asked Questions

How do I actually practice these skills if my current job is mostly remote or task-based?

This is the part where most people get stuck, thinking soft skills require a physical office. They don’t. If you’re remote, your “presence” is your digital footprint. Practice active listening by summarizing a Slack thread before responding, or refine your empathy by reading the subtext in an email tone. Even task-based work is an opportunity: treat every deadline like a reputation-building system. It’s about intentionality, even when you’re just a tiny icon on a screen.

Is it possible to improve my soft skills if I’m naturally more introverted or quiet?

Honestly, being the quiet one in the room isn’t a deficit—it’s actually a superpower if you use it right. You don’t need to become a loud, “extroverted” person to be effective. Instead, lean into your natural strengths: active listening and observation. Focus on high-impact communication, like being the person who asks the one really thoughtful question in a meeting rather than talking just to hear your own voice. Systems beat charisma every time.

How do I show my boss I'm working on these things without making it a big, awkward thing?

The trick is to stop thinking about “announcing” your growth and start focusing on “demonstrating” it through your workflow. Don’t ask for a formal meeting to discuss your “progress”; that’s where the awkwardness lives. Instead, bake these skills into your regular updates. When you handle a conflict calmly or pivot a project smoothly, just mention it casually in a 1:1: “Hey, I tried a new communication approach with the client today to keep things streamlined.” Let the results do the heavy lifting.
Healthy make ahead meals for busy weeknights.

Weeknight Survival: Make-ahead Meals to Save Time

I used to think that “meal prepping” meant spending my entire Sunday afternoon in a frantic, flour-dusted trance, assembling twenty identical plastic containers of bland, steamed broccoli and unseasoned chicken. If I see one more aesthetic TikTok of someone spending six hours making “gourmet” mason jar salads that turn into soggy mush by Wednesday, I’m going to lose it. Real life isn’t a Pinterest board, and honestly, most of those complicated recipes are just a recipe for burnout. I’ve learned the hard way that the goal of make ahead meals shouldn’t be to become a part-time chef; it should be to stop that 6 PM panic where you end up staring blankly into a fridge full of ingredients you’re too tired to actually use.

I’m not here to sell you on a lifestyle overhaul or a complicated grocery list that costs more than my monthly utility bill. Instead, I want to show you how to build a sustainable system of food that actually works with your schedule, not against it. I’m talking about low-effort, high-reward basics that you can mix and match so you don’t feel like you’re eating the same thing every single day. We’re stripping away the gatekeeping and focusing on actual efficiency so you can reclaim your week.

Table of Contents

Stop the Chaos Why Make Ahead Meals Are Non Negotiable

Stop the Chaos Why Make Ahead Meals Are Non Negotiable

Let’s be real: the “emergency” version of my Tuesday usually involves me staring blankly into a fridge full of random ingredients, eventually giving up and ordering expensive takeout. It’s exhausting, it’s expensive, and it’s a total drain on my mental bandwidth. I used to think I didn’t have time for this, but I realized that the time I “save” by not cooking is actually lost to the decision fatigue and the stress of trying to figure out what to eat when I’m already running on fumes.

That’s where a solid system comes in. Implementing actual weekly meal planning strategies isn’t about being a Pinterest perfectionist; it’s about reclaiming your evening. When you have a plan, you aren’t negotiating with your hunger at 7 PM. You’re just executing a system. It’s one of those small, repeatable wins that keeps your life from feeling like a constant scramble. Beyond just saving time, it’s probably the most effective way to stick to a budget without feeling deprived, because you’re actually using what you bought instead of letting it rot in the crisper drawer.

Mastering Weekly Meal Planning Strategies Without the Overwhelm

Mastering Weekly Meal Planning Strategies Without the Overwhelm

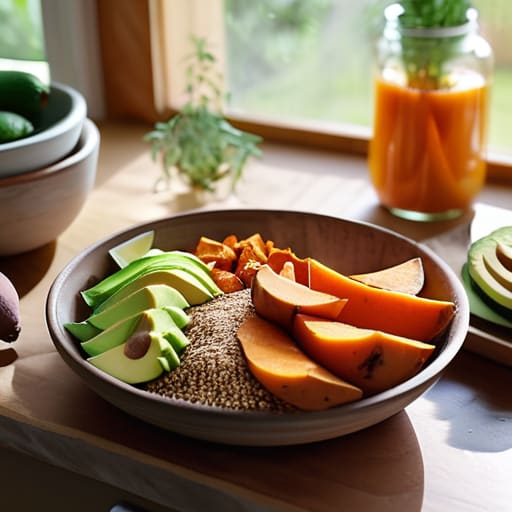
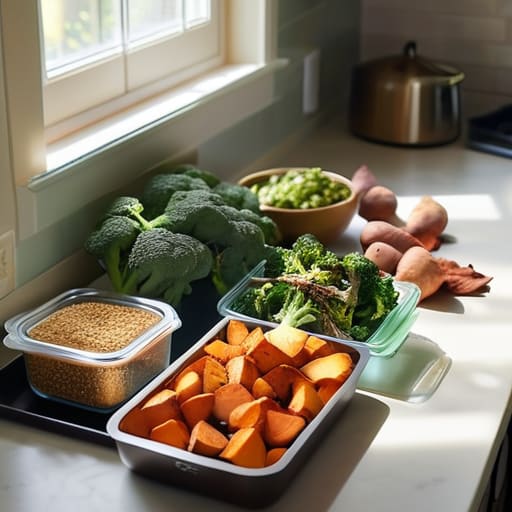
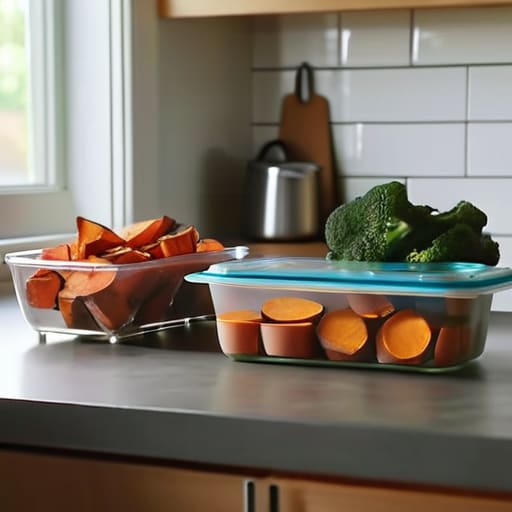
The biggest mistake I see people make is trying to plan a seven-day, five-course menu like they’re auditioning for a cooking show. That is a fast track to burnout. Instead, I swear by simple weekly meal planning strategies that focus on components rather than rigid recipes. Think of it as building a modular kit: roast a big batch of sweet potatoes, cook a mountain of quinoa, and prep two different proteins. If you have these building blocks ready, you can pivot from a grain bowl to a taco salad in about three minutes without needing a new recipe.

Once you have your components, the real magic happens in how you store them. Don’t just throw everything into random Tupperware; invest in some decent meal prep containers for freezing so you can build a “library” of back-up meals for those nights when your brain is totally fried. I also highly recommend the “cook once, eat twice” rule. If you’re making chili on Sunday, make double. It takes almost no extra effort, but it buys you an extra evening of freedom later in the week.

Real World Healthy Meal Prep Ideas for Actual Human Lives

Real World Healthy Meal Prep Ideas for Actual Human Lives

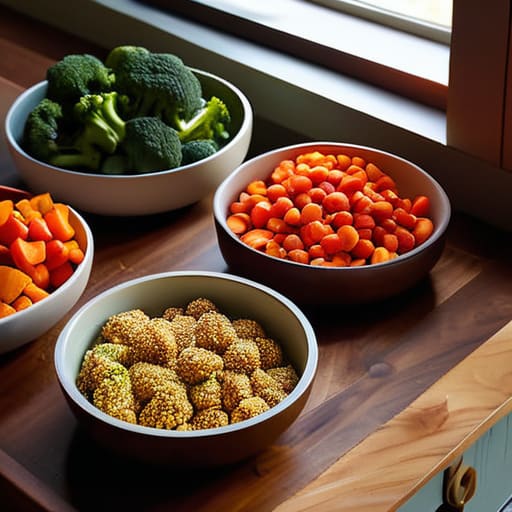
Let’s be real: most “meal prep” content online features aesthetic glass jars filled with perfectly arranged quinoa and kale that no one actually wants to eat by Thursday. My approach is a bit more chaotic but way more sustainable. Instead of trying to cook five different recipes, I focus on building blocks. I’ll roast two sheet pans of seasonal veggies, cook a massive batch of grains, and prep a protein like shredded chicken or seasoned chickpeas. Once you have these components, you can mix and match them all week so you aren’t staring at the same sad salad every single day.

If you’re working with a tight schedule or a tighter budget, lean into batch cooking basics. Think hearty soups, stews, or heavy chili—stuff that actually tastes better after sitting in the fridge for a day. For those of us who occasionally forget we even cooked, investing in decent meal prep containers for freezing is a total game changer. You can portion out extra servings and toss them in the freezer for those “I can’t even deal with cooking tonight” moments. It’s about creating a safety net, not a chore.

Budget Friendly Meal Prep and Time Saving Cooking Hacks

Let’s be real: the biggest barrier to staying on track isn’t a lack of willpower; it’s usually just being broke or being exhausted. If you’re trying to do budget friendly meal prep without spending your entire paycheck on organic microgreens, you have to get strategic. I’ve learned that buying staples in bulk—think grains, dried beans, and frozen veggies—is a total game changer. Frozen produce is just as nutritious as the fresh stuff, but it won’t rot in your crisper drawer if you have a chaotic week.

To save your sanity during the actual cooking process, I swear by a few specific time saving cooking hacks. For example, don’t chop every single vegetable individually; use a food processor or just buy the pre-cut stuff if it’s on sale. Also, if you’re prepping things like stews or chili, invest in some decent meal prep containers for freezing. There is nothing more satisfying than pulling a pre-portioned, homemade meal out of the freezer when you’re too tired to even look at a stove. It turns a potential takeout disaster into a five-minute win.

Pro Systems for Portion Control Meal Planning and Freezing

If you’ve ever pulled a massive, frozen block of spaghetti out of the freezer only to realize it’s enough to feed a small village, you’ve missed a crucial step in your system. To make this actually sustainable, you need to stop thinking in “batches” and start thinking in individual servings. I swear by using specific meal prep containers for freezing—the glass ones are great for reheating, but if you’re tight on space, high-quality silicone bags are total game changers. When you portion everything out immediately, you eliminate that mid-week decision fatigue where you end up ordering takeout because you can’t figure out how much of a dish you actually have left.

The real secret to long-term success is the “component method.” Instead of freezing full meals, try freezing portions of proteins or grains separately. This gives you way more flexibility; you can pivot from a grain bowl to a stir-fry in minutes. It’s one of those time saving cooking hacks that actually works when life gets messy. Just label everything with a piece of masking tape and a sharpie—date, contents, and portion size. It feels a little extra, but trust me, your future, exhausted self will thank you.

My Cheat Sheet for Not Failing at Meal Prep

  • Don’t try to cook five new recipes at once. That’s how you end up with a kitchen full of expensive, untouched ingredients and a massive sense of defeat. Pick one “base” protein or grain and just make a huge batch of it to use in different ways throughout the week.
  • Invest in a decent set of uniform glass containers. I know, it feels like a “lifestyle influencer” thing, but it actually matters. When everything fits perfectly in your fridge and stacks neatly, you can actually see what you have, which stops you from buying a third jar of salsa because you forgot the first two were hiding in the back.
  • Use the “component method” instead of full meals. Sometimes a pre-assembled container of pasta feels heavy or boring by Thursday. Instead, prep roasted veggies, a cooked grain, and a protein separately. It gives you the flexibility to mix and match so you don’t get “flavor fatigue.”
  • Label everything with a piece of masking tape and a sharpie. It sounds extra, but knowing exactly when that chili went into the freezer saves you from the dreaded “is this still safe to eat?” mental spiral.
  • Embrace the “semi-homemade” shortcut. If you’re having a brutal week, don’t feel guilty about using a rotisserie chicken or a bag of pre-washed salad greens. The goal is to eat well with minimal friction, not to win a Michelin star in your own kitchen.

The Bottom Line: Making It Stick

Don’t aim for perfection or a Pinterest-worthy fridge; just aim to have one or two reliable “emergency” meals ready so you aren’t defaulting to expensive takeout when your brain is fried.

Build systems, not just recipes. Whether it’s prepping a big batch of grains or using your freezer strategically, the goal is to reduce the number of decisions you have to make during the week.

Start small and scale up. You don’t need to spend your entire Sunday in the kitchen; even prepping just one protein or one vegetable can be the difference between a chaotic Tuesday and a manageable one.

The Bottom Line

At the end of the day, meal prepping isn’t about becoming a Pinterest-perfect chef or spending your entire Sunday hovering over a stove. It’s about the systems we talked about—the smart grocery lists, the batch-cooking basics, and the freezing hacks that actually save you time. Whether you’re just starting with one big batch of grains or you’re diving deep into full-week portion control, the goal is the same: to stop the constant decision fatigue that hits when you’re hungry and exhausted. You don’t have to do everything at once; just pick one strategy from this guide and start there.

Adulthood is messy, and some weeks are going to feel like a total whirlwind regardless of how many Tupperware containers you have lined up in your fridge. That’s okay. The point of these systems isn’t perfection—it’s about building a safety net for when life gets loud. When you have a solid foundation of make-ahead meals, you aren’t just feeding yourself; you’re buying back your own peace of mind. So, grab your multi-tool, clear some counter space, and let’s make this week a little less chaotic. You’ve totally got this.

Frequently Asked Questions

How do I keep my prepped meals from tasting like soggy leftovers by Thursday?

The “soggy leftover” vibe is usually a texture issue, not a flavor one. First, let your food cool completely before sealing the containers; trapping steam is how you get mushy veggies. Second, stop mixing everything in one bowl. Keep your proteins, grains, and greens in separate compartments so they don’t marinate in each other’s juices. Finally, keep your sauces on the side. Reheating is way less depressing when you add the dressing right before eating.

Is it actually safer to freeze everything, or am I going to end up with freezer burn after a week?

Honestly, it’s a bit of both. If you’re eating something within 3–4 days, the fridge is your best friend. But if you’re prepping for the long haul, freezing is the only way to stop the “what’s for dinner” panic. To avoid that nasty freezer burn, just make sure your containers are airtight or use heavy-duty freezer bags with all the air squeezed out. Think of it as protecting your investment so you don’t waste money.

What’s the best way to prep if I only have a tiny kitchen and zero counter space?

Honestly, the “everything on the counter” approach is a lie. If you’re working with a tiny kitchen, you have to treat it like a high-efficiency workstation. Stop trying to prep everything at once. Instead, use the “one-in, one-out” rule: clear a spot, chop, then move everything immediately into the fridge or a single bin. Invest in nesting bowls to save space, and honestly? Use your cutting board as your only real real estate.

Guide on how to choose a laptop.

Finding the Perfect Laptop for Your Lifestyle

Honestly, stop letting tech reviewers with $5,000 studio setups dictate your life. Most of the “expert” guides on how to choose a laptop are just glorified ad reads designed to make you feel like you’re lagging behind if you don’t have the latest titanium chassis or a processor that can render a Hollywood blockbuster. I spent way too much of my early freelance career thinking I needed a beast of a machine just to manage content calendars and a few dozen Chrome tabs, only to realize I was just throwing money at a problem that didn’t exist. You don’t need a supercomputer; you just need something that won’t die mid-email when you’re working from a coffee shop.

I’m not here to gatekeep specs or drown you in jargon that nobody actually uses in the real world. Instead, I’m going to give you a straightforward system to figure out what you actually need based on how you actually spend your day. We’re going to strip away the marketing fluff and focus on the stuff that matters—battery life, weight, and actual usability—so you can make a decision and get back to your life.

Table of Contents

Stop the Tech Panic a Real Way to Choose a Laptop

Stop the Tech Panic a Real Way to Choose a Laptop

The biggest mistake I see people make is walking into a store or scrolling through a tech site and letting the jargon paralyze them. You see a list of numbers and suddenly feel like you need a computer science degree just to buy a machine for writing emails and streaming Netflix. But here’s the secret: you don’t need to master every single laptop specifications explained in those glossy brochures. You just need to identify your “anchor tasks”—the three or four things you actually do every single day—and build your requirements around them.

If you’re looking for the best laptop for students or someone working remotely, your priority shouldn’t be raw power, but rather reliability and mobility. I always tell my friends to stop chasing the highest numbers and start looking at the balance. Instead of getting lost in the weeds of every single component, focus on the relationship between your processor and RAM requirements and your actual workflow. If you’re just running browser tabs and a few docs, you don’t need a $2,000 beast; you just need a system that won’t lag when you have twenty tabs open during a deadline.

Laptop Specifications Explained Without the Gatekeeping Nonsense

Laptop Specifications Explained Without the Gatekeeping Nonsense

Look, you don’t need to be a computer science major to understand what’s happening under the hood. When you’re looking at laptop specifications explained on a retail site, it usually feels like they’re trying to confuse you into spending an extra $400. Let’s strip it back. Think of the processor as the brain and the RAM as your short-term memory. If you’re just browsing, writing, or streaming, you don’t need a top-tier chip; you just need enough processor and RAM requirements to ensure you aren’t staring at a spinning loading icon every time you open a new tab.

The same goes for storage. Don’t get tricked into buying a massive hard drive if you already live in the cloud. Instead, focus on an SSD—it’s the difference between a laptop that feels snappy and one that feels like it’s running through molasses. If you’re looking for the best laptop for students, prioritize portability and a keyboard that doesn’t feel like mush. You want a machine that survives a long lecture and a heavy backpack without making you want to scream.

Processor and Ram Requirements for Your Actual Daily Life

Processor and Ram Requirements for Your Actual Daily Life

Look, I know the spec sheet looks like a math exam you didn’t study for, but let’s simplify this. When we talk about processor and RAM requirements, we’re really just talking about how much “brainpower” your machine has to juggle your open tabs. If you’re just browsing, writing, or streaming, an entry-level chip is fine. But if you’re the type to have forty Chrome tabs, a Spotify playlist, and a Zoom call running simultaneously, you need to prioritize RAM. I personally never settle for anything less than 16GB; anything less feels like trying to run a marathon in flip-flops. It’s that tiny bit of extra breathing room that prevents your computer from turning into a paperweight mid-deadline.

If you’re looking for the best laptop for students or anyone working remotely, don’t get lured into buying a top-of-the-line processor you’ll never actually use. It’s a waste of money. Instead, aim for the sweet spot where performance meets your actual workflow. You want a machine that feels snappy when you open it, not one that requires a prayer and a coffee break just to load a Google Doc.

Finding the Best Laptop for Students on a Tight Budget

Look, I get it. Being a student is expensive enough without having to drop a grand on a piece of hardware that’s going to be obsolete by junior year. When you’re hunting for the best laptop for students, the temptation is to buy whatever looks sleek in an ad, but that’s how you end up with a glorified paperweight. My biggest piece of advice? Prioritize the essentials over the aesthetic. You don’t need a touchscreen or a backlit keyboard with twenty different color options; you need something that won’t die in the middle of a lecture.

Instead of chasing high-end brands, focus on my go-to budget laptop buying tips: check the refurbished market and look for “last year’s flagship” models. You can often find a machine with much better processor and RAM requirements for half the price of a brand-new entry-level model. Just make sure you aren’t sacrificing too much on build quality. I’d rather have a slightly older, sturdy laptop that actually lasts through a long study session than a cheap, plastic one that falls apart the moment you toss it in your backpack.

Operating System Choices and Battery Life the Real Truth

Now, let’s talk about the software side of things, because your operating system choices will dictate your entire daily experience. If you’re deep in the creative world or need specific software for school, macOS is a dream, but it comes with a “tax” in the form of a higher price tag. Windows is the ultimate chameleon—it can handle almost anything—but it can sometimes feel a bit cluttered with bloatware if you aren’t careful. If you’re looking for the absolute best laptop for students on a razor-thin budget, ChromeOS is a solid way to keep things fast and simple, provided you live mostly in a browser.

But even the most powerful machine is just a glorified paperweight if it dies halfway through a coffee shop session. When you’re looking at a laptop battery life comparison, ignore the marketing fluff. Manufacturers love to claim “up to 15 hours,” but that’s usually in a vacuum with the brightness turned all the way down. Look for real-world reviews. I always prioritize a machine that can actually survive a full workday without me having to hunt for a wall outlet like my life depends on it.

Five Reality Checks Before You Hit "Add to Cart"

  • Don’t fall for the “thinnest is best” trap. If you’re a student or a freelancer moving between cafes, a super slim laptop often means zero ports and a battery that dies before your second coffee. Make sure it actually has the plugs you need so you aren’t living life tethered to a wall outlet.
  • Test the keyboard and trackpad if you can. It sounds extra, but if you’re typing up content or essays for hours, a mushy keyboard will drive you insane. If you’re buying online, check reviews specifically for “typing feel”—it’s a dealbreaker.
  • Prioritize screen brightness over resolution. You don’t need a 4K screen to check emails, but you do need a screen bright enough to see when you’re sitting near a window. Look for at least 300 nits of brightness so you aren’t squinting all day.
  • Check the upgradeability. Some laptops are built like sealed vaults where you can’t change a single thing. If you can find a model where you can add more RAM or a bigger hard drive later, you’re essentially future-proofing your investment for a fraction of the cost.
  • Be honest about your “worst-case scenario” usage. Are you just browsing and Netflixing, or are you running heavy editing software and fifty Chrome tabs at once? Build your system for your busiest day, not your easiest one, or you’ll be looking for a replacement in twelve months.

The TL;DR: Your New Laptop Game Plan

Stop chasing the highest numbers on a spec sheet; instead, match your hardware to your actual daily tasks so you aren’t paying for power you’ll never use.

Prioritize portability and battery life over raw processing speed if you’re someone who actually works from cafes or moves around a lot.

Don’t let “tech jargon” intimidate you into overspending—once you know your baseline needs, buying a laptop becomes a simple checklist rather than a stressful guessing game.

Cutting Through the Noise

At the end of the day, picking a laptop shouldn’t feel like you’re studying for a final exam you didn’t prepare for. We’ve covered a lot, from stripping away the marketing jargon to figuring out if you actually need that extra RAM or if you’re just being sold a dream. Remember: focus on your actual daily workflow—whether that’s juggling twenty Chrome tabs for a freelance project or just streaming shows in bed—and prioritize battery life and a decent keyboard. Don’t let the shiny, high-spec marketing distract you from what makes a machine truly functional for your specific routine.

I know that staring at a wall of technical specs can feel overwhelming, but try to remember that your laptop is just a tool, not a personality trait. It’s there to facilitate your life, not to become a source of constant friction or financial stress. Once you have a system for evaluating what you actually need versus what you’re being told you want, the decision becomes a lot less scary. You’ve got this. Now, go find a machine that works for you so you can get back to actually living your life.

Frequently Asked Questions

Is it actually worth paying extra for a touchscreen, or is that just a gimmick that drains my battery?

Honestly? For most of us, it’s a gimmick. Unless you’re a digital artist or someone who constantly needs to sign PDFs on the fly, you’ll likely find yourself reaching for the trackpad 99% of the time. Touchscreens add extra weight, increase the price, and—most importantly—they absolutely eat through your battery life. If you want a machine that actually lasts through a long coffee shop session, skip the touchscreen and invest that extra cash into better RAM instead.

Should I be looking for a laptop that’s super lightweight for carrying around, or is a bit of extra weight worth it for better performance?

It really comes down to your actual daily friction points. If you’re a student or a digital nomad constantly moving between cafes and libraries, that extra pound in your bag will eventually feel like a literal weight on your soul. But, if you’re doing heavy-duty video editing or multitasking like crazy, a lightweight machine might throttle your performance right when you need it most. My rule of thumb? Prioritize portability unless your work absolutely demands raw power.

How do I know if I’m going to regret buying a Mac versus a Windows laptop once I actually start using it for work?

The only way to avoid that “buyer’s remorse” feeling is to look at your actual workflow, not the hype. If your life revolves around specialized software—think heavy CAD, specific engineering tools, or niche gaming—Windows is your non-negotiable. But if you’re a heavy multitasker who lives in a browser, loves a seamless ecosystem, and needs a battery that won’t die mid-coffee shop session, go Mac. Don’t buy for the brand; buy for the tools you use.

Tips on how to focus while studying.

Staying Focused During Study Sessions (even When It’s Boring)

I used to think that if I just bought the right $30 aesthetic highlighter set or found the perfect “lo-fi beats to relax to” playlist, I’d finally figure out how to focus while studying. I spent more time curating my desk setup and color-coding my digital planner than actually reading my textbooks. It was all just performative productivity, and honestly, it was exhausting. I was treating my brain like a machine that just needed better accessories, rather than a system that was fundamentally broken by constant digital noise and zero structure.

I’m done with the gatekeeping and the “study harder” clichés that do nothing for your actual mental bandwidth. In this guide, I’m stripping away the fluff to give you the actual, unpolished systems I use to keep my brain on track when the distractions start feeling overwhelming. We aren’t talking about overnight miracles or expensive planners; we’re talking about low-friction habits and realistic boundaries that actually work when you’re tired, stressed, or just plain bored.

Table of Contents

Stop the Panic Real Systems for How to Focus While Studying

Stop the Panic Real Systems for How to Focus While Studying environment.

First, we need to talk about your environment. If you’re trying to grind in a room that looks like a laundry pile exploded, your brain is already losing the battle. An effective study environment setup isn’t about having a Pinterest-perfect desk; it’s about removing the visual noise that triggers your “to-do list” anxiety. Clear your surface of everything except what you actually need for this specific task. When you minimize the physical clutter, you’re essentially lowering your cognitive load and learning barriers, making it way easier for your brain to actually latch onto the information instead of scanning the room for distractions.

Next, stop trying to marathon your way through a syllabus. You aren’t a machine, and attempting to pull an eight-hour straight session is a recipe for burnout and zero retention. Instead, I swear by the pomodoro technique for students to keep my momentum steady. Set a timer for 25 minutes of pure, uninterrupted work, followed by a five-minute break where you actually move your body—get up, stretch, or grab water. It turns a daunting mountain of work into a series of manageable sprints, which is much easier on your nervous system.

Building Your Fortress an Effective Study Environment Setup

Building Your Fortress an Effective Study Environment Setup

Your physical space is basically the external version of your brain. If your desk is a graveyard of half-empty coffee mugs and random receipts, your mind is going to feel just as cluttered. An effective study environment setup isn’t about having a Pinterest-perfect aesthetic; it’s about removing every single friction point that pulls you away from the task at hand. I’ve learned the hard way that if my phone is within arm’s reach, I’ve already lost the battle. I now keep it in a completely different room—no exceptions.

To really get into that flow state, you need to manage your cognitive load and learning by simplifying your visual field. I keep my workspace minimal: just my laptop, a notebook, and maybe a single lamp. If you’re feeling overwhelmed, try clearing everything off your desk except what you actually need for the specific subject you’re tackling. It sounds basic, but reducing visual noise is the fastest way to stop your brain from constantly scanning for something else to do. When your environment is dialed in, you aren’t fighting your surroundings; you’re just working.

Cutting Through the Noise by Minimizing Study Distractions

Cutting Through the Noise by Minimizing Study Distractions

Let’s be real: your phone is a dopamine machine designed to wreck your attention span. If you’re trying to study with TikTok notifications pinging every thirty seconds, you aren’t actually working; you’re just performing the idea of working. To actually get things done, you have to get aggressive about minimizing study distractions. I started by moving my phone to a completely different room—not just face down on the desk, but physically out of sight. If it’s in your peripheral vision, your brain is subconsciously dedicating energy to not checking it, which spikes your cognitive load and learning efficiency.

Once the digital noise is dialed down, you need to manage your mental bandwidth. I’m a huge advocate for building deep work study habits by using timed intervals. Instead of staring at a pile of notes for three hours and feeling guilty when you drift off, try a structured approach like the pomodoro technique for students. Set a timer for 25 minutes of pure, uninterrupted focus, followed by a five-minute break where you actually move your body. This prevents that mid-afternoon brain fog and keeps your momentum from stalling out.

Mastering Deep Work Study Habits Without the Burnout

Here’s the thing: we’ve been conditioned to think that “studying hard” means sitting in a chair for six hours straight until our brains feel like mush. That’s not a system; it’s a recipe for burnout. To actually get things done, you need to lean into deep work study habits that respect your brain’s actual capacity. It’s about quality over sheer duration. If you try to force yourself to process complex information when your mental battery is at 5%, you’re just increasing your cognitive load and learning friction without actually retaining a single thing.

Instead of white-knuckling through a marathon session, I swear by a structured rhythm. I usually implement a modified pomodoro technique for students, where I hit intense, focused sprints followed by actual, non-negotiable breaks. A break isn’t scrolling TikTok—that’s just more input. A real break is standing up, stretching, or grabbing water. By cycling between high-intensity focus and intentional rest, you keep your brain from hitting that wall of total exhaustion, making the whole process feel way more sustainable.

Managing Cognitive Load and Learning to Improve Mental Clarity

The biggest mistake I see people making is treating their brain like a hard drive that can run infinite background apps without slowing down. In reality, your brain has a finite amount of bandwidth. When you try to juggle a complex textbook, a half-finished coffee, and that nagging feeling that you forgot to reply to an email, you’re spiking your cognitive load and learning becomes nearly impossible. You aren’t “bad at studying”; you’re just overtaxing your mental processor. To fix this, you have to stop the multitasking myth dead in its tracks.

I’ve found that the best way to handle this is to externalize your mental clutter. If a random thought pops up while you’re mid-sentence, don’t try to solve it right then—write it down on a “brain dump” notepad and get back to the task. This simple act of offloading mental loops allows you to reclaim your focus. By narrowing your scope to just one specific problem at a time, you’re essentially clearing the cache on your internal computer, which is the fastest way to start improving mental clarity for exams without feeling like your head is going to explode.

The Micro-Systems: 5 Tiny Shifts to Keep Your Brain on Track

  • Stop relying on willpower and start using “Time Boxing.” Instead of saying “I’m going to study biology for three hours,” tell yourself you are doing exactly 25 minutes of focused reading, followed by a mandatory 5-minute phone break. It’s much harder for your brain to revolt against a 25-minute sprint than an endless marathon.
  • Use the “Brain Dump” method before you even open a book. If you’re sitting down to work but your mind is racing about that email you forgot to send or what you’re making for dinner, write it all down on a scrap piece of paper first. Get it out of your head and onto the page so your working memory isn’t trying to juggle chores and chemistry at the same time.
  • Curate a “Focus Soundtrack” that stays consistent. I don’t do lyrics while I’m working—it’s too much sensory input. I stick to the same Lo-Fi beats, brown noise, or video game soundtracks every single time. Eventually, your brain will hear those specific sounds and automatically click into “work mode” because it recognizes the cue.
  • Implement a “Digital Lockdown” that actually works. If you find yourself reflexively clicking over to Instagram, put your phone in another room entirely. Not face down on the desk, not in your pocket—in a different room. If the friction of getting up to check it is higher than the urge to scroll, you’ve won half the battle.
  • Practice “Active Recall” instead of passive rereading. Highlighting a textbook feels like studying, but it’s actually just a way to trick yourself into thinking you know the material. Close the book, grab a blank sheet, and try to write down everything you just learned from memory. It’s uncomfortable and it feels harder, but that’s exactly how you know the information is actually sticking.

The TL;DR: Systems Over Willpower

Stop relying on sheer willpower to stay focused; you’ll fail every time. Instead, build physical and digital environments that make focus the default setting rather than a constant struggle.

Protect your brain’s limited energy by managing your cognitive load. If you try to do everything at once, you’ll just end up spinning your wheels and burning out before you actually learn anything.

Treat your study sessions like a repeatable system, not a chaotic emergency. Small, consistent habits—like specific workspaces and distraction-free blocks—are what actually move the needle.

The Bottom Line

At the end of the day, focusing isn’t about some mystical level of willpower or having a “gifted” brain; it’s about the systems you put in place before you even open your laptop. We’ve talked about everything from building a physical fortress for your desk to managing your cognitive load so you don’t hit a wall by 2:00 PM. It’s about minimizing the noise, setting up your environment to work with you instead of against you, and realizing that deep work is a muscle you have to train, not a switch you just flip. If you try to do everything at once, you’re going to burn out, so just pick one or two of these systems and start implementing them this week.

Please stop being so hard on yourself when you have a bad day and your focus completely evaporates. I’ve been there—staring at the same paragraph for twenty minutes while my brain feels like it has fifty browser tabs open at once. Adulthood is messy, and studying is even messier, but you don’t need to be perfect to be productive. You just need to reduce the friction enough to get moving again. You’ve got the tools now; just take it one small, repeatable step at a time and let the systems do the heavy lifting for you.

Frequently Asked Questions

What do I do when I’ve set up my system but my brain still refuses to cooperate?

Look, I’ve been there—you’ve got the perfect desk setup, your phone is in another room, and you’re still just staring at a blinking cursor. When the system fails, stop fighting your brain. It’s usually a sign of mental friction or burnout. Instead of forcing it, pivot. Do a five-minute “brain dump” to clear the clutter, change your physical environment, or switch to a low-stakes task. Don’t white-knuckle through the fog; just reset.

How do I handle sudden, unexpected distractions that aren't just my phone or laptop?

When life decides to throw a wrench in your focus—like a neighbor’s construction or a sudden sink leak—don’t fight it. Fighting the distraction just burns more mental energy. Instead, use the “Acknowledge and Pivot” method. Quickly note the interruption (literally write it down so your brain stops looping on it) and decide: can I solve this in under two minutes, or do I need to reschedule my session? If it’s the latter, pivot to a low-stakes task instead of spiraling.

Is it actually possible to maintain these deep work habits without feeling totally drained by the end of the day?

Honestly? It’s totally possible, but only if you stop treating your brain like a machine that can run at 100% indefinitely. The burnout usually happens because we treat deep work like a sprint instead of a controlled burn. You have to build “recovery buffers” into your system—actual, non-negotiable downtime where you aren’t scrolling or multitasking. If you don’t schedule the rest, your body will eventually schedule it for you via a total meltdown.

How to make handmade diy curtains.

Handmade Curtains: How to Make Them Without a Sewing Machine

I was staring at my living room window last Tuesday, surrounded by three different types of fabric swatches and a mounting sense of dread, realizing I had spent way too much money on “ready-made” panels that looked cheap and hung like wet paper. Most people will tell you that making diy curtains requires a high-end sewing machine and a degree in interior design, but honestly? That’s just gatekeeping. I grew up watching my dad fix everything from leaky pipes to broken chairs with nothing but a basic toolkit and some common sense, and I’ve realized that most home decor “hacks” are just unnecessarily complicated ways to spend more money.

In this guide, I’m stripping away the fluff and giving you the exact, unpolished system I use to get professional-looking windows without the professional price tag. We aren’t going to obsess over complicated pleats or expensive industrial equipment; instead, I’m walking you through the low-friction methods for measuring, cutting, and hanging your own fabric so it actually looks intentional. Whether you’re a total beginner or just someone who wants to stop overpaying for basic textiles, I’ll show you how to get this done efficiently and beautifully.

Table of Contents

Guide Overview

Total Time: 2-4 hours
Estimated Cost: $30-70
Difficulty: Beginner

Tools & Supplies

  • Fabric scissors for clean cutting
  • Sewing machine for stitching hems
  • Measuring tape for accurate dimensions
  • Iron for pressing seams
  • Fabric (2-3 yards depending on window size)
  • Thread (1 spool matching fabric color)
  • Sewing pins (1 box)
  • Curtain tape or header webbing (1 roll)

Step-by-Step Instructions

  • 1. First, grab a tape measure and actually measure twice. Don’t just eyeball the window; you need the width of the rod plus about 6-10 inches of “extra” fabric on each side so the curtains look lush rather than skimpy. For the length, decide if you want them hitting the floor or just skimming the sill, and then add about 4 inches to that number to account for the top and bottom hems.
  • 2. Next, pick your fabric. Since I’m all about making life easier, I usually steer people toward linen blends or heavy cottons because they hang beautifully and aren’t total nightmares to work with. Avoid anything super slippery like silk or cheap polyester if this is your first time; you want something that stays where you put it while you’re trying to pin it.
  • 3. Once you have your fabric, lay it out flat on a clean floor or a large table and cut it to your dimensions. I like to leave a little bit of “breathing room” around my measurements. If you’re feeling brave, you can try a no-sew method using heavy-duty iron-on hem tape, which is a total lifesaver if you don’t want to deal with a sewing machine.
  • 4. If you are going the sewing route, start by folding the edges over to create your hems. I usually do a double fold—fold it once, press it with an iron, fold it again, and press it again. This hides the raw edge of the fabric and makes the whole thing look actually professional instead of like a craft project gone wrong.
  • 5. Now, decide on your hanging method. If you want that effortless, high-end look, I highly recommend making a “rod pocket” by sewing a long tube at the top of the curtain. If you’re more of a minimalist, you can just sew on some discrete curtain rings or even use clip-on rings that attach directly to the fabric.
  • 6. Before you commit to the final stitch, pin everything in place and do a test hang. Use some heavy binder clips to hold the fabric up on your curtain rod just to see how the light hits it and how the length looks in your actual room. It’s much easier to fix a pin than it is to unpick a permanent seam.
  • 7. Finally, do your final sewing or ironing and give them a good steam. Even the most perfectly constructed DIY curtains will look a little sad if they come straight out of a folded pile. A quick pass with a steamer once they are hanging will make them look like you actually spent a ridiculous amount of money at a boutique.

Understanding Diy Curtains

Understanding DIY Curtains through fabric selection.

Before you actually start cutting into your fabric, we need to talk about the vibe you’re going for. I’ve learned the hard way that what looks good on a Pinterest board doesn’t always translate to your actual living room. The biggest game-changer is your fabric selection for window treatments; if you pick something too lightweight, your room will feel unfinished, but if it’s too heavy, it might overwhelm a small space. I usually lean toward linen blends because they have that effortless, lived-in look that doesn’t feel too “stiff” or formal.

Another thing to keep in mind is that your windows aren’t just holes in the wall—they’re the focal point of the room. When you’re measuring windows for curtains, don’t just measure the glass. You want to go wider and higher than the actual frame to make the room feel larger and more expensive. It’s a tiny tweak, but it makes a massive difference in how professional the final result looks. Honestly, getting the dimensions right is half the battle before you even touch a pair of scissors.

Key Things to Know

Key Things to Know: fabric selection.

Before you actually start cutting into anything, let’s talk about the stuff that usually trips people up. First off, don’t underestimate the importance of fabric selection for window treatments. I know, it’s tempting to just grab the cheapest linen you see at a craft store, but if you’re looking for privacy or light control, you need to consider the weight. A heavy velvet feels expensive and cozy, while a sheer voile is great for that airy, minimalist vibe. Just remember: the way the fabric hangs is everything. If it’s too flimsy, your windows will look sad rather than intentional.

Also, if you’re on a tight budget, don’t stress about owning a high-end sewing machine. There are plenty of ways to handle hemming curtains without sewing using iron-on hem tape, which is a total lifesaver for a quick weekend project. One more thing—double (and then triple) check your measurements. I once messed up a whole batch of fabric because I forgot to account for the rod width. Measure twice, cut once isn’t just a cliché; it’s the only way to keep your sanity.

Pro-Tips to Keep You From Regretting This Project

  • Don’t skip the iron. I know, it feels like an extra step, but if you don’t press your fabric before you start cutting, your finished curtains are going to look homemade in the worst way possible. Crisp edges are everything.
  • Measure twice, cut once—literally. Seriously, grab a measuring tape and double-check your window width plus the extra fabric needed for the hems. There is nothing more soul-crushing than realizing you’re two inches short after you’ve already made the cut.
  • Go heavy on the hem. If you want that expensive, high-end look, give your curtains a deep bottom hem. It adds weight so they hang straight and don’t flutter around like crazy every time someone opens a door.
  • Mind your fabric grain. If you’re using a patterned fabric, make sure the pattern is running the right way before you sew. There’s nothing worse than finishing a whole panel only to realize the print is sideways.
  • Use the right needle for the job. If you’re working with heavy velvet or thick linen, don’t try to force a standard thin needle through it; you’ll end up with a broken needle and a lot of frustration. Grab a heavy-duty one from your kit and save yourself the headache.

The TL;DR on DIY Curtains

Don’t sweat perfection; the goal is a functional, custom look that fits your space, not a showroom-ready masterpiece that takes ten hours to finish.

Invest in decent hardware and quality fabric—skimping on the basics is usually where the “DIY look” goes from intentional to just messy.

Measure twice, cut once, and always leave a little extra room; it’s much easier to tuck in a bit of excess fabric than it is to fix curtains that are two inches too short.

The Final Stitch

Completing curtains with The Final Stitch.

At the end of the day, hanging your own curtains isn’t about achieving some Pinterest-perfect, showroom aesthetic that looks like no one actually lives there. It’s about knowing that you measured twice, picked a fabric that actually suits your space, and followed a system that didn’t leave you staring at a pile of wasted textile. Whether you went the easy route with clip rings or tackled a full hem, the goal was to stop letting your windows feel unfinished and start taking control of your environment. You’ve got the tools, you’ve got the measurements, and most importantly, you’ve got a setup that actually works for your specific room.

I know that starting a DIY project can feel a little intimidating—especially when you’re worried about ruining a nice piece of fabric or drilling holes in the wrong spot. But honestly? The slight risk of a mistake is a small price to pay for the massive boost in confidence you get when you realize you don’t need to hire someone else to handle the basics. Adulthood is a lot less heavy when you realize you are actually capable of maintaining your own space. So, take the win, enjoy the new vibe in your room, and remember that every small system you build makes the big stuff much easier to handle.

Frequently Asked Questions

How do I figure out exactly how much fabric to buy so I don't end up with awkward gaps or a massive, expensive leftover pile?

The math part is usually where people panic, but it’s actually pretty simple once you get the formula down. First, measure your window width and multiply that by 2 or 2.5. That’s your “fullness factor”—it’s what prevents your curtains from looking like a flat sheet of paper when they’re closed. Then, add about 8-10 inches for your top and bottom hems. Do that math before you hit the fabric aisle so you aren’t overspending on scraps.

Do I actually need a sewing machine for this, or is there a way to do it that doesn't involve me learning how to thread one?

Honestly? You can totally skip the sewing machine. I’m all about reducing friction, and if the idea of threading a needle feels like a nightmare, don’t do it. You can use heavy-duty iron-on hem tape (like HeatnBond) to create clean, permanent edges with just an iron. It’s faster, way less intimidating, and honestly, if you do it right, nobody is going to know you didn’t stitch them yourself. No stress required.

What’s the best way to hang these if I’m renting and can’t exactly go drilling massive holes into the walls?

The renter’s struggle is real. If you can’t touch the walls, skip the drill and go for heavy-duty Command curtain rod brackets. They’re a lifesaver. Just make sure you clean the wall with rubbing alcohol first so they actually stick—don’t skip that step or your curtains will end up on the floor. If your rod is super heavy, look into tension rods; they wedge between the window frames and require zero hardware.

Learn how to use cloud storage.

Using Cloud Storage to Keep Your Digital Files Secure

Ever had that split second of pure, cold panic when you realize your laptop just died, and the only copy of that massive client project was sitting on its hard drive? I’ve been there, staring at a black screen and feeling like my entire career was evaporating. We’re constantly told that knowing how to use cloud storage is some high-level tech skill, but the truth is, most of the tutorials out there are way too bloated with jargon. They make it sound like you need a degree in computer science just to save a PDF, when really, you just need a system that actually works when things go sideways.

I’m not here to sell you on some expensive, enterprise-grade ecosystem that you’ll never fully utilize. Instead, I’m going to show you the exact, unpolished workflow I use to keep my freelance files organized and, more importantly, completely safe. We’re going to strip away the gatekeeping and focus on the practical steps to setting up a digital safety net that runs in the background of your life. No fluff, no tech-bro hype—just the real-world setup you need to stop worrying about your data and get back to actually doing your work.

Table of Contents

Stop the Digital Chaos How to Use Cloud Storage Effectively

Stop the Digital Chaos How to Use Cloud Storage Effectively

The biggest mistake I see people make is treating the cloud like a giant, messy junk drawer. They just dump everything in there and wonder why they can’t find that one specific PDF when they’re halfway through a meeting. To actually make this work, you need a logic-based folder hierarchy. I’m talking about a system that mirrors how your brain actually categorizes things—think “Work > Clients > 2024 > Project X” rather than just a massive pile of files named final_final_v2.doc. Once you establish this structure, syncing files across devices becomes seamless because you actually know where everything lives, whether you’re on your laptop or checking a quick doc on your phone.

Another thing: don’t ignore the difference between cloud storage vs local storage when it comes to your workflow. I use my hard drive for massive video files that would eat up my subscription quota in a week, but I keep all my essential documents and “active” projects in the cloud. This keeps me from constantly managing cloud storage space or getting hit with those annoying “storage full” notifications right when I need to save something important. It’s all about being intentional with what goes where.

Cloud Storage vs Local Storage Ending the Constant File Hunt

Cloud Storage vs Local Storage Ending the Constant File Hunt

I used to be the person who lived in constant fear of my laptop dying because every single important document—tax returns, portfolio pieces, even my favorite recipes—was sitting on that one physical hard drive. That’s the trap of relying solely on local storage. When you’re stuck in a “local-only” mindset, you’re one spilled coffee or one hardware failure away from a total meltdown. The real magic happens when you understand the nuance of cloud storage vs local storage and stop treating them like enemies.

Think of your local drive as your immediate workspace—it’s fast and doesn’t need internet—but think of the cloud as your safety net and your mobile office. By syncing files across devices, you’re essentially making sure that the version of the spreadsheet you started on your desktop is the exact same one you can finish on your phone while waiting for a latte. It’s about moving away from “where did I save that?” to “it’s just there whenever I need it.” Once you bridge that gap, the mental load of managing your files just… evaporates.

Mastering the Basics of How to Upload Files to the Cloud

Mastering the Basics of How to Upload Files to the Cloud

Honestly, once you understand the mechanics, learning how to upload files to the cloud is pretty much second nature. Most services—whether you’re using Google Drive, Dropbox, or iCloud—work on a simple drag-and-drop logic. You literally just grab the folder from your desktop and slide it into the browser window. If you want to be more efficient, I highly recommend installing the desktop app for your chosen service. This allows for seamless syncing files across devices, so the second you drop a photo into a folder on your laptop, it’s already sitting there waiting for you on your phone. It removes that annoying “I’ll send it to myself via email” middle step that just clutters your inbox.

Just a heads-up, though: don’t just dump everything in blindly. I’ve learned the hard way that managing cloud storage space is a real skill. If you upload every single blurry screenshot or massive unedited video, you’ll hit your storage limit faster than you think. Periodically audit your folders to keep things lean. It keeps your digital workspace clean and ensures you aren’t paying for extra storage you don’t actually need.

Seamlessly Syncing Files Across Devices for a Smoother Life

There is nothing that kills my productivity faster than being halfway through a project on my laptop, only to realize I need to make a quick edit on my phone while I’m out grabbing coffee, and then realizing the file isn’t actually there. It’s a total momentum killer. This is where the real magic of syncing files across devices comes in. When you set up your cloud folders correctly, your digital life starts to feel like one continuous stream rather than a bunch of disconnected islands.

The goal is to reach a point where you don’t even have to think about it. I treat my cloud drive like an extension of my brain; if I save a document in my “Work” folder on my desktop, I expect it to be sitting there, ready to go, the second I open my tablet. It’s about creating a frictionless workflow where your hardware doesn’t dictate your output. Just make sure you’re using a dedicated app for your chosen service rather than just the web browser—it makes the background syncing much more reliable and keeps your life from feeling like a constant scramble for the latest version.

Real Security Cloud Storage Security Best Practices You Need

Let’s be real: the biggest reason people hesitate to move everything online is the “what if I get hacked?” fear. It’s a valid concern, but honestly, most of the risk comes from laziness rather than the tech itself. If you’re just using a weak password and hoping for the best, you’re basically leaving your front door unlocked in a bad neighborhood. To actually stay safe, you need to treat your digital files with the same respect you’d give your physical wallet.

First things first, please, for the love of everything, turn on Two-Factor Authentication (2FA). It’s a minor inconvenience for five seconds of your time, but it’s the single most effective cloud storage security best practice you can implement. Even if someone manages to guess your password, they still can’t get in without that secondary code on your phone.

Also, keep an eye on what you’re actually storing. While the benefits of remote data storage are massive for accessibility, you shouldn’t be dumping your most sensitive, unencrypted documents into a public-facing folder. If you have something super high-stakes—like a scanned copy of your passport—consider encrypting it locally before you even think about uploading it. It’s all about building layers of defense so you can sleep better at night.

5 Tiny Systems to Keep Your Cloud from Becoming a Digital Junk Drawer

  • Stop the “Dump and Forget” habit. If you just drag everything into a folder without a naming convention, you’re just moving the mess from your desktop to the cloud. I use a simple YYYY-MM-DD_ProjectName format so I can actually find things when I’m in a rush.
  • Use the “Single Source of Truth” rule. Pick one main folder for your most important active projects and make sure that’s the only place you’re editing. There is nothing worse than realizing you spent three hours editing a version of a document that wasn’t even the most recent one.
  • Audit your storage once a month. I set a recurring calendar invite for the first Sunday of every month to delete the random screenshots and “temporary” files that are just eating up my space and cluttering my view.
  • Leverage the search function, but only if you use keywords. Since I don’t have time to click through twenty subfolders, I make sure my file titles include specific keywords—like “Tax_Receipt_2023″—so I can just hit Command+F and be done with it.
  • Set up an automated backup for your most critical “life” folders. Don’t rely on your memory to upload your scanned IDs or lease agreements; set your phone to auto-sync your camera roll and your laptop to sync your Documents folder so the heavy lifting happens while you sleep.

The TL;DR: Your Cloud Storage Cheat Sheet

Stop treating the cloud like a junk drawer; use a consistent folder structure now so you aren’t digging through a digital landfill later.

Always keep your most critical files synced across your phone and laptop—if you can’t access it while you’re out, the system is broken.

Security isn’t optional; turn on two-factor authentication immediately so a weak password doesn’t tank your entire digital life.

The Bottom Line

At the end of the day, getting your cloud storage under control isn’t about becoming a tech wizard; it’s just about building a better system so you aren’t constantly playing catch-up. We’ve covered everything from choosing between local and cloud setups to making sure your files actually sync across your phone and laptop without a hitch. Most importantly, we talked about security—because a system is only as good as its ability to keep your private stuff actually private. Once you’ve organized your folders and set up those automatic backups, you’ve effectively removed one major source of digital friction from your daily routine.

I know that setting up these systems can feel like just another chore on an already overwhelming to-do list, but I promise it’s worth the initial effort. Think of it as a gift to your future self—the version of you that is running late for a meeting and desperately needs that one specific PDF. When you stop treating your files like a junk drawer and start treating them like a curated library, you reclaim a weirdly satisfying sense of control. Adulthood is messy enough as it is; don’t let your digital life add to the chaos. Build the system now, and let your technology actually work for you instead of against you.

Frequently Asked Questions

How do I know if I'm paying for way more storage space than I actually need?

Check your storage breakdown before you renew that subscription. Most providers—Google, iCloud, Dropbox—have a “Storage Management” or “Usage” tab that shows exactly what’s eating up your space. If you see you’re only using 15GB of a 2TB plan, you’re basically throwing money into a void. Look for the “ghost files” or massive video folders, clear them out, and downgrade your plan. Don’t pay for empty space just because you’re afraid of running out.

If I delete something from my phone, is it gone from the cloud forever too?

The short answer? Usually, yes. Most services like iCloud or Google Drive are designed to “sync,” meaning they mirror exactly what’s on your device. If you delete a photo on your phone, the cloud thinks you want it gone everywhere. But don’t panic just yet—most platforms have a “Recently Deleted” folder that holds your files in limbo for 30 days. Check there first before you assume it’s gone for good.

Is it actually safe to keep sensitive stuff like my tax returns or ID photos in a cloud folder?

Honestly? It’s safe if you aren’t lazy about it. Storing your tax returns or ID photos in a random, unprotected folder is a massive risk, but using a reputable provider with two-factor authentication (2FA) is actually pretty solid. My rule of thumb: never rely on just a password. If you use a strong, unique password and turn on 2FA, you’re basically building a digital vault that’s way safer than a physical folder sitting on your desk.

Quick and easy dessert recipes for cravings.

Quick and Easy Desserts for Sudden Sweet Cravings

Let’s be real: most of the time, my craving for something sweet hits right when my brain is completely fried from a day of client calls and spreadsheets. I used to think that making a proper dessert required a pantry full of niche ingredients and a level of patience I simply didn’t possess after 7:00 PM. But honestly? Chasing those overly complicated, aesthetic recipes you see on TikTok is a recipe for burnout, not bliss. I’ve spent way too much time cleaning up flour messes just to end up with something mediocre, which is why I’ve finally curated a collection of easy dessert recipes that actually respect my time and my sanity.

I’m not here to give you a lecture on pastry techniques or demand you buy a stand mixer you’ll only use once. Instead, I’ve narrowed it down to five specific, low-effort systems that deliver high-reward results every single time. You’re going to learn how to satisfy that sugar craving using minimal tools and even fewer dishes. These are the reliable, go-to treats I keep in my back pocket for when I want something delicious but have absolutely zero energy to perform culinary gymnastics.

Table of Contents

The Three-Ingredient Pantry Hero

The Three-Ingredient Pantry Hero chocolate ganache.

We’ve all had those nights where the kitchen feels like a foreign country and you don’t have the mental bandwidth to read a recipe with twenty steps. This is my go-to when I’m staring at a nearly empty pantry: chocolate, heavy cream, and a pinch of salt. You just melt them together, let it chill, and suddenly you have a ganache that tastes like it came from a high-end boutique. It’s all about minimizing the friction between wanting something sweet and actually having it.

No-Bake Energy Bites (But Make Them Dessert)

No-Bake Energy Bites (But Make Them Dessert)

If the thought of turning on the oven makes you want to nap, this is the system you need. I call these my “emergency sweets” because they require zero heat and almost zero cleanup. You just toss oats, peanut butter, a bit of honey, and some chocolate chips into a bowl and smash them together until they’re cohesive. It’s essentially a low-effort hack for when you need a sugar fix but also want to feel like you’re eating something somewhat substantial.

The Microwave Mug Cake Reality Check

The Microwave Mug Cake Reality Check.

Look, I know there’s a stigma around microwave desserts, but let’s be real: sometimes you just need a cake right now. This isn’t about winning a baking competition; it’s about satisfying a craving in under two minutes. You just mix a little flour, cocoa powder, sugar, and milk in a mug, pop it in for about a minute, and you’re done. It’s the ultimate efficiency play for the late-night snackers among us.

Affogato: The Sophisticated Lazy Person’s Dream

This is my favorite way to trick people into thinking I have my life together when I’m actually running on caffeine and sheer willpower. An affogato is literally just a scoop of vanilla ice cream with a shot of hot espresso poured over it. There is zero cooking involved, yet it feels like a legitimate culinary event. It’s the perfect bridge between “I need caffeine to function” and “I need sugar to survive.”

Greek Yogurt Fruit Parfait

Sometimes “dessert” needs to feel a little more like “fuel,” especially if you’ve had a heavy lunch. This is my version of a deconstructed cheesecake that actually keeps you from crashing an hour later. You just layer some thick Greek yogurt with a drizzle of honey, some frozen berries, and a handful of granola. It’s a functional dessert that satisfies the sweet tooth without the heavy sugar slump.

The Low-Effort Dessert Strategy

Stop aiming for perfection; the goal here is a quick hit of dopamine without the mountain of dishes.

Keep a few “emergency” staples—like good chocolate or high-quality sea salt—on hand so you can level up even the simplest pantry snacks.

Focus on systems, not recipes; once you know the ratio for a basic crumble or a mug cake, you can stop searching for instructions and just start making things.

Low-Stakes Sweet Success

At the end of the day, these recipes aren’t about achieving some Michelin-star aesthetic or spending three hours cleaning flour off your counters. Whether you’re leaning into the five-minute microwave mug cake for a solo midnight snack or prepping a batch of easy cookies to have on hand for guests, the goal is the same: removing the barrier between you and a little bit of comfort. You don’t need a pantry full of specialty ingredients or a high-end stand mixer to make something that actually tastes good. Just pick one of these systems, keep the ingredients you need on hand, and stop overthinking the process.

I know that sometimes, even something as simple as deciding what to eat can feel like another overwhelming task on an endless to-do list. But treating dessert as a low-stakes ritual rather than a formal production changes the whole vibe. It’s about giving yourself permission to enjoy something sweet without the guilt of a massive cleanup or a failed experiment. Life is messy enough as it is; your kitchen time shouldn’t be. So, grab a spoon, find your favorite cozy spot, and just enjoy the win. You’ve earned it.

Frequently Asked Questions

Can I actually make these if I don't have a full set of baking tools or a fancy stand mixer?

Honestly, please don’t let a lack of equipment stop you. I’m the queen of making things work with whatever is in the drawer. If a recipe calls for a whisk, use a fork. No stand mixer? A sturdy spoon and some elbow grease work just fine. Most of these are designed to be low-friction, so if you have a bowl, a spoon, and a microwave, you’re basically halfway there. Just dive in.

What are the best ways to swap out ingredients if I'm trying to keep things a bit healthier or avoid dairy?

Look, you don’t need to overhaul your entire pantry to make these recipes work. If you’re dodging dairy, oat milk is my go-to for creaminess without the weird aftertaste, and coconut oil is a solid swap for butter in most bakes. If you’re trying to cut back on refined sugar, try a bit of maple syrup or even mashed bananas. It’s all about finding the substitution that fits your specific vibe.

How long can I realistically store these if I make a big batch for the week?

Honestly, it depends on what you’re making, but here’s the rule of thumb I use for my own meal prep. Most of these will stay fresh in an airtight container in the fridge for about 4 to 5 days. If you’re making something with fruit, aim for the earlier side of that window so it doesn’t get mushy. If you want to go bigger, most of these freeze beautifully for up to three months.

Effective time management tips for productivity.

Practical Time Management Hacks to Get Your Life Back

I am so tired of seeing those “aesthetic” productivity influencers post videos of themselves waking up at 4:00 AM to meditate, journal, and color-code a digital planner that looks more like a piece of art than a tool. Honestly, most of those overcomplicated time management tips feel like they were designed for people who don’t actually have a life to run. If you’re like me, you don’t need a $50 leather-bound notebook or a complex ritual; you just need a way to stop your Tuesday from feeling like a constant state of emergency.

I’m not here to sell you on a lifestyle overhaul or some magical app that will suddenly fix your brain. Instead, I’m going to share the unpolished, slightly messy systems I actually use to keep my freelance business and my sanity from colliding. We’re skipping the gatekeeping and the fluff to focus on low-friction habits that actually work when you’re tired, overwhelmed, or just plain busy. This is about making your life run smoother, not adding more work to your to-do list.

Table of Contents

Stop Living in Emergency Mode Real Time Management Tips

Stop Living in Emergency Mode Real Time Management Tips

First, let’s talk about the trap of the “busy” signal. We often mistake being frantic for being productive, but spinning your wheels isn’t progress. To stop the chaos, I’ve leaned heavily on the Eisenhower Matrix technique. Instead of reacting to every ping on my phone, I categorize everything into urgent vs. important. If it doesn’t actually move the needle on my long-term goals, it gets moved to a “later” list or delegated. It sounds simple, but it’s the only way I’ve found to actually start prioritizing tasks effectively without feeling like I’m ignoring my responsibilities.

Once you’ve actually sorted your list, you need a way to execute without burning out by noon. This is where I use the Pomodoro technique benefits to keep my brain from melting. I set a timer for 25 minutes of deep work, followed by a five-minute break to stretch or grab water. It prevents that heavy, midday slump and makes big, intimidating projects feel way more manageable. It’s not about working harder; it’s about creating a rhythm that respects your energy levels.

Ditch the Chaos With Proven Daily Scheduling Methods

Ditch the Chaos With Proven Daily Scheduling Methods

Honestly, the biggest mistake I see people making is trying to build a schedule that looks like a work of art. If your calendar is too rigid, one unexpected email or a late morning coffee run will derail your entire day, leaving you feeling like a failure. Instead of perfection, aim for structure. I’ve found that using the Eisenhower Matrix technique is a total game-changer when everything feels urgent. It forces you to stop reacting to every tiny ping on your phone and actually start prioritizing tasks effectively by separating what’s truly important from what’s just loud.

Once you know what actually matters, you need a way to actually do it without burning out by noon. This is where I lean heavily on the Pomodoro technique benefits—working in focused, timed sprints with actual, scheduled breaks. It’s one of my favorite productivity hacks for professionals because it keeps my brain from turning into mush. It turns a daunting eight-hour workday into a series of manageable sprints, making it way easier to stay on track without feeling like you’re constantly running a marathon.

Mastering the Eisenhower Matrix Technique for Real Priority

Mastering the Eisenhower Matrix Technique for Real Priority

If you’ve ever spent three hours answering non-urgent emails while your actual deadline looms like a dark cloud, you’ve already met the problem the Eisenhower Matrix technique was built to solve. Most of us fail at productivity not because we aren’t working hard, but because we’re busy doing the wrong things. This method is basically a way to audit your brain. You take your massive, terrifying to-do list and split it into four quadrants: Urgent/Important, Not Urgent/Important, Urgent/Not Important, and Neither.

The real magic happens when you realize that most of our “emergencies” actually live in that third quadrant—the stuff that feels loud but doesn’t actually move the needle on your goals. To truly master prioritizing tasks effectively, you have to become ruthless about the “Important/Not Urgent” box. That’s where the deep work lives—the stuff that actually prevents future fires. If you can learn to spend more time in that quadrant, you stop reacting to life and start actually steering it. It’s not about doing more; it’s about doing what actually matters.

Productivity Hacks for Professionals Who Hate Burnout

Here is the reality: most productivity advice feels like it was written by someone who enjoys working 80-hour weeks and drinking nothing but black coffee. If you’re like me, that’s a fast track to total burnout. I’ve learned that true productivity isn’t about squeezing every last drop of labor out of yourself; it’s about working in a way that doesn’t leave you a shell of a human by 5 PM. One of my favorite ways to manage this is by leaning into the Pomodoro technique benefits, which basically means working in focused sprints followed by actual, mandatory breaks. It keeps your brain from turning into mush.

Another thing that saved my sanity while freelancing was finding better overcoming procrastination strategies that didn’t involve self-shaming. Instead of staring at a massive, intimidating project, I started breaking everything down into “micro-tasks” that take less than ten minutes. It lowers the barrier to entry so much that it’s harder to make excuses. When you stop treating your to-do list like a mountain and start seeing it as a series of small, manageable steps, the constant low-level anxiety of “having too much to do” finally starts to fade.

Crushing Procrastination Strategies and the Pomodoro Technique Benefits

Let’s be real: most of us don’t actually struggle with a lack of time; we struggle with the paralyzing urge to avoid the task sitting right in front of us. I used to think procrastination was just a character flaw, but it’s usually just a sign that a project feels too big and intimidating. Instead of trying to power through a massive, vague goal, I’ve found that overcoming procrastination strategies works best when you shrink the target. If you can’t commit to an hour of work, commit to ten minutes. Usually, the hardest part is just breaking that initial seal of resistance.

This is where the Pomodoro technique benefits actually kick in for people like us who get easily distracted by a random notification or a sudden urge to clean the kitchen. By setting a timer for 25 minutes of deep work followed by a 5-minute break, you’re essentially giving your brain a finish line. It turns a marathon into a series of short sprints. It’s not about working harder; it’s about tricking your brain into staying focused long enough to actually get into a flow state without feeling like you’re trapped in a cubicle forever.

Small Tweaks to Keep Your System from Breaking

  • Stop relying on your brain to remember everything. I used to think I had a great memory until I realized I was spending half my mental energy just trying not to forget a grocery list or a client email. Use a “second brain”—whether that’s a simple Notes app or a physical pocket notebook—to dump every single thought immediately. If it’s not written down, it doesn’t exist.
  • Audit your “micro-distractions.” We all know about the big time-wasters like scrolling TikTok for an hour, but it’s the little things that kill your flow—checking a notification mid-sentence or opening a new tab “just for a second.” Try a “closed-tab policy” during deep work blocks where you only have exactly what you need open. It sounds intense, but it stops the mental bleed.
  • Build in “buffer zones” between tasks. One of the biggest mistakes I made early on was scheduling things back-to-back like a robot. Real life happens: a meeting runs over, your laptop needs an update, or you just need five minutes to breathe. If you schedule 15 minutes of “nothing” between big tasks, you won’t feel like you’re failing the second things don’t go perfectly.
  • The “Two-Minute Rule” is a lifesaver for preventing clutter. If a task pops up that takes less than two minutes—answering a quick Slack, filing a receipt, or putting a dish in the dishwasher—do it immediately. Letting these tiny things pile up is exactly how “small tasks” turn into an overwhelming mountain of dread by Friday afternoon.
  • Set a “Hard Stop” for your workday. Since I work freelance, the lines between “home” and “work” get blurry fast. Without a set time to close the laptop and put the phone away, you’ll end up in a state of constant, low-level burnout. Deciding that work ends at 6:00 PM (or whatever works for you) forces you to be more intentional with the hours you actually have.

The Bottom Line: How to Actually Use This

Stop trying to build a perfect, aesthetic life on Pinterest; focus on building small, messy systems that actually work when you’re tired or stressed.

Productivity isn’t about doing more things; it’s about making sure you’re doing the right things so you don’t spend your whole life feeling like you’re just putting out fires.

Be kind to yourself when a system fails—just tweak the process, grab your multi-tool, and get back to it.

The Bottom Line

At the end of the day, none of these tools—whether it’s the Eisenhower Matrix, the Pomodoro technique, or a structured daily schedule—are meant to turn you into some kind of productivity robot. They’re just tools in your kit, much like the multi-tool I keep in my bag, designed to help you navigate the friction of a busy life. We’ve covered how to prioritize what actually matters, how to stop the procrastination spiral, and how to build systems that prevent that constant, low-grade feeling of being overwhelmed. The goal isn’t to squeeze every single second out of your day for maximum output; it’s about creating breathing room so you aren’t constantly playing catch-up.

If you feel like you’re failing because you can’t stick to a perfect routine, please give yourself some grace. Real life is messy, and your systems will break sometimes—that’s just part of the process. The trick isn’t to achieve perfection, but to build resilience into your habits so that when things go sideways, you can reset without spiraling. Start small, pick one method that actually feels intuitive to you, and let the rest go for now. You don’t need to master everything by Monday; you just need to start making life a little bit easier, one small system at a time.

Frequently Asked Questions

How do I actually stick to these systems when my schedule keeps getting hijacked by unexpected emergencies?

This is where most people throw in the towel, but honestly? Expecting a perfect day is the quickest way to fail. When things go sideways, don’t try to force your old schedule back together. Just pivot to “Minimum Viable Productivity.” Pick the top two things that actually matter and let the rest slide. Build in “buffer blocks”—empty spaces in your calendar specifically meant for the inevitable chaos. It’s not a failure; it’s just part of the system.

Is there a way to use these methods without feeling like I'm turning my entire life into a rigid, soul-crushing spreadsheet?

Honestly, I get it. The second a system feels like a chore, you’re going to abandon it. The trick is to treat these methods as guardrails, not a cage. Don’t try to schedule every minute of your day; just use them to protect your energy. If a Pomodoro session feels too intense, skip it. Use the Eisenhower Matrix just to decide what to say “no” to. Systems should serve you, not the other way around.

Which of these techniques should I start with if I’m currently feeling completely overwhelmed and don't even know where to begin?

Honestly, when I’m spiraling and my brain feels like it has fifty tabs open, I go straight to the Eisenhower Matrix. It sounds fancy, but it’s really just a way to stop treating every tiny notification like a five-alarm fire. Don’t try to fix your whole life today. Just grab a piece of paper, dump everything out, and figure out what actually needs your attention right now versus what’s just loud noise. Start there.

Tips on how to write a resume.

Crafting a Resume That Actually Lands the Interview

I used to think that knowing how to write a resume meant spending hours obsessing over fancy templates and trying to sprinkle in enough corporate buzzwords to satisfy some mysterious algorithm. I spent way too many late nights staring at a blinking cursor, convinced that if I didn’t make my experience sound extraordinarily complex, I’d never get a foot in the door. But honestly? Most of that advice is just gatekeeping designed to make a simple task feel like a high-stakes math exam. It’s exhausting, it’s unnecessary, and frankly, it’s a complete waste of your energy.

I’m not here to give you a lecture or sell you a premium template pack; I just want to give you a system that actually works. I’m going to show you how to strip away the fluff and build a document that clearly communicates your value without the performative nonsense. We’re going to focus on functional clarity and repeatable steps so you can stop panicking and start applying. This is the no-nonsense guide to how to write a resume that gets you noticed by humans, not just bots.

Table of Contents

Stop Spiraling the No Nonsense System for How to Write a Resume

Stop Spiraling the No Nonsense System for How to Write a Resume.

First, let’s settle the debate that’s probably living rent-free in your head: chronological vs functional resume styles. Unless you’re making a massive pivot into a completely different industry, stick to the chronological format. It’s what recruiters expect, and it’s much easier for them to scan. When you’re diving into resume writing for beginners, the biggest mistake I see is people trying to be “creative” with layouts. Trust me, unless you’re a graphic designer, just keep it clean. You want a system that flows logically from your most recent win to your earliest role, not a scavenger hunt for your contact info.

Once you have the structure, you need to stop listing tasks and start showing impact. This is where most people fail. Instead of saying “managed social media accounts,” try quantifying achievements on your resume by saying “increased engagement by 20% over three months.” It’s the difference between saying you can cook and actually showing someone a finished meal. If you can’t find a percentage, use scale—how many people did you manage, or how many projects did you juggle? Numbers provide the proof that your system actually works.

Ditch the Fluff Resume Writing for Beginners Who Want Results

Ditch the Fluff Resume Writing for Beginners Who Want Results

Look, I get it. When you’re starting from scratch, looking at a blank page feels like staring into a void. Most people think they need to use these massive, flowery words to sound “professional,” but that’s actually the fastest way to get ignored. If you’re looking into resume writing for beginners, the secret isn’t about sounding like a corporate textbook; it’s about clarity. You want to strip away the filler adjectives like “hardworking” or “passionate”—everyone says those, and they don’t actually mean anything to a recruiter.

Instead of telling them you’re a “great communicator,” show them. This is where quantifying achievements on resume comes in to save your life. Did you manage a social media account? Don’t just say you “posted content.” Say you “increased engagement by 20% over three months.” Numbers provide the proof that your systems actually work. It turns a vague claim into a concrete fact. When you trade fluff for data, you stop begging for a chance and start proving you’re the solution to their problem.

Beat the Bot Real Ats Friendly Resume Tips That Work

Beat the Bot Real Ats Friendly Resume Tips That Work

Let’s be real: most people think they’re being rejected because they aren’t “qualified,” but half the time, a computer just couldn’t read your file. Applicant Tracking Systems (ATS) aren’t some mystical gatekeepers; they’re just basic software looking for specific data points. If you’re using a fancy, two-column layout with graphics and progress bars for your skills, you’re basically invisible. Stick to a clean, single-column layout and use standard headings. When it comes to ATS friendly resume tips, the golden rule is simplicity. If a machine can’t parse your text, a human will never even see it.

Another huge mistake is being too vague. Instead of saying you “helped with social media,” you need to start quantifying achievements on resume to give the software (and the recruiter) something concrete to grab onto. Use numbers, percentages, or specific tools. Instead of “managed projects,” try “managed a $5k monthly content budget.” This isn’t about bragging; it’s about providing the hard data that proves you actually know your stuff. Keep the formatting boring so your actual experience can do the heavy lifting.

Chronological vs Functional Resume Choosing Your Actual Combat Strategy

When you’re staring at a blank Google Doc, the first big decision is picking your layout. It’s basically deciding your combat strategy. Most people default to the chronological vs functional resume debate, but you shouldn’t just pick one because it sounds fancy. The chronological format is the standard for a reason; it tracks your career progression from most recent to oldest. If you have a steady work history, this is your best bet because it’s incredibly easy for recruiters to scan and is naturally one of those ATS friendly resume tips that keeps you out of the digital trash bin.

However, if you’re pivoting careers or have some gaps that make you feel awkward, the functional approach might feel safer. This style focuses on your skill clusters rather than a timeline. But honestly? A word of caution: pure functional resumes can sometimes confuse the bots and the humans alike. My advice for resume writing for beginners is to aim for a “hybrid” model. Lead with a punchy professional summary, then group your best wins by skill, and still include a clear, simplified timeline of where you worked. It gives you the best of both worlds without the fluff.

The Proof Is in the Numbers Quantifying Achievements on Resume

This is where most people trip up. They list their responsibilities like they’re reading back a job description—”Managed a team” or “Handled customer inquiries”—which tells me nothing about how good you actually were at it. To make your experience pop, you need to stop describing your tasks and start proving your impact. This is the core of quantifying achievements on resume; it’s about taking those vague duties and attaching a hard number, a percentage, or a dollar sign to them.

Think of it like this: don’t just tell me you “increased sales.” Tell me you boosted quarterly revenue by 22% through a new client outreach system. Instead of saying you “helped customers,” try “resolved an average of 40+ support tickets daily with a 95% satisfaction rating.” Numbers act as a universal language that cuts through the noise. Even if you’re just starting out with resume writing for beginners, adding even one or two data points transforms you from a passive participant into a high-performer who understands how to drive actual results.

The Final Polish: 5 Small Tweaks to Stop Your Resume from Looking Like a Template

  • Kill the “Objective” statement. Nobody cares what you want from them; they care what you can do for them. Swap that outdated paragraph for a punchy 3-line “Professional Summary” that actually highlights your value right out of the gate.
  • Audit your white space. If your resume looks like a dense wall of text, a recruiter is going to skim right past it. Use consistent margins and bullet points to give the reader’s eyes a place to rest—if they can’t find your skills in six seconds, you’ve already lost.
  • Standardize your formatting. I know, custom fonts are tempting, but stick to something clean and readable like Arial or Helvetica. If you’re using weird symbols or complex layouts, you’re just making it harder for both the ATS and the human reading it to do their jobs.

  • The “Verb Check.” Go through every single bullet point and make sure you aren’t starting with “Responsible for…” or “Assisted with…” It’s passive and boring. Use active, high-impact verbs like orchestrated, streamlined, or negotiated to show you actually took ownership.

  • Save it as a PDF, every single time. Unless a job posting specifically asks for a Word doc, send a PDF. It ensures that the clean, organized system you spent hours building looks exactly the same on their screen as it does on yours.

The TL;DR: Your Resume Survival Kit

Stop trying to sound like a corporate robot; focus on clear, quantifiable wins that prove you can actually do the job.

Choose a format that fits your actual career path—don’t force a chronological layout if your experience is non-linear.

Build a repeatable system for your resume so you aren’t reinventing the wheel every single time a job posting catches your eye.

The Final System Check

Look, we’ve covered a lot of ground, from choosing between a chronological or functional layout to the actual nitty-gritty of beating the ATS bots. The main takeaway I want you to hold onto is that your resume isn’t a biography; it’s a strategic marketing document. You don’t need to list every single thing you’ve ever done since high school. You just need to strip away the fluff, quantify your wins with actual numbers, and build a clean, functional system that tells a recruiter exactly how you can solve their specific problems. If you focus on clarity over complexity, you’re already ahead of 90% of the people applying for the same roles.

At the end of the day, I know how much it sucks to stare at a blank Google Doc feeling like your entire future depends on a single PDF. But remember, a resume is just a tool—it’s a way to open the door, not the entire house. Don’t let the pursuit of “perfect” turn into a state of permanent paralysis. Get your system in place, hit save, and start sending those applications. You have the skills and you have the framework now; the rest is just execution. You’ve got this.

Frequently Asked Questions

What do I even do if I have zero actual work experience to list?

Look, I’ve been there. When you’re starting from zero, your “work experience” isn’t a job title—it’s your life in action. Stop staring at a blank page and start auditing your time. Did you manage a budget for a club? That’s financial oversight. Did you handle a chaotic volunteer event? That’s project management. List your freelance gigs, your heavy-duty coursework, or even that intense DIY restoration project. If you did it consistently, it counts as a skill.

Is it actually okay to use a template from Canva, or will that mess up the ATS?

Honestly? Be careful. I love a good Canva aesthetic as much as the next person, but those hyper-designed templates are often an ATS nightmare. If your resume uses columns, heavy graphics, or text inside shapes, the software might just see a blank page. My rule of thumb: use Canva for your portfolio or creative pitch, but keep your actual resume clean, single-column, and text-based. Don’t let a pretty layout kill your chances.

How many pages is too many—am I overdoing it if I go past one page?

Look, I get the urge to include every single thing you’ve ever done, but please—stop. If you’re a student or early in your career, one page is the gold standard. If you’ve been in the game for a decade, two pages is fine, but three? That’s a novel, not a resume. If it’s not helping you land this specific job, cut it. Keep it tight, keep it relevant, and respect the recruiter’s time.

Tips on how to get an internship.

Finding an Internship That Truly Moves the Needle

I still remember sitting on my bedroom floor during my junior year, surrounded by half-empty coffee mugs and a laptop that was running way too hot, staring at a LinkedIn feed that felt like a personal attack. Every “success story” I read made it seem like you needed a massive network, a perfect GPA, and a secret handshake just to figure out how to get an internship that wasn’t just getting you coffee. It felt like everyone was playing a game where the rules were hidden, and honestly, the sheer amount of gatekeeping in the professional world is exhausting.

I’m not here to give you a lecture on “leveraging synergies” or some other corporate nonsense that sounds great in a textbook but fails in real life. Instead, I’m going to show you the actual, unpolished systems I used to break through the noise. We’re going to skip the fluff and focus on building a repeatable outreach process and a toolkit that actually works. This isn’t about luck; it’s about setting up a workflow so you can stop shouting into the void and start getting real responses.

Table of Contents

Stop the Panic My No Nonsense Guide on How to Get an Internship

Stop the Panic My No Nonsense Guide on How to Get an Internship.

First, we need to kill the idea that you need a perfect, polished pedigree to even start. Most people get stuck in “analysis paralysis,” staring at a blank Google Doc because they think their lack of experience makes them unqualified. The truth? You aren’t looking for a lifelong career right now; you’re just looking for a foot in the door. Instead of doom-scrolling job boards, start by auditing what you actually have. Even if it’s just class projects or volunteer work, these are your building blocks for building professional experience.

Once you stop spiraling, you need a repeatable system for your internship search strategies. Don’t just spray and pray your resume into every LinkedIn posting you see—that’s a one-way ticket to being ghosted. I prefer a “quality over quantity” approach where I pick five companies I actually care about and find a way to actually connect with someone there. Whether it’s a quick DM or a polite email, networking for early career professionals is much more effective than shouting into the digital void and hoping a recruiter notices your PDF.

Ditch the Template Real Resume Tips for Students Who Want Results

Ditch the Template Real Resume Tips for Students Who Want Results

Look, I know the temptation to grab a generic template from Canva and just plug in your info, but that’s exactly how you end up in the “maybe later” pile. Most recruiters can spot a cookie-cutter resume from a mile away, and frankly, it’s boring. Instead of trying to look like everyone else, focus on building professional experience through the lens of impact. Even if you’ve never had a “real” job, you’ve done things. Did you manage a budget for a club? Did you coordinate a volunteer event? Those aren’t just bullet points; they are proof that you can actually handle responsibility.

When you’re navigating the internship application process, your resume needs to act as a bridge between what you’ve done and what you can do. Stop listing tasks and start listing results. Don’t just say you “helped with social media”; say you “increased engagement by 15% over three months.” It sounds small, but it shows you’re thinking about the why behind the work. This isn’t about fluffing your way through; it’s about showing, not just telling, that you’re ready to be useful from day one.

Beyond the Job Board Smarter Internship Search Strategies That Actually Wor

Beyond the Job Board Smarter Internship Search Strategies That Actually Wor

If you’re spending eight hours a day refreshing LinkedIn or Indeed, you’re essentially playing a lottery where the odds are stacked against you. Most people think the only way to land a role is to submit a formal application and pray, but that’s a recipe for burnout. Instead, you need to lean into networking for early career professionals by looking where the jobs actually live: in people’s DMs and casual conversations. I’m talking about reaching out to alumni from your school or even just following people in your niche on social media to see what they’re actually working on.

The goal here isn’t to ask for a job immediately—that’s awkward and usually fails. It’s about lowering the barrier to entry through informational interviews. Ask someone for fifteen minutes to talk about their workflow or how they got their start. This shifts your entire internship search strategies from “begging for a chance” to “building a connection.” By the time a position actually opens up, you aren’t just another random name in a database; you’re a real person they already recognize.

The Unfiltered Truth About Networking for Early Career Professionals

Let’s be real: when people talk about networking, it sounds like this intimidating, high-stakes cocktail hour where you have to wear a blazer and pretend you care about hedge fund margins. It’s gross, right? But if you view it as “making friends in your industry” instead, the pressure drops significantly. For me, networking for early career professionals isn’t about sucking up to executives; it’s about finding people who are actually doing the work you want to do and asking them how they did it. Most people are surprisingly willing to help if you aren’t asking for a job in the first thirty seconds.

The goal isn’t to collect LinkedIn connections like Pokémon cards. It’s about building a loose web of people who know your name and your vibe. Instead of cold-applying to every single opening and hoping for a miracle, try reaching out to an alum from your school for a quick coffee chat. This approach turns the dreaded internship application process from a black hole into a series of warm introductions. You aren’t “gaming the system”—you’re just making sure your name is actually on a human’s desk instead of buried under a mountain of automated rejections.

Mastering Interview Preparation for Internships Without the Corporate Fluff

Look, I get it. The idea of sitting across from a hiring manager makes your stomach do backflips. But here’s the thing: an interview isn’t a deposition; it’s just a conversation to see if you actually want the job and if they’ll enjoy working with you. Most people fail because they try to memorize “perfect” answers that sound like they were pulled from a 2005 career blog. Instead, I want you to focus on storytelling. When they ask about a challenge, don’t give a vague answer. Use the STAR method—Situation, Task, Action, Result—to walk them through a real moment where you actually solved something.

The secret to effective interview preparation for internships is doing your homework so you don’t look like a deer in headlights. Spend twenty minutes digging into their recent projects or their company culture. If you can mention a specific initiative they launched, you’re already ahead of 90% of the other applicants. Also, please, prepare three intentional questions for them. Asking “what does a typical day look like?” is fine, but asking “how does this team measure success for interns?” shows you’re actually thinking about building professional experience rather than just collecting a paycheck.

The Small Systems That Keep You From Spiraling

  • Treat your search like a low-stakes job. Don’t try to spend eight hours a day staring at a screen—you’ll burn out by Tuesday. Instead, set a timer for 90 minutes every morning to send outreach emails or tweak your resume, then close the laptop and go live your life.
  • Build a “Master Document” for your applications. Stop re-typing your entire life story every time a new application pops up. Keep one messy, unpolished doc with every bullet point, project description, and award you’ve ever had, then just copy-paste and refine from there.
  • Organize your follow-ups in a simple spreadsheet, not your brain. If you don’t track when you sent an email or who you talked to, you’re going to look disorganized when you inevitably forget to follow up two weeks later. A basic Google Sheet is all you need to stay sane.
  • Curate your digital footprint before you hit ‘apply.’ Most recruiters are going to Google you the second they see a resume they like. Spend twenty minutes cleaning up your public socials or making sure your LinkedIn actually looks like a human being lives there, not a ghost.
  • Focus on “Proof of Work” rather than just “Experience.” If you don’t have a previous job title to lean on, show them a project you actually finished—a blog post, a restored piece of tech, or a well-organized Notion template. Showing you can actually do things is way more valuable than a fancy title.

The TL;DR: Your Internship Survival Checklist

Stop treating your internship search like a lottery; build a repeatable system of outreach and tracking so you’re actually making progress instead of just feeling busy.

Your resume isn’t a formal biography—it’s a marketing tool, so strip out the fluff and focus on the specific, tangible ways you can solve a company’s problems.

Networking isn’t about “climbing ladders” or being fake; it’s just about having low-pressure, honest conversations with real people to find out how things actually work.

The Bottom Line

Look, getting an internship isn’t about having a perfect, polished pedigree or knowing the secret handshake of some elite corporate club. It’s about building a repeatable system: refining a resume that actually tells your story, moving past the mindless scrolling on job boards, and having the guts to reach out to real people. If you focus on consistent, small actions—like sending two personalized outreach messages a week or tweaking your portfolio—instead of waiting for a miracle, you’re already ahead of 90% of the competition. It’s about moving from a state of reactive panic to intentional preparation.

At the end of the day, please don’t let a “no” or a ghosted email make you feel like you’re failing at adulthood. Most of the professionals you admire have been exactly where you are, staring at a blank screen and wondering if they’re ever going to break in. This process is just a series of iterations, much like any other project I tackle. Keep refining your system, keep showing up, and trust the process. You don’t need to have your entire career mapped out by next Tuesday; you just need to take the next logical step.

Frequently Asked Questions

What do I actually do if I have zero relevant experience or previous jobs on my resume?

Look, I’ve been there, and the “experience gap” feels like a massive wall. But here’s the truth: experience doesn’t just mean a paycheck. I look for “proof of work.” Did you manage a Discord server? That’s community management. Did you fix a vintage radio for a side project? That’s technical troubleshooting. Lean into your class projects, volunteer work, or even that organized chaos of a personal blog. Show them you can actually execute a task.

How much time should I realistically be spending on applications every week without burning out?

Look, if you’re spending forty hours a week staring at job boards, you’re going to crash by Tuesday. I treat my search like a freelance gig: set specific blocks of time—maybe 10 to 15 hours a week—and then actually stop. Quality beats volume every single time. It’s better to send five thoughtful, tailored applications than fifty generic ones that end up in a black hole. Protect your energy; burnout is the ultimate productivity killer.

Is it worth it to apply for internships that don't perfectly match my major if I just want to get my foot in the door?

Honestly? Yes. 100%. I used to think I had to follow my degree like a strict script, but that’s a trap. If you’re looking to build a system for your career, focus on transferable skills—project management, communication, or even just being the person who actually hits deadlines. An internship in a “mismatched” field is just a way to prove you can function in a professional environment. Get the experience; you can pivot the title later.

Page 1 of 2

Powered by WordPress & Theme by Anders Norén