Month: March 2026

Learning how to stop checking your phone.

How to Break Your Phone Addiction and Reclaim Your Attention

I was sitting at my desk last Tuesday, trying to finalize a content strategy for a client, when I realized I’d spent the last twenty minutes scrolling through mindless Reels. My neck was stiff, my eyes felt grainy, and I had that familiar, hollow sense of wasted time settling in my chest. It wasn’t even that I was looking for anything specific; it was just a twitch, a mindless reflex to reach for the glow. If you’re currently spiraling because you can’t figure out how to stop checking your phone every time there’s a three-second lull in your day, please know you aren’t broken or lazy. You’re just caught in a loop that was designed by geniuses to keep you hooked.

I’m not here to sell you on some expensive “digital detox” retreat or tell you to throw your smartphone in a lake. That’s not realistic for anyone actually trying to build a career or a life. Instead, I want to share the low-friction systems I’ve built to reclaim my focus without feeling like I’m living in the Stone Age. We’re going to talk about practical, slightly unpolished ways to rewire your environment so that your attention actually belongs to you again.

Table of Contents

The Reflexive Loop Why You Cant Stop Checking Your Phone

The Reflexive Loop Why You Cant Stop Checking Your Phone

Here’s the thing: you aren’t actually “weak-willed.” That’s a lie we tell ourselves when we feel guilty about scrolling for forty minutes when we meant to check a single text. What you’re actually experiencing is a physiological loop. Every time you see a red notification bubble or a new like, your brain gets a tiny, unearned hit of dopamine. It’s a design choice, not a personal failure. We’ve been conditioned to treat our devices like slot machines, and overcoming smartphone compulsion isn’t about grit; it’s about recognizing that the game is rigged against your attention span.

The problem is that this loop becomes a physical reflex. You find yourself reaching for your phone before you’ve even consciously realized you’re bored or stressed. It’s an automatic response to even the slightest moment of friction in your day. Instead of trying to fight the urge with pure willpower, we need to look at mindful technology consumption as a way to interrupt that circuit. If we don’t understand why our hands are moving on autopilot, we’re never going to build a system that actually sticks.

Dopamine Detox for Smartphone Use Rewiring Your Brains Reward System

Dopamine Detox for Smartphone Use Rewiring Your Brains Reward System

Look, we need to stop treating our phones like neutral tools and start acknowledging them for what they actually are: high-speed delivery systems for cheap dopamine. Every time you get that little red notification bubble or a hit of validation on a post, your brain gets a tiny chemical squirt. Over time, your reward system gets hijacked, making “real life”—which is often quiet or even slightly boring—feel intolerable by comparison. If you want to actually reclaim your brain, you have to lean into a dopamine detox for smartphone use that isn’t about living in a cave, but about resetting your baseline.

This isn’t about some overnight transformation; it’s about lowering the noise. Start by intentionally introducing friction. If you usually grab your phone the second you wake up, leave it in the kitchen overnight. By practicing these digital detox techniques in small, manageable chunks, you’re teaching your brain that it doesn’t need a constant stream of stimulation to function. You’re essentially retraining your focus to exist in the gaps between the pings, which is the only way to actually start improving your focus and attention span for the things that actually matter.

Unpolished Digital Detox Techniques for a Realistic Life

Unpolished Digital Detox Techniques for a Realistic Life

Look, I’m not going to tell you to throw your iPhone in a lake and go live in a cabin in the woods. That’s not realistic for anyone trying to navigate a career or a social life in 2024. Instead, we need to focus on setting digital boundaries that actually stick. One of my favorite low-effort hacks is the “charging station relocation.” If your phone sleeps on your nightstand, you’ve already lost the battle before the day starts. Move your charger to the kitchen or the living room. By physically separating your sleeping space from your device, you stop that immediate morning scroll and give your brain a chance to wake up without a dopamine hit.

Another thing that works for me is aggressive notification pruning. If a notification isn’t coming from a real human being or a time-sensitive calendar alert, it doesn’t deserve to buzz in your pocket. Most apps are just designed to pull you back in through mindful technology consumption—or rather, the lack thereof. Turn off every single non-essential alert. It feels weird for the first day, but once you stop reacting to every little ping, you’ll realize how much mental bandwidth you actually get back.

Setting Digital Boundaries to Stop Overcoming Smartphone Compulsion

The problem with most advice on setting digital boundaries is that it assumes you have infinite willpower. It doesn’t. You can’t just “decide” to be more present when your pocket is buzzing with curated chaos. Instead of relying on self-control, you need to build physical and digital fences that do the heavy lifting for you. I started by designating “no-phone zones” in my apartment—specifically my bed and the dining table. If my phone isn’t physically in the room, the compulsion to check it simply can’t trigger. It’s about removing the option entirely so your brain can finally settle.

This isn’t about a dramatic, week-long retreat; it’s about consistent, small-scale friction. If you’re serious about overcoming smartphone compulsion, try moving all your social media apps off your home screen and into a folder buried three pages deep. If you have to consciously search for Instagram, you break that mindless, reflexive swipe. These tiny hurdles are what actually lead to mindful technology consumption because they force you to ask, “Do I actually need to open this, or am I just bored?”

Mindful Technology Consumption Improving Focus and Attention Span

Here’s the thing: we often treat our phones like an extension of our limbs, but we rarely stop to think about the quality of the interaction. Mindful technology consumption isn’t about throwing your iPhone into a lake and moving to a cabin in the woods; it’s about moving from reactive scrolling to intentional usage. Instead of picking up your device because you feel a phantom buzz or a momentary pang of boredom, try asking yourself a single question before you unlock the screen: “What am I actually looking for right now?” If you don’t have a specific answer, you’re likely just falling into a mindless loop.

By creating this tiny gap between the impulse and the action, you start improving focus and attention span in a way that feels sustainable. It’s less about willpower and more about awareness. When you treat your digital time as a finite resource rather than an infinite void, you naturally start overcoming smartphone compulsion. It’s about reclaiming those micro-moments of your day so you can actually stay present when you’re grabbing coffee or hanging with friends, rather than being half-there and half-scrolling.

My Low-Friction Toolkit for Breaking the Scroll Habit

  • Move your “doomscrolling” apps off your home screen. If you have to swipe three times and search for Instagram, you’ve created enough friction to give your brain a second to ask, “Wait, do I actually want to do this?”
  • Turn your screen to grayscale. It sounds weird, but stripping away the vibrant colors makes your phone look like a boring, 1990s calculator instead of a slot machine. It kills that instant hit of visual dopamine.
  • Establish “No-Phone Zones” in your physical space. I don’t do a full digital detox, but I have a strict rule: no phones at the dining table and definitely none in the bedroom. Buy a cheap analog alarm clock so your phone isn’t the last thing you see at night.
  • Use the “One-Minute Rule” for notifications. If a notification pops up, ask yourself if it actually requires action within sixty seconds. If it’s just a random “like” or a promotional email, turn off the banner and silence the buzz entirely.
  • Charge your phone in a different room at night. This is the hardest one to implement, but it’s the most effective. If you have to physically get out of bed to check a notification, you’re way less likely to fall down a two-hour rabbit hole at 1 AM.

The TL;DR: Systems Over Willpower

Stop relying on willpower to stay off your phone; it’s a finite resource that will fail you when you’re tired. Instead, build physical barriers—like charging your phone in another room—to make the “bad” habit harder to perform.

Treat your digital consumption like any other resource. If you wouldn’t eat junk food for every single meal, don’t let mindless scrolling be your default state of being. Curate your feed to serve you, not drain you.

Progress isn’t about achieving a perfect, tech-free life; it’s about reducing the friction between you and your actual priorities. Aim for intentionality, not total isolation.

Reclaiming Your Real Life

Look, we aren’t going to pretend that you’ll suddenly become a monk who never touches a screen again. That’s not realistic, and honestly, it’s not the goal. The point of everything we’ve talked about—from building physical distance with your phone to understanding that dopamine loop—is to stop the unconscious reflex. It’s about moving away from that mindless scrolling that eats your afternoon and toward a life where you actually choose when to engage with your tech. You don’t need a perfect digital detox; you just need a few solid systems that keep the device from running your entire day.

At the end of the day, your attention is the most valuable thing you own. Every time you reflexively reach for that glowing rectangle, you’re giving a piece of your life away to an algorithm that doesn’t care about your goals or your peace of mind. Start small. Put the phone in a drawer during dinner or leave it in another room while you work. It’s going to feel weird at first, but that friction is actually a sign that you’re taking your power back. Build the systems, protect your focus, and finally start living in the world that’s happening right in front of you.

Frequently Asked Questions

What do I do if my job actually requires me to be on my phone for quick updates or emergencies?

This is where the “all or nothing” mindset fails you. If your job requires you to be reachable, don’t try to go ghost—just build a filter. Set your phone to “Do Not Disturb” but allow calls or texts from specific work contacts to break through. Use a separate app for work comms so you aren’t scrolling through Instagram to find a Slack update. It’s about being available when it matters, not being tethered 24/7.

How do I deal with the FOMO or the actual anxiety that hits when I first start implementing these boundaries?

Look, that spike of anxiety is totally normal—it’s basically digital withdrawal. Your brain is panicking because it’s used to constant stimulation. When that FOMO hits, don’t fight it; just acknowledge it. I usually grab my multi-tool or start a quick, tactile task to ground myself. Replace the scrolling reflex with something physical. You aren’t missing out on life; you’re actually finally showing up for it. Give the system a week to stabilize.

Are there specific apps or tools that actually help with this, or is that just adding more screen time to the problem?

It’s a valid concern—using an app to fix an app feels a bit like using a treadmill to escape a gym. Honestly, most “productivity” apps are just more digital noise. If you use them, keep it strictly functional. I use a simple grayscale setting to make my screen less “rewarding” to look at, and maybe a basic site blocker for when I’m deep in a project. If the tool doesn’t reduce friction, ditch it.


Quick and healthy breakfast ideas.

Nutritious Breakfasts You Can Whip Up in Minutes

I used to think that “eating healthy” meant spending my entire Sunday afternoon in a kitchen-induced trance, prepping elaborate meals that I’d eventually forget about in the back of the fridge. But let’s be real: most of us are just trying to survive the morning rush without crashing by 11 AM. When you’re running on caffeine and pure adrenaline, finding actual healthy breakfast ideas feels less like a wellness goal and more like an impossible chore. I realized that if my breakfast system was too complicated, I was just going to skip it entirely and end up grabbing a sugary pastry on the way to work, which is a recipe for a mid-morning burnout.

I’ve spent a lot of time refining my own morning systems to favor efficiency over aesthetics, and I want to share that with you. In this post, I’m breaking down five specific, low-friction options that actually keep you full and focused. These aren’t those overly curated, “aesthetic” recipes you see on Pinterest; these are real-world solutions designed for people who have actual lives to lead. By the end of this, you’ll have a handful of go-to moves to help you stop treating your mornings like a crisis.

Table of Contents

The Overnight Oats System

Preparing breakfast with The Overnight Oats System.

If you’re the type of person who hits snooze four times and then realizes you have zero time to actually eat, overnight oats are going to be your new best friend. I started doing this when I was juggling freelance clients and realized that a morning spent frantically searching for a granola bar was a morning wasted. You just grab a mason jar, throw in some oats, milk of your choice, and a spoonful of chia seeds, then let it sit in the fridge overnight. It’s essentially a set-it-and-forget-it breakfast that requires zero effort once you’re actually awake.

Savory Egg Bites for Busy Mornings

Savory Egg Bites for Busy Mornings

I used to think that “healthy” breakfast meant sweet, but I quickly realized that a sugar crash at 10:00 AM is the absolute worst for my productivity. Now, I lean into savory egg bites that I bake in a muffin tin once a week. You just whisk up some eggs, toss in whatever veggies are looking sad in your crisper drawer—spinach, peppers, or onions work great—and add a little feta or goat cheese. Once they’re baked and cooled, you can keep them in a container and just pop them in the microwave for thirty seconds whenever you’re hungry.

The High-Protein Smoothie Hack

The High-Protein Smoothie Hack prep bags.

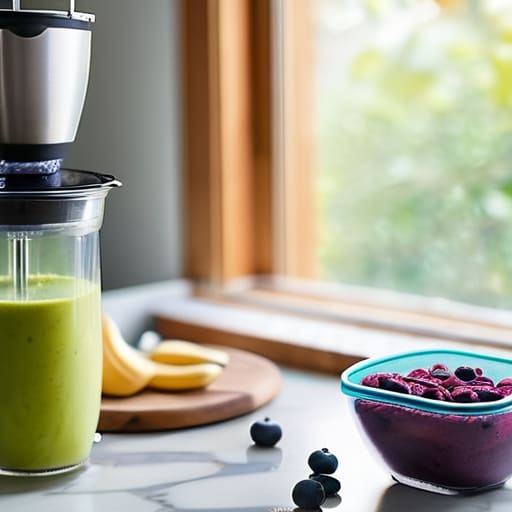
We’ve all been there: you want a smoothie, but by the time you’re washing the blender and chopping fruit, you’re already late for your first call. To fix this, I started using the “smoothie pack” method. I pre-portion my frozen fruit, spinach, and even a scoop of protein powder into individual silicone bags. When it’s time to eat, you just dump the bag into the blender, add your liquid, and blend it in seconds. It turns a chore into a thirty-second task.

Toast with a Strategy

Let’s be real: toast is the ultimate low-effort food, but if you’re just eating plain white bread, you’re going to be hungry again in twenty minutes. To make toast a legitimate breakfast system, you need to focus on the toppings. I usually go for sourdough because it’s easier on the gut, and I always pair it with a fat and a protein. Think avocado with a hard-boiled egg, or almond butter with sliced banana and hemp seeds. It’s about layering nutrients so you don’t crash mid-morning.

Greek Yogurt Bowls

If you want something that feels a little more “aesthetic” but requires almost no actual cooking, Greek yogurt bowls are the way to go. I love these because they are incredibly customizable depending on what you have on hand. The key is to stick to plain, unsweetened Greek yogurt to avoid the hidden sugars that most commercial brands cram into their fruit flavors. You get a massive hit of protein, which is the secret weapon for staying focused during a busy workday.

The Bottom Line

Stop aiming for a five-star brunch every morning; the goal is just to have something fuel-efficient ready so you aren’t running on caffeine and vibes alone.

Systems beat willpower every single time—if you have to make a decision at 7:00 AM, you’ve already lost the battle.

Keep it low-friction. If a “healthy” breakfast takes twenty minutes of prep you don’t have, it’s not a sustainable system, it’s just another chore.

Stop Overcomplicating Your Mornings

At the end of the day, these breakfast ideas aren’t about achieving some impossible level of culinary perfection or posting a curated aesthetic on your story. Whether you’re leaning into the low-maintenance vibe of overnight oats, grabbing something quick like Greek yogurt, or prepping savory egg bites for the week, the goal is the same: removing the decision fatigue that usually hits you the second you wake up. You don’t need a gourmet kitchen or an hour of free time to eat well; you just need a few reliable, repeatable systems that prevent you from reaching for a sugary granola bar or skipping the meal entirely.

I know how easy it is to let your morning routine slide into a chaotic mess of missed alarms and empty stomachs, but I promise you that small, consistent wins change everything. When you stop treating your breakfast like an afterthought and start treating it like a tool for your productivity, the rest of your day starts to feel a lot more manageable. You don’t have to overhaul your entire life overnight. Just pick one of these methods, try it out this week, and see how much better it feels to actually be fueled instead of just caffeinated and running on fumes.

Frequently Asked Questions

I’m not really a morning person—is there a way to prep these even further so I don't have to touch a stove at all?

Honestly, I feel that. I’m definitely not a “sunrise yoga” person. If you want to avoid the stove entirely, lean into the “grab and go” method. Make your overnight oats in mason jars the night before, or prep chia seed puddings. You can even make breakfast burritos (using pre-cooked protein), wrap them in foil, and just grab them from the fridge. No heat, no mess, just zero friction before your first coffee.

How do I make sure these quick options actually keep me full until lunch without crashing by 10 AM?

The secret is avoiding the sugar spike. If you just grab a piece of toast or a granola bar, your blood sugar will tank by 10 AM and you’ll be reaching for caffeine or pastries. You need to pair your carbs with protein or healthy fats. Think: adding an egg to that toast, or throwing some chia seeds into your oats. It’s all about that slow burn to keep your energy steady.

Can I swap out some of these ingredients if I have specific dietary restrictions, or will it totally mess up the prep system?

Absolutely. The whole point of a system is that it’s flexible, not a prison. If you’re dairy-free, swap the yogurt for coconut or soy; if you’re gluten-free, use certified oats. Just try to keep the “prep logic” the same—you’re still prepping a base and adding toppings. As long as the texture and timing work for you, the swaps won’t mess up the system at all. Don’t let a strict recipe stop you from actually using it.

How to set up two factor authentication.

Boosting Your Security With Two-factor Authentication

I still remember the cold, sinking feeling in my stomach when I tried to log into my primary email last year, only to realize someone had already changed my recovery info. I spent six hours on hold with support, feeling like my entire digital life was evaporating while I sat there with a lukewarm coffee and a mounting sense of dread. It was a total mess, and it taught me that relying on just a password is like leaving your front door unlocked in a bad neighborhood. We need to stop treating cybersecurity like some high-level IT chore and start seeing how to set up two factor authentication as a basic, non-negotiable survival skill for the modern world.

I’m not here to bore you with technical jargon or suggest you buy some expensive, enterprise-grade hardware just to protect your Instagram. My goal is to strip away the complexity and give you the actual, unpolished steps to locking down your accounts without making your daily routine feel like a chore. I’ll show you exactly how to navigate the settings and which apps are actually worth your time, so you can build a system that actually works when you need it most.

Table of Contents

Stop the Digital Panic Why Securing Online Accounts Matters

Stop the Digital Panic Why Securing Online Accounts Matters

Look, I’ve been there—that heart-stopping moment when you realize you’ve been logged out of your primary email and your password just… isn’t working. It’s a specific kind of digital vertigo. We spend so much time optimizing our workflows and meal prepping our weeks, but we often leave our digital front doors wide open. Securing online accounts isn’t about being a paranoid tech geek; it’s about preventing that sudden, frantic scramble to reclaim your identity when something goes wrong.

The reality is that a strong password is basically just a suggestion to a modern hacker. Relying on them alone is like locking your front door but leaving the key under the mat. By adding another layer, you’re essentially creating a fail-safe system that stops most bad actors in their tracks. Whether you’re choosing between authenticator app vs sms codes or looking into more advanced biometric options, the goal is the same: minimizing the friction of a potential crisis by making sure unauthorized access becomes nearly impossible. It’s a small setup cost now to avoid a massive headache later.

The Real Way to Handle How to Set Up Two Factor Authentication

The Real Way to Handle How to Set Up Two Factor Authentication

Look, I’m not here to give you a lecture on cybersecurity theory; I just want to show you the actual workflow that works. When you’re looking at different multi-factor authentication methods, you’ll quickly realize that not all of them are created equal. Most people default to getting a text message, but honestly? Relying on SMS codes is a bit of a gamble because of SIM swapping risks. If you want to actually stop preventing unauthorized access from being a constant worry, you need to level up.

The move is to switch to an authenticator app vs sms codes approach. Apps like Google Authenticator or Authy are way more reliable because they live on your device, not your cellular network. I personally swear by using an app because it’s just faster and more secure. Just a heads-up, though: once you set this up, you absolutely must save your backup codes for 2fa in a physical spot or a secure vault. If you lose your phone without those codes, you aren’t just inconvenienced—you’re locked out of your entire digital life.

Cutting Through the Noise Authenticator App vs Sms Codes

Cutting Through the Noise Authenticator App vs Sms Codes

When you start looking into your options, you’ll quickly realize there’s a massive difference between authenticator app vs sms codes. Most people default to SMS because it feels easy—you get a little text, you type in the number, and you’re done. But honestly? Relying on text messages is a bit of a security loophole. Hackers can pull off something called a SIM swap, where they basically hijack your phone number, and suddenly, your “secure” login is wide open. It’s one of those things that feels convenient until it becomes a total crisis.

If you want to actually level up your security, I highly recommend switching to an authenticator app like Authy or Google Authenticator. These apps generate codes locally on your device, which is a much more robust way of preventing unauthorized access. It’s slightly more friction because you have to physically open the app, but that tiny bit of extra effort is what keeps your digital life from falling apart. Just a pro-tip: whenever you set these up, make sure you save your backup codes in a safe, offline spot. If you lose your phone without those codes, you’re going to have a very bad day.

Unlocking Better Security With Biometric Authentication Benefits

If you’re already feeling a bit overwhelmed by the thought of managing extra apps or juggling codes, I get it. But this is where things actually get easier. Once you move past the basic SMS stage, integrating biometrics—like FaceID or your fingerprint—is a total game changer. The biggest of the biometric authentication benefits is that it bridges the gap between high security and actual convenience. Instead of hunting for your phone to grab a code, you’re just tapping a sensor or glancing at your screen. It turns a “security chore” into a split-second habit that doesn’t interrupt your flow.

However, even with the most seamless tech, you can’t rely on your face or thumb alone. I always tell people that true security is about layers. If your phone dies or you’re stuck in a situation where biometrics won’t work, you need a fallback. This is why I’m obsessed with keeping a physical or encrypted digital list of backup codes for 2fa tucked away somewhere safe. It’s the ultimate “just in case” system that prevents a minor tech glitch from turning into a full-blown identity crisis.

The Safety Net Preventing Unauthorized Access and Managing Backup Codes

Here is the part where most people mess up and accidentally lock themselves out of their own lives. When you’re busy preventing unauthorized access by turning on extra security, it’s easy to forget that technology is finicky. Your phone could die, get lost, or suddenly decide it doesn’t like your face anymore. If you haven’t prepared for that moment, you aren’t just inconvenienced—you’re stuck in a digital limbo trying to prove to a bot that you are, in fact, you.

This is exactly why you need to treat your backup codes for 2FA like your passport or your birth certificate. When you finish setting up your preferred method, the site will almost always spit out a list of one-time-use recovery codes. Do not just leave them sitting in your “Downloads” folder or, god forbid, in your email. I personally print mine out and tuck them into my physical planner, or I keep them in a secure, encrypted note that I can access even if my primary device is toast. It feels a little extra, but it’s the ultimate safety net for when things inevitably go sideways.

My Personal Cheat Sheet for Staying Secure Without the Headache

  • Treat your backup codes like actual physical cash; don’t just leave them sitting in a random “Notes” app on your phone. Print them out or write them in a physical notebook you keep in a drawer. If you lose your phone and haven’t saved those codes, you’re essentially locked out of your own life.
  • Prioritize authenticator apps over SMS whenever the option is there. Text messages are surprisingly easy to intercept through SIM swapping, and honestly, waiting for a carrier to deliver a code is just an extra layer of friction I don’t need in my day.
  • Audit your accounts in waves. Don’t try to secure every single random forum you joined in 2016 all at once—you’ll burn out. Start with the big ones: your primary email, your bank, and your main social media. Once those are locked down, the “emergency” feeling drops significantly.
  • Use a password manager to bridge the gap. 2FA is a massive pain if you’re constantly hunting for credentials. A good manager stores your passwords and, in many cases, can handle the autofill for your 2FA codes, which turns a three-minute ordeal into a three-second task.
  • Check your “trusted devices” settings once in a while. If you’ve lost a phone or had a laptop stolen, go into your security settings and manually revoke access for those old devices. It’s a small, five-minute system that prevents old, forgotten hardware from becoming a backdoor into your accounts.

The TL;DR on Not Getting Hacked

Ditch the SMS codes whenever you can; authenticator apps are way more secure and won’t fail you if your signal is trash.

Treat your backup codes like actual cash—don’t just leave them in your email, because if you lose access to your account, those codes are your only way out.

Security doesn’t have to be a chore; once you set up 2FA and biometrics, it becomes a quick, mindless habit that saves you from a massive headache later.

Getting It Done

At the end of the day, setting up 2FA isn’t about becoming a cybersecurity expert or living in fear of hackers; it’s just about building a better system for your digital life. We’ve covered the essentials—from choosing an authenticator app over those flimsy SMS codes to making sure you actually save your backup codes in a spot where you won’t lose them. It might feel like a chore right now, but once you’ve automated these security layers, you won’t have to spend your weekend frantically trying to recover a hijacked Instagram account or a drained bank statement. It’s all about reducing that future friction so you can stop worrying about the “what ifs” and just get back to your actual life.

I know, I know—adding another step to your login process feels like the exact opposite of “efficient.” But I promise you, the five seconds it takes to tap an app is a tiny price to pay for the peace of mind that comes with knowing your data is actually locked down. Adulthood is messy enough without having to deal with digital identity theft on top of everything else. Take the ten minutes today to tighten up your accounts. Your future, less-stressed self will definitely thank you for it.

Frequently Asked Questions

What happens if I lose my phone or my device breaks before I can enter a code?

This is exactly the “emergency mode” I try to help everyone avoid. If your phone dies or goes missing, you’re essentially locked out of your own life unless you’ve prepared. This is why those backup codes I mentioned are non-negotiable—treat them like physical keys to your house. If you don’t have them, you’ll be stuck in a grueling identity verification loop with customer support that can take days to resolve.

Will using an authenticator app make logging into my accounts way more annoying on a daily basis?

Honestly? It feels like a tiny bit more friction at first, but once the muscle memory kicks in, you barely notice. It’s like carrying a multi-tool instead of a massive toolbox—it’s a small extra step that saves you from a total disaster later. I’ve found that the three seconds it takes to tap an app is a much better trade-off than the hours of stress spent trying to recover a hacked account.

Is it actually worth the extra effort for "low-stakes" accounts like shopping sites or social media?

Honestly? Yes. I used to skip it for everything except my bank, thinking it was overkill. But here’s the thing: hackers don’t just want your money; they want your identity. If they grab your Instagram or a random shopping site where your card is saved, they can use that data to pivot into your more important stuff. It’s a domino effect. Taking thirty seconds to toggle 2FA now saves you a massive headache later.

Effective cable management DIY organizational hacks.

Tame the Cord Chaos With These Diy Cable Management Hacks

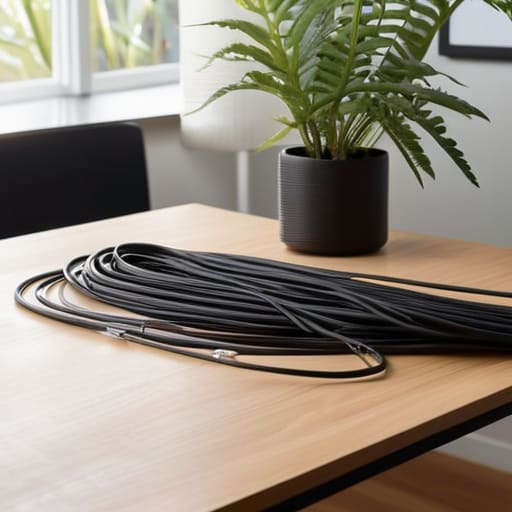
I was sitting on my floor last Tuesday, trying to hunt for a single charging brick, when I realized I was actually fighting a literal war against a massive, dusty nest of black wires behind my desk. It’s that specific kind of chaos that makes you feel like your entire life is spiraling, even if it’s just your workspace. Most people think you need to spend a fortune on those high-end, aesthetic wooden cable boxes to fix it, but that’s a total lie. Real cable management diy isn’t about buying expensive gadgets; it’s about using basic tools to stop the visual noise from draining your energy every time you sit down to work.

I’m not here to sell you on a lifestyle overhaul or some overpriced organizational system that looks good on Pinterest but falls apart in a week. Instead, I’m going to show you how to use stuff you probably already have—or can grab for five bucks at a hardware store—to actually tame the beast. We’re talking about practical, low-effort hacks like using velcro ties and mounting strips to create a system that actually stays put. Let’s get your space back under control so you can actually focus on your work instead of the mess under your feet.

Table of Contents

Guide Overview

Total Time: 1-2 hours
Estimated Cost: $20-50
Difficulty: Beginner

Tools & Supplies

  • Scissors or wire cutters for trimming ties
  • Label maker or masking tape for identification
  • Velcro cable ties (1 pack)
  • Cable management sleeves or raceways (1 set)
  • Adhesive cable clips (1 pack)
  • Power strip (1 unit)

Step-by-Step Instructions

  • 1. First things first, you have to unplug everything. I know, it sounds like a massive chore, but trying to organize a “live” nest of wires is a recipe for a headache and potentially a literal shock. Pull every single cord out from behind your desk and lay them out on the floor. It’s going to look like a disaster zone for a minute, but you need to see exactly what you’re actually dealing with before you can fix it.
  • 2. Once you have your mess spread out, grab a microfiber cloth and some isopropyl alcohol to clean the dust off. If you’re like me, there is probably a layer of gray fuzz coating every single power strip and cord. Trying to manage cables that are covered in grime is gross and honestly just makes the whole process feel more overwhelming. Get it clean now so your new system actually stays clean.
  • 3. Now, let’s talk categorization. Group your cables by their “destination”—meaning, which ones stay plugged into the computer and which ones are just going to a lamp or a charger. Use a label maker or even just some masking tape and a Sharpie to mark both ends of the cord. There is nothing more frustrating than being mid-project and having to trace a black cord through a dark corner just to find out which one it is.
  • 4. This is where the actual “DIY” part kicks in. Instead of buying those expensive, aesthetic cable boxes that look like they belong in a minimalist showroom, go to a hardware store and grab some cheap Velcro ties. Avoid the plastic zip ties if you can; they’re permanent, they’re aggressive, and if you ever need to move your setup, you’ll end up cutting them and potentially nicking a wire. Velcro is your best friend because it’s infinitely reusable.
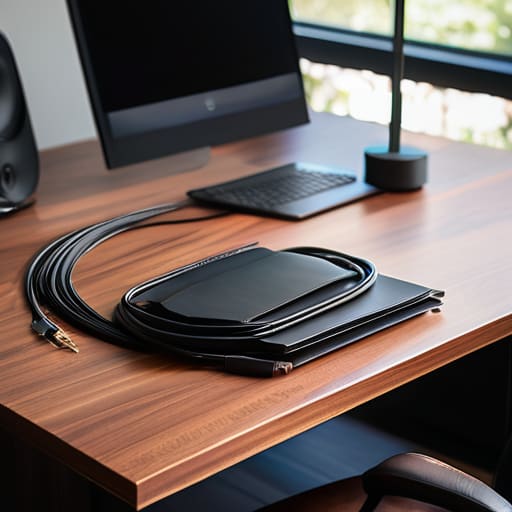
  • 5. Next, we need to deal with the “spaghetti” hanging off the edge of the desk. I highly recommend mounting a power strip to the underside of your desk using heavy-duty command strips or even some simple mounting screws if you’re feeling brave. If you can get the power source off the floor and tucked under the tabletop, you’ve already won 80% of the battle. It keeps the dust away and stops the cords from becoming a tripping hazard.
  • 6. For the cables that absolutely have to run down the back of a desk leg, use some adhesive cable clips. Don’t overthink it; just line them up in a straight path so the wires follow the natural silhouette of your furniture. If you have a bunch of loose chargers, I usually use a small command hook on the side of my desk to keep the lightning or USB-C ends from sliding onto the floor every time I unplug them.
  • 7. Finally, do a “stress test.” Plug everything back in one by one and make sure nothing is being pulled too tight. You want your cables to have a little bit of slack so that if you move your monitor or shift your chair, you aren’t putting tension on the ports. Take a second to admire the lack of chaos—you officially have a system that actually works.

Understanding Cable Management Diy

Understanding Cable Management Diy for workstations.

Before you dive into the actual labor, you need to understand that this isn’t just about making things look pretty for an Instagram aesthetic. It’s about reducing mental friction. When you sit down to work and see a literal bird’s nest of black wires tangling around your ankles, your brain registers it as chaos, even if you don’t realize it. True decluttering workstation electronics is about creating a space where you can actually focus without your eyes constantly darting to the mess on the floor.

I’ve learned through a lot of trial and error that the best approach is to categorize your chaos. Don’t just start wrapping things; first, identify which cables are permanent (like your monitor or desktop) and which are temporary (like your phone charger). Once you know that, you can decide which under desk cable management solutions actually make sense for your setup. There’s no point in buying expensive, heavy-duty trays if you’re only managing a single laptop and a lamp. It’s all about matching the tool to the specific mess you’re trying to solve.

Key Things to Know

Key Things to Know: cord concealment.

Before you go out and buy a bunch of expensive gadgets, there are a few reality checks you need to handle. First, stop thinking you need a professional setup to look clean. Most of the time, you can achieve decent cord concealment hacks just by being intentional about where things sit. One mistake I see all the time is trying to hide everything at once. If you try to shove every single plug behind a desk without a plan, you’ll just end up with a heavy, dusty knot that’s impossible to move. Start by grouping your most used items and leave some slack for when you actually need to unplug something.

Also, don’t overlook the power source itself. A huge part of the struggle is actually organizing power strips and adapters, which usually end up as the biggest culprits of visual chaos. I’ve found that if you secure the strip to the underside of your desk rather than letting it sit on the floor, you’ve already won half the battle. It keeps the dust away and makes the whole area feel intentional rather than accidental.

My Go-To Shortcuts for a Cleaner Setup

  • Stop buying those expensive plastic cord organizers; honestly, a pack of velcro cable ties from the hardware store is way more versatile and won’t strip your wires when you need to move things around.
  • Use adhesive cable clips to run your charging cords along the edge of your desk so they don’t slide off and end up in a heap on the floor every time you unplug your phone.
  • If you have a massive “spaghetti pile” under your desk, grab a cheap mesh cable management tray and screw it to the underside of your tabletop to get everything off the ground and out of sight.
  • Label both ends of your power strips and long extension cords with a simple piece of masking tape and a sharpie; you’ll thank me later when you aren’t playing “guess which plug kills the Wi-Fi” at 11 PM.
  • Don’t overstuff your power strips—it’s tempting to hide everything in one giant box, but if things get too cramped, they can overheat, and that’s a safety issue I don’t want you dealing with.

The Bottom Line

Stop overthinking the gear; most of the time, a few cheap velcro ties and some basic routing are more effective than buying expensive, specialized organizers.

Think in layers—manage the mess behind your desk first, then focus on the visible wires to actually make the space feel calm.

Build systems that are easy to change, because the second you move your monitor or add a new gadget, a rigid setup becomes a headache instead of a help.

Final Thoughts on Your New Setup

Final Thoughts on Your New Setup.

At the end of the day, cable management isn’t about achieving some unrealistic, Pinterest-perfect aesthetic that requires a professional contractor to pull off. It’s really just about reducing the visual noise that’s constantly draining your focus. Whether you decided to invest in some decent cable trays, went the cheap route with velcro ties, or finally labeled those power bricks so you aren’t playing a guessing game every time you need to unplug something, you’ve already done the hard part. You’ve moved from a state of “controlled chaos” to a system that actually works for you instead of against you.

Don’t feel like you have to tackle your entire home office or living room setup in one single afternoon. Adulthood is a lot easier when you approach these small frictions one by one. Start with your desk, get that win under your belt, and then move on to the next mess when you have the mental bandwidth. Building these little systems is how you stop feeling like you’re constantly fighting your environment and start actually enjoying your space. You’ve got this—now go enjoy your clean, cord-free sanctuary.

Frequently Asked Questions

Is it actually safe to bundle power strips and multiple cords together, or am I creating a fire hazard?

Honestly, this is the question I wish more people asked before they went full “cable nest” mode. Here’s the deal: bundling is fine for data cables, but bundling power strips or heavy-duty cords? That’s where it gets sketchy. If you trap too much heat in a tight bundle of high-draw wires, you’re basically building a tiny heater that can melt insulation. Keep your power strips separate and don’t wrap them in thick zip ties. Stay safe.

How do I keep my cable management looking clean if I have a lot of heavy equipment that needs to move around?

If you’re constantly shifting heavy gear, stop using permanent adhesive clips—they’ll just peel off and leave a sticky mess. Instead, lean into braided cable sleeves and heavy-duty Velcro wraps. Group everything into one “trunk” using a sleeve so it moves as a single unit rather than a spaghetti mess. I also swear by weighted cable bases to keep things from sliding off the desk when you unplug something in a hurry.

What’s the best way to handle cables that are stuck behind heavy furniture like a desk or a bed?

Honestly, this is the worst part of the job. You don’t want to risk a back injury or scratching your floor moving a heavy desk just to reach a plug. My go-to move? Get a long, flat-head screwdriver or a yardstick and some painter’s tape. Tape your cables to the stick, slide it into the gap, and use the tool to guide them exactly where you need them. It’s low-effort, but it works.

Easy guide to resin crafts for beginners.

Getting Started With Resin: an Easy Guide for New Crafters

I was staring at my kitchen table, surrounded by half-dried bubbles, a sticky layer of spilled epoxy, and a tray of coasters that looked more like melted plastic than art, wondering why the hell I’d even started this. I had watched a dozen “aesthetic” tutorials, but nobody mentioned that your workspace becomes a literal hazard zone if you don’t have a system. Most people think you need a studio full of expensive gear to master resin crafts for beginners, but honestly? That’s just gatekeeping. You don’t need a professional setup; you just need to stop treating your craft room like a junk drawer and start treating it like a controlled environment.

I’m not here to sell you on the “magic” of resin; I’m here to help you manage the mess. In this guide, I’m stripping away the fluff and giving you the exact, unpolished workflow I use to keep my projects clean and my sanity intact. We’re going to cover the essential gear you actually need, how to avoid those annoying air bubbles, and the real-world steps to finishing your first piece without feeling like you need a chemical shower afterward. Let’s get into it.

Table of Contents

Guide Overview

Total Time: 24-48 hours (including curing)
Estimated Cost: $60-120
Difficulty: Beginner

Tools & Supplies

  • Silicone molds for shaping the resin
  • Mixing cups for measuring and stirring
  • Wooden sticks for mixing
  • Heat gun or torch to remove bubbles
  • Nitrile gloves for hand protection
  • Epoxy resin kit (2-part resin and hardener)
  • Liquid pigments or mica powders for color
  • Silicone molds (various shapes)
  • Glitter or dried flowers for embellishment
  • Sandpaper for smoothing edges

Step-by-Step Instructions

  • 1. First, we need to talk about your workspace, because if you try to do this on your dining table without a plan, you’re going to regret it. Clear off a flat surface that you don’t mind getting a little messy, and lay down a thick layer of silicone mats or cheap plastic tablecloths. Resin is basically permanent once it sets, so having a non-stick barrier is the only way to save your furniture from a lifetime of sticky spots.
  • 2. Next, gear up with the actual safety essentials—and no, a paper mask won’t cut it. You need a pair of nitrile gloves (not latex, which can react with the resin) and a respirator mask if you’re working in a small room. I always keep a dedicated “resin kit” in my tote so I don’t have to hunt for gear mid-project, but the main thing is ensuring you have plenty of ventilation by cracking a window or turning on a fan.
  • 3. Now, let’s get into the actual mixing, which is where most people mess up. Use a small, disposable silicone cup to measure your resin and hardener by weight or volume—follow the ratio on the bottle exactly. If the instructions say 1:1, don’t guess; even a tiny error will leave your project feeling tacky and unfinished. Once you pour, stir slowly with a wooden stick to avoid trapping tiny air bubbles in the liquid.
  • 4. Once your mixture looks clear and consistent, it’s time to add your aesthetic elements. This is where you can get creative with dried flowers, glitter, or even old hardware from my thrift finds, but add them in stages if you’re doing a layered pour. If you dump everything in at once, your decorations will just sink to the very bottom, and you’ll lose that cool 3D effect you were going for.
  • 5. To deal with those annoying bubbles that inevitably pop up, grab a long-reach lighter or a heat gun and lightly pass the flame over the surface of the liquid. You’ll see the bubbles rise and disappear almost instantly. Just don’t hold the heat in one spot for too long, or you’ll actually melt your mold or cause the resin to smoke, which is a total mess to clean up.
  • 6. Finally, the hardest part of the entire process: the waiting game. Cover your piece with a cardboard box to keep dust from settling on it, and leave it completely alone for at least 24 hours. I know it’s tempting to poke it to see if it’s hard, but interrupting the curing process is the fastest way to ruin the structural integrity of your craft.

Ditch the Chaos a Realistic System for Resin Crafts for Beginners

Ditch the Chaos a Realistic System for Resin Crafts for Beginners

The biggest mistake I see people make isn’t the actual pouring; it’s the lack of a “landing zone.” If you try to work on your dining room table without a system, you’re going to end up with a sticky nightmare that ruins your furniture. Before you even touch a bottle, set up a dedicated station with a silicone mat and plenty of ventilation. Honestly, the most important safety precautions for working with epoxy aren’t just about gloves; you really need to be in a space where you aren’t breathing in those fumes all afternoon.

Once your space is set, focus on your workflow to avoid the mid-project panic. I always keep my essential resin art supplies—like stir sticks, heat guns, and levelers—in a single, organized bin so I’m not hunting for them while my resin is halfway through its chemical reaction. Also, don’t rush the process. If you try to force a project before the curing time for epoxy resin is actually complete, you’ll end up with a tacky, ruined mess. Slow down, stay organized, and let the chemistry do its thing.

Mastering the Essentials From Safety Precautions to Perfect Curing Times

Mastering the Essentials From Safety Precautions to Perfect Curing Times

Before you even think about touching your first batch of liquid, we need to talk about the stuff that keeps this from becoming a disaster. I’m big on systems, and the most important system here is your safety setup. Resin isn’t something you want to just “wing” without a plan; you need a well-ventilated space and a solid mask. When it comes to safety precautions for working with epoxy, don’t skimp on the gloves. One accidental spill on your skin is a quick way to ruin the vibe of your entire afternoon.

Once you’ve got your gear, the real magic—and the real frustration—happens during the mix. If you don’t get your resin mixing ratios for beginners exactly right, you’re going to end up with a sticky, half-cured mess that’s basically impossible to fix. It’s all about precision. Also, keep an eye on your environment; temperature matters. If your workspace is too cold, your curing time for epoxy resin is going to stretch out way longer than the bottle says, leaving you stuck in a waiting game that kills your momentum.

Small Wins: 5 Ways to Avoid a Resin Disaster

  • Stop mixing everything at once. It’s tempting to go big, but resin has a ticking clock. Work in small batches so you aren’t racing against a hardening puddle of wasted material.
  • Level your workspace or lose your mind. If your table is even slightly tilted, your pour will eventually drift to one side, and your piece will be lopsided. Check it with a level before you even open the bottles.
  • Embrace the “bubble dance.” Even with the best mixing, you’ll get air bubbles. Keep a heat gun or a butane torch nearby to lightly skim the surface—it’s the only way to get that glass-like finish without the frustration.
  • Don’t skimp on the ventilation. I know, it’s a hassle to set up, but breathing in fumes isn’t part of the aesthetic. Open a window and keep a fan running; your future self will thank you.
  • Use silicone mats for everything. Resin is basically permanent once it hits a surface, so don’t risk your good desk. A cheap silicone mat makes cleanup a five-second job instead of a weekend-long scrubbing session.

The Bottom Line: Making Resin Work for You

Don’t let the “perfect” aesthetic paralyze you; your first few pours are basically just expensive science experiments, so focus on the process rather than a flawless finish.

Invest in your setup, not just your supplies—having a dedicated, well-ventilated space and the right safety gear is what actually makes this hobby sustainable instead of a stressful mess.

Systems beat talent every time; if you prep your workspace and time your mixing carefully, you’ll spend way more time enjoying your creations and way less time cleaning up disasters.

The Messy Reality of Getting Started

The Messy Reality of Getting Started.

At the end of the day, resin is going to be a bit chaotic the first few times you try it. You’ll probably mess up a ratio, or your first pour will end up with a handful of stubborn bubbles, and that is perfectly fine. Just remember the systems we talked about: keep your workspace contained, respect the safety gear like it’s non-negotiable, and don’t rush the curing process just because you’re excited to see the result. If you stick to the basics of measuring accurately and managing your environment, you’re already ahead of most people. It’s all about minimizing the friction between your idea and the finished piece so you can actually enjoy the process rather than just cleaning up a disaster.

Don’t let the fear of a ruined mold or a sticky tabletop keep you from experimenting. The goal here isn’t to produce museum-quality art on day one; it’s to build a workflow that lets you create without feeling overwhelmed. Every mistake is just a data point that helps you refine your system for the next project. So, grab your gloves, clear off a small corner of your desk, and just start pouring. You’ve got the tools and the plan—now you just need to see what happens when you actually dive in.

Frequently Asked Questions

How do I stop getting those annoying tiny bubbles in my resin without buying an expensive vacuum chamber?

Honestly, you don’t need a vacuum chamber to get a clear pour. First, stop stirring like you’re whisking eggs; go slow and steady to avoid whipping air into the mix. I also swear by a heat gun or even a simple butane torch—just pass it quickly over the surface to pop those surface bubbles. If you’re working with pigment, try mixing it in stages. It’s all about reducing the chaos, not spending a fortune.

Is there a way to reuse leftover resin, or am I just going to end up wasting half the bottle?

Honestly, don’t let that leftover resin go to waste—that’s just throwing money down the drain. If you have a small amount left, pour it into a silicone mold to make tiny charms or beads. You can also mix it with glitter or dried flowers to make “resin scraps” for future projects. Just make sure you seal it properly so it doesn’t cure in the bottle. A little bit of planning goes a long way.

My resin feels sticky even after the "official" curing time—what did I do wrong?

Honestly, it’s usually one of three things. First, check your ratio—if you’re eyeballing it instead of using a digital scale, your chemistry is off. Second, your room might be too cold; resin hates a chill and needs warmth to bond properly. Lastly, you might have under-mixed. Even if it looks clear, those tiny unmixed pockets stay tacky forever. Grab a scale, turn up the heat, and mix like your life depends on it.

Best browser extensions for better web experience.

Must-have Browser Extensions for a Better Web Experience

If you’re anything like me, your browser window probably looks like a digital graveyard of fifty open tabs, half-finished research, and way too many distractions. I used to think that feeling constantly overwhelmed while working was just part of the job, but honestly? It’s just bad systems. We spend so much of our lives staring at a screen that our digital environment dictates our mental state. Finding the best browser extensions isn’t about adding more clutter to your toolbar; it’s about building a digital perimeter that actually protects your focus instead of draining it.

I’ve spent way too many hours testing different tools to see what actually sticks and what’s just a glorified way to waste more time. In this post, I’m stripping away the fluff and giving you the only five tools that have actually helped me reclaim my brain and streamline my workflow. These aren’t just random suggestions—they are the specific, functional pieces of my daily setup that turn a chaotic browser into a high-functioning workspace. Let’s get your digital life under control so you can actually get things done.

Table of Contents

Kill the Distractions with uBlock Origin

Kill the Distractions with uBlock Origin.

Honestly, the first thing I did when I started freelancing was installing uBlock Origin. There is nothing that kills my flow faster than a sudden, loud pop-up ad or a video that starts playing automatically when I’m just trying to research a client project. It’s not just about the annoying visuals, though; it’s about the mental bandwidth you lose every time your brain has to process a piece of digital junk you didn’t ask for.

Save Your Brain with Pocket

Save Your Brain with Pocket app.

My biggest struggle used to be the “tab graveyard”—you know, those thirty open tabs you keep because you “might” read that article later. Instead of letting my browser become a chaotic mess of half-finished thoughts, I just toss everything interesting into Pocket. It’s a simple way to curate a personal library of things that actually matter to me without cluttering my workspace.

Master Your Focus with Forest

Master Your Focus with Forest app.

I’m a sucker for a good system, but sometimes my willpower just isn’t enough to keep me off social media when I have a deadline looming. That’s where Forest comes in. It’s a gamified timer that helps you stay off your phone (and your distracting sites) by growing a virtual tree while you work. If you leave the app to go check a random notification, your little tree withers and dies, and honestly, the guilt is a surprisingly effective motivator.

Automate the Boring Stuff with Grammarly

Look, I have a degree in Communications, but that doesn’t mean I’m immune to typos, especially when I’m typing fast or working on a low-energy Tuesday afternoon. I use Grammarly not because I can’t write, but because I want to remove the friction of self-editing every single email and pitch. It catches those tiny, embarrassing mistakes that my eyes just naturally skip over when I’m in a rush.

Organize Your Life with Notion Web Clipper

Since I spend a huge chunk of my life building out content strategies and research boards, I need a way to move information from the web into my actual workspace without the manual copy-paste headache. The Notion Web Clipper is my go-to for this. I can grab a recipe, a design inspiration, or a piece of industry news and instantly categorize it directly into my Notion databases.

The Bottom Line

Don’t go overboard; the goal is to reduce friction, not to turn your browser into a cluttered mess of icons you never click.

Start with just one or two of these to see how they actually change your workflow before trying to automate everything at once.

Treat your digital space like your physical one—if a tool isn’t actually saving you time or mental energy, delete it and move on.

Reclaiming Your Digital Space

At the end of the day, these extensions aren’t about adding more “stuff” to your digital life; they’re about removing the friction that keeps you from actually getting things done. Whether you’re using a blocker to stop the endless scrolling loop, a manager to handle your heavy tab load, or a tool to streamline your research, the goal is the same: minimizing mental clutter. You don’t need to install every single thing on the Chrome Web Store to see a difference. Just pick the two or three that solve your specific, most annoying digital headaches and let them do the heavy lifting for you.

I know how it feels to stare at a browser window that looks like a digital junk drawer and feel that immediate sense of overwhelm. But remember, your tools should work for you, not the other way around. Implementing these small systems is a way of respecting your own bandwidth and protecting your focus from a world designed to distract you. Start small, keep your setup clean, and give yourself permission to close those tabs. You’ve got this, and honestly, once you build these little digital guardrails, you’ll wonder how you ever managed without them.

Frequently Asked Questions

Won't having all these extensions running at once slow down my laptop or drain my battery?

Honestly, that’s a fair concern. I used to worry about my laptop turning into a space heater every time I added something new. The short answer? Yes, if you go overboard, it’ll eat your RAM and drain your battery. But if you’re just using a handful of well-coded tools, you won’t notice a thing. My rule of thumb: if an extension feels laggy or you haven’t clicked it in a month, delete it. Keep it lean.

Are these extensions actually safe to use, or am I basically handing over my browsing data to a bunch of strangers?

I totally get the hesitation—it feels a little sketchy, right? Honestly, I’m picky about this too. My rule of thumb is to stick to extensions with high user counts, transparent privacy policies, and “open source” tags whenever possible. I always check the permissions before hitting install; if a simple dark mode tool is asking for access to my bank details, I’m out. Stick to the big names, and you’ll be fine.

How do I know if an extension is actually worth the space, or if it's just going to become more digital clutter?

Honestly, I use the “one-week trial” rule. If I install an extension and don’t find myself clicking it or relying on it daily within seven days, it’s dead weight. Digital clutter is just as heavy as physical clutter—it slows down your browser and drains your focus. If it isn’t actively solving a recurring problem or saving me at least five minutes of mental energy, I hit uninstall. If it’s not working for you, it’s just noise.

Guide to mastering inbox zero email management.

Mastering Inbox Zero: a Guide to Taming Your Email

I used to think that achieving inbox zero required some high-level productivity ritual or a $50-a-month subscription to a fancy AI organizer. I spent months chasing that “clean slate” feeling, only to wake up the next morning to a mountain of unread notifications that made my stomach do a tiny, anxious flip. Honestly, the productivity gurus make it sound like this holy grail of Zen, but for most of us, it just feels like treading water in a sea of digital noise that never actually stops.

I’m not here to sell you on a lifestyle overhaul or a complicated system that takes more time to maintain than the emails themselves. Instead, I’m going to give you the actual, unpolished steps I use to keep my digital life from spiraling. We’re going to strip away the gatekeeping and focus on a few sustainable habits that actually work for a busy, real-world schedule. No fluff, no expensive software—just a way to make your inbox work for you instead of the other way around.

Table of Contents

Stop Treating Your Inbox Like a Constant State of Emergency

Stop Treating Your Inbox Like a Constant State of Emergency.

The biggest mistake I see people making is treating every single notification like a fire that needs immediate extinguishing. We’ve been conditioned to think that seeing a red bubble on our app icon means we’re failing at life, but that’s just a recipe for burnout. When you react to every ping, you aren’t actually working; you’re just performing task-switching all day long. This constant state of high alert is exactly what leads to managing email overwhelm becoming a full-time job instead of a five-minute habit.

To fix this, you have to stop viewing your inbox as a to-do list. An inbox is just a waiting room, not the actual office. I started implementing a few specific email organization techniques to create a buffer between my brain and the incoming chaos. Instead of hovering over the refresh button, I set specific windows throughout the day to process everything at once. By decoupling my immediate attention from the arrival of a message, I finally stopped feeling like my digital life was constantly screaming for attention.

The Real World System for Achieving Actual Inbox Zero

The Real World System for Achieving Actual Inbox Zero.

First, we need to stop treating every notification like a fire drill. I started using a basic email workflow optimization strategy that centers on the “Three-Folder Rule”: Action Required, Awaiting Reply, and Archive. Instead of letting emails sit in your primary view like unwashed dishes in a sink, you move them immediately. If it takes less than two minutes, do it now. If it takes longer, it goes into “Action Required.” Everything else gets archived or deleted. This simple shift is the core of my zero inbox methodology because it stops the visual noise from triggering that low-level anxiety every time you open your laptop.

Next, you have to get aggressive with reducing digital clutter through automated filters. I spent an entire Sunday setting up rules so that newsletters and receipts bypass my inbox entirely and land in a dedicated “Read Later” or “Finance” folder. You don’t need to see a promotional discount code the second it hits your server. By implementing effective email filtering, you’re essentially building a gatekeeper for your brain, ensuring that when you actually sit down to work, you’re only seeing what truly matters.

Ditch the Chaos With Better Email Workflow Optimization

Ditch the Chaos With Better Email Workflow Optimization

The biggest mistake I see people making is treating their inbox like a glorified to-do list. When you use your inbox as a landing pad for every single thought or task, you aren’t actually working; you’re just reacting. To stop this cycle, you need to move toward actual email workflow optimization rather than just playing a constant game of whack-a-mole with unread notifications. This means setting strict boundaries on when you actually engage with your mail. If you’re checking your phone every time a ping goes off, you’re letting other people’s priorities dictate your entire morning.

Instead of manual sorting, lean into automation to handle the heavy lifting. I’m a huge advocate for effective email filtering—setting up rules so that newsletters, receipts, and CC’d threads bypass your primary view and go straight into dedicated folders. This is the fastest way to start reducing digital clutter without having to spend hours clicking and dragging. The goal isn’t to have a perfect, color-coded masterpiece; it’s to build a system where the only things hitting your main view are the things that actually require your brainpower.

Reducing Digital Clutter Without the Gatekeeping Nonsense

Look, we need to talk about the stuff that’s actually weighing you down before you even start sorting. You can’t build a clean system on top of a mountain of digital trash. Most people think they need complex email organization techniques to get organized, but usually, they just need to stop letting every single newsletter and notification take up space in their brain. I’m talking about the aggressive unsubscribing phase. If you haven’t opened a brand’s email in three weeks, hit that link at the bottom. Don’t feel guilty about it; it’s not a breakup, it’s just clearing the noise.

Once you’ve trimmed the fat, focus on reducing digital clutter by setting up some basic, automated guardrails. I’m a huge fan of effective email filtering—set up rules so that receipts, social media notifications, or those annoying “update” emails bypass your primary view and go straight to a specific folder. This isn’t about being a productivity robot; it’s about managing email overwhelm by ensuring that when you actually sit down to work, you’re only seeing things that actually require your attention.

Mastering Effective Email Filtering to Stop the Overwhelm

Look, I used to spend twenty minutes every morning just squinting at my screen, trying to figure out which notifications actually mattered and which were just noise. That’s where effective email filtering comes in. Instead of manually sorting every single message, you need to let the software do the heavy lifting. I started setting up rules that automatically move newsletters to a “Read Later” folder and send receipts directly to a “Finance” label. It’s not about being a tech wizard; it’s just about creating a digital sorting hat so the junk never even hits your primary view.

The goal here is managing email overwhelm by creating boundaries before you even open the app. If you find yourself constantly deleting the same types of promotional emails, stop doing it manually. Create a filter that sends them straight to the trash or a specific archive folder. By implementing these small email organization techniques, you aren’t just cleaning up a list; you’re reclaiming your focus. You want your inbox to be a workspace, not a dumping ground for every brand that wants your attention.

My No-Nonsense Cheat Sheet for Keeping the Chaos at Bay

  • Use the “Two-Minute Rule” religiously—if an email takes less than two minutes to answer, just do it right then and get it out of your sight.
  • Stop using your inbox as a To-Do list; if an email requires actual work, move it to a dedicated task manager or a calendar slot and archive the thread immediately.
  • Aggressively unsubscribe from anything that doesn’t serve you; if you haven’t opened a newsletter in three weeks, hit that unsubscribe button instead of just deleting it.
  • Create “Action Required” folders or labels so you can skim your inbox for actual tasks rather than wading through endless CC’d threads and CC notifications.
  • Set specific “email windows” in your day to check messages, rather than letting every single notification hijack your focus and break your flow.

The TL;DR on keeping your inbox under control

Stop letting every notification dictate your mood; treat email as a task to be managed, not a 24/7 emergency signal.

Build a repeatable workflow—like aggressive filtering and quick sorting—so you’re working with your inbox instead of fighting against it.

Focus on reducing digital friction by ditching the clutter early, because a cleaner inbox is just a byproduct of better systems.

Getting Your Life Back From Your Inbox

Look, reaching inbox zero isn’t about achieving some impossible state of digital perfection or becoming a productivity robot. It’s really just about building a few reliable systems so you aren’t constantly reacting to every single ping and notification. We’ve covered how to stop treating every email like a five-alarm fire, how to actually use filters to do the heavy lifting for you, and how to strip away the digital clutter that’s just eating up your mental bandwidth. At the end of the day, it’s about taking back control of your attention instead of letting a random newsletter or a non-urgent CC dictate how your afternoon goes.

I know it feels overwhelming when you first look at that unread count, but I promise you, it’s much more manageable than it looks. You don’t need a fancy, paid subscription to a complex project management tool to fix this; you just need to start applying these small, repeatable steps to your daily workflow. Once you stop letting your inbox run your life, you’ll realize how much mental energy you were wasting on things that didn’t even matter. Take it one step at a time, set up your filters, and give yourself permission to actually close the tab. You’ve got this.

Frequently Asked Questions

What do I actually do with all those old emails from three years ago that I'm too scared to delete?

Look, I get it. There’s this weird anxiety that if you delete an email from 2021, you’re somehow deleting a piece of your history or a vital receipt you’ll need later. But here’s the truth: you aren’t going to scroll through three years of junk to find that one obscure confirmation code.

Won't I miss something super important if I start setting up all these aggressive filters?

I totally get the anxiety—the fear of a “lost” email is real. But here’s the thing: filters aren’t meant to hide things; they’re meant to categorize them. Think of it like sorting your mail into a pile for bills and a pile for junk. I always set my filters to skip the inbox but stay in a specific “To Review” folder. That way, nothing is actually deleted; it’s just moved out of your immediate line of sight.

How am I supposed to maintain this system when my job literally requires me to be on email all day?

I hear you—when your entire job lives in an inbox, “checking email less” feels like career suicide. But there’s a massive difference between being available and being reactive. Instead of letting every ping hijack your focus, try batching. Set specific windows for deep-dive replies and use “office hours” for the lighter stuff. You aren’t ignoring people; you’re just choosing when to engage so you can actually get your real work done.

Tips on how to reduce sugar in your diet.

Simple Hacks to Reduce Sugar in Your Diet

I used to think that cutting back meant buying those $14 “superfood” protein bars that taste like sweetened chalk, or spending my entire Sunday meal-prepping complex, sugar-free recipes that felt more like a chore than a lifestyle. Honestly, the wellness industry makes it feel like you need a PhD and a massive budget just to figure out how to reduce sugar in your diet without losing your mind. It’s exhausting, and frankly, it’s gatekeeping. You don’t need a complete pantry purge or a radical lifestyle overhaul to see a difference in your energy levels; you just need a better system.

I’m not here to sell you on a detox tea or some impossible standard of perfection. Instead, I want to give you the actual, unpolished steps I used to stabilize my own energy and stop the mid-afternoon crashes. We’re going to look at small, repeatable swaps—the kind that actually fit into a busy freelance schedule—and how to spot the hidden sugar lurking in your “healthy” snacks. No hype, no expensive supplements, just practical systems to make the transition feel less like an emergency and more like a habit.

Table of Contents

Understanding How to Reduce Sugar in Your Diet

Understanding How to Reduce Sugar in Your Diet.

Before we get into the actual “how-to,” we need to address the elephant in the room: sugar isn’t just that obvious white powder in your pantry. It’s sneaky. Most of the trouble comes from hidden sugars in processed foods—the kind tucked away in your “healthy” yogurt, jarred pasta sauce, or even your favorite salad dressing. If you aren’t actively looking for them, they’ll bypass your willpower every single time.

To actually make progress, you have to stop guessing and start investigating. This means learning how to read nutrition labels for sugar like a pro. I used to think a product was safe just because the front of the box looked clean and minimalist, but once I started checking the ingredient list for things like maltodextrin or high fructose corn syrup, my entire perspective shifted. It’s not about being perfect or cutting everything out overnight; it’s about developing the awareness to see what’s actually being added to your plate. Once you spot the patterns, the chaos starts to settle, and you can actually start making intentional choices instead of just reacting to cravings.

Key Things to Know

Key Things to Know: Reading nutrition labels.

Before you start swapping out your snacks, you need to realize that sugar isn’t just the stuff you sprinkle on your oatmeal. The real culprits are the hidden sugars in processed foods that hide behind fancy names like maltodextrin or high fructose corn syrup. I spent way too much time thinking I was being “healthy” by grabbing flavored yogurts or granola bars, only to realize I was basically eating dessert for breakfast. Learning how to read nutrition labels for sugar is probably the single most important skill you can develop here; if you can’t decode the ingredient list, you’re just playing a guessing game with your energy levels.

Another thing to keep in mind is that your body is going to fight you at first. When you start cutting back, you’ll likely deal with some intense urges for a quick fix. This is where reducing sugar cravings becomes a game of strategy rather than just willpower. Instead of white-knuckling it, I’ve found that leaning into natural sugar alternatives—like whole fruit or even a bit of dark chocolate—makes the transition feel less like a punishment and more like a manageable shift in your daily routine.

Practical Tips and Steps

Practical Tips and Steps for sugar reduction.

Instead of trying to quit everything at once, I like to focus on one small swap at a time. Start by mastering how to read nutrition labels for sugar; most people are shocked to see how much sweetener is packed into “healthy” items like yogurt or granola bars. Once you spot those hidden sugars in processed foods, you can start looking for natural sugar alternatives like berries or a bit of real honey to satisfy that sweet tooth without the massive crash.

I also swear by the “addition method” rather than just subtraction. If you’re feeling a massive energy slump, don’t just reach for a candy bar—try adding more protein or healthy fats to your meal. This is one of my favorite blood sugar management tips because it keeps you feeling full and actually helps with reducing sugar cravings in the long run. It’s much easier to stay consistent when you aren’t constantly fighting your own biology. Just build a system that works for your actual schedule, not some idealized version of a diet.

Common Mistakes to Avoid

The biggest mistake I see people make is going scorched earth. You wake up on Monday, swear off everything sweet, and try to live on kale and water. By Wednesday, you’re staring at a bag of gummy bears like they’re the holy grail. This “all-or-nothing” mentality is a recipe for burnout. Instead of a total purge, focus on reducing sugar cravings by making gradual, sustainable swaps. If you try to do too much at once, your brain is going to rebel, and you’ll end up right back where you started.

Another trap is assuming that if a food is labeled “healthy” or “organic,” it’s automatically safe. This is where the real damage happens. There are so many hidden sugars in processed foods—like flavored yogurts, granola bars, and even some pasta sauces—that you wouldn’t expect. You really have to learn how to read nutrition labels for sugar rather than just glancing at the front of the box. Don’t let clever marketing trick you into thinking a “fruit smoothie” is anything more than a liquid sugar bomb.

Final Thoughts

Look, I’m not here to tell you that you need to live on kale smoothies and steamed chicken for the rest of your life. That’s not a system; that’s a recipe for burnout. The goal here isn’t perfection—it’s just about building enough awareness so that you aren’t accidentally sabotaging yourself. Once you get the hang of how to read nutrition labels for sugar, you’ll start seeing that “healthy” granola bar is basically just a candy bar in disguise. It takes a second to adjust, but once you stop the constant spikes and crashes, you’ll actually feel the benefits of a low sugar lifestyle in your energy levels throughout the day.

Don’t try to overhaul your entire pantry overnight. Just pick one thing—maybe it’s swapping your afternoon soda for something else or being more mindful of the hidden sugars in processed foods during your grocery runs. Small, repeatable wins are what actually stick. If you slip up and eat a box of cookies, don’t throw the whole week away. Just reset and keep moving. That’s the only way to make this actually sustainable.

My Low-Friction Strategy for Cutting Sugar

  • Stop drinking your sugar. It sounds harsh, but liquid calories from sodas, sweetened lattes, and even “healthy” fruit juices hit your bloodstream like a freight train and leave you crashing an hour later. Switch to sparkling water with a squeeze of lime or plain iced tea; it’s a much easier system to maintain than trying to quit sweets cold turkey.
  • Become a label detective, but don’t get bogged down in the math. You don’t need to calculate grams every time you shop, just look for the “hidden” culprits like high fructose corn syrup, maltodextrin, or cane sugar in things that aren’t even desserts—like pasta sauce or salad dressings. If sugar is in the first three ingredients, put it back.
  • Prioritize protein and healthy fats at every single meal. When I’m running low on energy, I used to reach for a granola bar, which is basically just a candy bar in disguise. Now, I make sure I have eggs, avocado, or Greek yogurt first. If you’re actually satiated, those sugar cravings don’t have nearly as much power over you.
  • Audit your “convenience” foods. Most of the stuff we buy to save time—like pre-packaged snack packs or flavored yogurts—is loaded with sugar to make them shelf-stable and addictive. I’ve started buying the plain versions (like plain yogurt or raw nuts) and adding my own fruit. It takes an extra thirty seconds, but it keeps the sugar spikes away.
  • Don’t aim for perfection; aim for a better baseline. If you try to go zero-sugar overnight, you’re going to burn out by Wednesday. Instead of banning everything, just focus on one swap a day. Once that feels like a normal part of your routine, add another. It’s about building a sustainable habit, not a temporary restriction.

The TL;DR Version

Stop aiming for perfection; focus on small, sustainable swaps like trading soda for sparkling water rather than trying to cut everything out overnight.

Audit your pantry and labels religiously, because most of the “hidden” sugar is hiding in the stuff you think is healthy, like yogurt or granola.

Build a system of preparation, like meal prepping or keeping easy snacks on hand, so you aren’t making impulsive, high-sugar decisions when you’re hungry and tired.

The Long Game

At the end of the day, cutting back on sugar isn’t about some massive, overnight transformation or punishing yourself with a restrictive diet that leaves you miserable by Tuesday. It’s really just about the small, tactical shifts we talked about: reading those sneaky nutrition labels, swapping out the sugary morning ritual for something more stable, and being mindful of the hidden stuff in processed snacks. Remember, the goal isn’t perfection; it’s about building a more sustainable system for how you fuel your body. If you slip up and grab a dessert at a friend’s house, don’t throw the whole plan out the window. Just get back to your baseline at the next meal and keep moving.

I know that changing how you eat can feel like a lot of mental friction, especially when sugar is literally engineered to be addictive. But I promise you, once you move past that initial adjustment period, the steady energy levels and the lack of those mid-afternoon crashes are completely worth the effort. You aren’t depriving yourself of joy; you’re actually gaining more control over how you feel every single day. Think of this as a small upgrade to your internal operating system. Once you get these habits running in the background, life just feels a little bit smoother.

Frequently Asked Questions

How do I deal with those intense sugar cravings when they hit in the middle of the afternoon?

The afternoon slump is real, and usually, that craving is just your brain screaming for a quick dopamine hit. Instead of reaching for the candy jar, try a “bridge snack.” I always keep almonds or a Greek yogurt in my fridge; the protein and fat stabilize your blood sugar so you don’t crash harder later. If you need something sweet, go for berries. It’s about managing the spike, not just fighting the urge.

Are there any specific "healthy" snacks that are actually just hidden sugar bombs I should watch out for?

Honestly, the “health food” aisle is a minefield. I used to grab granola bars and flavored yogurt thinking I was being productive, but most of them are basically dessert in disguise. Watch out for low-fat yogurts (they add sugar to fix the texture), protein bars that read like candy bars, and those “natural” fruit juices. If the label says “organic cane sugar” or “agave,” it’s still a sugar bomb. Stick to whole foods whenever you can.

Do I need to cut out fruit entirely, or is that okay to keep in my diet?

Please, do not cut out fruit. That’s a one-way ticket to a sugar crash and a very grumpy mood. Fruit comes with fiber, which is basically the “buffer” your body needs to process natural sugars without the massive insulin spike you get from a candy bar. Think of it as a slow-release energy source rather than a sudden hit. Just stick to whole fruit instead of juices, and you’re golden.

Essential career advice for students graduating.

What I Wish I Knew About Career Planning Before Graduation

I remember sitting in my university library during finals week, staring at a LinkedIn notification that felt more like a personal attack than an opportunity. Every “expert” post I scrolled past was filled with this polished, high-stakes jargon about “leveraging synergies” and “building personal brands,” making me feel like I was already failing a race I hadn’t even started. Most of the career advice for students out there is just expensive gatekeeping wrapped in a suit, designed to make you feel like you need a secret roadmap that only certain people possess. It’s exhausting, and honestly, it’s mostly fake.

I’m not here to give you a lecture on how to “crush your KPIs” before you’ve even landed your first internship. Instead, I want to give you the actual, unpolished systems I used to navigate the chaos of entry-level work without losing my mind. We’re going to skip the fluff and focus on the small, repeatable habits—from managing your digital footprint to building a network that doesn’t feel transactional—that actually make the transition from classroom to cubicle feel manageable.

Table of Contents

Understanding Career Advice for Students

Understanding Career Advice for Students through systems.

Most of the advice you’ll find online feels like it was written by a corporate bot designed to make you feel behind. It’s usually this vague, high-level nonsense about “finding your passion” or “leveraging synergies,” which helps exactly zero people when they’re staring at a blank LinkedIn profile at 2:00 AM. In reality, navigating your path isn’t about having a grand epiphany; it’s about incremental systems. You don’t need a ten-year master plan; you just need to understand how to move the needle from one week to the next.

A huge part of this is realizing that career planning for college students shouldn’t feel like a monolithic, terrifying task. It’s actually just a series of small, manageable workflows. Instead of trying to “solve” your entire future, focus on specific, repeatable actions—like refining your internship hunting strategies or learning how to actually talk to people without feeling like an impostor. When you break it down into these tiny, practical pieces, the whole process stops feeling like a looming crisis and starts feeling like something you can actually manage.

Key Things to Know

Key Things to Know: Career Planning Tips

First off, let’s get one thing straight: your degree is a foundation, not a finished product. Most people think that once you graduate, the “real world” just hands you a desk and a paycheck, but it’s rarely that linear. You need to start thinking about career planning for college students as a series of small, manageable experiments rather than one giant, terrifying decision. Instead of trying to map out your entire thirties right now, focus on gathering the raw materials—the experiences and the connections—that will give you options later.

This means getting intentional about how you spend your downtime between classes. I’m talking about moving beyond just “getting good grades” and actually focusing on entry level job preparation through real-world application. Whether that’s perfecting your internship hunting strategies or just learning how to communicate effectively in a professional setting, these are the micro-systems that actually move the needle. It’s about building a toolkit of practical skills so that when that first big opportunity actually lands in your inbox, you aren’t scrambling to figure out how to be a professional.

Practical Tips and Steps

Practical Tips and Steps for internship hunting.

First, let’s talk about the actual mechanics of getting your foot in the door. Instead of just blindly hitting “apply” on every LinkedIn posting you see, you need to refine your internship hunting strategies. I used to think more applications meant more chances, but it actually just meant more burnout. What works better is a targeted approach: identify ten companies you actually care about and find one person at each who does the job you want. Reach out with a low-pressure question about their workflow rather than asking for a job immediately. It’s about building a bridge, not just shouting into a void.

While you’re doing that, you have to stop treating your CV like a static document you write once and forget. Think of building a professional resume as a living system. Every time you learn a new software or finish a project, log it in a simple Notion page or even a notes app. When it comes time to apply for a role, you aren’t scrambling to remember what you did in sophomore year; you’re just curating the best parts of your existing data. This removes the frantic, last-minute panic that usually kills your confidence.

Common Mistakes to Avoid

The biggest mistake I see is the “wait and see” approach—thinking you can just cruise through your degree and then magically pivot into a career once you have that piece of paper. People often treat career planning for college students like it’s something that happens after graduation, but that’s exactly how you end up in a post-grad panic. If you wait until senior year to start looking at job descriptions, you’re going to realize too late that you lack the specific experience those roles actually demand.

Another trap is obsessing over the “perfect” path while ignoring the actual mechanics of getting your foot in the door. I see so many people spending months perfecting a single bullet point on a CV instead of actually practicing networking for undergraduates. It’s easy to get paralyzed by the idea that you need a massive, polished brand, but in reality, you just need to start talking to people in your field. Stop trying to engineer a flawless trajectory and just focus on building small, consistent connections; it’s much more effective than staring at a blank LinkedIn profile.

Final Thoughts

Look, I know this feels like a lot. When you’re staring down the barrel of graduation, it’s easy to feel like you need to have every single thing figured out by Tuesday. But honestly? Most people are just winging it, even the ones who look like they have a five-year plan taped to their mirror. The goal isn’t perfection; it’s just about building enough momentum so you aren’t standing still when the opportunities actually show up.

Focus on the small, repeatable wins. Whether you’re refining your entry level job preparation or just trying to figure out how to talk to a recruiter without your heart racing, it all counts. Don’t let the fear of doing it “wrong” paralyze you. If you keep iterating on your internship hunting strategies and staying consistent with your systems, the friction will eventually start to fade. You don’t need to solve your entire life today—you just need to take the next logical step.

5 Low-Friction Systems to Build Your Career While Still in School

  • Stop waiting for the “perfect” internship to appear. Instead, build a simple tracker for every small win—a project you finished, a software you learned, or even a difficult group task you managed. When application season hits, you won’t be staring at a blank screen trying to remember what you actually did three months ago.
  • Treat your LinkedIn like a living document, not a digital resume you only touch when you’re desperate. Spend just fifteen minutes every Sunday updating it with any new skills or even just following companies you actually care about. It keeps the algorithm happy and keeps you from having a meltdown when you finally need to hit ‘apply.’
  • Curate your “professional circle” without the awkwardness. You don’t need to go to massive, soul-crushing networking events; just reach out to one alum from your school who has a job that looks cool. Ask for a ten-minute virtual coffee to ask about their actual day-to-day. It’s much less intimidating and way more effective.
  • Audit your digital footprint like you’re a stranger. I know, it sounds paranoid, but a quick sweep of your public socials ensures that the first thing a recruiter sees is your actual vibe, not a random, unhinged post from sophomore year. Clean, consistent, and intentional.
  • Build a “Master Resume” file. This is a messy, unformatted Google Doc where you dump every single bullet point, responsibility, and metric from every job or club you’ve ever been in. When you need to tailor a resume for a specific role, you aren’t reinventing the wheel—you’re just picking the best pieces from your master list.

The TL;DR: Systems Over Stress

Stop waiting for a “perfect” roadmap to appear; your career is built through small, messy iterations and consistent systems, not a single grand plan.

Focus on building a toolkit of transferable skills—like communication and basic tech troubleshooting—that work regardless of what industry you end up in.

Treat networking like a low-stakes habit rather than a high-pressure event; it’s much easier to build connections when you aren’t treating every interaction like a crisis.

The Bottom Line

Look, building a career isn’t about finding some magical, secret door that everyone else is hiding from you; it’s really just about the small, repetitive systems we talked about. Whether it’s keeping your LinkedIn updated so it doesn’t feel like a chore, or setting aside just twenty minutes a week to network without the soul-crushing anxiety, these habits are what actually move the needle. Stop waiting for a perfect moment or a “sign” that you’re ready to enter the workforce. You don’t need to have your entire life mapped out by graduation to be successful; you just need to stop treating every application like a life-or-death crisis and start treating it like a manageable process that you can refine as you go.

At the end of the day, I want you to remember that your first job—or even your fifth—is not your final destination. It’s just data. Every rejection and every “we went with another candidate” email is just more information to help you tweak your system and try again. Adulthood feels heavy when you think you have to get everything right on the first try, but I promise you, it’s much lighter when you realize that growth is iterative. Take the tools you’ve built, keep your multi-tool close, and just keep moving forward at your own pace. You’ve got this.

Frequently Asked Questions

How do I actually start building these systems if I don't even have a job or any relevant experience yet?

Honestly, this is where everyone gets stuck, but you don’t need a paycheck to start building systems. Think of it as “low-stakes prototyping.” Start by treating your learning like a project: set a weekly schedule for a specific skill, document what you learn in a Notion page, or build a tiny portfolio of “mock” work. You’re not just waiting for a job; you’re building the infrastructure so that when the job finally hits, you’re already running.

I feel like I'm constantly behind everyone else; how do I know if my "progress" is actually working or if I'm just spinning my wheels?

That feeling of spinning your wheels is usually a sign that you’re measuring “busyness” instead of “output.” To fix this, stop looking at how many hours you worked and start looking at your “win” list. At the end of each week, write down three tangible things you actually moved forward—not just emails sent, but actual progress. If those wins aren’t stacking up, your system is broken, not you. Adjust the process, not the effort.

Is it worth spending time on these career systems now, or should I just focus on my grades and worry about the rest later?

Look, I get the urge to just grind for the GPA and hope for the best, but treating your career like a “later” problem is how you end up in a state of constant emergency after graduation. Grades get you through the door, but systems get you through the day. Start building small, low-friction habits now—like a simple networking tracker or a cleaned-up LinkedIn—so you aren’t playing catch-up when the real world actually hits.

Using the pomodoro technique for productivity.

Getting More Done With the Pomodoro Method

I was sitting at my desk last Tuesday, staring at a half-finished content calendar while my brain felt like it had forty different browser tabs open at once. I had spent twenty minutes scrolling through “aesthetic” productivity apps, convinced that I just needed a $10 subscription or a more expensive planner to finally get my life together. But honestly? All that high-tech gatekeeping is just a distraction from the fact that my focus is shot. I realized I didn’t need a digital overhaul; I just needed to stop treating my work sessions like a marathon and start using the pomodoro technique to actually manage my energy.

I’m not here to sell you on some magical, life-altering ritual that requires a dedicated workspace and a zen garden. I just want to show you how to use this system to stop the constant mental burnout that comes from trying to do everything at once. I’m going to walk you through the actual, unpolished way I use these timed intervals to get through my freelance workload without feeling like my head is going to explode. No fluff, no expensive tools—just real, repeatable systems that actually work when you’re tired and overwhelmed.

Table of Contents

Stop the Chaos Why You Need the Pomodoro Technique

Stop the Chaos Why You Need the Pomodoro Technique

The truth is, most of us approach our to-do lists like we’re trying to fight a forest fire. We sit down, stare at a screen for four hours, and somehow end up more exhausted than when we started, even if we only actually did twenty minutes of real work. That’s not productivity; that’s just spinning your wheels. When you try to power through without breaks, you aren’t actually being efficient—you’re just preventing mental fatigue by ignoring the fact that your brain has a finite amount of gas in the tank.

This is where the magic happens. Instead of treating your focus like an infinite resource, you start treating it like a battery that needs regular recharging. By utilizing specific work-rest cycle benefits, you stop the dreaded mid-afternoon slump from turning into a total meltdown. It’s about shifting your mindset from “I have to finish this entire project right now” to “I just need to give this my undivided attention for twenty-five minutes.” Once you stop viewing work as one long, grueling marathon, you’ll realize that structured intervals are actually the secret to staying sane.

Ditching the Burnout Real Work Rest Cycle Benefits

Ditching the Burnout Real Work Rest Cycle Benefits

The biggest mistake I see people making is thinking that “grinding” for four hours straight is a badge of honor. In reality, it’s just a fast track to a brain fog that feels impossible to shake. By leaning into actual work-rest cycle benefits, you aren’t being “lazy”—you’re actually training your brain to stay sharp. When you work in short, intense bursts followed by a mandatory break, you’re essentially preventing mental fatigue before it has a chance to settle in and ruin your afternoon.

Instead of hitting that wall at 3:00 PM where you’re just staring blankly at a spreadsheet, these structured intervals keep your energy levels from bottoming out. It’s less about forcing yourself to work more and more, and more about improving concentration levels by giving your mind permission to actually step away. When you know a break is coming in twenty-five minutes, it’s way easier to stay locked in. It turns your workday from a marathon of suffering into a series of manageable sprints, which is honestly the only way I’ve managed to stay sane as a freelancer.

Mastering Your Pomodoro Timer Intervals Without the Stress

Mastering Your Pomodoro Timer Intervals Without the Stress

Here is the standard setup, but let’s be real: the biggest mistake people make is treating these intervals like a rigid military drill. If you try to force yourself into a strict 25-minute block when you’re clearly in a flow state, you’re just going to break your momentum. I’ve found that the secret to improving concentration levels isn’t about being a slave to the clock; it’s about finding a rhythm that actually respects your brain’s natural capacity. If 25 minutes feels too short and you’re hitting a groove, try bumping it to 50 minutes, provided you extend your break accordingly.

The goal here is preventing mental fatigue before it actually hits you. Don’t wait until you’re staring blankly at your screen to take that breather. When the timer goes off, actually step away. I’m talking about leaving your desk, grabbing water, or stretching—not just switching from your laptop to scrolling through TikTok. If you use your breaks to consume more digital noise, you aren’t actually resetting; you’re just layering more input on an already tired brain.

Applying Deep Work Principles to Your Messy Reality

Here’s the thing: most productivity advice assumes you’re working in a vacuum with zero distractions, but my life is usually a chaotic mix of Slack notifications, laundry staring me down, and the urge to scroll TikTok. If you try to force yourself into a rigid, four-hour block of uninterrupted focus, you’re going to fail. Instead, I like to blend deep work principles with the reality of my actual environment. It’s about creating a “container” for your focus. When that timer starts, the goal isn’t to be a perfect machine; it’s just to commit to one single task so your brain stops jumping between fifteen different tabs.

By combining these focused sprints with the work-rest cycle benefits we talked about earlier, you’re essentially training your brain to recognize when it’s time to lock in and when it’s time to breathe. You don’t need a silent library to do this. Even if you’re working from a noisy cafe or a messy kitchen table, using those structured intervals helps in improving concentration levels because you know there is a definitive end point in sight. It turns a daunting project into something much more manageable.

Practical Time Management Strategies for Preventing Mental Fatigue

The thing about working from home (or anywhere that isn’t a cubicle) is that the line between “on” and “off” gets incredibly blurry. You think you’re being productive because you’ve been staring at a screen for four hours straight, but really, you’re just spinning your wheels. To actually succeed at preventing mental fatigue, you have to stop treating your brain like a machine that can run indefinitely. I’ve found that the most effective time management strategies aren’t about squeezing more tasks into your day; they’re about protecting your cognitive energy so you don’t hit a wall by 3:00 PM.

Instead of pushing through that heavy, brain-fog feeling, try leaning into the work-rest cycle benefits we talked about earlier. When you feel your focus splintering, that is your signal to step away. Don’t just switch from your laptop to scrolling on your phone—that’s not a break, it’s just more input. I personally try to do something tactile during my intervals, like watering my plants or grabbing a quick snack. It gives your eyes a rest and helps in improving concentration levels when you finally sit back down to tackle the next task.

5 Ways to Actually Make This Work (Without Losing Your Mind)

  • Stop being a perfectionist with your timer. If a client calls or your cat decides to have a crisis halfway through a 25-minute block, just reset. Don’t let one interruption turn into a reason to scrap the whole day.
  • Pick a “distraction notepad.” Keep a physical notebook next to you so when you suddenly remember you need to buy more laundry detergent, you can scribble it down and immediately get back to work instead of opening a new tab.
  • Guard your breaks like your life depends on it. A “break” isn’t scrolling through TikTok for ten minutes—that’s just more screen time for your brain. Actually stand up, stretch, or go refill your water. Your eyes need the reset.
  • Match your task difficulty to your energy levels. Don’t try to tackle your most complex, brain-melting project during your first Pomodoro if you’re still waking up. Use the early blocks for easy wins to build momentum.
  • Use the right tools, but don’t overcomplicate it. You don’t need a $20 productivity app with a subscription. A simple kitchen timer or a basic web timer is plenty. The system is the point, not the aesthetic of the app.

The TL;DR: Making it Work for You

Forget the rigid rules; the goal isn’t to follow a timer perfectly, but to use those intervals to stop your brain from spiraling into burnout.

Use your breaks to actually disconnect—step away from the screen and move your body so you aren’t just swapping one type of mental fatigue for another.

Treat this as a flexible system, not a chore; if a 25-minute block feels too short or too long for your current flow, tweak it until it actually feels sustainable.

Final Thoughts: Making it Work for You

At the end of the day, the Pomodoro technique isn’t about becoming a productivity robot or following some rigid, unchangeable law. It’s just a tool to help you navigate the chaos of a workday without losing your mind. We’ve talked about how setting those small, timed intervals can stop the constant mental fog, how integrating deep work prevents that dreaded burnout, and why adjusting your breaks to fit your actual energy levels is way more important than following a textbook guide. Whether you’re tackling a massive freelance project or just trying to clear out your inbox, the goal is to create a system that serves you, rather than one that makes you feel like you’re constantly failing a test.

If you try this tomorrow and realize that 25 minutes feels too short, or that you need a longer walk during your break—change it. The beauty of a good system is that it’s supposed to be flexible enough to survive your real, messy life. Don’t let the fear of “doing it wrong” keep you from starting. Just pick a timer, set a small goal, and give yourself permission to step away when the bell rings. You aren’t just managing your time; you’re protecting your peace, and that is the ultimate productivity hack.

Frequently Asked Questions

What do I actually do during the five-minute breaks so I don't just end up scrolling on my phone?

This is where most people trip up. If you pick up your phone, your brain isn’t actually resting; it’s just switching from one stream of data to another. Instead, treat those five minutes like a physical reset. Step away from your desk. Refill your water, do some quick stretches, or just stare out the window for a second. The goal is to give your eyes and your focus a break, not to feed the scroll.

Is it okay to mess with the timer if I'm finally in a flow state, or will that ruin the whole point?

Honestly? If you’re in a flow state, ride that wave. The whole point of the Pomodoro technique is to manage your energy, not to act like a slave to a kitchen timer. If you force yourself to stop just because a bell rang, you’re actually breaking the system. If the flow is real, keep going. Just make sure you take a slightly longer break afterward so you don’t crash later.

How do I handle it when a sudden "emergency" task pops up right in the middle of my focused work block?

This is the ultimate test of your system. When a “crisis” hits, don’t just drop everything—that’s how you lose your momentum. Instead, use the “Parking Lot” method. Grab a sticky note, jot down exactly where you left off and what the very next step is, then deal with the emergency. If it’s actually urgent, pivot. If it’s just someone else’s lack of planning, write it down and get back to your timer.

Page 2 of 2

Powered by WordPress & Theme by Anders Norén