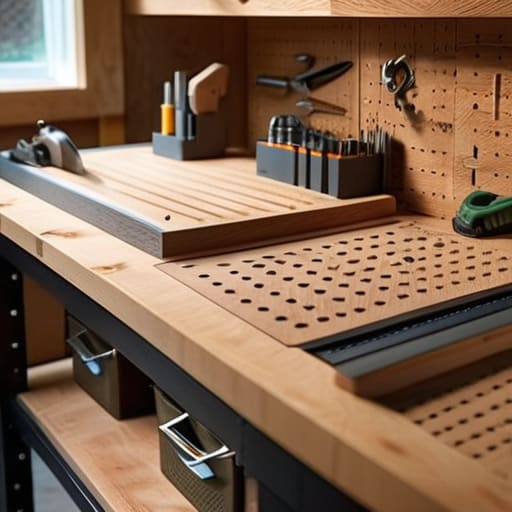
I was halfway through trying to solder a vintage radio I’d picked up at a thrift store when my “workspace”—which was really just a wobbly folding card table—decided to give up on life. My tools slid everywhere, my coffee spilled, and I spent more time chasing a screwdriver across the floor than actually fixing anything. It was a total mess, and it hit me: you can’t build a system for your life if your foundation is literally shaking. Most people think you need a massive garage and a thousand dollars in professional-grade equipment to get started, but honestly, learning how to build a workbench is less about the fancy gear and more about creating a stable, reliable zone where you can actually focus.
Forget those over-complicated, expensive blueprints that assume you own a CNC machine. I’m going to show you how to build a solid, no-nonsense workbench using basic materials you can grab at any hardware store. We’re skipping the gatekeeping and focusing on a functional, durable setup that won’t break the bank or your spirit. By the end of this, you’ll have a dedicated spot that actually supports your projects instead of fighting against them.
Table of Contents
Guide Overview
Tools & Supplies
- Circular saw or miter saw for cutting lumber
- Power drill/driver for assembly
- Tape measure for precise marking
- Speed square for ensuring 90-degree angles
- 2×4 lumber (approx. 8-10 boards)
- 4×8 plywood sheet (for tabletop)
- 2.5-inch wood screws (one large box)
- Wood glue (one bottle)
Step-by-Step Instructions
- 1. First things first, you need to grab your materials. Don’t go overboard with expensive hardwoods; you’re building a workspace, not a dining room table. I usually go for standard 2x4s and a thick sheet of plywood for the top. It’s cheap, it’s sturdy, and if you accidentally gouge it with a screwdriver later, it’s not a tragedy. Grab a box of 2.5-inch wood screws and a drill—and please, double-check that your drill is actually charged before you head to the hardware store.
- 2. Map out your frame on the floor. This is where most people mess up by not accounting for the thickness of the wood. I like to lay everything out to make sure my dimensions actually fit the footprint of my room. Once you’ve confirmed the math, start by building two identical rectangular frames using your 2x4s. This creates the “skeleton” of your bench, and keeping them identical is crucial if you want the whole thing to stop wobbling later.
- 3. Connect your frames with your vertical legs. This is where the bench actually gets its height. I recommend cutting four sturdy posts and screwing them into the corners of your rectangular frames. If you want a bench that feels actually solid, use more screws than you think you need here. A little extra effort in the structural phase means you won’t be fighting a shaky table every time you try to hammer something.
- 4. Secure the top to the frame. This is the most satisfying part, but it can be tricky if you don’t want the plywood to split. I always pre-drill pilot holes through the plywood and into the 2×4 frame. It takes an extra thirty seconds, but it prevents the wood from cracking and makes the whole surface feel much more seamless. If you have a scrap piece of wood, use it to check that your top is completely level before you finish driving the screws.
- 5. Add a lower shelf for storage. Since my goal is to reduce friction, I can’t stand having my tools scattered all over the floor. About a foot or two from the bottom, add another set of 2×4 supports and slide a second piece of plywood underneath. This gives you a dedicated spot for your heavy stuff—like power tool cases or bins of hardware—so your main workspace stays clear and functional.
- 6. Sand the edges and call it a day. You don’t need a professional finish, but you definitely don’t want a splintered edge catching your sleeve while you’re working. Take a bit of medium-grit sandpaper and smooth out the corners and any rough spots on the top. It’s a small, low-effort step that makes the whole experience feel a lot more intentional and less like a construction site accident.
Understanding How to Build a Workbench
Before you start sawing through expensive lumber, you need to decide what kind of “work” you’re actually doing. There is a huge difference between a light-duty table for assembling small electronics and a heavy duty workbench design meant for heavy hammering or sanding. If you try to use a flimsy desk for real projects, you’re going to end up frustrated by the wobble. I always tell people to prioritize stability over aesthetics; it doesn’t matter how pretty it looks if it shifts every time you apply pressure.
Another thing people usually overlook is the “future you” factor. When I’m looking at different woodworking workbench plans, I’m not just looking at the tabletop; I’m looking at the footprint. You need to think about workshop organization tips from day one. If you don’t integrate some form of workbench tool storage ideas into the build, your workspace will quickly turn into a graveyard of loose screwdrivers and stray bolts. Plan for your tools to have a home, otherwise, the whole system breaks down the second you actually start working.
Key Things to Know
Before you start cutting anything, you need to think about the “why” behind your build. If you’re just planning to assemble some small electronics or do some light crafts, a basic setup is fine. But if you’re planning on doing actual repairs or heavier DIY projects, you really need to prioritize a heavy duty workbench design. There is nothing more frustrating than trying to sand something down only to have your entire table wobble like it’s on a boat. Stability is everything; if the surface isn’t rock solid, you’ll end up fighting the furniture instead of focusing on your project.
I also highly recommend thinking about your workflow before you even buy the lumber. It’s easy to get caught up in the construction, but if you don’t integrate some workbench tool storage ideas into the initial build, you’re just going to end up with a cluttered mess six months from now. I’m a huge advocate for keeping your most-used tools within arm’s reach. Whether that’s adding a pegboard to the back or building shallow drawers into the frame, a little bit of foresight now saves a massive amount of headache later.
Pro-Tips for a Workbench That Won't Fall Apart in a Week
- Don’t overthink the dimensions. Before you buy a single screw, measure your actual workspace and your own height. You don’t want a bench that’s too low, forcing you to hunch over every time you’re trying to fix something, or too high that you can’t get any leverage.
- Prioritize stability over aesthetics. It doesn’t matter if the wood looks pretty if the whole thing wobbles every time you use a hammer. Use heavy-duty bracing or even bolt it to the wall studs if you have the space; a rock-solid base is the difference between a tool and a headache.
- Plan for your “messy” future. I learned this the hard way with my old electronics projects—if you don’t build in a way to manage cords or have a spot for small parts, your workbench will just become a graveyard of clutter. Think about where the power strip is going before you finish the frame.
- Invest in a decent top. You can get creative with the base, but don’t skimp on the surface you’re actually working on. A thick layer of plywood or even a reclaimed piece of butcher block will take much more beating than a thin, flimsy sheet that’s going to dent the first time you drop a screwdriver.
- Leave room for growth. If you’re building this in a corner, make sure you aren’t boxing yourself in so tightly that you can’t actually move around it. You need enough clearance to stand comfortably and, ideally, enough room to tuck a small rolling cart underneath for extra storage later.
The Bottom Line
Don’t overthink the aesthetics; a workbench is a tool, not a piece of showroom furniture, so prioritize stability and surface area over everything else.
Invest in decent fasteners and solid wood—it’s much easier to build it right once than to spend your weekend fixing a wobbly table that ruins your projects.
Build for your actual workflow, not a Pinterest dream; make sure it’s at a height that won’t kill your back and has enough room for the specific tools you actually use.
Final Thoughts Before You Get to Work
At the end of the day, building this workbench isn’t about achieving some level of professional woodworking perfection or having a workspace that looks like a Pinterest board. It’s really just about creating a reliable foundation where you can actually get things done without constantly tripping over clutter or fighting a wobbly surface. We covered the essentials—from choosing the right lumber and ensuring your base is sturdy to making sure your height doesn’t wreck your back—so now you have the blueprint. Just remember that the most important part of the process is consistency over complexity; you don’t need a high-tech workshop, you just need a space that respects your workflow and stays out of your way.
Once that last screw is tightened and you wipe away the sawdust, I want you to take a second to actually appreciate what you’ve built. There is something incredibly grounding about knowing that the surface you’re working on was constructed by your own hands. This workbench is more than just wood and hardware; it’s a physical manifestation of your commitment to improving your own environment. Don’t let it sit empty or become a graveyard for half-finished projects. Use it, mess it up, and let it evolve with you. You’ve officially built the system for your success, so now go out there and actually start creating.
Frequently Asked Questions
Do I really need power tools for this, or can I pull this off with just a basic hand saw and a drill?
Honestly? You can definitely pull this off with just a hand saw and a drill. I’ve built a few things using nothing but manual tools, and it just takes a little more patience and a steady hand. If you’re okay with spending extra time on the cuts, you don’t need a table saw or a circular saw to get a solid result. Just go slow, measure twice, and don’t rush the process.
What kind of wood should I actually buy if I'm on a budget but don't want the whole thing to wobble in six months?
Look, if you’re trying to save money without building a glorified wobbly table, skip the expensive hardwoods. You don’t need oak or maple. Honestly, the sweet spot is construction-grade pine or Douglas fir from a big-box store. It’s cheap, easy to find, and surprisingly sturdy if you use thicker dimensions (think 2x4s for the frame). Just grab a sheet of 3/4″ plywood for the top—it’ll handle the weight and won’t sag immediately.
How do I make sure my workbench stays level if my garage or basement floor is uneven?
This is the reality of most basements—nothing is ever actually flat. Don’t try to fight the floor; instead, build the bench to accommodate it. I swear by adjustable heavy-duty leveling feet. You screw them into the legs, then just twist them until the bubble in your level stays dead center. If you’re on a tighter budget, shim the low spots with scraps of plywood or even some hard plastic wedges. Just get it level now so you aren’t fighting it later.
