I used to think that learning how to make soap required a chemistry degree and a laboratory-grade setup that would take up half my kitchen. I’d scroll through these incredibly aesthetic tutorials where everything looked perfect, but they never actually showed you the messy reality of dealing with lye or the frustration of a batch that won’t set. The truth is, most of the gatekeeping around DIY skincare is just noise; you don’t need a massive budget or a sterile environment, you just need a reliable system and a few basic tools.
In this guide, I’m stripping away the intimidation factor and giving you the actual, unpolished steps to getting it right the first time. We’re going to walk through the essential equipment, the safety protocols that actually matter, and the simple workflow I use to keep my workspace clean and my results consistent. No fluff, no expensive “essential” gadgets you’ll never use—just a practical breakdown of how to make soap that works for your real, busy life.
Table of Contents
Guide Overview
Tools & Supplies
- Digital scale for precise measurements
- Stick blender for emulsifying oils and lye
- Heat-resistant glass beaker or stainless steel pot
- Silicone soap molds for easy removal
- Sodium hydroxide (Lye) 5-10 oz
- Carrier oils (Olive, Coconut, or Shea) 32 oz
- Distilled water 10 oz
- Essential oils or fragrance oils 1 oz
Step-by-Step Instructions
- 1. First things first, you need to set up your workspace like you’re prepping for a science experiment, not a bake sale. Clear off a big section of your kitchen counter and lay down some parchment paper or silicone mats. You’ll want to gather all your gear—digital scale, stainless steel bowls, an immersion blender, and your safety kit (goggles and gloves). I can’t stress this enough: safety is the foundation of this whole process, so don’t try to wing it by skipping the protective gear.
- 2. Next, we need to handle the lye. This is the part that makes people nervous, but it’s actually pretty straightforward if you follow the golden rule: always add the lye to the water, never the other way around. Weigh out your distilled water and your lye separately using your scale, then slowly pour the lye into the water. It’s going to get hot and release some fumes, so do this in a well-ventilated area. Once it’s mixed, set it aside to cool down to a comfortable temperature.
- 3. While your lye-water is cooling, it’s time to prep your oils. I usually go with a mix of olive oil for moisture and coconut oil for that satisfying lather. Weigh out your oils and melt any solids in a heat-safe container. Once they’re liquid, mix them together in a large bowl. The goal here is to get your oils and your lye-water to a similar temperature—ideally somewhere between 90°F and 110°F—so the reaction is smooth and predictable.
- 4. Now comes the actual “making” part: the emulsification. Slowly pour your lye-water into your oil mixture. Grab your immersion blender and give it a few quick pulses, then stir manually with the blender turned off. You’re looking for “trace,” which is basically when the mixture reaches the consistency of pudding. If you lift the blender and the drips leave a visible trail on the surface, you’re officially in the clear.
- 5. This is where you get to be a little creative. If you want to add essential oils for scent or some dried botanicals for aesthetics, stir them in now. Just make sure you do this right at the trace stage so the scents don’t just evaporate or sink to the bottom. I personally love adding a bit of lavender oil, but don’t overdo it; you want a subtle vibe, not a scent bomb that takes over your entire house.
- 6. Once everything is mixed, pour the liquid soap into your mold. If you’re using a silicone mold, it’s easy; if you’re using a wooden box, make sure it’s lined with parchment paper so you don’t have a nightmare of a cleanup later. Tap the mold firmly on the counter a few times to shake out any trapped air bubbles. This ensures your bars come out looking professional and smooth rather than pitted.
- 7. Finally, the hardest part: waiting. Cover your mold with a piece of cardboard and a towel to insulate it, then let it sit undisturbed for 24 to 48 hours. Once it feels firm to the touch, pop it out of the mold and slice it into bars using a sharp knife. You can’t use them immediately, though. You need to let the bars “cure” in a cool, dry place for about 4 to 6 weeks. This process is non-negotiable if you want a hard, long-lasting bar that won’t turn into mush the second it touches water.
Understanding How to Make Soap
Before you dive into the actual mixing, you need to get your head around the science of it. Most of what I do falls under cold process soap making methods, which is basically a chemical reaction called saponification. You’re combining fats (oils) with an alkaline solution (lye) to create something entirely new. It sounds intense, but it’s really just a predictable system once you respect the chemistry.
The biggest hurdle for most people is the intimidation factor regarding safety. I can’t stress this enough: please don’t skip the lye safety precautions. I always keep my goggles and gloves right next to my mixing station so I’m never tempted to “just quickly” grab them later. It’s not about being paranoid; it’s about having a workflow that protects you so you can actually enjoy the process.
Once you’ve got your safety gear sorted, it’s all about the ingredients. I love using natural soap ingredients for skin like shea butter or olive oil because they actually feel good when you use them. If you’re looking to add a scent, stick to high-quality essential oils rather than synthetic fragrances to keep everything clean and intentional.
Key Things to Know
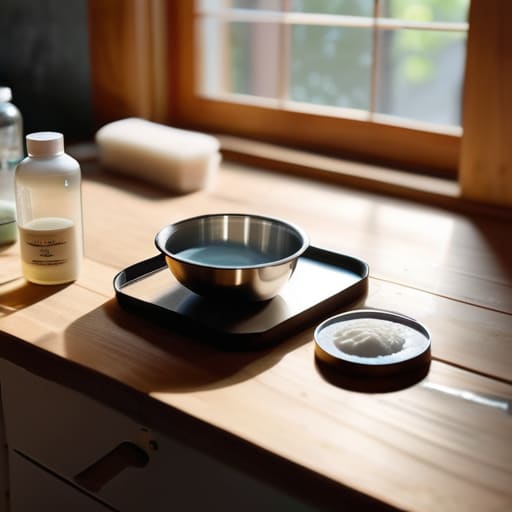
Before you dive in, we need to talk about the gear and the safety side of things. I know the word “lye” sounds intimidating—and honestly, it is—but if you follow basic lye safety precautions, it’s totally manageable. Always wear your goggles and gloves, and work in a well-ventilated space. You don’t need a professional laboratory, but having a solid soap making equipment list—think digital scales, stainless steel bowls, and a reliable immersion blender—is what separates a successful batch from a frustrating mess.
Once you’ve got the safety part down, you can start thinking about the “why” behind your ingredients. If you’re leaning toward cold process soap making methods, you have total control over the chemistry, which is great for customizing natural soap ingredients for skin types. For example, if you have dry skin, you might lean heavier on shea butter. If you want that spa-like vibe, investing in high-quality essential oils for natural soap makes a world of difference in the final product. It’s all about building a system that works for your specific needs.
Pro-Tips to Save Your Sanity (and Your Skin)
- Don’t skip the scale. I know it’s tempting to just grab a measuring cup and wing it, but soap making is chemistry, not baking. If you aren’t weighing your ingredients in grams, you’re basically playing Russian roulette with your batch.
- Respect the lye. This is the part where I remind you that safety isn’t optional. Put on your goggles and gloves before you even touch the container. It’s much easier to be cautious for ten minutes than to deal with a chemical burn because you were feeling “too cool” for gear.
- Embrace the “messy” middle. There’s a specific window where the oils and lye hit and everything starts to thicken—we call it trace. Don’t panic if it happens faster or slower than the YouTube tutorial showed; just keep stirring until it reaches a pudding-like consistency.
- Invest in a good stick blender. You can stir soap by hand if you have all day and a lot of patience, but if you want to actually enjoy this hobby without your arms falling off, a dedicated immersion blender is your best friend.
- Give it time to cure. This is the hardest part for me personally. Just because the soap looks solid doesn’t mean it’s ready. If you use it too early, it’ll be too soft and might even irritate your skin. Let it sit in a cool, dry place for at least 4-6 weeks—your skin will thank you later.
The Bottom Line
Don’t let the chemistry scare you off; as long as you follow your measurements to the gram and respect the safety protocols, you’re going to be fine.
Success is all about the setup—having your workspace organized and your tools ready before you even touch the lye will save you so much stress.
Your first batch might not look like something from a high-end boutique, but that’s okay; the goal is to learn the system, not to achieve perfection on day one.
Getting Your Hands Dirty
At the end of the day, making your own soap is really just about respecting the process. You’ve got your lye safety protocols down, you’ve mastered the temperature checks, and you’ve figured out how to balance your oils. It might feel like a lot of moving parts right now, but once you move past that initial intimidation factor, it becomes a rhythmic, almost meditative routine. Just remember that consistency is your best friend here—don’t try to skip the weighing process or rush the curing time just because you’re excited to see the final product. If you stick to the systems we talked about, you’ll stop making “experiments” and start making actual, high-quality bars that you’re proud to use.
I know that starting a new DIY project can feel like adding another massive item to your to-do list, but I promise the payoff is worth the mental load. There is something incredibly grounding about stepping away from a screen and actually creating something tangible with your own two hands. You aren’t just making soap; you’re building a tiny bit of self-sufficiency and reclaiming a piece of your daily ritual from big-box consumerism. So, grab your gear, clear off your workspace, and just dive in. You’ve got this.
Frequently Asked Questions
Is it actually safe to do this in my kitchen, or do I need a dedicated workspace?
Honestly, you don’t need a dedicated studio, but you do need to claim a “zone.” I usually clear off my kitchen island and lay down some silicone mats. The main thing is keeping your soap supplies far away from where you prep food—lye is no joke. As long as you have good ventilation, a clear workspace, and you’re diligent about cleaning up immediately, your kitchen is totally fine. Just don’t make it a permanent fixture.
How long do I really have to wait before I can actually use the soap?
The short answer? You need to wait at least four to six weeks. I know, that feels like an eternity when you’ve just spent all that time prepping and pouring, but patience is part of the system. During this “curing” phase, the water evaporates, making the bar harder and much longer-lasting. If you rush it, the soap might feel too soft or even irritate your skin. Just tuck them away in a cool, dry spot and let time do the work.
Can I swap out the scents or oils if I don't want to follow the recipe exactly?
Short answer: Yes, but don’t just wing it. You can definitely swap scents or oils, but you have to respect the chemistry. If you swap one oil for another, you need to check its “SAP value” to make sure your lye calculations stay accurate—otherwise, you’ll end up with a bar that’s either too harsh or too mushy. For scents, stick to essential oils or fragrance oils specifically made for soap. Just keep the ratios in mind.
