Category: DIY

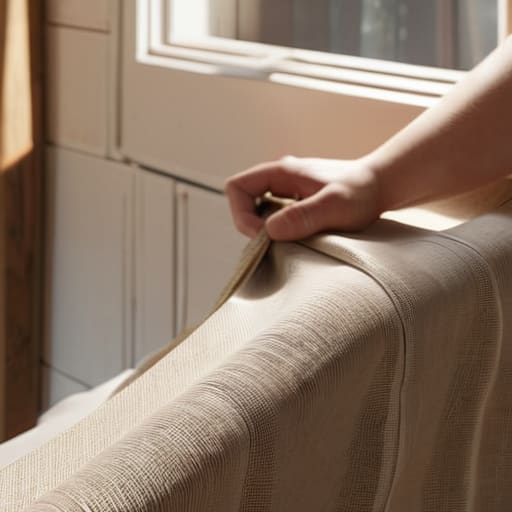
How to make handmade diy curtains.

Handmade Curtains: How to Make Them Without a Sewing Machine

I was staring at my living room window last Tuesday, surrounded by three different types of fabric swatches and a mounting sense of dread, realizing I had spent way too much money on “ready-made” panels that looked cheap and hung like wet paper. Most people will tell you that making diy curtains requires a high-end sewing machine and a degree in interior design, but honestly? That’s just gatekeeping. I grew up watching my dad fix everything from leaky pipes to broken chairs with nothing but a basic toolkit and some common sense, and I’ve realized that most home decor “hacks” are just unnecessarily complicated ways to spend more money.

In this guide, I’m stripping away the fluff and giving you the exact, unpolished system I use to get professional-looking windows without the professional price tag. We aren’t going to obsess over complicated pleats or expensive industrial equipment; instead, I’m walking you through the low-friction methods for measuring, cutting, and hanging your own fabric so it actually looks intentional. Whether you’re a total beginner or just someone who wants to stop overpaying for basic textiles, I’ll show you how to get this done efficiently and beautifully.

Table of Contents

Guide Overview

Total Time: 2-4 hours
Estimated Cost: $30-70
Difficulty: Beginner

Tools & Supplies

  • Fabric scissors for clean cutting
  • Sewing machine for stitching hems
  • Measuring tape for accurate dimensions
  • Iron for pressing seams
  • Fabric (2-3 yards depending on window size)
  • Thread (1 spool matching fabric color)
  • Sewing pins (1 box)
  • Curtain tape or header webbing (1 roll)

Step-by-Step Instructions

  • 1. First, grab a tape measure and actually measure twice. Don’t just eyeball the window; you need the width of the rod plus about 6-10 inches of “extra” fabric on each side so the curtains look lush rather than skimpy. For the length, decide if you want them hitting the floor or just skimming the sill, and then add about 4 inches to that number to account for the top and bottom hems.
  • 2. Next, pick your fabric. Since I’m all about making life easier, I usually steer people toward linen blends or heavy cottons because they hang beautifully and aren’t total nightmares to work with. Avoid anything super slippery like silk or cheap polyester if this is your first time; you want something that stays where you put it while you’re trying to pin it.
  • 3. Once you have your fabric, lay it out flat on a clean floor or a large table and cut it to your dimensions. I like to leave a little bit of “breathing room” around my measurements. If you’re feeling brave, you can try a no-sew method using heavy-duty iron-on hem tape, which is a total lifesaver if you don’t want to deal with a sewing machine.
  • 4. If you are going the sewing route, start by folding the edges over to create your hems. I usually do a double fold—fold it once, press it with an iron, fold it again, and press it again. This hides the raw edge of the fabric and makes the whole thing look actually professional instead of like a craft project gone wrong.
  • 5. Now, decide on your hanging method. If you want that effortless, high-end look, I highly recommend making a “rod pocket” by sewing a long tube at the top of the curtain. If you’re more of a minimalist, you can just sew on some discrete curtain rings or even use clip-on rings that attach directly to the fabric.
  • 6. Before you commit to the final stitch, pin everything in place and do a test hang. Use some heavy binder clips to hold the fabric up on your curtain rod just to see how the light hits it and how the length looks in your actual room. It’s much easier to fix a pin than it is to unpick a permanent seam.
  • 7. Finally, do your final sewing or ironing and give them a good steam. Even the most perfectly constructed DIY curtains will look a little sad if they come straight out of a folded pile. A quick pass with a steamer once they are hanging will make them look like you actually spent a ridiculous amount of money at a boutique.

Understanding Diy Curtains

Understanding DIY Curtains through fabric selection.

Before you actually start cutting into your fabric, we need to talk about the vibe you’re going for. I’ve learned the hard way that what looks good on a Pinterest board doesn’t always translate to your actual living room. The biggest game-changer is your fabric selection for window treatments; if you pick something too lightweight, your room will feel unfinished, but if it’s too heavy, it might overwhelm a small space. I usually lean toward linen blends because they have that effortless, lived-in look that doesn’t feel too “stiff” or formal.

Another thing to keep in mind is that your windows aren’t just holes in the wall—they’re the focal point of the room. When you’re measuring windows for curtains, don’t just measure the glass. You want to go wider and higher than the actual frame to make the room feel larger and more expensive. It’s a tiny tweak, but it makes a massive difference in how professional the final result looks. Honestly, getting the dimensions right is half the battle before you even touch a pair of scissors.

Key Things to Know

Key Things to Know: fabric selection.

Before you actually start cutting into anything, let’s talk about the stuff that usually trips people up. First off, don’t underestimate the importance of fabric selection for window treatments. I know, it’s tempting to just grab the cheapest linen you see at a craft store, but if you’re looking for privacy or light control, you need to consider the weight. A heavy velvet feels expensive and cozy, while a sheer voile is great for that airy, minimalist vibe. Just remember: the way the fabric hangs is everything. If it’s too flimsy, your windows will look sad rather than intentional.

Also, if you’re on a tight budget, don’t stress about owning a high-end sewing machine. There are plenty of ways to handle hemming curtains without sewing using iron-on hem tape, which is a total lifesaver for a quick weekend project. One more thing—double (and then triple) check your measurements. I once messed up a whole batch of fabric because I forgot to account for the rod width. Measure twice, cut once isn’t just a cliché; it’s the only way to keep your sanity.

Pro-Tips to Keep You From Regretting This Project

  • Don’t skip the iron. I know, it feels like an extra step, but if you don’t press your fabric before you start cutting, your finished curtains are going to look homemade in the worst way possible. Crisp edges are everything.
  • Measure twice, cut once—literally. Seriously, grab a measuring tape and double-check your window width plus the extra fabric needed for the hems. There is nothing more soul-crushing than realizing you’re two inches short after you’ve already made the cut.
  • Go heavy on the hem. If you want that expensive, high-end look, give your curtains a deep bottom hem. It adds weight so they hang straight and don’t flutter around like crazy every time someone opens a door.
  • Mind your fabric grain. If you’re using a patterned fabric, make sure the pattern is running the right way before you sew. There’s nothing worse than finishing a whole panel only to realize the print is sideways.
  • Use the right needle for the job. If you’re working with heavy velvet or thick linen, don’t try to force a standard thin needle through it; you’ll end up with a broken needle and a lot of frustration. Grab a heavy-duty one from your kit and save yourself the headache.

The TL;DR on DIY Curtains

Don’t sweat perfection; the goal is a functional, custom look that fits your space, not a showroom-ready masterpiece that takes ten hours to finish.

Invest in decent hardware and quality fabric—skimping on the basics is usually where the “DIY look” goes from intentional to just messy.

Measure twice, cut once, and always leave a little extra room; it’s much easier to tuck in a bit of excess fabric than it is to fix curtains that are two inches too short.

The Final Stitch

Completing curtains with The Final Stitch.

At the end of the day, hanging your own curtains isn’t about achieving some Pinterest-perfect, showroom aesthetic that looks like no one actually lives there. It’s about knowing that you measured twice, picked a fabric that actually suits your space, and followed a system that didn’t leave you staring at a pile of wasted textile. Whether you went the easy route with clip rings or tackled a full hem, the goal was to stop letting your windows feel unfinished and start taking control of your environment. You’ve got the tools, you’ve got the measurements, and most importantly, you’ve got a setup that actually works for your specific room.

I know that starting a DIY project can feel a little intimidating—especially when you’re worried about ruining a nice piece of fabric or drilling holes in the wrong spot. But honestly? The slight risk of a mistake is a small price to pay for the massive boost in confidence you get when you realize you don’t need to hire someone else to handle the basics. Adulthood is a lot less heavy when you realize you are actually capable of maintaining your own space. So, take the win, enjoy the new vibe in your room, and remember that every small system you build makes the big stuff much easier to handle.

Frequently Asked Questions

How do I figure out exactly how much fabric to buy so I don't end up with awkward gaps or a massive, expensive leftover pile?

The math part is usually where people panic, but it’s actually pretty simple once you get the formula down. First, measure your window width and multiply that by 2 or 2.5. That’s your “fullness factor”—it’s what prevents your curtains from looking like a flat sheet of paper when they’re closed. Then, add about 8-10 inches for your top and bottom hems. Do that math before you hit the fabric aisle so you aren’t overspending on scraps.

Do I actually need a sewing machine for this, or is there a way to do it that doesn't involve me learning how to thread one?

Honestly? You can totally skip the sewing machine. I’m all about reducing friction, and if the idea of threading a needle feels like a nightmare, don’t do it. You can use heavy-duty iron-on hem tape (like HeatnBond) to create clean, permanent edges with just an iron. It’s faster, way less intimidating, and honestly, if you do it right, nobody is going to know you didn’t stitch them yourself. No stress required.

What’s the best way to hang these if I’m renting and can’t exactly go drilling massive holes into the walls?

The renter’s struggle is real. If you can’t touch the walls, skip the drill and go for heavy-duty Command curtain rod brackets. They’re a lifesaver. Just make sure you clean the wall with rubbing alcohol first so they actually stick—don’t skip that step or your curtains will end up on the floor. If your rod is super heavy, look into tension rods; they wedge between the window frames and require zero hardware.

Effective cable management DIY organizational hacks.

Tame the Cord Chaos With These Diy Cable Management Hacks

I was sitting on my floor last Tuesday, trying to hunt for a single charging brick, when I realized I was actually fighting a literal war against a massive, dusty nest of black wires behind my desk. It’s that specific kind of chaos that makes you feel like your entire life is spiraling, even if it’s just your workspace. Most people think you need to spend a fortune on those high-end, aesthetic wooden cable boxes to fix it, but that’s a total lie. Real cable management diy isn’t about buying expensive gadgets; it’s about using basic tools to stop the visual noise from draining your energy every time you sit down to work.

I’m not here to sell you on a lifestyle overhaul or some overpriced organizational system that looks good on Pinterest but falls apart in a week. Instead, I’m going to show you how to use stuff you probably already have—or can grab for five bucks at a hardware store—to actually tame the beast. We’re talking about practical, low-effort hacks like using velcro ties and mounting strips to create a system that actually stays put. Let’s get your space back under control so you can actually focus on your work instead of the mess under your feet.

Table of Contents

Guide Overview

Total Time: 1-2 hours
Estimated Cost: $20-50
Difficulty: Beginner

Tools & Supplies

  • Scissors or wire cutters for trimming ties
  • Label maker or masking tape for identification
  • Velcro cable ties (1 pack)
  • Cable management sleeves or raceways (1 set)
  • Adhesive cable clips (1 pack)
  • Power strip (1 unit)

Step-by-Step Instructions

  • 1. First things first, you have to unplug everything. I know, it sounds like a massive chore, but trying to organize a “live” nest of wires is a recipe for a headache and potentially a literal shock. Pull every single cord out from behind your desk and lay them out on the floor. It’s going to look like a disaster zone for a minute, but you need to see exactly what you’re actually dealing with before you can fix it.
  • 2. Once you have your mess spread out, grab a microfiber cloth and some isopropyl alcohol to clean the dust off. If you’re like me, there is probably a layer of gray fuzz coating every single power strip and cord. Trying to manage cables that are covered in grime is gross and honestly just makes the whole process feel more overwhelming. Get it clean now so your new system actually stays clean.
  • 3. Now, let’s talk categorization. Group your cables by their “destination”—meaning, which ones stay plugged into the computer and which ones are just going to a lamp or a charger. Use a label maker or even just some masking tape and a Sharpie to mark both ends of the cord. There is nothing more frustrating than being mid-project and having to trace a black cord through a dark corner just to find out which one it is.
  • 4. This is where the actual “DIY” part kicks in. Instead of buying those expensive, aesthetic cable boxes that look like they belong in a minimalist showroom, go to a hardware store and grab some cheap Velcro ties. Avoid the plastic zip ties if you can; they’re permanent, they’re aggressive, and if you ever need to move your setup, you’ll end up cutting them and potentially nicking a wire. Velcro is your best friend because it’s infinitely reusable.
  • 5. Next, we need to deal with the “spaghetti” hanging off the edge of the desk. I highly recommend mounting a power strip to the underside of your desk using heavy-duty command strips or even some simple mounting screws if you’re feeling brave. If you can get the power source off the floor and tucked under the tabletop, you’ve already won 80% of the battle. It keeps the dust away and stops the cords from becoming a tripping hazard.
  • 6. For the cables that absolutely have to run down the back of a desk leg, use some adhesive cable clips. Don’t overthink it; just line them up in a straight path so the wires follow the natural silhouette of your furniture. If you have a bunch of loose chargers, I usually use a small command hook on the side of my desk to keep the lightning or USB-C ends from sliding onto the floor every time I unplug them.
  • 7. Finally, do a “stress test.” Plug everything back in one by one and make sure nothing is being pulled too tight. You want your cables to have a little bit of slack so that if you move your monitor or shift your chair, you aren’t putting tension on the ports. Take a second to admire the lack of chaos—you officially have a system that actually works.

Understanding Cable Management Diy

Understanding Cable Management Diy for workstations.

Before you dive into the actual labor, you need to understand that this isn’t just about making things look pretty for an Instagram aesthetic. It’s about reducing mental friction. When you sit down to work and see a literal bird’s nest of black wires tangling around your ankles, your brain registers it as chaos, even if you don’t realize it. True decluttering workstation electronics is about creating a space where you can actually focus without your eyes constantly darting to the mess on the floor.

I’ve learned through a lot of trial and error that the best approach is to categorize your chaos. Don’t just start wrapping things; first, identify which cables are permanent (like your monitor or desktop) and which are temporary (like your phone charger). Once you know that, you can decide which under desk cable management solutions actually make sense for your setup. There’s no point in buying expensive, heavy-duty trays if you’re only managing a single laptop and a lamp. It’s all about matching the tool to the specific mess you’re trying to solve.

Key Things to Know

Key Things to Know: cord concealment.

Before you go out and buy a bunch of expensive gadgets, there are a few reality checks you need to handle. First, stop thinking you need a professional setup to look clean. Most of the time, you can achieve decent cord concealment hacks just by being intentional about where things sit. One mistake I see all the time is trying to hide everything at once. If you try to shove every single plug behind a desk without a plan, you’ll just end up with a heavy, dusty knot that’s impossible to move. Start by grouping your most used items and leave some slack for when you actually need to unplug something.

Also, don’t overlook the power source itself. A huge part of the struggle is actually organizing power strips and adapters, which usually end up as the biggest culprits of visual chaos. I’ve found that if you secure the strip to the underside of your desk rather than letting it sit on the floor, you’ve already won half the battle. It keeps the dust away and makes the whole area feel intentional rather than accidental.
My Go-To Shortcuts for a Cleaner Setup

  • Stop buying those expensive plastic cord organizers; honestly, a pack of velcro cable ties from the hardware store is way more versatile and won’t strip your wires when you need to move things around.
  • Use adhesive cable clips to run your charging cords along the edge of your desk so they don’t slide off and end up in a heap on the floor every time you unplug your phone.
  • If you have a massive “spaghetti pile” under your desk, grab a cheap mesh cable management tray and screw it to the underside of your tabletop to get everything off the ground and out of sight.
  • Label both ends of your power strips and long extension cords with a simple piece of masking tape and a sharpie; you’ll thank me later when you aren’t playing “guess which plug kills the Wi-Fi” at 11 PM.
  • Don’t overstuff your power strips—it’s tempting to hide everything in one giant box, but if things get too cramped, they can overheat, and that’s a safety issue I don’t want you dealing with.

The Bottom Line

Stop overthinking the gear; most of the time, a few cheap velcro ties and some basic routing are more effective than buying expensive, specialized organizers.

Think in layers—manage the mess behind your desk first, then focus on the visible wires to actually make the space feel calm.

Build systems that are easy to change, because the second you move your monitor or add a new gadget, a rigid setup becomes a headache instead of a help.

Final Thoughts on Your New Setup

Final Thoughts on Your New Setup.

At the end of the day, cable management isn’t about achieving some unrealistic, Pinterest-perfect aesthetic that requires a professional contractor to pull off. It’s really just about reducing the visual noise that’s constantly draining your focus. Whether you decided to invest in some decent cable trays, went the cheap route with velcro ties, or finally labeled those power bricks so you aren’t playing a guessing game every time you need to unplug something, you’ve already done the hard part. You’ve moved from a state of “controlled chaos” to a system that actually works for you instead of against you.

Don’t feel like you have to tackle your entire home office or living room setup in one single afternoon. Adulthood is a lot easier when you approach these small frictions one by one. Start with your desk, get that win under your belt, and then move on to the next mess when you have the mental bandwidth. Building these little systems is how you stop feeling like you’re constantly fighting your environment and start actually enjoying your space. You’ve got this—now go enjoy your clean, cord-free sanctuary.

Frequently Asked Questions

Is it actually safe to bundle power strips and multiple cords together, or am I creating a fire hazard?

Honestly, this is the question I wish more people asked before they went full “cable nest” mode. Here’s the deal: bundling is fine for data cables, but bundling power strips or heavy-duty cords? That’s where it gets sketchy. If you trap too much heat in a tight bundle of high-draw wires, you’re basically building a tiny heater that can melt insulation. Keep your power strips separate and don’t wrap them in thick zip ties. Stay safe.

How do I keep my cable management looking clean if I have a lot of heavy equipment that needs to move around?

If you’re constantly shifting heavy gear, stop using permanent adhesive clips—they’ll just peel off and leave a sticky mess. Instead, lean into braided cable sleeves and heavy-duty Velcro wraps. Group everything into one “trunk” using a sleeve so it moves as a single unit rather than a spaghetti mess. I also swear by weighted cable bases to keep things from sliding off the desk when you unplug something in a hurry.

What’s the best way to handle cables that are stuck behind heavy furniture like a desk or a bed?

Honestly, this is the worst part of the job. You don’t want to risk a back injury or scratching your floor moving a heavy desk just to reach a plug. My go-to move? Get a long, flat-head screwdriver or a yardstick and some painter’s tape. Tape your cables to the stick, slide it into the gap, and use the tool to guide them exactly where you need them. It’s low-effort, but it works.

Easy guide to resin crafts for beginners.

Getting Started With Resin: an Easy Guide for New Crafters

I was staring at my kitchen table, surrounded by half-dried bubbles, a sticky layer of spilled epoxy, and a tray of coasters that looked more like melted plastic than art, wondering why the hell I’d even started this. I had watched a dozen “aesthetic” tutorials, but nobody mentioned that your workspace becomes a literal hazard zone if you don’t have a system. Most people think you need a studio full of expensive gear to master resin crafts for beginners, but honestly? That’s just gatekeeping. You don’t need a professional setup; you just need to stop treating your craft room like a junk drawer and start treating it like a controlled environment.

I’m not here to sell you on the “magic” of resin; I’m here to help you manage the mess. In this guide, I’m stripping away the fluff and giving you the exact, unpolished workflow I use to keep my projects clean and my sanity intact. We’re going to cover the essential gear you actually need, how to avoid those annoying air bubbles, and the real-world steps to finishing your first piece without feeling like you need a chemical shower afterward. Let’s get into it.

Table of Contents

Guide Overview

Total Time: 24-48 hours (including curing)
Estimated Cost: $60-120
Difficulty: Beginner

Tools & Supplies

  • Silicone molds for shaping the resin
  • Mixing cups for measuring and stirring
  • Wooden sticks for mixing
  • Heat gun or torch to remove bubbles
  • Nitrile gloves for hand protection
  • Epoxy resin kit (2-part resin and hardener)
  • Liquid pigments or mica powders for color
  • Silicone molds (various shapes)
  • Glitter or dried flowers for embellishment
  • Sandpaper for smoothing edges

Step-by-Step Instructions

  • 1. First, we need to talk about your workspace, because if you try to do this on your dining table without a plan, you’re going to regret it. Clear off a flat surface that you don’t mind getting a little messy, and lay down a thick layer of silicone mats or cheap plastic tablecloths. Resin is basically permanent once it sets, so having a non-stick barrier is the only way to save your furniture from a lifetime of sticky spots.
  • 2. Next, gear up with the actual safety essentials—and no, a paper mask won’t cut it. You need a pair of nitrile gloves (not latex, which can react with the resin) and a respirator mask if you’re working in a small room. I always keep a dedicated “resin kit” in my tote so I don’t have to hunt for gear mid-project, but the main thing is ensuring you have plenty of ventilation by cracking a window or turning on a fan.
  • 3. Now, let’s get into the actual mixing, which is where most people mess up. Use a small, disposable silicone cup to measure your resin and hardener by weight or volume—follow the ratio on the bottle exactly. If the instructions say 1:1, don’t guess; even a tiny error will leave your project feeling tacky and unfinished. Once you pour, stir slowly with a wooden stick to avoid trapping tiny air bubbles in the liquid.
  • 4. Once your mixture looks clear and consistent, it’s time to add your aesthetic elements. This is where you can get creative with dried flowers, glitter, or even old hardware from my thrift finds, but add them in stages if you’re doing a layered pour. If you dump everything in at once, your decorations will just sink to the very bottom, and you’ll lose that cool 3D effect you were going for.
  • 5. To deal with those annoying bubbles that inevitably pop up, grab a long-reach lighter or a heat gun and lightly pass the flame over the surface of the liquid. You’ll see the bubbles rise and disappear almost instantly. Just don’t hold the heat in one spot for too long, or you’ll actually melt your mold or cause the resin to smoke, which is a total mess to clean up.
  • 6. Finally, the hardest part of the entire process: the waiting game. Cover your piece with a cardboard box to keep dust from settling on it, and leave it completely alone for at least 24 hours. I know it’s tempting to poke it to see if it’s hard, but interrupting the curing process is the fastest way to ruin the structural integrity of your craft.

Ditch the Chaos a Realistic System for Resin Crafts for Beginners

Ditch the Chaos a Realistic System for Resin Crafts for Beginners

The biggest mistake I see people make isn’t the actual pouring; it’s the lack of a “landing zone.” If you try to work on your dining room table without a system, you’re going to end up with a sticky nightmare that ruins your furniture. Before you even touch a bottle, set up a dedicated station with a silicone mat and plenty of ventilation. Honestly, the most important safety precautions for working with epoxy aren’t just about gloves; you really need to be in a space where you aren’t breathing in those fumes all afternoon.

Once your space is set, focus on your workflow to avoid the mid-project panic. I always keep my essential resin art supplies—like stir sticks, heat guns, and levelers—in a single, organized bin so I’m not hunting for them while my resin is halfway through its chemical reaction. Also, don’t rush the process. If you try to force a project before the curing time for epoxy resin is actually complete, you’ll end up with a tacky, ruined mess. Slow down, stay organized, and let the chemistry do its thing.

Mastering the Essentials From Safety Precautions to Perfect Curing Times

Mastering the Essentials From Safety Precautions to Perfect Curing Times

Before you even think about touching your first batch of liquid, we need to talk about the stuff that keeps this from becoming a disaster. I’m big on systems, and the most important system here is your safety setup. Resin isn’t something you want to just “wing” without a plan; you need a well-ventilated space and a solid mask. When it comes to safety precautions for working with epoxy, don’t skimp on the gloves. One accidental spill on your skin is a quick way to ruin the vibe of your entire afternoon.

Once you’ve got your gear, the real magic—and the real frustration—happens during the mix. If you don’t get your resin mixing ratios for beginners exactly right, you’re going to end up with a sticky, half-cured mess that’s basically impossible to fix. It’s all about precision. Also, keep an eye on your environment; temperature matters. If your workspace is too cold, your curing time for epoxy resin is going to stretch out way longer than the bottle says, leaving you stuck in a waiting game that kills your momentum.

Small Wins: 5 Ways to Avoid a Resin Disaster

  • Stop mixing everything at once. It’s tempting to go big, but resin has a ticking clock. Work in small batches so you aren’t racing against a hardening puddle of wasted material.
  • Level your workspace or lose your mind. If your table is even slightly tilted, your pour will eventually drift to one side, and your piece will be lopsided. Check it with a level before you even open the bottles.
  • Embrace the “bubble dance.” Even with the best mixing, you’ll get air bubbles. Keep a heat gun or a butane torch nearby to lightly skim the surface—it’s the only way to get that glass-like finish without the frustration.
  • Don’t skimp on the ventilation. I know, it’s a hassle to set up, but breathing in fumes isn’t part of the aesthetic. Open a window and keep a fan running; your future self will thank you.
  • Use silicone mats for everything. Resin is basically permanent once it hits a surface, so don’t risk your good desk. A cheap silicone mat makes cleanup a five-second job instead of a weekend-long scrubbing session.

The Bottom Line: Making Resin Work for You

Don’t let the “perfect” aesthetic paralyze you; your first few pours are basically just expensive science experiments, so focus on the process rather than a flawless finish.

Invest in your setup, not just your supplies—having a dedicated, well-ventilated space and the right safety gear is what actually makes this hobby sustainable instead of a stressful mess.

Systems beat talent every time; if you prep your workspace and time your mixing carefully, you’ll spend way more time enjoying your creations and way less time cleaning up disasters.

The Messy Reality of Getting Started

The Messy Reality of Getting Started.

At the end of the day, resin is going to be a bit chaotic the first few times you try it. You’ll probably mess up a ratio, or your first pour will end up with a handful of stubborn bubbles, and that is perfectly fine. Just remember the systems we talked about: keep your workspace contained, respect the safety gear like it’s non-negotiable, and don’t rush the curing process just because you’re excited to see the result. If you stick to the basics of measuring accurately and managing your environment, you’re already ahead of most people. It’s all about minimizing the friction between your idea and the finished piece so you can actually enjoy the process rather than just cleaning up a disaster.

Don’t let the fear of a ruined mold or a sticky tabletop keep you from experimenting. The goal here isn’t to produce museum-quality art on day one; it’s to build a workflow that lets you create without feeling overwhelmed. Every mistake is just a data point that helps you refine your system for the next project. So, grab your gloves, clear off a small corner of your desk, and just start pouring. You’ve got the tools and the plan—now you just need to see what happens when you actually dive in.

Frequently Asked Questions

How do I stop getting those annoying tiny bubbles in my resin without buying an expensive vacuum chamber?

Honestly, you don’t need a vacuum chamber to get a clear pour. First, stop stirring like you’re whisking eggs; go slow and steady to avoid whipping air into the mix. I also swear by a heat gun or even a simple butane torch—just pass it quickly over the surface to pop those surface bubbles. If you’re working with pigment, try mixing it in stages. It’s all about reducing the chaos, not spending a fortune.

Is there a way to reuse leftover resin, or am I just going to end up wasting half the bottle?

Honestly, don’t let that leftover resin go to waste—that’s just throwing money down the drain. If you have a small amount left, pour it into a silicone mold to make tiny charms or beads. You can also mix it with glitter or dried flowers to make “resin scraps” for future projects. Just make sure you seal it properly so it doesn’t cure in the bottle. A little bit of planning goes a long way.

My resin feels sticky even after the "official" curing time—what did I do wrong?

Honestly, it’s usually one of three things. First, check your ratio—if you’re eyeballing it instead of using a digital scale, your chemistry is off. Second, your room might be too cold; resin hates a chill and needs warmth to bond properly. Lastly, you might have under-mixed. Even if it looks clear, those tiny unmixed pockets stay tacky forever. Grab a scale, turn up the heat, and mix like your life depends on it.

Natural ways how to unclog a drain.

Gentle Ways to Unclog Drains Without Using Toxic Chemicals

There is nothing quite like the sheer, cold panic of standing in your bathroom at 7:00 AM, watching gray, stagnant water slowly rise toward your ankles because the sink decided to quit on you. Most people immediately think they need to call an expensive plumber or pour a gallon of caustic, skin-burning chemicals down the pipe, but honestly? That’s usually unnecessary overkill. I learned the hard way growing up that most plumbing issues aren’t a crisis; they’re just a system failure that needs a little manual intervention. Learning how to unclog a drain shouldn’t feel like a high-stakes emergency, even if the smell of standing water makes you want to move out immediately.

I’m not going to give you a lecture on professional plumbing theory or suggest you buy a $200 specialized tool. Instead, I’m sharing the actual, unpolished steps I use to fix my own sinks without breaking the bank or my spirit. We’re going to walk through the low-friction methods—from the basic plunger technique to the “zip tie” hack—that actually work in real life. My goal is to help you clear that blockage so you can get back to your morning routine and stop stressing about your pipes.

Table of Contents

Guide Overview

Total Time: 15-45 minutes
Estimated Cost: $0-20
Difficulty: Beginner

Tools & Supplies

  • Plunger [Cup or flange style for creating suction]
  • Drain Snake [Handheld auger to reach deep clogs]
  • Baking Soda [1/2 cup for natural cleaning]
  • White Vinegar [1/2 cup for chemical reaction]

Step-by-Step Instructions

  • 1. First, let’s try the low-effort approach: the boiling water method. If you think it’s just a buildup of soap scum or grease, boil a kettle and pour it slowly down the drain in two or three stages. Give it a second to work its magic between pours, but don’t do this if you have PVC pipes, as the extreme heat can actually warp the joints.
  • 2. If the hot water didn’t do the trick, grab your plunger—and no, the little sink ones don’t work as well as the flange plunger with the extra rubber flap. Make sure there’s enough water in the sink to cover the bell of the plunger, create a tight seal over the drain, and give it some really aggressive, rhythmic pumps. It’s all about creating that pressure vacuum to dislodge whatever is stuck.
  • 3. If you’re dealing with a bathroom sink or tub, the culprit is almost always a clump of hair tangled in the stopper. I usually keep a small pair of tweezers or a “zip tie tool” in my kit for this. Pull out the stopper, reach in (wear gloves, seriously), and manually fish out the gunk. It’s gross, I know, but it’s way more effective than pouring chemicals down there.
  • 4. For the stubborn clogs that won’t budge, it’s time to go under the sink and tackle the P-trap. Place a bucket underneath the U-shaped pipe to catch whatever mess comes out, then use your hands or a wrench to unscrew the slip nuts. Once the pipe is off, clear out the debris manually and rinse the pipe in another sink before putting it all back together.
  • 5. If you’re feeling a bit more “DIY” and the clog is deeper in the pipes, you might need to use a drain snake (or an auger). Feed the cable into the drain until you feel resistance, then rotate the handle to hook onto the blockage. Slowly pull the cable back out, being careful not to force it too hard if you hit a bend, or you might end up causing a leak.
  • 6. Once the water is finally flowing again, don’t just walk away. Flush the system one last time with a mixture of baking soda and white vinegar. It’ll fizz like a science fair project, but it helps clear out any remaining residue and freshens up the scent of the drain so your house doesn’t smell like a sewer.

Understanding How to Unclog a Drain

Understanding How to Unclog a Drain.

Before you start hacking away at the pipes, you need to figure out what you’re actually fighting. Most of the time, it’s a battle of physics. In the kitchen, it’s usually a buildup of grease and food particles that have turned into a solid mass. In the bathroom, the culprit is almost always removing hair from bathroom drains that has tangled around the stopper or caught on the pop-up assembly. If you can identify the “why” behind the clog, you can choose the right tool for the job instead of just guessing.

If the clog feels shallow, I’m a huge advocate for natural drain cleaner recipes rather than reaching for those harsh, caustic chemicals that can actually eat away at your pipes over time. A simple baking soda and vinegar drain method works wonders for minor slow-downs because the fizzing action helps break up organic matter without the toxic fumes. However, if you’re dealing with something deeper in the plumbing, you’ll eventually need to graduate to something more heavy-duty, like using a plumbing snake to physically hook and pull the blockage out.

Key Things to Know

Key Things to Know about plumbing.

Before you go full DIY mode, there are a few things I’ve learned from watching my dad tackle plumbing disasters that you should keep in mind. First, know your limits. If you’ve tried a plunger and a few basic fixes and nothing is budging, it might be time to stop before you accidentally damage your pipes. Sometimes, using a plumbing snake is the only way to reach a deep blockage, and if that feels intimidating, don’t be afraid to call a professional. It’s better to pay for a plumber now than to replace a burst pipe later.

Also, let’s talk about prevention, because honestly, fixing a clog is way more annoying than avoiding one. I’m a big fan of the baking soda and vinegar drain method once a month just to keep things flowing. It’s a super simple, non-toxic way to clear out minor buildup before it turns into a full-blown emergency. If you’re dealing with a bathroom sink, just make sure you’re regularly removing hair from bathroom drains with a little tool—it’s gross, I know, but it’s a total game-changer for your sanity.

Pro-tips to save your sanity (and your pipes)

  • Put the chemicals down. Seriously. Most of those heavy-duty liquid cleaners are super caustic and can actually damage older pipes or create a toxic mess if they don’t work. I’d much rather use a physical method like a plunger or a snake than risk a plumbing emergency later.
  • Keep a “drain strainer” in every sink. It’s a tiny, cheap habit, but catching hair and food scraps before they even enter the drain is a total game-changer for preventing clogs in the first place.
  • Don’t forget the boiling water trick. If you’re dealing with a slow drain caused by soap scum or grease buildup, pouring a kettle of boiling water down there can sometimes melt the gunk away without any extra effort. Just be careful if you have PVC pipes—don’t use water that’s too aggressive.
  • Clean your P-trap regularly. If you’re feeling brave, unscrew the U-shaped pipe under the sink and manually clear out whatever is stuck in there. It’s a little gross, but it’s often the most effective way to deal with a stubborn clog.
  • Be patient with the plunger. It’s not about how hard you hit it; it’s about the seal. Make sure there’s enough water in the sink to cover the plunger cup and give it steady, forceful pumps to create that suction needed to move the blockage.

The TL;DR Version

Start small and mechanical—don’t immediately reach for harsh chemicals that can damage your pipes; a plunger or a snake is almost always a safer, more effective first move.

Identify the culprit—knowing whether you’re dealing with a hair clog in the shower or grease buildup in the kitchen helps you pick the right tool for the job.

Build a maintenance habit—the best way to avoid a plumbing emergency is to use mesh strainers and avoid dumping fats down the sink in the first place.

Don't Let a Clog Get the Best of You

Don't Let a Clog Get the Best of You

At the end of the day, dealing with a clogged drain is really just about choosing the right tool for the specific level of mess you’re facing. Whether you started with a simple plunger, moved on to some baking soda and vinegar, or had to break out the actual snake, the goal was the same: restoring your flow. Remember that most of these issues are just minor friction points in your daily routine that can be solved with a little bit of patience and the right system. Just make sure you don’t go overboard with harsh chemical cleaners, as those can end up being way more trouble than they’re worth in the long run.

I know that staring at a sink full of standing water can feel like one of those “adulting is hard” moments, but honestly, you’ve got this. Once you realize that most household hiccups are just small puzzles waiting to be solved, they lose their power to stress you out. My best advice is to view these little maintenance tasks as part of your personal systems rather than unexpected emergencies. Keep your tools handy, stay calm, and remember that a little bit of proactive maintenance goes a long way in keeping your space—and your sanity—running smoothly.

Frequently Asked Questions

Is it actually safe to use those heavy-duty chemical cleaners, or am I just going to ruin my pipes?

Honestly? I’d avoid them if you can. I know they look tempting when you’re staring at a sink full of murky water, but those heavy-duty chemicals are super harsh. They generate intense heat that can actually warp PVC pipes or eat away at older metal ones over time. If you’ve already poured some down, don’t add anything else. It’s much safer to stick to a plunger or a drain snake than to risk a plumbing nightmare.

How do I know if the clog is something I can fix myself or if I’m officially at the "call a professional" stage?

Honestly, it’s all about the “effort vs. result” ratio. If you’ve tried a plunger and some baking soda and the water is still sitting there like a stagnant pond, stop. If you start seeing water backing up into your shower when you flush the toilet, that’s a main line issue—don’t touch that. If you feel any resistance when using a snake, pull back. Don’t risk a flooded kitchen just to save a service fee.

What should I do if I try plunging and the water just stays stuck or starts backing up into other sinks?

If the water isn’t budging or—worse—it’s backing up into your shower while you’re working on the kitchen sink, you’ve officially moved past a simple clog. This usually means the blockage is deeper in your main stack or there’s a venting issue. Stop plunging immediately; you’re just pushing pressure around now. At this point, it’s time to call a pro. It’s frustrating and expensive, but forcing it can lead to much costlier pipe damage.

Guide on how to fix a running toilet.

Stop the Water Waste: a Simple Guide to Fixing a Running Toilet

I was sitting in my living room trying to focus on a client’s content calendar when that faint, relentless hissing sound started drifting in from the hallway. It’s that specific, maddening noise that tells you your water bill is about to spike and your peace of mind is officially gone. Most people hear that sound and immediately think they need to call an expensive plumber or replace the entire unit, but honestly? That’s just unnecessary gatekeeping. Learning how to fix a running toilet is usually way less about heavy machinery and way more about just understanding a few basic parts that have probably just shifted out of place.

I’m not going to give you some overly technical manual that reads like a textbook; I want to give you the actual, unpolished steps to stop the noise. In this guide, we’re going to troubleshoot the most common culprits—from the flapper to the fill valve—without the unnecessary panic. My goal is to help you walk into that bathroom, pop the lid off, and get everything running smoothly again in under fifteen minutes. Let’s just get this sorted so you can get back to your life.

Table of Contents

Guide Overview

Total Time: 30-60 minutes
Estimated Cost: $10-30
Difficulty: Beginner

Tools & Supplies

  • Adjustable wrench for tightening bolts
  • Screwdriver for securing components
  • Sponge for removing excess water
  • Replacement flapper (1 unit)
  • Replacement fill valve (1 unit)
  • Replacement toilet tank repair kit (1 kit)

Step-by-Step Instructions

  • 1. First, we need to see what we’re actually dealing with. Take the lid off the tank—carefully, because these things are heavy and if you crack it, you’re having a very bad day—and just look inside. Don’t touch anything yet, just observe. Watch where the water is going. Is it constantly trickling into the bowl? Is the water level in the tank so high it’s spilling into the overflow tube? Knowing the visual evidence tells us exactly which part is failing.
  • 2. If the water is constantly running into that open tube in the middle, your float is likely the culprit. The float is that ball or cylinder that rises with the water to tell the valve to shut off. If it’s set too high, the water just keeps coming until it hits the overflow. Use the adjustment screw on top of the fill valve to lower the float level so the water stops well below the top of that tube.
  • 3. If the float level looks fine but you still hear that ghostly hissing sound, it’s time to check the flapper. This is that rubber plug at the bottom that lifts up when you flush. Over time, these get old, warped, or covered in mineral buildup, meaning they won’t create a watertight seal. Reach in and feel the rubber; if it feels slimy or looks uneven, it’s time to swap it out.
  • 4. Before you go running to the hardware store, do a quick “clean check.” Sometimes, a little bit of grit gets stuck under the flapper, preventing it from seating properly. Take a cloth and wipe down the rim of the flush valve seat and the underside of the flapper. If that fixes the leak, you just saved yourself a trip and a few bucks.
  • 5. If the flapper is definitely shot, replacing it is surprisingly easy. Turn off the water supply valve (the little knob on the wall behind the toilet) and flush to empty the tank. Unhook the old flapper from its pegs and remove the chain. When you buy the new one, bring the old one with you to the store. There are dozens of different shapes and sizes, and “close enough” usually isn’t good enough in plumbing.
  • 6. Once the new flapper is in place, reconnect the chain. You want just enough slack so that it doesn’t pull the flapper up prematurely, but not so much that it gets caught underneath the seal. If the chain is too long, it can actually interfere with the closing process, causing the exact leak you’re trying to fix.
  • 7. To wrap this up, turn the water supply back on and let the tank fill. Watch it closely to make sure the water stops at the right level and that the flapper settles down firmly. If you don’t hear that constant trickle anymore, congratulations, you’re officially a DIYer and you just saved yourself a $150 plumber visit.

Understanding How to Fix a Running Toilet

Understanding How to Fix a Running Toilet

Before you go diving into the tank, you need to understand that most of these issues aren’t actually “broken” in a catastrophic way; they’re usually just out of alignment. Think of it like a glitch in a system rather than a total hardware failure. Most of the time, you’re dealing with a simple toilet flush mechanism troubleshooting situation where a piece of plastic has shifted or a seal has worn down from years of use. If you can identify whether the water is escaping from the bottom of the tank or just constantly refilling from the top, you’ve already won half the battle.

If you notice the water is constantly trickling into the overflow tube, you’re likely looking at a toilet fill valve adjustment issue rather than a part that needs a full replacement. On the flip side, if you hear that ghostly hissing sound even when no one has used the bathroom, it’s usually a sign that you need to replace the toilet flapper because it’s no longer creating a tight seal. Once you recognize these patterns, the whole process feels way less intimidating.

Key Things to Know

Key Things to Know: Toilet troubleshooting.

Before you start unscrewing anything, there are a few things I’ve learned from my own trial and error that can save you a massive headache. First, don’t panic if you see water constantly trickling into the bowl; it doesn’t always mean you need a whole new toilet. Most of the time, it’s just a matter of toilet flush mechanism troubleshooting. Check the chain first. If it’s too tight, it keeps the valve open; if it’s too long, it gets caught under the seal. It’s a tiny detail, but it’s usually the culprit behind that annoying, endless sound.

Another thing to keep an eye on is the water level in toilet tank. If the water is rising so high that it’s spilling into the overflow tube, you aren’t looking at a leak, but rather a calibration issue. You can usually fix this with a quick toilet fill valve adjustment using the screw located on top of the valve. It’s much easier to tweak the float than it is to call out a professional for something that takes thirty seconds to dial in.

My quick-fix cheat sheet for when things go sideways

  • Don’t touch the handle first. If the water is constantly running, the problem is almost always inside the tank, not the lever you’re pressing. Start by lifting the lid and looking at the mechanics before you start twisting anything.
  • Check the chain tension. If the chain connecting the handle to the flapper is too long, it gets caught underneath and keeps the seal open. If it’s too short, it won’t let the flapper drop all the way. Aim for just a little bit of slack.
  • Feel the flapper for “mushiness.” Over time, those rubber seals get old and warped. If the flapper feels slimy or doesn’t sit flat against the hole, stop trying to adjust it and just go buy a replacement. They’re cheap and take two seconds to swap.
  • Watch the water level in the overflow tube. If the water is pouring into that open pipe in the middle of the tank, your fill valve is set too high or it’s just broken. You need to adjust the float so the water stops well below the top of that tube.
  • Keep a basic toolkit nearby. You don’t need a professional setup, but having a pair of pliers and maybe a screwdriver handy will save you from having to run back to the garage halfway through the job.

The TL;DR Version

Most running toilets are just a symptom of a worn-out flapper or a misaligned float, so don’t assume you need a whole new tank.

Always turn off the water supply valve before you start poking around; it’s a tiny step that prevents a massive, unmanaged mess.

Think of this as a quick diagnostic check rather than a plumbing overhaul—identify the part, swap it out, and get back to your day.

The Bottom Line

The Bottom Line: fixing a running toilet.

At the end of the day, a running toilet is usually just a symptom of one of three things: a faulty flapper, a misaligned float, or a clogged fill valve. Most of the time, you aren’t looking at a massive plumbing disaster; you’re just looking at a piece of rubber that has reached its expiration date. By taking ten minutes to peek inside the tank and identify the culprit, you’ve already done the hardest part. You’ve saved yourself a ridiculous water bill and, more importantly, you’ve avoided that unnecessary “emergency” phone call to a plumber that ends up costing more than the actual part.

I know that facing a broken fixture can feel a little intimidating if you didn’t grow up with a toolkit in your hand, but I promise it’s much more manageable than it looks. Once you realize that these systems are just a series of simple, replaceable parts, the anxiety starts to fade. Don’t let a little bit of running water make you feel like you aren’t “handy” enough. Every small fix you tackle is just another way of building your own competence and making your space feel a little more like yours. You’ve got this.

Frequently Asked Questions

Is it worth actually replacing the whole tank assembly, or can I just swap out a single part?

Honestly? Don’t go buying a whole new tank assembly unless you’ve literally dropped the toilet or the porcelain is cracked. That’s a massive, expensive headache you probably don’t need. Most of the time, it’s just a $10 flapper or a $15 fill valve that’s gone rogue. Swap the individual part first. It’s faster, cheaper, and way less of a project. If that doesn’t fix it, then—and only then—should you consider the big overhaul.

How do I know if the problem is the flapper or if the fill valve is just acting up?

The easiest way to tell is the “dye test.” Drop a few drops of food coloring into the tank and wait about 15 minutes without flushing. If the water in the bowl starts turning that color, your flapper isn’t sealing properly and needs to be replaced. If the tank stays clear but the water is still running or won’t stop filling, the fill valve is likely the culprit.

Can I use any random parts from the hardware store, or do I need to find specific brands for my toilet model?

Honestly, don’t go buying random parts just because they look similar. While most standard flappers are pretty universal, things like fill valves or specific lever handles can be picky about their specific toilet model. To avoid a second trip to the hardware store (and more frustration), I always snap a quick photo of the inside of my tank and the brand name on the porcelain before I head out. It saves so much headache.

Essential tools for DIY projects.

Must-have Tools for Anyone Starting Out in Diy

I still remember the exact moment I realized I was being lied to. I was twenty-two, standing in the middle of a big-box hardware store, staring at a $300 “professional grade” starter kit that looked more like a collection of shiny, useless plastic than actual equipment. I had a leaky kitchen faucet and a sense of impending doom, but that kit wasn’t going to help me fix it. The truth is, the industry loves to gatekeep by making you think you need a massive, expensive workshop just to handle basic home maintenance. You don’t. Most of the stuff they try to upsell you on is just clutter that takes up space in your closet. I’ve spent years figuring out which essential tools for diy actually earn their keep and which ones are just expensive distractions.

I’m not here to give you a shopping list of everything you could possibly use if you were a professional contractor. Instead, I want to give you the actual, unpolished blueprint for a toolkit that works. My goal is to help you build a setup that reduces the friction of adulthood, focusing on a few reliable pieces that will actually stop your house from falling apart. We’re going to strip away the hype and focus on functional, high-impact gear that fits into a real life.

Table of Contents

The No Panic Starter Kit Essential Tools for Diy Success

The No Panic Starter Kit Essential Tools for Diy Success

Look, you don’t need a garage full of heavy machinery to start fixing things around your apartment. Most of the time, you’re just trying to tighten a loose screw or hang a heavy mirror without it crashing into your floor. I always tell people to start with a solid maintenance tool checklist rather than running to the hardware store and grabbing everything that looks shiny. You really just need the basics: a decent multi-bit screwdriver, a hammer that doesn’t feel like it’s going to snap in half, and a high-quality tape measure.

When you’re deciding between hand tools vs power tools, my rule of thumb is to master the manual stuff first. There’s no point in buying a high-end cordless drill if you haven’t even learned how to use a level properly. If you’re on a tight budget, focus on getting one really good version of a tool rather than a cheap five-piece set that breaks the second you apply pressure. Investing in a few reliable pieces of budget friendly diy gear early on saves you so much frustration (and money) in the long run.

Hand Tools vs Power Tools Choosing Your Fighting Style

Hand Tools vs Power Tools Choosing Your Fighting Style

When you’re first starting out, the debate of hand tools vs power tools can feel a little overwhelming, like you’re choosing a side in a war you didn’t sign up for. Here’s the truth: you don’t need a garage full of heavy machinery to be “handy.” Hand tools are your bread and butter. They’re precise, they’re quiet, and they don’t require a dedicated charging station. If you’re just tightening a loose cabinet handle or assembling flat-pack furniture, a solid screwdriver and a hammer are your best friends. They’re the foundation of any budget friendly diy gear collection because they’re reliable and easy to control.

That said, power tools are the “cheat codes” of adulthood. If you’re looking into beginner woodworking equipment or even just hanging a heavy floating shelf, a cordless drill is going to save you a massive amount of physical frustration. I used to think I could manual-labor my way through everything, but once I invested in a decent drill, my DIY speed tripled. The goal isn’t to own every gadget on the shelf; it’s about knowing when a bit of extra torque is worth the investment to keep your projects from becoming a headache.

Your Budget Friendly Diy Gear Stop Overspending on Fluff

Your Budget Friendly Diy Gear Stop Overspending on Fluff

Look, I get it. You walk into a big-box hardware store and suddenly feel like you need a $500 professional-grade drill set just to hang a floating shelf. That is a total trap. Most of those massive, pre-packaged home improvement starter kit bundles are actually just a way to sell you twenty mediocre tools when you really only need five good ones. My rule of thumb? Buy for the project you have today, not the imaginary workshop you think you’ll own in three years.

Instead of dropping a fortune on everything under the sun, focus on building a curated collection of budget friendly diy gear that actually lasts. I’m a huge advocate for hitting up thrift stores or Facebook Marketplace for high-quality, vintage hand tools—they often have better weight and durability than the cheap plastic stuff sold today. If you’re just starting out, prioritize quality over quantity. It’s much better to own one solid, reliable screwdriver that won’t strip your screws than a massive set of flimsy junk that ends up in a landfill by next month.

Beyond the Basics Building Your Beginner Woodworking Equipment

Once you’ve mastered the basics of fixing a loose cabinet hinge or tightening a screw, you’ll probably feel that itch to actually make something. I remember my first attempt at a simple floating shelf; I thought I could wing it with just a screwdriver and some luck, but I quickly realized that beginner woodworking equipment requires a bit more intentionality. You don’t need a massive, expensive workshop to start, but you do need a few things that go beyond a standard home improvement starter kit.

Start by investing in a decent combination square and a decent set of wood chisels. These aren’t just for show; they are the difference between a joint that fits perfectly and one that looks like a toddler hacked at it with a butter knife. If you’re leaning toward the electric side of things, a small orbital sander is a total game-changer for smoothing out surfaces without spending hours doing it by hand. My advice? Don’t rush into buying every gadget on the shelf. Focus on quality over quantity so you aren’t stuck with a drawer full of cheap plastic that breaks the first time you hit a knot in the wood.

The Maintenance Tool Checklist to End the Home Emergencies

Look, there is a massive difference between having a collection of tools for a hobby and having a maintenance tool checklist that actually saves your sanity when something breaks at 10 PM. I’m not talking about setting up a full-blown workshop; I’m talking about the stuff that prevents a minor drip from turning into a flooded kitchen. You need a dedicated “emergency kit” mindset. This means having a high-quality adjustable wrench, a set of screwdrivers that won’t strip your screws, and a reliable flashlight always within reach.

When you’re building this out, don’t feel pressured to jump straight into heavy-duty beginner woodworking equipment or expensive machinery. Most home emergencies are actually pretty small and boring—a loose cabinet handle, a wobbly chair, or a slow drain. Focus your energy on gathering essential workshop supplies that handle these quick fixes. If you have these basics tucked away in one organized spot, you stop reacting to your house like it’s a crisis and start managing it like a pro. It’s all about reducing that friction before the chaos starts.

5 Ways to Keep Your Gear From Becoming Junk

  • Stop buying the “all-in-one” kits. They usually promise the world but give you ten mediocre versions of the same thing. I’ve learned the hard way that it’s much better to buy one high-quality screwdriver that actually grips than a 50-piece set where half the bits strip the moment you touch a screw.
  • Learn the “One-Project Rule” before you hit the hardware store. Don’t go in thinking, “I might need this someday.” That’s how you end up with a drawer full of random hex keys and specialized wrenches you’ll never touch again. Only buy what your current project—or the very next one—demands.
  • Treat your tools like they’re actually worth something. I know it sounds extra, but wiping down a metal surface or oiling a hinge after you use it takes ten seconds and prevents that annoying rust that ruins everything. A little bit of upkeep means you aren’t fighting your own equipment halfway through a job.
  • Organize by frequency of use, not by “type.” I don’t care if all the hammers go together; I care that the stuff I grab every single week is right at the front of my kit. If you have to dig through a heavy plastic bin to find your measuring tape, you’re going to lose momentum and probably end up frustrated.
  • Don’t be afraid to borrow or rent. If you need a heavy-duty power drill for a one-off weekend project, don’t drop $200 on a professional model. Ask a neighbor, check a local tool library, or rent one. Your goal is to finish the task, not to own every piece of machinery on the planet.

The TL;DR on Not Stressing Your Wallet or Your Sanity

Don’t fall for the “complete set” trap; buy what you actually need for the specific problem you’re solving right now.

Prioritize quality over quantity—one decent screwdriver you can actually rely on is better than a 50-piece kit of junk that breaks the first time you use it.

Maintenance is your best defense; keeping your tools clean and organized means you won’t be scrambling for a working hammer when something actually breaks.

The Bottom Line

Look, we’ve covered a lot of ground, from picking your first set of hand tools to figuring out when it’s actually worth dropping cash on power equipment. The biggest takeaway I want you to hold onto is that you don’t need a professional-grade workshop or a massive budget to start fixing things yourself. Whether you’re building a basic woodworking kit or just trying to maintain a functional living space so nothing breaks at 2 AM, the goal is the same: building a system that works for you. Start small, buy quality over quantity, and focus on the tools that solve your immediate problems rather than the ones that just look cool in a catalog.

At the end of the day, having these tools isn’t about becoming a master craftsman or spending every weekend covered in sawdust. It’s about the quiet confidence that comes from knowing you can handle whatever your environment throws at you. There is a specific kind of peace that settles in when you realize you don’t have to call a professional for every minor hiccup. So, grab that multi-tool, build your kit one piece at a time, and stop letting small repairs feel like massive emergencies. You’ve totally got this.

Frequently Asked Questions

I really want to start, but is it better to buy one high-quality drill or a cheap set that has everything included?

Honestly? Buy the one high-quality drill. I know the “all-in-one” kits look tempting when you’re staring at your bank account, but those cheap sets are usually a trap. You’ll end up with a motor that burns out halfway through a project and bits that strip every screw you touch. It’s way less frustrating to have one reliable tool that actually works than a box full of junk that makes you want to quit.

How do I know if a tool is actually worth the investment or if it's just some overpriced brand name I'm paying for?

Honestly, it’s a trap. I used to think buying the most expensive brand meant I was “doing it right,” but I was just paying for the logo. My rule of thumb? If you’re using it once a year, buy the cheap version. If you’re using it every weekend, invest in quality. Check the weight—cheap tools feel hollow and flimsy. If it feels like it’ll snap the first time you apply pressure, leave it on the shelf.

Where do I even store all this stuff so my apartment doesn't just look like a construction zone?

Look, I get it. The second you buy a drill, your living room starts looking like a hardware store exploded. To keep your space from feeling like a construction zone, stop thinking about “storage” and start thinking about “zones.” I swear by a sleek, rolling tool chest that tucks into a corner or a heavy-duty clear bin system inside a closet. If it’s out of sight, the mental clutter disappears too.

Budget-friendly diy gift ideas for everyone.

Thoughtful Diy Gifts That Won’t Break the Bank

We’ve all been there: it’s three days before a birthday or a holiday, and you’re spiraling because you realized you have nothing to give. You end up scrolling endlessly through overpriced boutique sites, feeling that familiar pang of guilt because a generic gift card feels so impersonal. I used to think that being a good gift-giver meant having a massive budget or endless crafting skills, but honestly, that’s just a recipe for burnout. The truth is, the best diy gift ideas aren’t about spending hours on a complex project that looks nothing like the Pinterest tutorial; they are about creating something intentional that actually fits into someone’s daily rhythm.

I’m tired of the gatekeeping around “crafting,” so I’ve put together a list of five streamlined projects that are actually doable. I’m talking about high-impact, low-stress options that focus on functionality and thoughtfulness rather than just aesthetic fluff. These five ideas will help you stop the last-minute panic and start building a small, repeatable system for gifting that feels personal without costing you your entire weekend. Let’s get into it.

Table of Contents

The Curated "Survival Kit"

The Curated "Survival Kit" gift box.

Most people think DIY gifts have to be something you actually make with your hands, like a lopsided candle, but I prefer the art of the curated kit. Think of it as building a specialized survival system for someone’s specific lifestyle. If your best friend is constantly stressed about work, put together a “Sunday Reset” box with a high-quality face mask, a specific blend of loose-leaf tea, and a candle that actually smells like something real. It’s not about being a craftsman; it’s about showing you actually pay attention to what they need.

Elevated Pantry Staples

Handmade elevated pantry staples in jars.

Growing up with a chef mom, I learned that the best gifts are often the ones that actually get used up. There is nothing worse than receiving a knick-knack that just collects dust on a shelf. Instead, try making a batch of something high-end that they wouldn’t normally buy for themselves, like a small-batch infused olive oil or a jar of homemade chili crunch. It feels fancy, it looks great on a kitchen counter, and it doesn’t create long-term clutter.

The Custom Digital Archive

Curating memories with The Custom Digital Archive.

This is my favorite way to handle gifts for the people who already have everything. Since I spend so much of my time managing digital assets for work, I’ve realized how much we overlook our own memories. If you have a friend or family member with a massive, disorganized photo library, spend an afternoon curating a “Year in Review” digital album or a custom Spotify playlist that tracks the specific songs you guys listened to during a road trip.

Upcycled Vintage Finds

My hobby of thrifting vintage electronics has taught me one thing: old stuff often has more soul than anything new you can find on Amazon. If you’re feeling a little more hands-on, look for something small and sturdy at a thrift store—like a vintage brass tray, a ceramic vase, or even an old wooden box—and give it a quick refresh. You don’t need to be a master restorer; sometimes just a deep cleaning and a bit of polishing is enough to make it feel brand new.

The "Low-Stakes" Self-Care Bundle

We talk a lot about self-care, but most “spa kits” are just overpriced versions of stuff you can find at any big-box retailer. I like to take a more practical approach by building a bundle around a single, functional ritual. For example, if someone is a big reader, create a “Reading Nook” kit with a high-quality bookmark, a bag of local coffee beans, and a cozy pair of socks. It’s a system for relaxation rather than just a collection of random scents.

The Bottom Line

Don’t let the “perfect” gift get in the way of a thoughtful one; people care way more about the fact that you actually remembered them than how much you spent.

Build a little “gift kit” in your junk drawer—extra nice wrapping paper, a good pair of shears, and some blank cards—so you aren’t scrambling at 11 PM the night before a birthday.

Focus on utility. The best gifts are usually the ones that solve a tiny, annoying problem in someone’s daily routine.

The Bottom Line

At the end of the day, giving a great gift isn’t about how much money you spent or how many hours you spent obsessing over every tiny detail. It’s about the fact that you actually saw someone and took a moment to create something specifically for them. Whether you went with a customized pantry kit, a curated digital playlist, or a simple piece of restored vintage tech, the goal was to remove the generic, store-bought feeling from the exchange. You don’t need to be a professional artisan to pull this off; you just need to follow a simple system and focus on the person receiving it.

If you’re still feeling that familiar pang of “I’m not creative enough” or “this is going to look messy,” just stop. Perfection is the enemy of actually getting things done, and honestly, a slightly imperfect handmade gift is way more meaningful than a flawless, expensive gadget. My advice? Pick one idea from this list, set a timer for thirty minutes, and just start building. Adulthood is stressful enough as it is—don’t let gift-giving become another item on your anxiety checklist. You’ve got this, and the people you love will definitely feel the effort.

Frequently Asked Questions

How do I make these gifts look "expensive" or high-end without actually spending a ton on materials?

The secret isn’t the price tag; it’s the presentation. If you want things to look high-end, ditch the neon tissue paper and go for a cohesive, minimalist palette—think cream, forest green, or charcoal. Invest in heavy-weight cardstock for tags and use real linen or velvet ribbons instead of plastic ones. It sounds extra, but a heavy, textured weight communicates “luxury” instantly. When the packaging feels intentional, the gift feels curated, not just cobbled together.

I'm super short on time—are there any DIY options that don't require hours of prep or a massive learning curve?

Honestly, I get it. Some days you just don’t have the bandwidth for a three-day craft project. If you’re in a time crunch, lean into “assembly” rather than “creation.” Grab some high-quality basics—like a nice candle or a bag of local coffee—and pair them with a handwritten note and a single, thoughtful item like a curated playlist or a cute thrifted mug. It takes ten minutes, but the intentionality makes it feel personal.

What's the best way to package these so they don't just look like a random craft project I threw together?

The secret is ditching the shiny, store-bought gift bags. They look cheap and add a ton of waste. Instead, go for a cohesive, minimalist aesthetic. I love using plain brown kraft paper or even leftover fabric scraps as wraps. Tie it all together with actual twine or a single sprig of dried eucalyptus. It’s a small system, but it makes a “craft project” look like a curated, intentional gift.

How to make a compost bin guide.

The Secret to Building a Functional Compost Bin at Home

I was standing in my kitchen last Tuesday, staring at a mountain of coffee grounds and wilted kale, feeling that familiar wave of “adulting guilt” because I knew exactly where all that waste was headed: the landfill. Most people make composting sound like this intense, high-maintenance lifestyle choice that requires a backyard the size of a football field and a degree in soil science, but honestly? That’s just gatekeeping. You don’t need a complicated ecosystem or expensive, aesthetic wooden crates to start; you just need to figure out how to make a compost bin that actually fits into your current, slightly chaotic life.

In this guide, I’m stripping away the fluff and showing you the actual, unpolished steps to building a functional system using stuff you probably already have in your garage or shed. We’re going to talk about low-effort builds, how to prevent your bin from becoming a smelly disaster, and the tiny systems that keep everything running smoothly. No hype, no expensive equipment—just a straightforward way to turn your scraps into something useful without adding more stress to your plate.

Table of Contents

Guide Overview

Total Time: 1-2 hours
Estimated Cost: $20-50
Difficulty: Beginner

Tools & Supplies

  • Drill with bits for making ventilation holes
  • Handsaw or utility knife for cutting materials
  • Measuring tape for accurate sizing
  • Plastic storage bin (approx. 18-30 gallons)
  • Drill bits (small diameter)
  • Hardware cloth or fine mesh (optional for base)

Step-by-Step Instructions

  • 1. First, you need to decide on your setup based on how much space you actually have. If you have a backyard, a large wooden bin or even just a designated corner of the yard works great, but if you’re dealing with a tiny balcony, I’d suggest a small plastic bin with a lid. Just make sure whatever you pick has enough room for things to actually breathe, because air is the secret ingredient here.
  • 2. Grab your container and get ready to make some much-needed ventilation holes. If you’re using a plastic bin, grab a drill (or a heated screwdriver if you’re feeling old-school) and pop holes in the sides and the bottom. You want to create a constant airflow so your compost doesn’t turn into a soggy, stinky mess that you’ll eventually want to abandon.
  • 3. Now, let’s talk about the foundation. You can’t just throw scraps into an empty bin and expect magic to happen. You need to start with a “brown” base—think shredded cardboard, dry leaves, or even some old newspaper from your recycling pile. This layer acts like a sponge for moisture and prevents everything from compacting into a dense, smelly block.
  • 4. Once your base is set, it’s time to start layering your “greens” and “browns.” This is where people usually get confused, but it’s actually pretty simple: “greens” are your nitrogen-rich kitchen scraps like coffee grounds and veggie peels, while “browns” are your carbon-rich dry materials like twigs or paper. The golden rule I live by is to keep a ratio of about two parts brown to one part green to keep the chemistry balanced.
  • 5. Every time you add a fresh batch of kitchen scraps, toss a handful of dry browns on top of them. I like to think of it like making a lasagna; you want to sandwich the wet stuff between layers of dry material. This prevents fruit flies from throwing a party in your kitchen and keeps the odors locked down.
  • 6. Give it a little love every week or two by turning the pile. Use a small garden shovel or a pitchfork to mix things up, moving the stuff from the outside into the center. This introduces fresh oxygen, which is basically fuel for the microbes that are doing the heavy lifting of breaking everything down for you.
  • 7. Finally, keep an eye on the moisture level. Your compost should feel like a wrung-out sponge—damp, but not dripping wet. If it’s too dry, sprinkle a little water on it; if it’s too soggy, just toss in some more shredded cardboard and give it a good stir. Once it looks like dark, crumbly soil and smells like a forest after it rains, you’ve officially made dirt gold.

Understanding How to Make a Compost Bin

Understanding How to Make a Compost Bin.

Before you start drilling holes or stacking pallets, you need to realize that composting isn’t about magic; it’s just about managing a tiny, controlled ecosystem. Most people overcomplicate this by thinking they need a professional-grade setup, but it really comes down to balancing your carbon and nitrogen. If you don’t get the ratio right, you’ll end up with a smelly pile that feels more like a chore than a system. I always tell people to focus on organic waste decomposition as a science of ratios—think of it like meal prepping, but for microbes.

The specific backyard composting methods you choose will depend entirely on how much space you actually have and how much effort you’re willing to put in every weekend. If you have a massive yard, a large bin is great, but if you’re working with a balcony or a small patio, you might want to look into a vermicomposting setup using worms instead. Regardless of the method, the goal is the same: keep it simple enough that you actually stick to it when life gets busy.

Key Things to Know

Key Things to Know: Compost Aeration Tips

Before you start digging or drilling, there are a few realities about organic waste decomposition that most “aesthetic” lifestyle blogs tend to gloss over. First, it’s all about the balance. If your pile starts smelling like a swamp, you’ve likely got too much moisture or not enough air. This is where aeration for compost bins becomes your best friend; you need to turn that pile every week or so to keep oxygen flowing through the mix. Without it, the process stalls, and you’re just left with a soggy mess instead of actual soil.

Also, don’t get too caught up in the “perfect” build. Whether you’re looking into backyard composting methods or a smaller indoor setup, the most important thing is consistency over complexity. You don’t need a massive, professional-grade structure to see results. If you’re short on space, a small-scale vermicomposting setup (using worms!) can work wonders right under your sink. Just keep an eye on your ratios of “greens” and “browns,” and you’ll find that the system eventually starts to manage itself.

5 ways to keep your bin from becoming a total disaster

  • Don’t ignore the “browns.” Everyone remembers to throw in their veggie scraps, but if you don’t balance those greens with dry stuff like shredded cardboard or dead leaves, your bin is going to turn into a slimy, stinky mess real fast.
  • Give it some air. Compost needs to breathe just as much as we do. If it gets too packed down and compacted, the good bacteria die off and everything just sits there rotting instead of breaking down. Give it a quick stir with a shovel once a week to keep things moving.
  • Size actually matters. If you build a tiny bin, you’ll run out of space in two weeks and end up with a pile of scraps sitting on your kitchen counter. Aim for something big enough to actually hold a decent amount of volume so the heat can build up properly.
  • Watch the moisture levels. You want it to feel like a wrung-out sponge—damp, but not dripping. If it’s too dry, nothing happens; if it’s too wet, it smells. If it’s looking a bit soggy, toss in some more dry cardboard to soak up the excess.
  • Keep the “no-go” items out. I know it’s tempting to throw everything in there, but keep meat, dairy, and oily foods far away from your DIY bin. Unless you want to deal with unwanted pests and a very unpleasant smell, stick to the plant-based stuff.

The TL;DR for a Stress-Free Bin

Don’t overthink the gear; whether it’s a DIY bin or a store-bought one, the goal is just to give your scraps a dedicated home so they don’t end up in the trash.

Balance is everything—keep a mix of “greens” (nitrogen) and “browns” (carbon) to prevent your compost from smelling like a landfill.

Consistency beats perfection; you don’t need to be a scientist, you just need to turn the pile occasionally and keep it damp, not soaking wet.

Final Thoughts on Your New System

Final Thoughts on Your New System.

At the end of the day, building your first compost bin isn’t about achieving some kind of perfect, Pinterest-worthy ecological masterpiece. It’s really just about setting up a functional loop where your waste stops being a problem and starts being a resource. Whether you went with a simple DIY bin or a more structured setup, the core principle remains the same: manage your browns and greens, keep an eye on moisture, and don’t overthink the science. Once you get the rhythm of adding your scraps and turning the pile, it becomes just another small, repeatable system that keeps your kitchen running smoothly without the constant guilt of throwing everything in the trash.

I know that starting something new—especially something that involves a little bit of dirt and potential mess—can feel like just another chore on an already overflowing to-do list. But honestly, seeing that pile of scraps transform into actual, usable soil is one of the most satisfying ways to reclaim control over your daily footprint. You don’t need to change your entire lifestyle overnight to make a difference; you just need to start with one bin and one consistent habit. Trust me, once you see how much less stress (and trash) you have, you’ll wonder why you didn’t just start the system sooner.

Frequently Asked Questions

Will my compost bin smell like a literal dumpster if I do this right?

Honestly? Not if you actually follow the system. A healthy compost pile should smell like damp earth, not a landfill. If it starts smelling like a literal dumpster, it’s usually just a sign that things are too wet or you’ve added too much “green” stuff (like fruit scraps) without enough “brown” stuff (like dried leaves or cardboard) to balance it out. Just toss in some more browns, give it a quick stir to let it breathe, and you’re good.

How much space do I actually need to set this up without it taking over my whole yard?

Honestly, you don’t need a massive dedicated corner to make this work. If you’re working with a small yard, a compact bin about the size of a standard trash can is plenty. Just find a spot that’s tucked away but still accessible—you don’t want to be hauling scraps halfway across the property every day. As long as it’s out of the main walkway and gets a little airflow, you’re golden.

Can I just throw everything in there, or are there specific things that are going to ruin the whole system?

Definitely don’t just throw everything in there. If you do, you’re basically asking for a stinky, fly-ridden disaster. Stick to the basics: fruit scraps, veggie peels, coffee grounds, and eggshells are your best friends. Avoid meat, dairy, or oily foods—they’ll make your bin smell like something died in your backyard. Also, skip the pet waste. Keep it simple with greens (nitrogen) and browns (carbon) so the system actually works without the headache.

How to build a raised garden bed.

Step-by-step Guide to Constructing Your Own Raised Garden Bed

I was standing in my backyard last spring, staring at a pile of expensive cedar planks and a very confusing instruction manual, feeling like I was about to lose my mind. I had this vision of a Pinterest-perfect veggie patch, but instead, I just had a massive headache and a lot of wasted time. Most people will tell you that learning how to build a raised garden bed requires a degree in carpentry or a massive budget for specialized equipment, but that’s honestly just gatekeeping. My dad taught me early on that if you have a solid plan and the right basic tools, you can build just about anything without breaking a sweat or your bank account.

In this guide, I’m stripping away the fluff and giving you the actual, unpolished steps to get your garden up and running. We’re going to walk through the exact materials you actually need (and the ones you can skip), how to prep your space without overthinking it, and a simple assembly process that won’t leave you feeling defeated. My goal is to help you build a system that works so you can spend less time scrambling with lumber and more time actually enjoying your homegrown tomatoes.

Table of Contents

Guide Overview

Total Time: 2-4 hours
Estimated Cost: $75-150
Difficulty: Beginner

Tools & Supplies

  • Drill/Driver for assembling wood
  • Measuring Tape for accurate cuts
  • Level to ensure flat base
  • Handsaw or Miter saw for resizing lumber
  • Untreated Cedar or Redwood boards (approx. 3-4 pieces)
  • Galvanized wood screws (1 box)
  • Garden soil/Compost mix (enough to fill volume)
  • Hardware cloth or landscape fabric (optional for base)

Step-by-Step Instructions

  • 1. First things first, you need to pick your spot and get your materials. I’m a huge fan of using cedar or redwood because they actually resist rot, so you aren’t rebuilding this whole thing in two years. Grab some 2×6 or 2×12 boards, some heavy-duty exterior screws, and a drill. Don’t skimp on the screw quality—you don’t want them snapping halfway through the assembly when you’re just trying to get home for dinner.
  • 2. Once you have your wood, it’s time to measure and cut. If you don’t have a saw, most big-box hardware stores will do the heavy lifting for you if you bring your measurements. I usually aim for a 4×4 foot bed because it’s deep enough for real root growth but small enough that you can actually reach the middle without stepping on your soil and compacting it.
  • 3. Now, let’s get the frame together. Lay your boards out on a flat surface to make sure everything is square. Start driving your exterior screws through the sides of the boards into the corner posts (or into each other if you’re doing a simple butt joint). I always recommend pre-drilling your holes first; it takes an extra thirty seconds, but it prevents the wood from splitting and saves you a massive headache later.
  • 4. Before you move the bed to its permanent home, line the bottom with something sturdy. I personally swear by hardware cloth (that metal mesh stuff) if you have squirrels or gophers in your area, or even just a thick layer of plain cardboard to suppress weeds. This creates a solid barrier that keeps the bad stuff out while letting the good stuff in.
  • 5. Drag your frame to its final location—make sure it’s somewhere that actually gets sun, not just somewhere that looks pretty—and level it out. If one side is higher than the other, your water is going to pool in one corner and drown your plants. You might need to dig out a little bit of dirt under the high side to get it perfectly even.
  • 6. Finally, it’s time for the good part: filling it up. Don’t just grab whatever dirt is in your backyard; it’s probably mostly clay and rocks. I use a mix of high-quality compost, peat moss, and vermiculite to create a “fluffy” environment. Think of it like meal prepping for your plants—if you give them a nutrient-dense foundation now, they won’t struggle later.

Understanding How to Build a Raised Garden Bed

Understanding How to Build a Raised Garden Bed

Before you start sawing anything, you need to pick your materials, and this is where people usually get stuck. Honestly, the biggest debate I see is cedar vs pressure treated lumber. If you have the budget, go with cedar; it’s naturally rot-resistant and won’t leach anything into your veggies. If you’re on a tighter budget, modern pressure-treated wood is generally considered safe for food crops, but if you want to be extra cautious, just line the inside with a heavy-duty barrier.

You also shouldn’t just wing the size of your setup. I always recommend sticking to specific diy raised garden bed dimensions—ideally no more than 4 feet wide. Why? Because if it’s wider than that, you’ll have to step into the bed to reach the middle, which compacts the soil and kills your hard work. Once the frame is down, don’t forget about the foundation. Preparing ground for raised beds by clearing out grass or laying down cardboard helps prevent weeds from hijacking your garden before you even plant a single seed.

Key Things to Know

Key things to know about raised bed wood.

Before you start digging, let’s talk about the stuff that usually trips people up: the materials. When you’re deciding on the best wood for raised beds, you’re basically choosing between longevity and your budget. I personally swear by cedar because it’s naturally rot-resistant and won’t leach weird chemicals into your veggies, but it can get pricey. If you go the route of pressure-treated lumber, just make sure you’re getting the modern, eco-friendly stuff that’s safe for food crops. It’s a bit of a debate, but for my peace of mind, I usually stick to untreated cedar whenever I can swing it.

Also, don’t just dump cheap dirt into your new setup and call it a day. The magic is actually in your raised bed soil mix ratio. You want a blend that’s light enough for roots to move through but rich enough to actually feed them—think a mix of compost, peat moss, and perlite. If you skip the prep work here, you’ll spend your entire summer troubleshooting wilted leaves instead of actually enjoying your garden. Keep it simple, but don’t skimp on the soil quality.

Pro-Tips to Save You a Massive Headache Later

  • Don’t skimp on the wood quality. I know cedar is pricier, but if you go with cheap, untreated pine, you’ll be rebuilding the whole thing in two seasons once it starts rotting. Buy it once, do it right.
  • Level your ground before you even think about putting the boards down. If your base is wonky, your bed is going to be lopsided, and water will pool in one corner, turning your soil into a swamp.
  • Line the bottom with hardware cloth if you have critters around. If you don’t want moles or voles treating your garden like an all-you-can-eat buffet, a little bit of wire mesh goes a long way.
  • Think about your reach. Don’t make the bed wider than four feet if you can help it. You want to be able to reach the middle from either side without stepping into the bed and compacting your soil.
  • Pre-drill your holes. I used to skip this to save time, but I ended up splitting the wood every single time. Take the extra thirty seconds to drill a pilot hole; your future self will thank you.

The Bottom Line

Don’t get paralyzed by perfection—just get the wood in the ground and start growing. You can always upgrade your setup next season, but the goal is to actually start.

Prioritize your materials. Using untreated wood or cheap hardware is a recipe for a mid-summer breakdown, and I’d rather you spend a little more now than redo the whole thing in six months.

Systems over luck. Once your bed is built, stick to a simple maintenance routine so you aren’t playing catch-up with weeds and dry soil when you’re actually trying to relax.

Getting Your Hands Dirty

Getting Your Hands Dirty building raised beds.

At the end of the day, building a raised bed isn’t about achieving some Pinterest-perfect aesthetic; it’s about creating a controlled environment where your plants can actually thrive without you fighting a losing battle against weeds and bad soil. Just remember to double-check your measurements before you start cutting, use rot-resistant wood like cedar if your budget allows, and don’t skip the step of lining the bottom to protect your structure. If you follow these basic systems, you’ve already done the hard part of removing the friction from your gardening season. Once the frame is level and the soil is in, the heavy lifting is officially behind you.

I know that starting a DIY project can feel a little daunting, especially if you aren’t someone who spends their weekends in a workshop, but I promise that the payoff is worth the initial chaos. There is something incredibly grounding about stepping outside and seeing something you built with your own hands actually producing food. Don’t worry about making it look flawless or professional; just focus on making it functional and sustainable. You’ve built the foundation, so now go out there, plant something, and enjoy the process of watching your hard work grow.

Frequently Asked Questions

What kind of wood should I actually use if I don't want it rotting out in two years?

If you want to avoid the heartbreak of your garden bed turning into mush by next season, skip the cheap pressure-treated stuff from the big-box stores—it’s often packed with chemicals you don’t want near your food. Instead, go for Cedar or Redwood. They have natural oils that fight rot and bugs. They’re a bit pricier upfront, but it’s a better system: you spend more now so you aren’t rebuilding the whole thing in two years.

Do I need to line the bottom with something, or can I just put it straight on the grass?

Honestly, don’t just dump soil straight onto the grass. If you do, the grass will fight your plants for nutrients, and you’ll end up with a muddy mess. I usually layer some plain brown cardboard at the bottom first. It smothers the weeds and eventually breaks down into compost, which is basically free food for your plants. It’s a low-effort system that saves you so much headache later.

How deep should these things be if I'm planning on growing root veggies like carrots?

If you’re going for carrots or parsnips, don’t skimp on the depth. You’ll want your beds to be at least 12 inches deep—ideally 18 if you can swing it. Root veggies need loose, uncompressed soil to stretch out; if the bed is too shallow or the soil gets packed down, they’ll end up stunted or, even worse, looking like twisted little gnarls. Give them plenty of vertical room to do their thing.

Learning sewing basics for beginners guide.

A Beginner’s Guide to Learning the Sewing Fundamentals

I used to think you needed a massive, $400 sewing machine and a dedicated studio space just to fix a loose button or a ripped seam, but that’s honestly just gatekeeping. Most of those “essential” starter kits you see online are just expensive ways to clutter your junk drawer with tools you’ll never actually touch. When I first started looking into sewing basics for beginners, I was so overwhelmed by the technical jargon and the sheer amount of gear people insisted on buying that I almost gave up entirely. The truth is, you don’t need a professional setup to stop your favorite jeans from falling apart; you just need a functional system that works for your actual life.

I’m not here to give you a lecture on textile theory or sell you on a lifestyle you don’t have time for. Instead, I’m stripping everything back to the absolute essentials—the stuff that actually helps you finish a project without wanting to throw your machine out the window. My goal is to walk you through the real-world mechanics of stitching, from choosing a needle that won’t snap to mastering the tension settings that make or break a seam. We’re going to focus on low-friction methods that turn sewing from a stressful chore into a reliable skill you can actually use.

Table of Contents

Understanding Sewing Basics for Beginners

Understanding Sewing Basics for Beginners tools.

Before you dive into a complex pattern, you need to get comfortable with the actual mechanics of the craft. It’s easy to get overwhelmed by the sheer amount of gear out there, but honestly, you don’t need a studio full of equipment to start. I always tell people to focus on gathering a few essential sewing machine tools first—think quality fabric shears, a seam ripper (your new best friend), and some decent pins. Once you have the physical stuff, the real learning curve is understanding how the machine actually functions. Mastering how to thread a sewing machine might feel tedious the first five times, but it’s the foundation of everything; if your thread isn’t seated perfectly, nothing else matters.

Once you’ve got the machine running, it’s all about the relationship between your thread and your material. I highly recommend starting with some stable cotton quilter’s fabric rather than anything stretchy or slippery, which can be a total nightmare for a novice. As you build your confidence, you’ll start experimenting with different basic sewing stitches for beginners, like the straight stitch or the zigzag, to secure your seams. The goal isn’t perfection right out of the gate; it’s just about building a system that works.

Key Things to Know

Key things to know: sewing supplies.

Before you dive in, let’s get one thing straight: you don’t need a massive, professional studio to start. Most people get overwhelmed by the sheer volume of sewing notions and supplies available at craft stores, but honestly? It’s mostly noise. Start with a small, curated kit. You’ll want decent fabric shears (never use them on paper, seriously), a handful of glass-head pins, and a seam ripper—because you will mess up, and that’s okay.

Once you have your kit, the real hurdle is usually the machine itself. Don’t let the manual intimidate you; once you master how to thread a sewing machine, everything else starts to click. It’s a mechanical process, not magic. I spent way too long trying to force the thread through the wrong path before I realized it’s all about following the tension paths.

Lastly, keep your expectations realistic regarding your material. Different fabric types for new sewists behave wildly differently; trying to sew a slippery silk when you’re just starting is a recipe for a meltdown. Stick to stable cottons while you’re learning the ropes.

Practical Tips and Steps

Practical Tips and Steps for sewing beginners.

First things first: don’t let the sheer amount of stuff in the craft aisle paralyze you. You don’t need a professional studio to start; you just need a curated pile of sewing notions and supplies that actually serve a purpose. I always tell people to start with a decent pair of fabric shears (and never use them on paper, please) and a handful of universal pins. When it comes to picking your first project, stick to stable fabric types for new sewists like cotton poplin or linen. Avoid anything stretchy or slippery like silk or jersey until you’ve mastered the tension on your machine, otherwise, you’ll just end up frustrated and ready to quit.

Once you’ve got your workspace set up, the real hurdle is usually the machine itself. Learning how to thread a sewing machine can feel like trying to solve a Rubik’s Cube the first time you do it, but it’s really just about following the visual path. Don’t rush this part. If your thread isn’t seated perfectly in the tension discs, your stitches will bunch up and look like a mess. Take it slow, check your work frequently, and remember that even the pros have to re-thread their machines more often than they’d like to admit.

Common Mistakes to Avoid

Look, I’ve definitely spent more hours than I’d like to admit fighting with a piece of fabric that just wouldn’t cooperate. One of the biggest pitfalls I see is people trying to tackle complex projects before they’ve actually mastered how to thread a sewing machine correctly. If your tension is off because you rushed the setup, you’re going to end up with a bird’s nest of thread under your fabric, and that is a massive headache to unpick. Take your time with the mechanics; it’s not worth the frustration.

Another thing that trips people up is ignoring the relationship between your needle and your material. I’ve seen so many people try to blast through heavy denim with a universal needle meant for lightweight cotton, and it’s a recipe for broken needles and ruined projects. Learning which fabric types for new sewists work best with specific needles is a total game-changer. Also, please, for the love of everything, stop using kitchen scissors for your thread. It sounds small, but dulling your blades on anything other than fabric is one of those common sewing mistakes to avoid that will eventually cost you more than a new pair of shears.

Final Thoughts

Look, I know it feels like a lot right now. Between figuring out how to thread a sewing machine without losing your mind and trying to memorize every single stitch, it’s easy to feel like you’re failing before you’ve even started. But honestly? The goal isn’t to become a master tailor by next Tuesday. It’s just about having enough skill to fix a loose button or taper a pair of jeans so they actually fit.

Don’t let the sheer amount of sewing notions and supplies sitting in the craft aisle intimidate you. You don’t need the industrial-grade setup to make something functional. Start small, embrace the slightly wonky seams, and just keep moving forward. Adulthood is mostly just improvising until something works, and sewing is no different.

If you can master even just a few basic sewing stitches for beginners, you’ve already won half the battle. You’re building a system of self-reliance that saves you money and keeps clothes out of landfills. So, grab your kit, forgive your mistakes, and just start sewing. You’ve got this.

My Low-Stress Systems for Actually Getting Things Done

  • Stop buying those massive, $100 “all-in-one” sewing kits. Most of the stuff in them is cheap junk that’ll break halfway through your first project. Just grab a decent pair of fabric shears, some quality thread, and a handful of assorted needles. It’s better to have three tools that actually work than thirty that don’t.
  • Treat your fabric like it’s fragile. I know it feels like just a piece of cloth, but if you don’t iron it flat before you start cutting, your measurements are going to be off, and your finished piece will look wonky. A quick steam or press is the difference between a “DIY project” and something that actually looks intentional.
  • Don’t try to tackle a tailored blazer on day one. You’ll burn out and throw your machine out the window. Start with something low-stakes—like a pillowcase or a simple tote bag. You need to build the muscle memory of handling the machine without the pressure of ruining an expensive piece of fabric.
  • Get used to the “unthread” ritual. Most of my frustration comes from realizing I missed a tiny step in the threading process. If your machine is acting weird or the thread is bunching up, don’t just keep pushing. Stop, unthread everything, and start over. It takes two minutes and saves you twenty minutes of troubleshooting later.
  • Invest in a good seam ripper and learn to love it. I used to feel like using a seam ripper meant I had “failed,” but that’s just bad logic. Even the pros mess up a stitch. Think of the seam ripper as a “reset button” rather than a sign of defeat. It’s part of the process.

The TL;DR for Your Sewing Survival Kit

Don’t get paralyzed by the gear aisle; start with a decent pair of shears, some basic thread, and a handful of needles to get the momentum going.

Focus on building small, repeatable habits like pinning your fabric properly and checking your tension early, rather than trying to tackle a complex garment on day one.

Embrace the mess—mistakes aren’t failures, they’re just part of the system, so rip out those bad stitches and keep moving.

The Bottom Line

Look, if you’re feeling a little overwhelmed by the sheer amount of thread, needles, and “how-to” videos out there, just breathe. You don’t need a professional studio to start fixing your own clothes; you just need to master the basics—getting your tension right, learning a decent straight stitch, and actually investing in a good pair of shears so you aren’t hacking away at your fabric. It’s all about building a small, reliable toolkit and not letting the fear of a crooked seam stop you from even trying. Once you have these foundational systems down, you’ll realize that sewing isn’t some mystical art form—it’s just a practical skill that keeps your wardrobe from ending up in a landfill.

At the end of the day, my goal isn’t for you to become a master tailor overnight. I just want you to feel like you have a little more control over your stuff. There is something incredibly grounding about sitting down, focusing on a single task, and realizing you can actually fix what is broken instead of just buying something new. So, go ahead and make that first messy stitch. It’s going to look a little wonky, and that’s perfectly fine. The goal is progress over perfection, and honestly, once you start seeing the results of your own handiwork, you won’t want to stop.

Frequently Asked Questions

Do I really need a sewing machine right away, or can I actually get things done with just a needle and thread?

Honestly? You definitely don’t need a machine right out of the gate. If you’re just trying to fix a loose button or patch a small tear, a needle and thread are all you need. I actually prefer hand-stitching for small repairs—it’s quieter and gives you way more control. Save your money for a decent kit of quality thread and sharp shears first. Once you’re consistently fixing things every week, then we can talk machines.

How do I figure out which fabric is actually beginner-friendly versus the stuff that's going to make me want to quit?

Look, if you pick the wrong fabric, you’re going to end up staring at a pile of wrinkled, sliding mess and wanting to throw your machine out the window. Stick to stable, non-stretchy wovens like cotton poplin or linen blends first. They actually stay where you put them. Avoid silk, chiffon, or anything super stretchy like jersey for now—they’re slippery, frustrating, and basically designed to make you quit before you even start.

What's the best way to keep my workspace from turning into a total disaster zone of thread scraps and pins?

The secret is to stop treating your workspace like a storage unit and start treating it like a workflow. I use a “clear as you go” system: keep a small magnetic bowl for pins and a dedicated scrap bin right next to your machine. If you wait until the end of the project, you’re already buried. Also, invest in a rolling cart—it keeps your tools mobile and off your main desk when you’re done.

Page 3 of 3

Powered by WordPress & Theme by Anders Norén