Author: Sienna Lowery Page 7 of 16

I believe that adulthood doesn't have to feel like a constant state of emergency if you have the right systems in place. My goal is to strip away the gatekeeping and give you the actual, unpolished steps to making your life run smoother.

Effective office politics tips for integrity.

Navigating Office Politics With Integrity

I used to think that “office politics” was just some shadowy, high-stakes game played by people in expensive suits, something you either mastered or got crushed by. I spent my first few months in the corporate world trying to ignore it, thinking that if I just put my head down and did great work, the noise would disappear. I was wrong. The truth is, ignoring the social architecture of your workplace isn’t a strategy; it’s just a way to let other people decide your value for you. Most of the generic office politics tips you find online are either way too manipulative or completely useless fluff that tells you to “be a team player” without explaining how to actually survive the subtle power plays.

I’m not here to teach you how to climb a ladder by stepping on people—that sounds exhausting and frankly, a little sociopathic. Instead, I want to give you the actual, unpolished systems to navigate these dynamics so you can protect your peace and your career. We’re going to talk about building genuine social capital and setting boundaries that actually stick. My goal is to help you stop playing defense and start moving through your workday with a sense of calm efficiency, rather than constant anxiety.

Table of Contents

Stop Playing Defense Real Office Politics Tips That Actually Work

Stop Playing Defense Real Office Politics Tips That Actually Work

Most people treat office politics like a game of dodgeball—you just spend your whole day ducking and weaving to avoid getting hit by someone else’s drama. But that is a fast track to burnout. Instead of just reacting to every sudden shift in the room, you need to start managing workplace dynamics with a bit more intention. This doesn’t mean becoming a manipulator; it means being observant. I’ve learned that the most effective way to navigate these waters is to stop treating every disagreement like a personal attack and start seeing them as data points. When you understand the underlying motivations of the people around you, you stop being a victim of the chaos and start seeing the actual patterns at play.

A huge part of this is mastering professional boundary setting so you don’t become the designated “dumping ground” for everyone else’s stress or extra workload. If you’re always the one smoothing things over or taking on the emotional labor of the team, you aren’t actually building influence—you’re just becoming indispensable in all the wrong ways. You have to decide early on where your responsibilities end and someone else’s drama begins.

Managing Workplace Dynamics Without Losing Your Mind or Your Soul

Managing Workplace Dynamics Without Losing Your Mind or Your Soul

The hardest part of navigating these waters isn’t the big, dramatic confrontations; it’s the slow, daily drain of trying to please everyone while keeping your head above water. To survive this, you have to get serious about professional boundary setting. If you’re the person who always says “yes” to every extra task or every late-night Slack message, you aren’t being a team player—you’re just making yourself a target for burnout. I’ve learned that saying “I can’t take that on right now if I want to finish my current project with quality” isn’t rude; it’s actually a way of protecting your value.

At the same time, you can’t just build a wall and hide. You need a baseline level of emotional intelligence at work to read the room before you make your move. This doesn’t mean being a social butterfly or a corporate climber; it just means understanding the unwritten rules of how information flows in your specific office. When you stop reacting emotionally to every slight and start observing the patterns of who actually holds the power, you stop being a victim of the chaos and start becoming a strategist.

The Unpolished Guide to Professional Boundary Setting and Emotional Intelli

The Unpolished Guide to Professional Boundary Setting and Emotional Intelli

Look, I used to think being a “team player” meant saying yes to every late-night Slack message and absorbing every bit of drama like a sponge. I was wrong. Real professional boundary setting isn’t about being difficult; it’s about protecting your capacity so you can actually do the job you’re paid for. If you don’t set the perimeter, people will naturally drift into your personal time and mental space until you’re completely fried. I started by being very clear about my “off” hours, and honestly? The sky didn’t fall. People actually respected my time more once I showed them where the line was drawn.

That ties directly into emotional intelligence at work. It’s not about being a therapist for your colleagues; it’s about reading the room and knowing when to engage and when to step back. When you’re handling difficult coworkers, the goal isn’t to win the argument—it’s to minimize the friction. I’ve learned that staying calm when someone else is spiraling is a massive power move. It allows you to navigate the chaos without letting their lack of systems become your personal crisis.

Practical Systems for Handling Difficult Coworkers and Avoiding Burnout

When you’re dealing with a coworker who is constantly undermining your work or sucking the energy out of every meeting, you can’t just “hope it gets better.” You need a system for handling difficult coworkers that doesn’t involve you becoming a person you hate. My go-to method is the “Documentation Loop.” Every time a problematic interaction happens, don’t just vent to a friend—jot down the date, the context, and exactly what was said in a private digital note. This isn’t about being petty; it’s about having a factual trail if things ever escalate to HR or a performance review. It turns an emotional headache into a manageable data point.

To keep this from draining your battery, you also have to lean heavily into professional boundary setting. If a certain person constantly interrupts your flow with non-urgent “emergencies,” stop being so available. Start using “time-blocking” as a shield. If they approach your desk, try: “I’m in the middle of a deep-work sprint right now, but I can check my inbox at 3:00 PM.” It’s a polite way of saying your time isn’t a free-for-all. By treating your energy like a finite resource, you stop the burnout before it even starts.

Building Professional Influence Through Conflict Resolution in the Office

Here’s the thing: most people think conflict is a sign that things are falling apart, but if you play it right, it’s actually your best chance at building professional influence. When a disagreement breaks out in a meeting, the instinct is usually to either shut down or get defensive. Instead, try to be the person who de-escalates. By staying calm and focusing on the actual problem rather than the person causing it, you position yourself as a leader who can handle heat. It’s not about being a doormat; it’s about showing that you have the emotional intelligence at work to steer a chaotic conversation back to something productive.

I’ve found that the most effective way to handle these moments is to treat conflict like a system error that needs debugging. Instead of letting tension simmer, address it with a “let’s look at the facts” approach. This shifts the energy from a personal battle to a collaborative fix. When you master conflict resolution in the office, you stop being just another person in the cubicle next to them and start becoming the person everyone looks to when things get messy.

The Low-Friction Cheat Sheet: 5 Ways to Play the Game Without Losing Your Cool

  • Stop being the “mysterious” coworker. You don’t need to spill your life story, but you do need to be visible. If people don’t know what you’re working on, they can’t advocate for you when you’re not in the room. A quick, casual “Hey, just so you know, I’m deep in this project until Thursday” goes a long way in building perceived value.
  • Map out the actual power structure, not just the org chart. The person with the fancy title might not be the one everyone actually listens to. Pay attention to who people look at for approval during meetings or who gets the “real” info in the breakroom. Understanding these informal networks helps you know whose buy-in you actually need to move a project forward.
  • Master the art of the “neutral observation.” When office gossip starts swirling, don’t jump in with a hot take just to feel included. Instead, use phrases like, “That’s an interesting way to look at it,” or “I haven’t seen that side of things yet.” It keeps you in the loop without getting your hands dirty or making you a target for the next round of drama.
  • Document everything, but keep it low-key. I’m not talking about a frantic paper trail for a lawsuit, but rather a simple “done list” or a quick follow-up email after a verbal agreement. “Just following up on our chat to make sure we’re on the same page about X” is a professional way to protect your boundaries and your sanity if things get messy later.
  • Build “social capital” when things are actually going well. Don’t just reach out to people when you need a favor or a sign-off. Small, low-stakes interactions—sharing an interesting article related to a colleague’s project or offering a genuine compliment on a presentation—build a reservoir of goodwill. It makes the inevitable moments of friction much easier to navigate when you’ve already established a baseline of respect.

The TL;DR: How to Stay Sane While Navigating the Chaos

Stop treating office politics like a war you need to win; treat it like a system you need to navigate so you can actually get your work done and go home on time.

Protect your energy by setting hard boundaries early—if you don’t define your workspace and your limits, someone else will define them for you.

Focus on building genuine, low-stakes alliances instead of playing power games; having a few people who actually have your back is worth more than any strategic ladder-climbing.

The Bottom Line

At the end of the day, navigating office politics isn’t about becoming a corporate shark or playing some high-stakes game of chess. It’s really just about building sustainable systems for how you interact with the people around you. We’ve talked about setting hard boundaries, managing your emotional energy, and moving from a defensive posture to one of intentional influence. If you can master the art of communicating clearly and resolving conflicts without letting them bleed into your personal life, you’ve already won half the battle. The goal isn’t to win every argument; it’s to protect your peace while still making sure your work gets the credit it deserves.

I know that trying to implement these changes can feel overwhelming, especially when you’re already running on fumes. But remember, you don’t have to overhaul your entire professional personality overnight. Just pick one small system—maybe it’s a better way to say ‘no’ to a low-priority task or a more direct way to ask for feedback—and start there. Adulthood is messy, and the workplace is often even messier, but you don’t have to be a victim of the chaos. You can be the person who stays calmly efficient in the middle of it all. You’ve got this.

Frequently Asked Questions

How do I navigate office politics if I'm a remote worker and don't have those "watercooler" moments to build influence?

The “watercooler” thing is a total myth for remote workers, but you can still build influence without being in the office. You have to be intentional about digital visibility. Don’t just exist in Slack; contribute to threads, share relevant articles, and use your 1:1s to ask about other departments, not just your tasks. If you aren’t physically there, you have to make sure your impact and your presence are felt through consistent, proactive communication.

Is there a way to stay out of the drama without being seen as someone who isn't a "team player"?

The trick is to pivot from “drama” to “deliverables.” When a vent session starts heating up, don’t just go silent—that’s how you get labeled as aloof. Instead, be the person who acknowledges the feeling but quickly redirects to the task. Try something like, “That sounds incredibly frustrating, but I really want to make sure we nail this deadline first.” You aren’t being a hermit; you’re just being the person who stays focused on the work.

How do I handle a situation where my direct manager is actually the one driving the toxic politics?

This is the ultimate boss level, and honestly, it’s the hardest one to navigate. When the toxicity is coming from the top, you can’t “fix” them; you can only protect yourself. Start a paper trail—save every weirdly worded email or shifting directive to a private folder. Focus on being “unassailably professional.” Do your job so well there’s no daylight for criticism, and start quietly building your exit strategy. You can’t outmaneuver a broken system from the bottom.

How to build a desk under $100.

Building a Solid, Budget-friendly Desk for Under $100

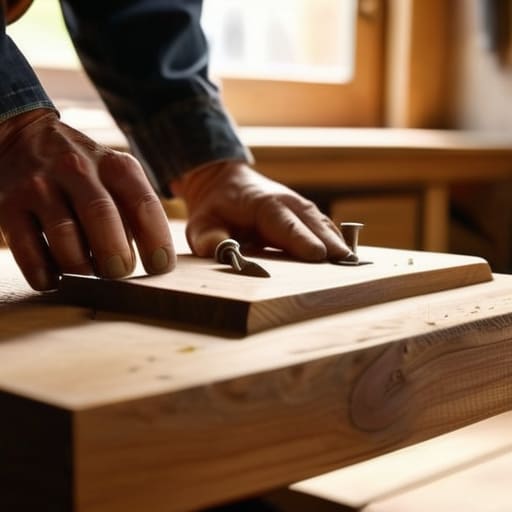
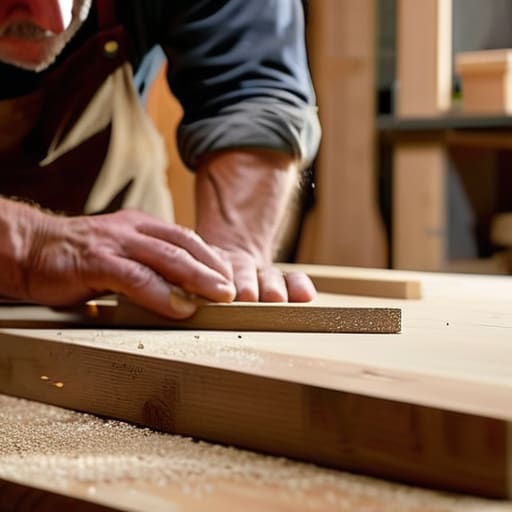
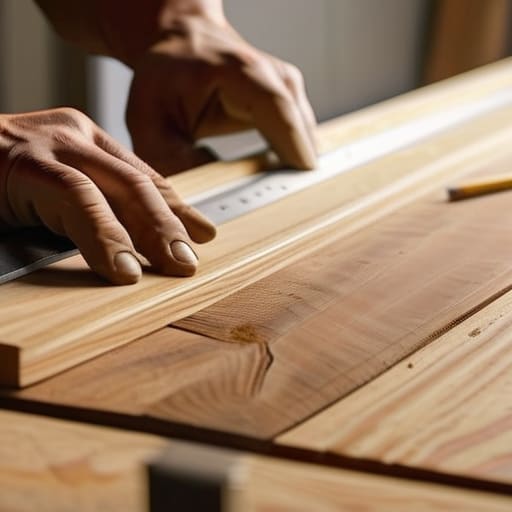
I was sitting on my floor at 2:00 AM, surrounded by a sea of particleboard scraps and those tiny, soul-crushing Allen wrenches, wondering why I thought I could “save money” by following a generic flat-pack manual. My old setup was wobbly, cramped, and frankly, a total productivity killer, but I quickly realized that learning how to build a desk isn’t actually about having a master carpenter’s toolkit or a pristine workshop. It’s about understanding the basic physics of a stable surface so your laptop doesn’t end up face-planting during a Zoom call.

I’m not here to give you a lecture on fine woodworking or suggest you buy a $500 table saw just to get started. Instead, I’m going to walk you through a streamlined, repeatable system for constructing a solid workspace using materials you can actually find at a local hardware store. We’re going to focus on the structural essentials—the stuff that actually matters—so you can stop fighting your furniture and finally create a setup that actually supports your workflow.

Table of Contents

Guide Overview

Total Time: 4-6 hours
Estimated Cost: $100-200
Difficulty: Beginner

Tools & Supplies

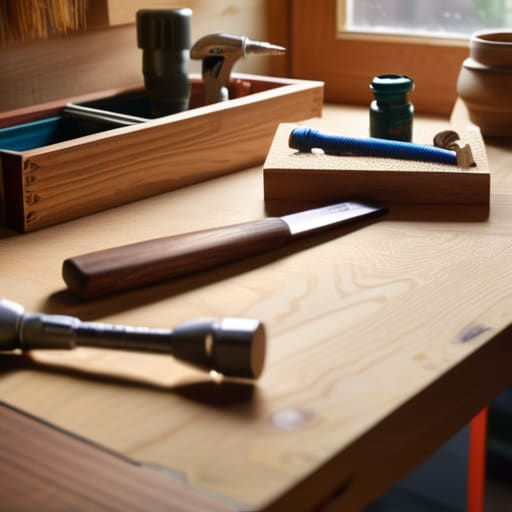
  • Power drill and bits for driving screws
  • Circular saw or hand saw for cutting wood
  • Tape measure for precise sizing
  • Sandpaper for smoothing surfaces
  • Level to ensure a flat workspace
  • Wood planks (e.g., 2x4s or plywood) for frame and top
  • Wood screws for assembly
  • Wood glue for extra stability
  • Sandpaper (various grits) for finishing
  • Wood stain or paint for protection

Step-by-Step Instructions

  • 1. First, stop scrolling through Pinterest and actually get your measurements right. Grab a tape measure and decide exactly how much space this thing is going to take up in your room. If you’re working in a small apartment, every inch counts. Measure your height too—you don’t want to build a desk that leaves you hunched over like a gargoyle by the end of a work session. Write these numbers down in a physical notebook so you aren’t squinting at your phone screen while you’re at the hardware store.
  • 2. Next, let’s talk materials without the gatekeeping. You don’t need exotic hardwoods to make this work. For a solid, budget-friendly starter desk, I usually go for a pre-cut butcher block or a thick piece of plywood from the home improvement store. Grab some heavy-duty metal hairpin legs or even those modular trestle legs if you want to keep it simple. Just make sure you have a sturdy screwdriver or a cordless drill—don’t try to do this manually unless you really enjoy forearm cramps.
  • 3. Once you have your pieces, it’s time to prep the surface. If you bought raw wood, it’s going to feel a bit gritty. Grab some medium-grit sandpaper and smooth out the edges until they don’t feel like they’re going to snag your sweater. If you’re feeling extra, you can go in with a finer grit for a polished look, but the goal here is functionality over perfection. You want a surface that feels good under your palms when you’re deep in a flow state.
  • 4. Now, let’s get the legs attached. Flip your desktop upside down on a rug or some cardboard so you don’t scratch the finish. Line up your legs with the corners, and here’s the trick: double-check your alignment before you drive any screws in. If you’re off by even a fraction, the whole thing is going to wobble like a loose tooth. Use a level if you have one, or just trust your eyes and make sure the pre-drilled holes actually line up with the frame.
  • 5. Drive those screws in, but for the love of everything, don’t over-tighten them. If you crank them in too hard, you risk cracking the wood or stripping the screw head, and then you’re in a real mess. Just tighten them until they’re snug and secure. Once the legs are on, flip the desk right-side up. Give it a little shake—if it’s steady, you’ve officially passed the vibe check.
  • 6. Finally, we need to tackle the “cable chaos” problem before it even starts. A desk isn’t really a desk if it’s a graveyard of tangled wires. Pick up a cheap pack of adhesive cable clips or a simple under-desk tray. Route your power strips and chargers through a system so they aren’t dangling near your feet. This is the part that actually makes the desk usable for the long haul rather than just looking pretty for five minutes.

Understanding How to Build a Desk

Understanding How to Build a Desk guide.

Before you start hacking away at lumber, you need to get intentional about the space you’re actually occupying. Most people jump straight into buying wood without realizing that a desk that’s even two inches too high can turn a productive afternoon into a literal backache. I always suggest looking up a custom desk dimensions guide before you even hit the hardware store. You want to measure your chair height, your monitor level, and even how much room you need for your legs to move freely. It’s about designing for your body, not just for the aesthetic.

When it comes to materials, don’t feel pressured to go out and buy expensive hardwoods right away. If you’re focused on building a workspace on a budget, a solid plywood core with a nice veneer or even a thick butcher block from a big-box retailer works wonders. The goal isn’t to create a museum piece; it’s to create a functional surface that can handle your coffee spills and laptop heat. Just keep your design simple—minimalism is your best friend when you’re trying to avoid unnecessary structural headaches.

Key Things to Know

Key Things to Know: Best desk woods.

Before you start making sawdust, let’s talk about the materials. If you’re looking for something that feels high-end but won’t break the bank, I always suggest looking into the best wood for office desks based on your specific vibe. Pine is super affordable and easy to work with if you’re just starting out, but it can be a bit soft and prone to dents. If you want something more durable that can handle years of coffee spills and heavy monitors, walnut or oak are the gold standards—they just cost a bit more upfront.

Also, please don’t skip the measurement phase. I know it’s tempting to just grab some boards and start drilling, but checking a custom desk dimensions guide before you buy your lumber is a total game-changer. You need to account for your chair clearance and how much legroom you actually need when you’re sitting down. There is nothing worse than finishing a project only to realize your knees are hitting the underside of the frame. Measure twice, cut once isn’t just a cliché; it’s the difference between a functional setup and a frustrating mistake.

Pro-Tips to Save Your Sanity (and Your Back)

  • Don’t eyeball the height. Measure yourself sitting in your favorite chair first; if the desk is too high or too low, you’re going to be dealing with shoulder tension and a massive headache by Tuesday.
  • Buy a decent drill, not the cheapest one at the hardware store. A weak driver will strip your screws halfway through, and nothing kills my productivity faster than fighting with a tool that won’t do its job.
  • Level your floor before you trust your desk. If you’re working on an old apartment floor that slopes, don’t blame your construction—just grab some adjustable leveling feet so your coffee doesn’t slide off the edge.
  • Sand everything twice. It feels like extra work, but unless you want splinters ruining your favorite sweater or scratching your laptop, you need to go from coarse to fine grit until it feels like silk.
  • Leave a little breathing room for cables. I always drill a small notch or a hole near the back for cord management; otherwise, you end up with a “cable nest” that makes your workspace look like a disaster zone.

The TL;DR on Your New Workspace

Don’t overcomplicate the build; focus on a solid, level foundation first, because a wobbly desk will ruin your productivity faster than a bad WiFi connection.

Measure twice, cut once, and actually double-check your hardware—there is nothing more frustrating than being halfway through a build and realizing you’re one screw short.

Build for your actual life, not an aesthetic Pinterest board; make sure the dimensions actually fit your setup and your physical comfort, not just your “vibe.”

The Final Piece of the Puzzle

The Final Piece of the Puzzle desk.

At the end of the day, building your own desk isn’t about achieving some level of master craftsmanship or having a workshop that looks like a Pinterest board. It’s really just about the fundamentals: picking a sturdy top, ensuring your legs are level, and making sure you didn’t skip the crucial step of pre-drilling your holes to avoid splitting the wood. If you followed the system we laid out, you’ve moved past the overwhelming “how do I even start” phase and into the reality of having a functional workspace. You’ve turned a pile of raw materials into a reliable anchor for your daily productivity, and honestly, that’s a massive win for your setup.

Don’t sweat the small stuff, like a slightly uneven screw head or a minor scratch in the finish. Those little imperfections are just proof that you actually did the work yourself instead of just clicking “buy now” on a mass-produced piece of particle board. My goal is always to help you reduce the friction in your life, and having a desk that you built with your own hands is a huge step toward taking ownership of your environment. Now that the heavy lifting is done, go clear off your new surface, grab a coffee, and actually get to work. You earned this.

Frequently Asked Questions

Do I really need a power drill for this, or can I get away with a basic screwdriver?

Look, I’ll be real with you: you can do it with a manual screwdriver, but you’re going to pay for it in wrist fatigue and frustration. If you’re just driving a few small screws into a light shelf, go ahead. But if you’re building a full desk, get the drill. Life is too short to spend two hours doing something that a power tool can finish in ten minutes. Save your energy for the actual design.

How do I make sure the desk doesn't wobble like crazy once I actually put my computer on it?

The “wobble factor” is the absolute worst, especially when you’re mid-meeting and your monitor starts dancing. First, check your floor—if you’re on carpet, you almost certainly need adjustable leveling feet. If it’s a hard floor and still shaky, don’t just shove a folded piece of cardboard under it; that’s a temporary fix that’ll fail. Instead, tighten every single bolt one last time, and if it’s still acting up, look into adding a small cross-brace or a stabilizer bar to the back. Stability is all about structural tension.

What’s the best way to finish the wood so it doesn't look like a middle school shop project?

Look, the difference between “DIY disaster” and “boutique furniture” is all in the prep. If you just slap some stain on raw wood, it’s going to look blotchy and amateur. You need to sand it like your life depends on it—start with a coarse grit and work your way up to at least 220. Once it’s smooth, use a wood conditioner before staining. It levels out the absorption so the color actually looks intentional, not accidental.

Beating procrastination using the two minute rule.

Beating Procrastination With the Two-minute Rule

I used to think that “productivity” meant buying a $30 linen planner and color-coding my entire existence, but honestly? That was just a fancy way of procrastinating. I spent so much time setting up elaborate systems that I never actually did the work, leaving me drowning in a sea of half-finished tasks and mental clutter. I realized that the real secret isn’t some complex ritual; it’s just the two minute rule. If you can finish something in the time it takes to brew a cup of coffee, you need to stop adding it to a list and just get it done.

I’m not here to sell you on a life-altering spiritual awakening or a complicated time-blocking method that requires a PhD to implement. Instead, I’m going to give you the unpolished, practical way I use the two minute rule to keep my freelance life from spiraling into total chaos. We’re going to strip away the fluff and focus on the small, repeatable actions that actually reduce the friction of your day. No gatekeeping, no expensive apps—just real steps to help you stop treating every tiny task like a looming emergency.

Table of Contents

Stop the Chaos Why Your Life Feels Like a Constant Emergency

Stop the Chaos Why Your Life Feels Like a Constant Emergency

Ever feel like you’re constantly playing catch-up with your own life? Like you’re walking through a mental fog of half-finished tasks, unread emails, and that one pile of mail on the counter that’s been staring you down for a week? That’s not just “being busy”—it’s the result of reducing mental clutter being ignored for too long. When we let tiny, insignificant tasks pile up, they stop being small chores and start feeling like heavy weights. Suddenly, your to-do list isn’t just a list; it’s a source of low-grade anxiety that follows you from your desk to your bed.

We often mistake this feeling for a lack of discipline, but it’s actually just a failure of our systems. We treat every minor inconvenience like a major project, which is the fastest way to burn out. Instead of finding effective time management strategies, we end up stuck in a cycle of reactive living, where we’re just putting out fires instead of actually moving forward. We’ve turned our daily existence into a constant state of emergency simply because we haven’t learned how to clear the small stuff out of the way before it snowballs.

The Unpolished Truth About the Two Minute Rule

The Unpolished Truth About the Two Minute Rule.

Look, I’m not here to sell you on some magical productivity hack that’s going to turn you into a robot. Most of the stuff you read online about time management strategies feels incredibly performative, like you need a color-coded planner and a 5:00 AM yoga routine just to wash a coffee mug. That’s not reality. The truth is, most of our stress doesn’t come from the massive, life-altering projects; it comes from the tiny, nagging tasks we let pile up until they feel like a mountain.

The concept is actually pretty simple, rooted in David Allen’s Getting Things Done philosophy, but people tend to over-intellectualize it. It’s not about complex scheduling; it’s about reducing mental clutter by making a split-second decision. If a task—like hanging up your coat or replying to a quick text—takes less than 120 seconds, you don’t add it to a list. You don’t “schedule” it for later. You just do it. It’s one of those building micro habits that actually works because it removes the friction of having to decide what to do next.

Beyond David Allen Real World Strategies for Improving Daily Efficiency

Beyond David Allen Real World Strategies for Improving Daily Efficiency.

Look, I’m a huge fan of David Allen’s Getting Things Done methodology, but let’s be real: reading a massive productivity tome doesn’t actually fix your messy kitchen or your overflowing inbox. The theory is great, but in the trenches of freelance life, I need things that actually stick. For me, it’s not about a perfect, rigid system; it’s about building micro habits that act as guardrails for my day. Instead of trying to overhaul my entire existence every Monday morning, I focus on tiny, non-negotiable actions that prevent the small stuff from snowballing into a crisis.

If you want to actually see results, you have to stop treating productivity like a grand performance and start seeing it as a series of small wins. I’ve found that the best way to approach improving daily efficiency is to stop looking for the “perfect” app and start looking at your physical environment. If a task is tiny, kill it immediately. If it’s not, put it in a system that doesn’t require a PhD to navigate. It’s about lowering the barrier to entry so that doing the work feels easier than avoiding it.

Building Micro Habits to Finally Conquer Mental Clutter

The thing about the two-minute rule is that it’s not just a productivity hack; it’s the foundation for building micro habits that actually stick. When you’re constantly staring down a massive, intimidating to-do list, your brain naturally wants to shut down. That’s where the paralysis sets in. Instead of trying to overhaul your entire life overnight—which, let’s be real, never works—you have to start with these tiny, almost insignificant wins. If you can commit to hanging up your coat the second you walk in the door or replying to that one-sentence email immediately, you’re training your brain to stop seeing every small task as a mountain to climb.

By focusing on these tiny bursts of action, you’re effectively reducing mental clutter before it even has a chance to settle in. It’s about preventing that low-level background anxiety that comes from knowing there are fifty tiny things hanging over your head. When you tackle the small stuff instantly, you clear the mental bandwidth needed to actually focus on the big, meaningful projects that matter. It’s not about being a productivity robot; it’s about making sure your brain isn’t constantly bogged down by the “noise” of unfinished business.

No Bs Overcoming Procrastination Techniques for Busy Adults

Look, we’ve all been there: staring at a mounting pile of laundry or an unread email thread like it’s a final boss in a video game. The problem isn’t that you’re lazy; it’s that your brain is treating every tiny task like a massive project. To actually start overcoming procrastination techniques that work, you have to stop negotiating with yourself. When I feel that paralysis creeping in, I use the “5-Second Rule”—count down from five and physically move before your brain has a chance to talk you out of it. It sounds stupidly simple, but it breaks the cycle of overthinking.

Another thing that saves my sanity is “temptation bundling.” If I have a tedious admin task to tackle, I only allow myself to listen to my favorite true crime podcast while I’m doing it. It’s one of those low-effort time management strategies that makes the “ugh” tasks feel a little less heavy. The goal isn’t to be a productivity robot; it’s just to find ways to lower the barrier to entry so you can actually get started without a mental breakdown.

How to Actually Use This Without Burning Out

  • The “One-Touch” Rule: If you pick something up—like a piece of mail or a stray sock—don’t put it down in a “temporary” spot. Either file it, bin it, or put it away immediately. If it takes under two minutes, the decision is already made.
  • Set a “Micro-Timer” for the scary stuff: If a task feels overwhelming, tell yourself you’ll only do it for 120 seconds. Usually, the friction isn’t the task itself, it’s the mental energy required to start. Once the timer hits, you’re allowed to stop, but you’ll find you probably won’t.
  • Batch your “Admin Quick-Hits”: Instead of letting tiny tasks like replying to a text or confirming a coffee date bleed into your entire day, group them. Spend five minutes at 11:00 AM and five minutes at 4:00 PM just knocking out those two-minute digital chores.
  • Use the “Visual Cue” method: If you have a two-minute task that you keep forgetting (like watering a plant or grabbing your charger), put the object in your direct line of sight. Don’t rely on your brain to remember; rely on your environment to remind you.
  • Stop “Productivity Porn” scrolling: If you find yourself spending twenty minutes researching the “perfect” planner or app to manage your life, stop. That’s a procrastination trap. Close the tab and go do one actual two-minute task instead. Real systems are built through action, not curation.

The TL;DR: How to actually use this stuff

Stop letting small tasks turn into mental weight; if it takes under two minutes, do it immediately so you don’t have to “remember” to do it later.

Focus on building tiny, repeatable systems rather than waiting for a massive burst of motivation that probably isn’t coming.

Use these rules to lower the friction of your day, not to add more “productivity chores” to your already overflowing to-do list.

The Bottom Line

Look, we’ve covered a lot of ground here, from stripping away the productivity gatekeeping to actually implementing those micro-habits that stop your brain from spiraling. The takeaway isn’t about becoming some sort of hyper-optimized robot; it’s about realizing that most of your stress comes from the tiny, nagging tasks you keep pushing to “later.” Whether it’s answering that one-sentence email, putting your dishes in the dishwasher, or hanging up your jacket, these small wins add up. When you commit to the two-minute rule, you aren’t just cleaning up your space—you are actively reclaiming your mental bandwidth by refusing to let minor friction points turn into a mountain of overwhelming chaos.

At the end of the day, I want you to stop waiting for some magical “perfect moment” to finally get your life together. Perfectionism is just procrastination in a fancy suit, and it’s honestly exhausting. You don’t need a total life overhaul or a complex $50 planner to feel in control; you just need to start moving. Give yourself permission to be imperfect, but stay consistent with the small stuff. If you can master these tiny, repeatable systems now, you’ll realize that adulthood doesn’t have to be an emergency—it can actually be something you navigate with a sense of calm efficiency.

Frequently Asked Questions

Does this rule actually work for big, daunting tasks, or is it just for small stuff like washing a dish?

Honestly, if you try to use it for a massive project, you’re going to burn out. The rule isn’t about finishing the whole thing; it’s about breaking the seal. Instead of “writing a thesis,” your two-minute task is just “opening a blank doc and typing a title.” It’s about tricking your brain into starting. Once the momentum is there, the daunting stuff feels a lot less like a mountain and more like a series of small steps.

How do I stop myself from getting distracted by a million tiny two-minute tasks and actually finishing my real work?

This is the trap everyone falls into: “productive procrastination.” You feel like you’re winning because you’re clearing emails or folding laundry, but you’re actually just avoiding the heavy lifting.

What do I do when a "two-minute task" turns into a massive rabbit hole that eats up my whole afternoon?

This is exactly how the system breaks down. You start by “just” checking one email and suddenly it’s 3 PM and you’re deep in a Wikipedia rabbit hole. When this happens, you have to use a hard stop. If a task feels like it’s morphing, pivot immediately: write it down on a “Later” list and walk away. Don’t let a quick fix turn into a project; if it’s not done in 120 seconds, it’s a scheduled task, not a micro-task.

Steps on how to protect your online privacy.

Easy Steps to Enhance Your Online Privacy

I’m so tired of the “cybersecurity experts” on my feed acting like you need a degree in computer science or a $500-a-month subscription to a black-box VPN just to exist online. It’s honestly exhausting how people gatekeep basic digital safety, making it feel like you’re either a total tech genius or a sitting duck for hackers. Most of the advice out there is either way too expensive or so complicated it actually makes you more likely to make a mistake. The truth is, learning how to protect your online privacy shouldn’t feel like a full-time job or a constant state of panic; it should just be a few low-maintenance systems that run in the background while you actually live your life.

I’m not here to sell you on some magical software or give you a lecture on encryption protocols that nobody actually uses. Instead, I’m going to give you the unpolished, real-world steps I use to keep my own data tucked away without losing my mind. We’re going to strip away the jargon and focus on the practical, repeatable habits that actually move the needle. Consider this your no-nonsense guide to reclaiming your digital space without the headache.

Table of Contents

Stop the Digital Panic How to Protect Your Online Privacy

Stop the Digital Panic How to Protect Your Online Privacy

First, we need to address the low-hanging fruit. Most people think they’re being careful, but they’re actually leaving the front door wide open. The easiest way to tighten things up is by embracing two-factor authentication importance across every single account you own. I know, it’s an extra five seconds of your life every time you log in, but it’s the difference between a minor annoyance and a total identity crisis. Once you have that layer of defense, start looking at your managing digital footprint habits. Go through your old social accounts and delete the stuff you don’t need; if a platform isn’t serving you, it shouldn’t be collecting your data.

Next, let’s talk about your actual connection. I’m a big fan of building secure browsing habits that don’t require a degree in computer science. This means being picky about the Wi-Fi you jump on and understanding the basic VPN benefits for privacy when you’re working from a coffee shop. It’s not about being a paranoid hermit; it’s just about making sure your personal business stays personal.

Managing Your Digital Footprint Without the Constant Overwhelm

Managing Your Digital Footprint Without the Constant Overwhelm

The biggest mistake I see people make is thinking they have to go completely off the grid to be safe. Honestly, that’s just a recipe for burnout. Instead of trying to delete every single account you’ve ever made, focus on managing your digital footprint through small, repeatable audits. I try to set a calendar reminder once every few months to just scroll through my old social accounts and app permissions. If I haven’t used an app in six months, it’s gone. It’s not about perfection; it’s about reducing the surface area for things to go wrong.

Another way to lower the friction is to automate your security so you aren’t constantly thinking about it. This is where two-factor authentication importance really hits home. Once you set up an authenticator app on your devices, it’s a minor inconvenience for a massive increase in actual safety. It’s one of those “set it and forget it” systems that makes a huge difference. You don’t need to be a cybersecurity expert; you just need to build a few low-maintenance barriers between your personal life and the rest of the internet.

Low Maintenance Systems for Avoiding Online Tracking for Good

Low Maintenance Systems for Avoiding Online Tracking for Good

The trick isn’t to go off the grid—that’s exhausting and honestly not realistic for anyone with a job or a social life. Instead, it’s about setting up a few “set it and forget it” layers so you aren’t manually fighting every cookie that pops up. Start by auditing your browser; if you’re still using a default setup, you’re basically leaving your front door unlocked. Switching to a privacy-focused browser or adding a few solid extensions can fundamentally change your secure browsing habits without adding any extra clicks to your day.

I also highly recommend looking into the actual VPN benefits for privacy rather than just buying whatever flashy ad tells you to. A decent VPN acts like a constant, quiet shield, masking your IP address so companies can’t easily build a terrifyingly accurate map of your movements. It’s one of those small, background systems that makes a huge difference in avoiding online tracking over the long haul. Once these tools are configured, you can stop obsessing over every single site you visit and just get on with your life.

Simple Secure Browsing Habits That Actually Stick

The biggest mistake I see people make is thinking they need to overhaul their entire digital existence overnight. You don’t. Realistically, it’s about building secure browsing habits that don’t feel like a chore. For me, that started with just switching my default search engine to something that doesn’t profile me every time I look up a recipe. It’s a tiny shift, but it’s one less data point being sold to some random advertiser.

I also highly recommend getting comfortable with a browser extension or two that blocks trackers automatically. If you’re traveling or using public Wi-Fi at a cafe, understanding the basic VPN benefits for privacy is a total game-changer. It essentially creates a private tunnel for your data so you aren’t leaving your digital front door wide open. You don’t need to be a cybersecurity expert; you just need to stop making it easy for companies to follow you around the web. Once these little things become muscle memory, you’ll realize that staying safe doesn’t have to be a full-time job.

Practical Layers Vpn Benefits and Two Factor Authentication Importance

If we’re talking about actual layers of defense, we need to move past just clearing your cookies. Think of a VPN as your digital privacy cloak. When you’re using public Wi-Fi at a coffee shop—which, let’s be real, I do way too often—you’re basically broadcasting your activity to anyone on that network. Using a VPN creates a secure tunnel for your data, and understanding the VPN benefits for privacy means you aren’t just hiding your IP address; you’re using data encryption methods to make sure your actual traffic is unreadable to outsiders. It’s a low-effort way to add a massive wall between your personal business and the rest of the web.

Next up is the one thing most people skip because it’s a minor inconvenience: Two-Factor Authentication (2FA). I know, getting a code on your phone feels like a chore, but the two-factor authentication importance cannot be overstated. It’s the difference between a hacker guessing your password and being completely locked out. Even if your credentials leak in a breach, that second layer keeps your accounts intact. It’s not about being paranoid; it’s about building a fail-safe system so one mistake doesn’t ruin your entire digital life.

My five non-negotiable privacy quick wins

  • Audit your app permissions once a month. I know, it sounds tedious, but I just set a recurring calendar invite for the first Sunday of the month. I go through my settings and revoke access to my location, microphone, or contacts for any app that doesn’t actually need them to function. If a flashlight app wants to know where I live, the answer is a hard no.
  • Switch to a privacy-focused search engine like DuckDuckGo or Brave. Google is great for finding a specific recipe, but they’re also building a massive dossier on every single thing you click. Making the switch to a search engine that doesn’t track your search history is one of the easiest ways to stop the data collection loop without changing your actual behavior.
  • Stop using the same password for everything—seriously. I used to think I could remember them all, but that’s how you end up in a digital crisis. I use a password manager to generate long, random strings of gibberish for every site. It’s one less thing for my brain to hold onto, and it means if one site gets breached, my entire life isn’t compromised.
  • Clean up your “social” footprint by tightening your privacy settings. Every few months, I go through my Instagram and TikTok settings to make sure my profile isn’t more public than it needs to be. You don’t have to go ghost, but limiting who can see your tagged photos or your location can save you a lot of headache down the line.
  • Use “burner” emails for those annoying one-time signups. You know when a site says you can only access a discount code if you provide an email? Don’t give them your primary inbox. I use services like SimpleLogin or even just a secondary “junk” Gmail account specifically for shopping and newsletters. It keeps my main inbox clean and keeps my real identity out of marketing databases.

The TL;DR on keeping your digital life under control

Privacy isn’t about being a ghost; it’s about building small, automated layers—like 2FA and better browser settings—so you don’t have to think about it every single day.

Stop trying to fix everything at once; pick one area, like your password manager or your tracking settings, and get that system running before moving to the next.

Real security is low-maintenance. If a privacy “hack” feels too complicated to keep up with, you won’t do it, so stick to the simple, repeatable habits that actually fit your life.

The bottom line on digital peace of mind

Look, we’ve covered a lot of ground, from tightening up your browsing habits to setting up those essential layers like 2FA and a solid VPN. The goal here wasn’t to turn you into a paranoid tech hermit, but to help you build a sustainable defense against the constant data harvesting that happens in the background of our lives. You don’t need to overhaul every single device you own by tomorrow morning. Instead, focus on implementing these small, repeatable systems—like managing your footprint and using more secure browsers—so that privacy becomes a background process rather than a daily chore that drains your mental energy.

At the end of the day, protecting your privacy is really just about reclaiming a little bit of control in a world that feels increasingly loud and intrusive. It’s about reducing the friction between you and your digital life so you can actually enjoy being online without that nagging feeling that someone is always watching over your shoulder. Don’t aim for perfection; aim for consistency. If you can implement even half of these systems, you’re already miles ahead of most people. You’ve got this—just take it one small, functional step at a time.

Frequently Asked Questions

If I start using a VPN and different browsers, is it going to mess up my workflow or make everything run way slower?

Honestly, I had the exact same fear when I started. If you pick the right tools, it won’t wreck your flow. A decent VPN might add a tiny bit of lag, but it’s usually negligible unless you’re doing high-stakes gaming. As for browsers, it’s more about the mental switch than speed. Once you set up your “work” browser and your “private” browser, it actually becomes a system that helps you stay focused rather than slowing you down.

I'm already overwhelmed with passwords—is there a way to actually manage all this without losing my mind?

I feel this in my soul. Trying to remember twenty different strings of random characters is a one-way ticket to burnout. Honestly, the only way to do this without losing your mind is to stop trying to do it manually. Get a password manager—something like Bitwarden or 1Password—and let it do the heavy lifting. You only have to remember one master password, and it handles the rest. It’s one small system that saves so much mental energy.

How much of my data is actually "out there" already, and is there even a point in trying to scrub it now?

Honestly? A lot. Between data brokers and old social accounts, your footprint is probably wider than you think. But please don’t let that paralyze you. It’s not about achieving total digital invisibility—that’s a myth. It’s about damage control. Think of it like cleaning out a junk drawer; you might never get it perfectly empty, but you can definitely stop more clutter from piling up and make what’s left much easier to manage.

Professional development tips for continuous growth.

Easy Habits for Continuous Professional Growth

I used to think that “professional development tips” meant I had to spend my entire weekend reading dense, soul-crushing leadership books or paying for some overpriced seminar that promised to “unlock my potential.” Honestly, it felt like a massive scam designed to make us feel like we were constantly failing if we weren’t aggressively networking at 7:00 AM. Most of the advice out there is just performative hustle culture wrapped in a fancy suit, telling you to “optimize your synergy” instead of actually giving you the tools to do your job without burning out.

I’m over the gatekeeping and the fluff. In this guide, I’m stripping away the corporate jargon to give you the actual, unpolished systems I use to keep my freelance career from turning into a total dumpster fire. We aren’t going to talk about vague “mindset shifts”; instead, I’m sharing the practical, repeatable habits that actually move the needle. This is about building a career that functions like a well-oiled machine, so you can stop living in crisis mode and finally start working with intention.

Table of Contents

Stop Guessing Real Professional Development Tips That Actually Work

Stop Guessing Real Professional Development Tips That Actually Work

Most people treat their career like a game of whack-a-mole—just reacting to whatever task or crisis lands on their desk. But if you want to actually move the needle, you have to shift from a reactive state to a proactive one. This starts with intentional workplace skill acquisition. Instead of just taking whatever random seminar your HR department throws at you, look at where the gap is between your current role and the one you actually want. Are you missing technical proficiencies, or is it time to focus on soft skills for leadership? Identify the specific friction points in your day-to-day and target those first.

Once you know what’s missing, you need a system for the actual learning part. I’m a huge advocate for continuous learning strategies that don’t feel like a second full-time job. This might mean dedicating just twenty minutes on Tuesday mornings to a specific tutorial or carving out time for mentorship in career progression by grabbing coffee with someone two levels above you. The goal isn’t to collect certificates to hang on a wall; it’s to build a toolkit that makes you indispensable.

Ditch the Chaos With Smarter Workplace Skill Acquisition

Ditch the Chaos With Smarter Workplace Skill Acquisition

We’ve all been there: you realize you’re missing a key piece of the puzzle for a promotion, so you frantically sign up for a random $500 online course that you’ll eventually abandon three weeks in. That’s not growth; that’s just expensive procrastination. Effective workplace skill acquisition isn’t about hoarding certificates to look good on LinkedIn; it’s about identifying the specific gaps between where you are and where you want to be. I like to treat my skill-building like a DIY project—you don’t just buy a whole new toolkit when you only need a specific screwdriver. You identify the exact tool, find a reliable way to master it, and then actually use it in your daily workflow.

Instead of trying to learn everything at once, focus on building a professional growth mindset that prioritizes high-leverage habits. This means looking for “micro-learning” opportunities—like spending fifteen minutes a day mastering a new Excel function or observing how your manager handles a difficult client. When you stop viewing learning as a massive, daunting task and start seeing it as a series of small, intentional upgrades, the whole process feels a lot less like a chore and more like a system that actually works for you.

Systems for Success Continuous Learning Strategies Without the Burnout

Systems for Success Continuous Learning Strategies Without the Burnout.

The biggest mistake I see people making is treating learning like a marathon they have to sprint every single day. You can’t just download a whole new skill set in a weekend without hitting a wall. Instead, I treat my growth like a slow-cooker recipe—low heat, consistent, and steady. To make continuous learning strategies actually stick, you have to integrate them into the gaps you already have. If you have fifteen minutes between meetings, don’t just scroll through mindless content; use that pocket of time to listen to a niche industry podcast or read one article related to your field.

It’s also about diversifying what you’re actually learning. Everyone focuses on the technical stuff, but if you want real career advancement techniques that actually move the needle, you need to invest in your people skills too. I’ve found that focusing on soft skills for leadership—like how to communicate a complex idea clearly or how to manage up—often yields a much higher return on investment than just collecting more software certifications. It’s not about doing more; it’s about being more intentional with the energy you already have.

Unlocking Career Advancement Techniques Through a Growth Mindset

We need to talk about the “growth mindset” trap. You’ve probably seen it on every LinkedIn post ever—that vague, toxic positivity that suggests if you just “believe” in yourself, you’ll get a promotion. That’s not a system; that’s a daydream. To me, a real professional growth mindset isn’t about manifesting a corner office; it’s about how you react when a project inevitably goes sideways. Instead of spiraling into “I’m not good at this,” I try to pivot to “what part of this system is broken?” It’s the difference between seeing a mistake as a personal failure and seeing it as a data point for your next move.

This shift in perspective is what actually fuels long-term career advancement techniques. When you stop viewing your current skill set as a finished product, you start looking for the gaps. I’ve found that the most effective way to do this is to stop waiting for a formal training seminar and start auditing your own workflow. Are you missing the soft skills for leadership that would make your team run smoother? Are you avoiding the tasks that actually stretch your capabilities? Once you stop fearing the learning curve, the “climb” feels a lot less like a mountain and more like a series of manageable steps.

Leading Without the Panic Mastering Essential Soft Skills

We’ve all been there: you’re in a meeting, someone asks a high-stakes question, and suddenly your brain feels like it has fifty browser tabs open and they’re all frozen. Most people think leadership is about having all the answers, but in reality, it’s about how you manage the chaos when you don’t. Mastering soft skills for leadership isn’t about performing some polished, corporate version of yourself; it’s about developing the emotional regulation to stay steady when things go sideways.

I used to think being “professional” meant being a robot, but that’s a fast track to burnout. True leadership is actually a form of workplace skill acquisition—you have to practice active listening and clear communication just like you’d practice a new software tool. Instead of trying to control every outcome, focus on building systems for empathy and conflict resolution. When you stop reacting to every minor hiccup and start responding with intention, you aren’t just managing a team; you’re building a foundation for mentorship in career progression that actually feels sustainable.

The Low-Friction Toolkit: 5 Ways to Level Up Without Losing Your Mind

  • Audit your “energy leaks” before adding new skills. There is no point in taking a high-level certification course if your current workflow is so messy that you can’t find twenty minutes to breathe. Fix your basic productivity systems first so you actually have the mental bandwidth to learn something new.
  • Build a “Second Brain” for your wins. I started keeping a messy, unpolished Notion page specifically for every tiny win, positive email, or project milestone. When it comes time for performance reviews or updating my resume, I’m not digging through old threads in a panic; I’m just grabbing my pre-made list of evidence.
  • Treat networking like a low-stakes maintenance task, not a high-stress event. Stop waiting for a job opening to suddenly reach out to people. Instead, set a recurring monthly reminder to grab coffee or send a quick “thinking of you” DM to one person in your field. It keeps the connections warm so they don’t feel transactional when you actually need them.
  • Micro-dose your learning. You don’t need to enroll in a three-month bootcamp to stay relevant. Find a niche podcast or a specific industry newsletter and commit to just 15 minutes during your morning commute or while you’re meal prepping. Small, consistent inputs beat one massive, overwhelming deep dive every single time.
  • Curate your digital environment. If your LinkedIn feed is just a sea of toxic hustle culture and “rise and grind” nonsense, hit unfollow. Follow the people who actually share actionable tutorials or thoughtful industry critiques. Your professional development is heavily influenced by the noise you allow into your brain every day.

The TL;DR: Your Career System Cheat Sheet

Stop treating professional growth like a massive, scary project; break it down into tiny, manageable systems that fit into your actual life.

Skill acquisition shouldn’t feel like a second job—focus on high-impact, repeatable habits rather than trying to learn everything at once.

Soft skills aren’t “extra”—they’re the foundation that keeps your career from feeling like a constant state of emergency.

The Bottom Line

Look, we’ve covered a lot of ground here, from ditching the “firefighting” mentality to actually building a system for skill acquisition that doesn’t leave you feeling completely fried by Tuesday. Professional development isn’t about some massive, overnight transformation or buying a dozen expensive certifications you’ll never use. It’s about the small, intentional shifts: mastering those soft skills when things get tense, protecting your energy through smarter learning habits, and refusing to let your career happen to you by accident. When you stop treating growth like a chore and start treating it like a repeatable system, the whole vibe of your work life changes.

At the end of the day, I want you to remember that you don’t need to have it all figured out by Monday morning. Adulthood is messy, and your career path is going to be even messier, but you don’t have to navigate it in a constant state of panic. If you take even one of these systems and implement it this week, you’re already ahead of the curve. Stop waiting for a “perfect time” to level up and just start building your toolkit one small piece at a time. You’ve got this, and more importantly, you deserve a career that feels sustainable.

Frequently Asked Questions

How do I actually find time for this when my current 9-to-5 is already draining everything out of me?

I hear you. Honestly, trying to “level up” when you’re already running on fumes feels like adding more chores to an endless to-do list. The mistake is thinking you need a dedicated three-hour block of “study time.” You don’t. I use “micro-learning”—15 minutes of a podcast during my commute or one industry article while I eat lunch. Stop looking for big windows of time and start reclaiming the tiny, dead spaces in your day.

Is it worth spending my own money on certifications, or should I be pushing my company to pay for them?

Look, I get the dilemma. Here’s my rule of thumb: if the certification makes you more valuable to your current boss, make them pay for it. It’s a business expense, not a personal one. But if you’re leveling up for your next job or a pivot, bite the bullet and pay for it yourself. Think of it as an investment in your own portability. Don’t let your career growth be hostage to your company’s budget.

How do I know if I'm actually making progress or if I'm just busy doing "learning" tasks that don't actually move the needle on my career?

Honestly, this is where most people trip up. You can spend all day color-coding a Notion board or watching “productivity” tutorials and still be standing still. To tell if you’re actually moving, look for “output” rather than “input.” Are you applying a new skill to a real project? Are you getting more autonomy at work? If your “learning” doesn’t result in a tangible change in your workflow or your responsibilities, you’re just hobbyist-level busy.

Easy slow cooker recipes for dinner.

Set-and-forget Slow Cooker Dinners

Let’s be real: the “5 PM panic” is a very specific kind of hell. You finish your workday, your brain is fried, and then you realize you have zero plan for dinner other than staring blankly into a fridge full of raw ingredients. I used to think that eating well meant spending my entire evening hovering over a stove, but I’ve realized that’s just a recipe for burnout. Instead of treating cooking like a second job, I started leaning into easy slow cooker recipes to do the heavy lifting for me. It’s not about being a gourmet chef; it’s about setting a system in place so you can actually relax when you get home.

In this post, I’m breaking down five of my absolute go-to meals that require almost zero brainpower to prep. These aren’t those overly complicated, “Pinterest-perfect” recipes that require twenty different spices you’ll never use again. I’m sharing five low-friction staples that are filling, actually delicious, and—most importantly—designed to fit into a chaotic schedule. By the time you’re done reading, you’ll have a foolproof rotation of meals that will help you stop stressing about dinner and start reclaiming your evenings.

Table of Contents

The "Dump and Go" Salsa Chicken

The "Dump and Go" Salsa Chicken recipe.

If you’re having one of those days where your brain is basically mush, this is the recipe you need. You literally just grab a pack of chicken breasts, a jar of your favorite salsa, and maybe a can of black beans if you’re feeling fancy. Throw it all in the slow cooker, turn it on low, and walk away from your kitchen for a few hours.

Lazy Sunday Pot Roast

Homemade Lazy Sunday Pot Roast with vegetables.

There is something incredibly grounding about a pot roast, but I used to avoid it because I thought it required too much prep. Now, I realize that a good roast is basically just a set-it-and-forget-it miracle. Grab a chuck roast, toss in some baby carrots, halved potatoes, and an onion, then pour in a bit of beef broth and some Worcestershire sauce.

Creamy Pesto Tortellini

Creamy Pesto Tortellini in a crockpot.

This one is for when you want something that feels a little more “adult” and intentional but you have zero energy to actually cook. You just layer refrigerated tortellini, a jar of pesto, a splash of heavy cream, and some parmesan cheese into the crockpot. It’s not a recipe you need to obsess over; it’s more of a vibe you create with a few pantry staples.

No-Stress Vegetarian Chili

I’ve found that a good vegetarian chili is the best way to clear out that random assortment of cans sitting in the back of your pantry. Grab some kidney beans, black beans, crushed tomatoes, and whatever frozen corn you have lying around. Season it heavily with cumin and chili powder because flavor is non-negotiable, even when you’re being lazy.

Honey Garlic Chicken Thighs

If you’re tired of the same old chicken recipes, this one is a total game changer. You just whisk together some honey, soy sauce, garlic, and a little ginger, then pour it over bone-in, skinless chicken thighs. The sauce reduces into this glossy, addictive glaze that makes even the simplest side dish like steamed broccoli taste like a restaurant meal.

The Low-Stress Slow Cooker Philosophy

Don’t aim for perfection; the goal is just to have a hot, decent meal waiting for you so you aren’t scrolling through delivery apps at 7 PM.

Batch cook whenever you have the energy, because having two nights of leftovers is the ultimate hack for a chaotic work week.

Invest in a few versatile staples like bone broth or aromatics that you can throw into almost any recipe to instantly level up the flavor without extra effort.

The Low-Stress Dinner Strategy

At the end of the day, these recipes aren’t about becoming a gourmet chef or spending your entire evening hovering over a stove. It’s about the simple math of dumping ingredients into a pot in the morning so you aren’t staring blankly at a takeout menu at 6 PM. Whether you’re leaning into the hearty comfort of a beef stew or the hands-off ease of a salsa chicken, the goal is the same: eliminating decision fatigue. By setting up these small, repeatable meal systems, you’re essentially buying back your evening time and ensuring you actually eat something decent instead of just grazing on snacks.

I know adulthood can feel like a relentless cycle of “what’s for dinner?” and “how am I going to get everything done?” but it doesn’t have to be that chaotic. Using a slow cooker is just one way to build a buffer between your busy schedule and your basic needs. Don’t feel like you have to master every recipe on this list right away; just pick one that looks easy and start there. Once you realize that feeding yourself can be a streamlined process rather than a chore, everything else starts to feel a little more manageable. You’ve got this.

Frequently Asked Questions

Can I use frozen meat directly in these recipes, or do I really need to thaw everything first?

Honestly, it depends on the recipe, but for most of these, I’d stick to thawing first. Throwing a solid block of frozen meat into a slow cooker can be risky because it stays in the “danger zone” temperature for too long while it defrosts, which isn’t great for food safety. If you’re in a time crunch, just pop the meat in a sealed bag in a bowl of cool water—it thaws way faster than you’d think.

How do I keep the food from turning into mush if I end up being stuck at work longer than planned?

The “mush factor” is real, and it’s usually because things keep cooking even after the timer hits zero. If you know you’re stuck at the office, try undercooking your proteins and veggies by about 20%. Also, if you can, pull the heavy ceramic pot out of the heating base as soon as you get home to stop the residual heat. It’s a small tweak, but it keeps the texture from turning into baby food.

Is it worth investing in a high-end slow cooker, or can I just make these work with whatever cheap one I found at a thrift store?

Honestly? Don’t sweat the high-end stuff. Since I spend half my weekends thrifting vintage electronics, I’ve learned that a machine is only as good as the system you use with it. A $20 thrifted crockpot will heat up just fine. Save your money for better ingredients or a solid multi-tool. As long as the lid fits tight and it actually stays on, it’ll do the job. Just keep an eye on it.

How to build a garden trellis.

How to Construct a Trellis for Your Climbing Plants

I was standing in my backyard last July, staring at a pathetic, tangled mess of tomato vines that were basically just suffocating each other on the dirt. I had spent way too much money on those flimsy, plastic lattice kits from the big-box store, and they had already snapped under the weight of a single heavy rainstorm. It was a total waste of time and money. Most people think you need a degree in carpentry or a massive budget to fix this, but the truth is that learning how to build a garden trellis is actually way simpler than the DIY influencers make it look. You don’t need a workshop full of power tools; you just need a system that actually works with the plants, not against them.

In this guide, I’m stripping away the gatekeeping and showing you how to construct something sturdy using basic materials you can find anywhere. I’m going to walk you through a few different methods—from the quick-and-dirty scrap wood approach to something a bit more intentional—so you can stop worrying about your plants collapsing and start actually enjoying your garden. We’re focusing on functional, low-maintenance builds that won’t break the bank or your spirit.

Table of Contents

Guide Overview

Total Time: 1-2 hours
Estimated Cost: $30-60
Difficulty: Beginner

Tools & Supplies

  • Measuring tape for accurate cuts
  • Handsaw or miter saw for wood processing
  • Drill with bits for making holes
  • Screwdriver or drill driver for fastening
  • Cedar or pressure-treated wood stakes (4-5)
  • Wooden garden lattice panels (1)
  • Wood screws (1 box)
  • Garden staples or landscape nails (1 pack)

Step-by-Step Instructions

  • 1. First, let’s talk supplies so you aren’t running back and forth to the hardware store mid-project. You’ll need some untreated cedar or redwood stakes (they resist rot way better than cheap pine), some heavy-duty garden twine or zip ties, a pair of sturdy wire cutters, and a drill if you’re feeling fancy. Honestly, if you want to keep it even simpler, you can just use repurposed wooden pallets from a local shop, but let’s stick to the stakes for a cleaner look.
  • 2. Once you have your materials, grab your stakes and decide on your layout. I usually space them about three feet apart, depending on how much room your plants actually need to breathe. Don’t just eyeball it; use a piece of string to mark a straight line so your trellis doesn’t end up looking like a leaning tower of garden debris.
  • 3. Now, it’s time to get those stakes into the ground. If your soil is super dry or packed hard, you might want to soak the area with a hose first to make it more manageable. Drive the stakes deep—at least 8 to 12 inches—so they don’t budge when a heavy summer storm hits or your climbing vines start getting unreasonably heavy.
  • 4. This is where the actual “trellis” part happens. You’re going to create a grid pattern by running your twine or wire between the stakes. Start at the bottom and work your way up, tying the string securely to each stake. I find that a criss-cross pattern works best because it gives the plants multiple points of contact to grab onto as they grow.
  • 5. If you’re using a heavier plant, like cucumbers or small melons, I highly recommend adding a few horizontal support bars across the vertical stakes. You can use scrap wood or even thick bamboo poles for this. It adds a layer of structural integrity that prevents the whole system from sagging once the fruit starts to weigh everything down.
  • 6. Finally, give your new trellis a quick “stress test.” Grab the stakes and give them a gentle shake to make sure everything is anchored firmly. If it feels solid, you’re good to go. Now, just tuck your seedlings in at the base and let them do the rest of the work—you’ve already done the hard part.

Understanding How to Build a Garden Trellis

Understanding How to Build a Garden Trellis

Before you start hammering nails, you need to figure out what you’re actually trying to accomplish. Not all plants are created equal, and treating a delicate sweet pea the same way you treat a heavy, woody wisteria is a recipe for a collapsed mess. If you’re working with lightweight annuals, a simple lattice will do fine, but for anything with real weight, you’re going to need heavy duty plant supports that won’t buckle under the pressure. I always tell people to look at their plants first and build for their weight, not just for the aesthetic.

When I’m browsing for wooden trellis design ideas, I try to avoid anything that looks too precious or high-maintenance. The goal here is functionality. You want something that integrates into your space without looking like a cluttered eyesore. Think about your specific layout—are you trying to create a privacy screen, or do you just need some vertical gardening solutions to save space in a tiny balcony garden? Once you decide on the “why,” the “how” becomes a lot less intimidating.

Key Things to Know

Key Things to Know: Heavy-duty supports.

Before you start hammering things together, you need to think about what’s actually going to be living on this thing. Not all vines are created equal. If you’re planting something lightweight like sweet peas, a basic frame is fine, but if you’re eyeing something massive like wisteria or heavy climbing roses, you’re going to need heavy duty plant supports. I’ve learned the hard way that a flimsy structure won’t hold up once the summer growth kicks in; it’ll just buckle under the weight and end up in a heap on the dirt.

Another thing to keep in mind is your long-term vision for the space. When looking at different vertical gardening solutions, consider how much sunlight your chosen spot gets and how much room you have to move around. You don’t want to build a massive, permanent fixture only to realize it’s blocking your walking path or casting a shadow over your vegetable patch. My best advice? Plan for the plant’s mature size, not just how it looks in the nursery pot. It saves you a massive headache (and a lot of wasted wood) down the road.

Pro-Tips to Keep Your Trellis from Becoming a Total Mess

  • Don’t overthink the wood choice; if you aren’t planning on this being a permanent garden centerpiece, cedar or even pressure-treated pine works perfectly fine to handle the moisture without breaking the bank.
  • Check your soil’s vibe before you start digging—if you’re planting heavy climbers like wisteria or jasmine, you need to make sure your trellis is anchored deep enough so the whole thing doesn’t tip over once the plants actually get heavy.
  • Leave a little breathing room between your trellis and your house or fence; you don’t want to trap moisture against your siding and end up with a mold problem just because you wanted some greenery.
  • Use zip ties or soft garden twine to attach your vines early on, but don’t tie them too tight—plants need to grow and thicken up, and you don’t want to accidentally strangle them as they expand.
  • Think about your “future self” by building the trellis slightly taller than you think you need; there is nothing more frustrating than having a beautiful plant that has nowhere to go after just one season.

The Bottom Line

Don’t overthink the materials; as long as your structure is sturdy enough to handle the weight of growing vines, you’re winning.

Prioritize deep anchoring—if your trellis isn’t secured well into the ground, a single heavy rainstorm will turn your hard work into a pile of scrap wood.

Build for the plant, not the aesthetic—always check what kind of climbing habit your specific plant has before you commit to a design.

Bringing It All Together

Building a trellis, bringing it all together.

At the end of the day, building a trellis isn’t about achieving some Pinterest-perfect architectural masterpiece; it’s about creating a functional structure that actually holds up when your plants start getting heavy. We’ve covered everything from picking out the right scrap wood to making sure those stakes are driven deep enough to survive a summer storm. Just remember that the goal is to minimize future headaches by getting the foundation right now. If you’ve followed the steps, you’ve moved past the “hoping it works” phase and into the “it’s actually going to work” phase. You’ve got the materials, you’ve got the layout, and most importantly, you have a system that works for your specific space.

I know that starting a DIY project can sometimes feel like just one more thing on an already overflowing to-do list, but there is something incredibly grounding about working with your hands. There is a specific kind of peace that comes from seeing a plant you nurtured finally have a sturdy place to climb. Don’t let the fear of a slightly crooked line stop you from getting started. Perfection is overrated, but intentionality is everything. Go out there, get a little dirt under your fingernails, and build something that makes your garden—and your daily routine—just a little bit easier to manage.

Frequently Asked Questions

Do I really need to treat the wood, or can I just use whatever I find in the garage?

Honestly? If you grab random scrap from the garage, you’re probably setting yourself up for a headache. If the wood isn’t pressure-treated or sealed, it’ll rot and collapse by next season, and then you’re back at square one. If you really want to use what you have, just grab a can of exterior sealant or some leftover deck stain. It takes ten minutes, but it saves you from rebuilding the whole thing in six months.

How do I make sure the whole thing doesn't just tip over once my plants actually start growing?

This is exactly where most DIY projects go to die—the moment the weight of the plant hits the structure. To keep it from tipping, you need to anchor the base. Don’t just stick the posts in the dirt; drive them at least 12 inches deep, or better yet, use heavy-duty garden stakes or even small concrete pavers to weight the bottom. If it’s a free-standing trellis, tie the top to a sturdy fence or a nearby post. Stability is everything.

What’s the best way to attach the trellis to the wall without making a mess of my siding?

Honestly, if you’re worried about ruining your siding, skip the direct drilling. I usually go with heavy-duty command hooks if it’s a lighter trellis, or better yet, use a freestanding frame that just leans against the wall. If you absolutely have to attach it, use standoff spacers. They create a tiny gap between the trellis and the house, so you aren’t grinding hardware directly into your siding. It keeps things clean and much easier to fix later.

Learning how to make soup from scraps.

Fridge Foraging: How to Turn Scraps Into Delicious Soup

I used to think that learning how to make soup required a massive, expensive stockpot and a three-hour window of uninterrupted kitchen time, but that’s honestly just a recipe for burnout. Growing up, I watched my mom turn a random assortment of wilted veggies and a half-empty carton of broth into something that felt like a hug in a bowl, and she never once used a “gourmet” technique. Most recipe blogs make it feel like you need a culinary degree just to boil some water, but the truth is that good soup is about systems, not ceremony.

I’m not here to give you a list of fancy ingredients you’ll never use again or tell you to spend your entire Sunday hovering over a stove. Instead, I want to show you my actual, unpolished method for building flavor without the stress. We’re going to focus on a repeatable framework that works whether you’re using fresh produce or whatever is sitting in the back of your pantry. This is about making sure you have a warm, reliable meal ready to go when life gets chaotic, without the kitchen meltdown.

Table of Contents

Ditch the Panic Why You Actually Need a Soup System

Ditch the Panic Why You Actually Need a Soup System.

Look, we’ve all been there: it’s 7:00 PM on a Tuesday, you’re exhausted, and the only thing standing between you and a breakdown is a meal that doesn’t involve a delivery app. Most people approach a pot of liquid as an afterthought, which is why they end up with something that tastes like warm, sad water. The problem isn’t your cooking ability; it’s that you’re trying to wing it without a framework.

When you stop treating every meal like a frantic experiment and start focusing on vegetable soup fundamentals, everything changes. You don’t need a pantry full of exotic spices; you just need to understand how to layer your flavors. Once you grasp the basic difference between stock vs broth for soup, you realize you aren’t just “making food”—you’re building a foundation. A system allows you to stop staring blankly at the pantry and start executing. It turns a chaotic kitchen moment into a predictable, low-effort win that actually nourishes you.

The Foundation Mastering Your Stock vs Broth for Soup

The Foundation Mastering Your Stock vs Broth for Soup

Before you even touch a knife, you need to understand the liquid foundation of your meal. Most people treat this part as an afterthought, but the distinction between stock vs broth for soup is actually where the soul of the dish lives. Think of stock as the heavy lifter; it’s usually made from bones and is rich in gelatin, giving your soup that silky, lip-smacking mouthfeel. Broth, on the other hand, is lighter and more herb-forward, perfect if you’re aiming for something refreshing rather than a hearty stew.

If you’re in a rush and reaching for a carton, just check the label. I usually lean toward low-sodium options because it gives me total control over the essential soup seasonings later on. If you use a salty store-bought base, you’re basically locked into that flavor profile, and it’s a nightmare to fix if it ends up tasting like a salt lick. My personal rule of thumb? Always aim for a base that tastes good on its own. If the liquid is boring, the whole bowl will be too.

Building Flavor Without the Chaos Essential Soup Seasonings

Building Flavor Without the Chaos Essential Soup Seasonings

Once you’ve got your liquid foundation sorted, it’s time to talk about the stuff that actually makes your taste buds wake up. Most people think they need an expensive spice rack to make something decent, but honestly? It’s about layering. You want to start with the basics—garlic, onion, and maybe some dried thyme or oregano—and let them cook down before you even think about adding your main ingredients. This is where those essential soup seasonings really do the heavy lifting. If you just throw everything in at once, the flavors stay isolated and weird; you want them to marry into one cohesive vibe.

A pro tip I learned from my mom: don’t forget the acid. If your pot of goodness tastes “flat” or just boring, don’t reach for more salt immediately. Try a squeeze of lemon or a tiny splash of apple cider vinegar. It cuts through the heaviness and brightens everything up instantly. It’s one of those small, low-effort tweaks that makes a massive difference in your vegetable soup fundamentals. Keep it simple, keep it layered, and you won’t need a recipe book to save you.

The Real Way How to Make Soup Using Simmering Techniques

Once you’ve got your stock and seasonings sorted, it’s time to actually get the heat going. This is where most people mess up by turning the stove up to high, thinking they’re “cooking faster.” In reality, a violent boil just breaks down your ingredients into a sad, mushy mess and clouds your liquid. Instead, you want to master gentle simmering techniques for flavor development. You’re looking for those tiny, lazy bubbles that barely break the surface—what I call the “lazy simmer.” This slow heat allows the fats to emulsify and the aromatics to actually infuse the liquid rather than just floating around aimlessly.

If you’re working with tougher components like root vegetables or dried beans, patience is your best friend. I usually keep my heat on the lowest possible setting to ensure the vegetable soup fundamentals—like those sweet carrots and earthy onions—soften without losing their structural integrity. If you find your liquid is getting too thin and you want something more comforting, don’t reach for heavy cream right away. Try some simple thickening soup methods like mashing a few of the cooked veggies directly into the pot to create a natural, velvety texture.

No More Thin Watery Mess Reliable Thickening Soup Methods

There is nothing more disappointing than pouring a bowl of something you spent an hour on, only to realize it has the consistency of flavored water. If your soup feels more like a thin broth than a cohesive meal, you probably skipped the structural phase. One of my favorite thickening soup methods is the classic roux—just melting butter and whisking in flour before adding your liquid. It’s a total game-changer for creamy textures, but if you want something a bit more low-effort, just grab a potato. Grating a raw potato directly into the pot during your simmering phase adds starch that naturally binds everything together without needing a heavy cream finish.

If you’re leaning into more plant-based vegetable soup fundamentals, I swear by the “blend and stir” trick. Take a ladleful of your cooked beans or veggies, toss them into a blender (or use an immersion blender right in the pot), and whip them back into the base. This creates a rich, velvety mouthfeel that makes even the simplest ingredients feel incredibly intentional. It’s all about adding that body and substance so you actually feel full after eating.

My Low-Friction Cheat Sheet for Better Soup

  • Don’t overthink the prep. If you’re exhausted, use a food processor to chop your aromatics instead of spending twenty minutes at the cutting board. It’s not cheating; it’s efficiency.
  • Always taste as you go. A soup that tastes “flat” usually doesn’t need more salt—it needs acid. A tiny squeeze of lemon or a splash of vinegar at the very end can wake up the whole pot.
  • Sauté your veggies first. If you just throw everything into boiling liquid, you’re basically making vegetable tea. Sautéing your onions, carrots, and celery in a little oil first builds that deep, foundational flavor.

  • Keep a “soup kit” in your pantry. Having high-quality bouillon, dried herbs, and canned coconut milk or cream on hand means you can turn a random assortment of wilted veggies into a real meal in ten minutes.
  • Let it rest. If you have the bandwidth, let your soup sit for even ten minutes after you turn off the heat. It allows the flavors to actually marry and the texture to settle so it doesn’t feel disjointed.

The Soup System Cheat Sheet

Stop treating soup like a recipe and start treating it like a process—focus on building layers of flavor (stock, aromatics, seasonings) rather than just following a list of ingredients.

Don’t settle for a watery mess; always have a thickening plan in your back pocket, whether that’s a simple roux, a starch slurry, or just mashing some of your veggies directly into the broth.

Control the heat to control the quality; low and slow simmering is your best friend for developing deep flavor without turning your ingredients into a mushy, overcooked afterthought.

The Low-Stress Soup System: Final Thoughts

At the end of the day, making a great soup isn’t about following a rigid, intimidating recipe from a dusty cookbook; it’s about understanding the mechanics of flavor. Once you’ve mastered the difference between a rich stock and a basic broth, learned how to layer your seasonings without overcomplicating things, and figured out which thickening method actually fits your texture goals, you’re no longer just “cooking”—you’re operating a system. You’ve moved past the phase of staring blankly at a pot of watery vegetables and into a space where you can actually trust your intuition. Stop worrying about perfection and just focus on building a solid foundation that works for your schedule and your pantry.

I know that sometimes, when you’ve had a long day and your brain feels like it has too many tabs open, even something as simple as deciding what to eat can feel overwhelming. But I promise you, once you have these little workflows in place, the kitchen becomes a place of recovery rather than another chore on your to-do list. Soup is the ultimate “low-friction” meal—it’s forgiving, it’s scalable, and it’s incredibly grounding. So, grab your favorite pot, trust the process, and just start simmering. You’ve got this.

Frequently Asked Questions

Can I actually use frozen veggies in my soup, or will it turn into a mushy mess?

Honestly, you can totally use frozen veggies, but there’s a trick to it so you don’t end up with a bowl of mush. The key is timing. If you toss them in at the start with your aromatics, they’ll definitely disintegrate. Wait until the last 5–10 minutes of simmering to add them. They’re already blanched, so they just need to heat through. It’s a massive time-saver for those “I can’t even” nights.

How do I stop my soup from tasting way too salty after it sits in the fridge overnight?

The “salt bomb” effect is real—as soup sits, the liquid reduces and those flavors just concentrate. If you wake up to a salt lick, don’t toss it. The easiest fix is to dilute it with a splash of unsalted stock or even just water, then bring it back to a simmer. If it’s still aggressive, stir in a dollop of Greek yogurt or heavy cream; the fat helps neutralize that sharp saltiness.

Is it worth it to make a massive batch for meal prep, or does the texture fall apart when I reheat it?

It’s absolutely worth it, but you have to be strategic. If you’re making something like a chunky beef stew, the texture holds up great, but delicate veggies or noodles will turn into mush by day three. My hack? Store your “add-ins”—like fresh greens, noodles, or crunchy toppings—separately. Reheat the base, then toss the fresh stuff in at the end. It keeps the meal from feeling like a soggy afterthought.

Tips on how to sharpen tools.

Keep Your Equipment Sharp: Maintenance Tips for Your Tools

I was halfway through a weekend DIY project, trying to prune some overgrown hedges, when my shears gave a pathetic, metal-on-metal screech and just… died. I spent the next twenty minutes hacking away, sweating and getting increasingly frustrated, only to realize that the problem wasn’t my technique—it was my gear. Most people think you need to drop hundreds on professional-grade whetstones or some high-tech electric grinder just to get a decent edge, but that’s a total myth. Learning how to sharpen tools doesn’t have to be this intimidating, expensive ritual that requires a degree in metallurgy.

I’m stripping away all the gatekeeping and the overly complicated “pro” tutorials that make you feel like you’re doing something wrong. In this guide, I’m sharing the exact, low-stress system I use to keep my kitchen knives, garden shears, and workshop tools in peak condition using stuff you probably already have in your junk drawer. We’re going to focus on the actual, unpolished steps to getting a razor-sharp edge without the headache, so you can stop fighting your equipment and actually start working.

Table of Contents

Guide Overview

Total Time: 30-60 minutes per tool
Estimated Cost: $30-80
Difficulty: Beginner

Tools & Supplies

  • Kitchen knives (Steel or carbon blades)
  • Garden shears (Bypass style)
  • Sharpening stones/Whetstones (1 set, dual-grit)
  • Honing rod (1 unit)
  • Honing oil or water (1 bottle)
  • Microfiber cloth (1 unit)

Step-by-Step Instructions

  • 1. First things first, you need to get your gear in order. Don’t just wing this with a random rock you found in the garden. You’ll need a whetstone (a double-sided one is best for beginners), some water or honing oil depending on what kind of stone you have, and a clean rag. I always keep a small microfiber cloth handy because nobody wants a greasy mess all over their workbench.
  • 2. Before you even touch the stone, give your tools a good clean. If there’s dried gunk, rust, or old grease on the blade, you’re just going to be sharpening the dirt instead of the metal. Use some warm soapy water and a scrub brush to get them looking decent. Once they’re dry, you’re actually ready to start the real work.
  • 3. Now, let’s talk about the stone. If you’re using a water stone, soak it for about 10 minutes until the bubbles stop rising. This is non-negotiable if you want to avoid scratching your tools. Lay the stone on a flat, stable surface—I personally use a damp paper towel underneath to keep it from sliding around like crazy while I’m working.
  • 4. This is the part where most people mess up: finding your angle. You want to hold the tool at a consistent angle—usually about 15 to 20 degrees for most household blades. A good hack is to use a penny as a guide; stack two pennies under the spine of your blade to roughly estimate the tilt. The key is consistency over speed; if your angle wobbles, you’re just making the edge uneven.
  • 5. Start with the coarse side of the stone. Using light, even pressure, push the blade across the stone in a smooth, sweeping motion. You aren’t trying to grind the metal away; you’re just realigning the edge. Keep going until you feel a “burr” forming—that’s a tiny, microscopic lip of metal curling over the edge. Once you feel that, you know you’re on the right track.
  • 6. Flip the tool over and repeat the process on the other side. You want to match that same angle you used on the first side to ensure the edge is perfectly centered. It’s a bit of a rhythmic thing, so try to find a steady pace. If you feel yourself getting frustrated or your hand is shaking, take a five-minute breather. Precision requires a calm hand.
  • 7. Finally, switch to the fine-grit side of your stone to polish everything out. This step is what turns a “working” edge into a razor-sharp edge. Run the tool through a few light strokes on the fine side to smooth out any imperfections left by the coarse grit. To test it, try slicing through a single sheet of paper; if it glides through without snagging, you’ve officially mastered the system.

Understanding How to Sharpen Tools

Understanding How to Sharpen Tools with bevels.

Before you actually start grinding away at a blade, you need to understand the “why” behind the movement. Most people think sharpening is just about rubbing metal against a stone until it feels pointy, but it’s really about managing sharpening bevel angles. Every tool has a specific angle designed by the manufacturer to balance strength and sharpness. If you go too shallow, you’ll roll the edge; if you go too steep, you’ll end up with a blunt, heavy-duty blade that can’t slice through a tomato. It’s a fine line, but once you get the muscle memory down, it becomes second nature.

It’s also worth clearing up the confusion between honing steel vs sharpening stone. I see so many people trying to “fix” a nicked blade with a honing rod, and it just doesn’t work. Think of a honing steel as a maintenance tool to realign the edge during use, whereas a stone actually removes metal to repair the edge itself. If you want to focus on maintaining edge retention over the long haul, you have to treat the stone as your primary tool and the steel as your quick daily check-in.

Key Things to Know

Key Things to Know: sharpening vs honing.

Before you dive in, there are a few little nuances that separate a “functional” edge from one that actually feels effortless to use. First, don’t get caught in the trap of thinking a honing steel is a replacement for a real stone. While it’s great for daily maintenance, there is a massive difference between honing steel vs sharpening stone; the steel just realigns the edge, while the stone actually removes metal to create a new one. If you want to get serious about maintaining edge retention, you really need to focus on your consistency with those sharpening bevel angles. If you’re too steep or too shallow, you’re basically just wasting your time and your grit.

Another thing I wish someone had told me earlier is that the work doesn’t end once the blade is sharp. If you’re working with carbon steel, you need to be obsessive about preventing tool rust by wiping them down immediately after use. I also highly recommend investing in a few best sharpening accessories, like a simple honing guide or a decent honing oil, to keep things from getting messy or uneven. It’s all about building the habit.

Five ways to avoid making a total mess of your tools

  • Don’t go overboard with the pressure. I used to think more force meant a better edge, but you’re actually just grinding away the metal and ruining the geometry of the blade. It’s all about consistent, light strokes.
  • Keep your cooling station ready. If you’re using an electric sharpener, the metal gets hot fast. If it’s too hot to touch, you’re risking warping the steel. Keep a bowl of water nearby to dip the tool in between passes.
  • Check your angle constantly. This is where most people fail. If you’re inconsistent with the angle, you’re just creating a rounded, useless edge instead of a sharp one. Pick an angle, stick to it, and don’t wander.
  • Test on something soft first. Before you go hacking away at a piece of wood or a vegetable, test the edge on a scrap piece of cardboard or a piece of paper. It’s a low-stakes way to see if you actually achieved a cut or if you just made it shiny.

  • Clean up the metal dust immediately. Those tiny little metal shavings (the “swarf”) are annoying and can actually get into your skin or mess up your workspace. Wipe everything down with a rag as soon as you’re done so you aren’t cleaning it up later.

The Quick Cheat Sheet

Don’t wait until your tools are useless; a quick, five-minute touch-up every few months prevents the frustration of fighting with a blunt blade.

Consistency beats intensity—you don’t need a professional workshop, just a decent whetstone and a steady, repeatable angle.

Safety isn’t optional; if you aren’t respecting the edge, you’re going to end up with a slip that turns a quick task into a trip to the ER.

The Bottom Line

The Bottom Line: sharpening tools for efficiency.

At the end of the day, sharpening your tools isn’t about achieving some level of professional perfection; it’s about respect for the work you’re doing. We’ve covered the essential mechanics—from choosing the right grit on your whetstone to maintaining that consistent angle that makes or breaks the edge. Remember, it’s much better to spend ten minutes every few months doing a quick touch-up than to spend an hour fighting with a blunt blade that’s actively making your job harder. Once you get the hang of the rhythm and the feel of the metal against the stone, it stops feeling like a chore and starts feeling like a necessary part of your workflow.

I know that diving into DIY maintenance can feel a little intimidating at first, especially if you didn’t grow up with a toolkit always within reach. But honestly? Taking ownership of your gear is one of the quickest ways to feel like you actually have your life together. There is a specific kind of quiet satisfaction that comes from pulling a tool out of your bag and knowing it’s going to perform exactly how it’s supposed to. Don’t let the fear of a messy workspace or a slightly uneven edge stop you from starting. Just embrace the learning curve, keep your systems simple, and trust that you’re building a foundation that will make everything else run a little bit smoother.

Frequently Asked Questions

How do I know if my tool is actually sharp or if I'm just imagining it?

The “paper test” is my go-to, but honestly, the real way to tell is by how much effort you’re putting in. If you’re hacking away at a tomato or forcing a blade through cardboard, it’s dull. A truly sharp tool should glide through material with almost zero resistance. If you feel any catching, dragging, or—worst of all—you have to apply extra muscle just to get the job done, stop. It’s not sharp.

Is it safe to sharpen my tools if they have a little bit of rust on them already?

Honestly, yeah, it’s totally safe, but don’t just dive straight into the sharpening stone. If you try to sharpen over rust, you’ll just gum up your equipment and end up with a jagged, uneven edge. Think of it as a two-step process: clean first, then sharpen. Use a bit of steel wool or a wire brush to knock that oxidation off. Once it’s smooth and shiny again, you’re good to go.

At what point do I stop trying to fix it myself and just buy a new one?

Honestly, it’s all about the math and the “frustration tax.” If the time and cost of the repair outweigh the price of a replacement—or if fixing it feels like a constant battle against a losing system—just let it go. I have a rule: if I’ve spent more than two hours troubleshooting or if the tool feels unsafe to use, I stop. Don’t let “sunk cost fallacy” turn a simple task into a weekend-long headache.

Tips on how to speed up your computer.

Quick Fixes to Revive a Slow Computer

Ever feel like you’re staring down a spinning rainbow wheel of death just because you opened a single Chrome tab? I’ve been there, sitting on my floor surrounded by half-disassembled vintage tech, wondering why a machine that cost a month’s rent is acting like a glorified paperweight. Most tech blogs will try to sell you on expensive “optimization software” or tell you that you need to drop a grand on a new MacBook, but honestly? That’s just gatekeeping disguised as expertise. You don’t always need a brand-new setup to fix the lag; usually, you just need to know how to speed up your computer by stripping away the digital clutter that’s choking your processor.

I’m not here to give you a lecture on RAM architecture or throw jargon at your head. Instead, I’m sharing the actual, unpolished steps I use to keep my own freelance workstation running smoothly without breaking the bank. We’re going to focus on high-impact, repeatable systems—from managing your startup bloat to the hardware tweaks that actually move the needle. No hype, no unnecessary spending, just a straightforward roadmap to getting your tech back in your corner instead of fighting against it.

Table of Contents

Stop Fighting Your Hardware How to Speed Up Your Computer

Stop Fighting Your Hardware How to Speed Up Your Computer

First things first, let’s tackle the low-hanging fruit: the digital clutter you probably didn’t even know was eating your resources. Most of us have a dozen apps that decide they have the right to launch the second we log in, and it’s honestly exhausting. You need to optimize windows startup programs by diving into your Task Manager and disabling anything that isn’t strictly necessary. It’s a five-minute fix that stops your machine from choking before you’ve even finished your first cup of coffee. While you’re at it, take a second to clear temporary files pc style—just run a quick disk cleanup to sweep away the digital dust that’s been piling up in the corners of your drive.

If you’ve done the software cleanup and things still feel sluggish, it might be time to look at the actual guts of the machine. If you’re still running on an old-school spinning drive, the single best thing you can do is replace hdd with ssd. It is a total game-changer; it’s like moving from a bicycle to a car overnight. If your budget is tighter, even just trying to upgrade ram for faster computer tasks can prevent that dreaded freezing when you have too many Chrome tabs open.

Stop the Chaos Optimize Windows Startup Programs and Background Processes

Stop the Chaos Optimize Windows Startup Programs and Background Processes.

If your computer takes a literal eternity to become usable after you log in, it’s probably because you’re fighting a losing battle against your own settings. Every time you boot up, a dozen different apps are likely screaming for attention at once. To fix this, you need to optimize Windows startup programs by opening your Task Manager (Ctrl + Shift + Esc) and heading straight to the “Startup” tab. I usually go on a bit of a tear here, disabling everything that doesn’t absolutely need to be running the second you turn the machine on. Spotify, Steam, and random printer software don’t need to be hogging your resources before you’ve even had your coffee.

Once you’ve trimmed the fat from your boot sequence, take a second to manage background processes that are quietly draining your energy. It’s easy to ignore those little icons in your system tray, but they add up. If you notice your fan spinning like it’s about to take flight, something is working too hard in the shadows. Stripping these away isn’t about being a tech expert; it’s just about reducing the friction so your hardware actually does what you tell it to do.

The Digital Declutter a Quick Disk Cleanup Tutorial for Your Pc

The Digital Declutter a Quick Disk Cleanup Tutorial for Your Pc.

If you’re anything like me, your “Downloads” folder is probably a digital graveyard of PDFs you read once in 2022 and random screenshots that serve no purpose. It sounds trivial, but all that junk creates friction. When your drive is stuffed to the brim, your OS has to work twice as hard just to find the space it needs to breathe. This is where a quick disk cleanup tutorial comes in handy to clear the mental and digital fog.

You don’t need to go on a deep-dive scavenger hunt, though. Start by hitting the search bar and typing “Disk Cleanup.” It’s an old-school Windows tool, but it’s still the most efficient way to clear temporary files pc users often forget about. Check those boxes for system files and temporary internet files, hit okay, and let it do the heavy lifting. It’s one of those small, repeatable systems that prevents your computer from feeling like it’s wading through molasses. Once you’ve purged the nonsense, you’ll actually notice your file explorer feels snappier and less heavy.

Deep Cleaning Your Storage Clear Temporary Files and Defragment Hard Drive

If you’ve already done a general cleanup and things still feel sluggish, we need to go a layer deeper. Think of this like cleaning out the junk drawer in your kitchen—it’s not just about the surface; it’s about the stuff hiding in the corners. You really need to clear temporary files pc style by digging into your system folders. These little cache files and installer leftovers accumulate like digital dust, hogging space and slowing down your file indexing. It’s a tedious process if you do it manually, but once you clear that cache, you’ll notice your system feels a lot less “heavy.”

Once you’ve cleared the digital clutter, we need to talk about how your data is actually physically arranged. If you’re still running on an older mechanical drive, you should definitely defragment hard drive sectors to help your computer find files faster. It basically reorganizes the data so the drive doesn’t have to work as hard to read it. Just a heads-up: if you’ve already made the jump to an SSD, skip the defrag step entirely—doing it on a solid-state drive is actually counterproductive.

No More Gatekeeping Replace Hdd With Ssd and Upgrade Ram

If you’ve already tried all the software tweaks and your machine is still dragging its feet, it’s time to stop treating the symptoms and actually fix the problem. We need to talk about hardware. Most people think they need to drop $1,000 on a brand-new laptop when the real issue is just a bottleneck in their current setup. Honestly, the single most transformative thing you can do is replace HDD with SSD. If you’re still running on an old-school mechanical hard drive, you’re essentially trying to run a marathon in sand; switching to a Solid State Drive makes everything from booting up to opening Chrome feel instantaneous.

While you’re at it, don’t overlook your memory. If you constantly have twenty tabs open alongside Spotify and Slack, you probably need to upgrade RAM for faster computer performance. Think of RAM as your workspace—the more you have, the more tasks you can juggle without everything freezing up. It’s not about being a tech genius; it’s just about giving your system enough breathing room to actually do its job. It’s a small investment that makes a massive difference in your daily sanity.

The "small wins" list: 5 ways to stop the lag right now

  • Audit your browser extensions. I know, I know—we all love a good productivity plugin, but if you have twenty of them running in the background of Chrome, you’re basically asking your computer to run a marathon in sand. Delete the ones you haven’t clicked on in a month.
  • Check your power settings. If you’re on a laptop, it might be stuck in “Power Saver” mode to keep the battery alive, which basically puts your CPU in slow motion. Switch it to “High Performance” when you’re actually trying to get work done.
  • Manage your desktop clutter. It sounds aesthetic-focused, but having hundreds of loose files sitting on your actual desktop forces your system to use resources just to render those icons. Move them into folders; your RAM will thank you.
  • Update your drivers (the easy way). You don’t need to go digging through obscure forums. Just hit “Check for Updates” in Windows Update or use your manufacturer’s dedicated app. Often, a simple driver patch is all that’s standing between you and a smooth experience.
  • Watch your tab count. If you’re a “tab hoarder” like me, try using a tool or a built-in browser feature that suspends inactive tabs. It keeps the site ready for you but stops it from eating up all your memory while you’re focusing on something else.

The TL;DR on a faster setup

Stop treating your computer like a junk drawer; if you aren’t using a program or a file, clear it out so your system doesn’t have to work overtime just to exist.

Software fixes can only take you so far, so if you’re still running on an old HDD, stop fighting a losing battle and just upgrade to an SSD—it’s the single biggest “life hack” for your hardware.

Small, repeatable maintenance is better than a total meltdown; spend five minutes a week managing your startup apps and background processes so you don’t have to spend five hours troubleshooting a frozen screen later.

The Bottom Line

Look, we’ve covered a lot of ground here, from the quick wins like trimming down your startup apps and clearing out those dusty temporary files to the bigger, more permanent fixes like upgrading your hardware. It can feel overwhelming when you first look at a sluggish machine, but it really just comes down to reducing the friction between you and your work. Whether you went the route of a digital declutter or decided to finally bite the bullet and swap that old HDD for a snappy SSD, you’ve essentially stripped away the digital junk that was slowing your momentum. You don’t need to be a tech wizard to maintain this; you just need to keep these systems in place so the chaos doesn’t creep back in.

At the end of the day, your computer is just a tool meant to serve you, not a source of daily frustration that drains your energy. I’ve spent way too many hours fighting with glitchy hardware when I could have been focusing on my actual life, and I don’t want that for you. Think of these tweaks as a way to reclaim your time and mental bandwidth. Once your setup is running smooth and predictable, you can stop worrying about the spinning wheel of death and get back to what actually matters. You’ve got the systems now—so go ahead and make your tech work for you.

Frequently Asked Questions

I've already tried cleaning up my files, so why is my laptop still running hot and sounding like a jet engine?

Honestly, if you’ve already done the digital cleanup and it’s still acting like it’s about to take off, we’re looking at a physical problem, not a software one. It’s likely dust buildup in your fans or just poor airflow. Since I’m always carrying a multi-tool, I’ll tell you: grab a can of compressed air and give those vents a good blast. If that doesn’t work, your thermal paste might be drying out.

If I upgrade my RAM, will I actually notice a difference when I'm just browsing Chrome, or is that only for heavy video editing?

Honestly, yes. If you’re a Chrome devotee with fifty tabs open while also having Spotify and Slack running in the background, you’ll definitely feel it. Chrome is a notorious memory hog; it’s basically a resource vacuum. Upgrading your RAM won’t necessarily make a single webpage load faster, but it stops that annoying stuttering and freezing when you’re switching between tasks. It’s all about making the multitasking feel seamless instead of a struggle.

Is it actually safe to delete everything in my temporary files folder, or am I going to accidentally break an app I use every day?

Honestly, I get the hesitation—the last thing you want is to nuking a folder and suddenly having your favorite apps go on strike. But here’s the deal: it’s generally very safe. Temporary files are meant to be disposable leftovers. If an app actually needs something, it’ll just recreate it. If you’re nervous, just skip anything that says “in use” and let the rest go. It’s low risk, high reward for your speed.

Page 7 of 16

Powered by WordPress & Theme by Anders Norén