Author: Sienna Lowery Page 6 of 16

I believe that adulthood doesn't have to feel like a constant state of emergency if you have the right systems in place. My goal is to strip away the gatekeeping and give you the actual, unpolished steps to making your life run smoother.

Best free design tools for creators.

Top-tier Design Software That Won’t Cost You a Cent

Let’s be real: the “creative professional” starter pack usually looks like a massive monthly subscription fee that eats up your entire freelance budget before you’ve even landed your first client. I spent way too much time in my early twenties thinking I needed a $50-a-month suite just to make a decent social media graphic or a clean presentation. It’s a total gatekeeping tactic that makes adulthood feel way more expensive than it actually needs to be. But honestly? You don’t need to go into debt to produce high-quality work. I’ve spent months testing different platforms to find the best free design tools that actually hold their own without the hefty price tag.

In this post, I’m stripping away the fluff and giving you my personal toolkit. I’ve narrowed it down to five specific resources that I use in my own workflow to keep things calmly efficient and visually polished. Whether you’re trying to build a brand from scratch or just need to fix a quick layout for a side project, these are the actual, no-BS tools that will help you stop overpaying for software and start creating like a pro.

Table of Contents

Canva is your ultimate safety net

Canva is your ultimate safety net.

Look, I know the design purists might roll their eyes, but if you need to whip up a social media graphic or a quick presentation in under ten minutes, Canva is a lifesaver. It’s essentially the cheat code for people who don’t have the time or the patience to learn complex layering systems. I use it constantly when I’m in a rush and just need something that looks semi-professional without the headache.

Figma for the collaborative dreamers

Figma for the collaborative dreamers.

If you’re moving past basic social posts and actually trying to build out a website layout or a mobile app prototype, you need to jump into Figma. It’s a browser-based powerhouse that feels surprisingly smooth, even if you aren’t a total tech nerd. I love how it handles real-time collaboration, meaning you can be working on a project with a friend or a client and see their cursor moving across the screen instantly.

CapCut for effortless video editing

CapCut for effortless video editing.

Video is non-negotiable these days, but let’s be real: professional editing software can be a total nightmare to navigate. That’s why I always point people toward CapCut. Whether you’re editing a quick Reel or a more structured TikTok, it handles the heavy lifting like auto-captions and trending transitions with zero drama. It’s designed for the way we actually consume content now.

Photopea for the Photoshop itch

We’ve all been there—you need to do something specific like remove a background or fix a weird lighting issue, and suddenly you realize you don’t have Photoshop installed. Instead of panicking or paying for a monthly subscription you won’t use, just open Photopea in your browser. It is essentially a free clone of Photoshop that lives in a tab, which is a total win for my minimalist setup.

Unsplash for high-quality visuals

A design is only as good as the assets you put into it, and nothing kills a vibe faster than using grainy, low-res stock photos that scream “generic corporate website.” Unsplash is my go-to for sourcing imagery that actually feels human and intentional. The library is massive, and the aesthetic tends to lean much more towards artistic and moody rather than staged and fake.

The Bottom Line

You don’t need a massive monthly subscription to produce professional-grade work; most of the “industry standard” tools are just gatekeeping when there are perfectly capable free alternatives.

Pick one tool from this list and actually master it rather than downloading five different apps and never opening them again.

Focus on your systems and your eye for design, not the price tag of your software—the tool is just a means to an end.

Stop Overthinking and Start Creating

Look, the point isn’t to own every single expensive subscription on the market; it’s about having a toolkit that actually serves your workflow without draining your bank account. Whether you’re leaning on Canva for quick social assets, using Figma to map out a complex UI, or grabbing high-res visuals from Unsplash, the goal is the same: minimizing friction. You don’t need a massive studio setup or a thousand-dollar software suite to produce something that looks professional. Once you’ve integrated these free tools into your daily routine, you’ll realize that the “pro” barrier was mostly just a myth.

At the end of the day, the tools are just there to facilitate the work, not to be the work itself. I spent way too much time early in my career worrying about whether my software was “industry standard” instead of just focusing on the actual output. Don’t let the lack of a premium subscription hold your creativity hostage. Grab one of these tools, set up a simple system, and just start building. Adulthood is messy enough as it is—don’t let your creative process be another source of unnecessary stress. You’ve got this.

Frequently Asked Questions

Do these free tools actually have enough features for professional client work, or am I going to hit a wall pretty quickly?

Honestly? You’ll hit a wall if you try to use them for everything, but for most freelance workflows, they’re more than enough. If you’re doing high-end retouching or complex 3D modeling, yeah, you’ll eventually need the paid stuff. But for 90% of client deliverables—social assets, basic branding, or layout work—these tools get the job done without the monthly subscription tax. Master the free ones first; don’t let a software price tag gatekeep your career.

Is there a steep learning curve with these, or can I start using them today without watching a dozen tutorials?

Honestly? Most of these are pretty plug-and-play. If you can navigate a basic smartphone app or use Google Docs, you’re already halfway there. You might spend ten minutes poking around to find where the “export” button lives, but you definitely don’t need to sit through a three-hour masterclass. My rule of thumb: just open the tool, try to break something, and figure it out as you go. That’s how I actually learn.

How do I manage my files and assets without accidentally paying for a premium subscription once I start getting organized?

The trap is thinking you need a “Pro” plan the second you get organized. Don’t fall for it. My rule: audit your storage before you subscribe. Use Google Drive or Dropbox for the raw files, but keep your actual working assets in a local, organized folder structure on your hard drive first. Only move things to the cloud once you’ve hit that free tier ceiling. It keeps your workflow clean without the accidental monthly drain.

Person weatherstripping a door to stop drafts.

Stop Drafts and Save Energy by Weatherstripping Your Doors

I was sitting on my living room floor last Tuesday, wrapped in a literal blanket, staring at the gap under my front door and wondering why my heater was working overtime for absolutely nothing. It’s that specific, annoying kind of draft that follows you around the room like a ghost, making your space feel less like a sanctuary and more like a wind tunnel. Most people think you need to call a contractor or swap out the entire door frame to fix this, but that is honestly such a waste of money. The truth is, weatherstripping a door is one of those tiny, low-effort systems that completely changes the vibe of your home once you actually get it done right.

I’m not going to give you a lecture on thermal dynamics or suggest you buy a professional toolkit you’ll never use again. Instead, I’m breaking down the exact, unpolished steps I used to stop the draft and finally get my utility bill under control. We’re going to talk about which foam actually sticks, how to measure without losing your mind, and how to make sure the seal is actually airtight. Let’s just get this fixed so you can stop shivering and start actually enjoying your space.

Table of Contents

Guide Overview

Total Time: 1-2 hours
Estimated Cost: $20-50
Difficulty: Beginner

Tools & Supplies

  • Measuring tape for sizing the door perimeter
  • Scissors or utility knife for trimming material
  • Screwdriver for installing door sweeps or hardware
  • Cleaning cloth and mild detergent to prep surfaces
  • Weatherstripping roll or strips (adhesive or tension type)
  • Door sweep (if gaps exist at the bottom)
  • Caulking (optional for gaps around the door frame)

Step-by-Step Instructions

  • 1. First, you need to figure out what you’re actually dealing with. Grab a flashlight and a piece of paper, and on a windy day, hold the paper near the edges of the door to see where it flutters. This helps you identify the exact gaps that are letting the air in. You might find it’s the sides, the top, or even that annoying space at the very bottom where the door meets the threshold.
  • 2. Once you know where the leaks are, it’s time to clean the surface. This is the part everyone skips, but if you don’t do it, your new weatherstripping is going to peel off in a week. Take some rubbing alcohol and a microfiber cloth and wipe down the door frame where the seal will sit. You want it to be completely free of dust and old adhesive residue so the new stuff actually sticks.
  • 3. Now, pick your weapon. If you have large, visible gaps, go with the adhesive foam strips or the rubber D-profile seals. If you’re just dealing with that gap at the bottom of the door, you’ll want a door sweep. I usually keep a few different types in my junk drawer just in case, so check your gaps before you head to the hardware store to avoid a second trip.
  • 4. If you’re using the adhesive foam strips, start at the top of the door frame and work your way down. Peel the backing off just a little bit at a time—don’t pull the whole thing off at once or it’ll get tangled and useless. Press it firmly into the frame, making sure it’s straight. If you mess up, just peel it back slowly and try again; it’s not a permanent mistake.
  • 5. For the bottom of the door, installing a sweep is a total game-changer. Most of them just screw directly into the bottom of the door, which is super straightforward. Just hold it up, mark the screw holes with a pencil, and drill small pilot holes first so you don’t split the wood. Then, screw it in tight. If you’re renting and can’t drill, look for the slide-on versions that just grip the bottom of the door.
  • 6. The final step is the “light test.” Close the door and look at the edges from the inside. If you see any slivers of light peeking through, you’ve still got a leak. You might need to add a second layer of foam or reposition the strip to ensure a tight seal. Once it’s dark in there, you’re officially done and can finally stop shivering in your own living room.

Understanding Weatherstripping a Door

Understanding weatherstripping a door to find drafts.

Before you start sticking things to your door, you need to figure out where the actual damage is happening. Most people think a draft is just coming from the sides, but it’s often a bottom-up problem. You’re basically looking for the “weak links” in your entryway. If you can see light peeking through the edges when the door is closed, that’s your signal that your current seal is shot. It’s not just about comfort, though; it’s about reducing heating and cooling loss so you aren’t essentially paying to heat the sidewalk.

The trick is matching the right fix to the right gap. There are various types of weatherstripping materials out there—everything from foam tape and V-strip to heavy-duty rubber—and using the wrong one is a waste of your Saturday. For the sides and top, a flexible adhesive strip usually does the trick, but for that gap at the floor, you’ll likely need a more robust solution. If the gap is huge, don’t bother with thin tape; you’ll want to look into a proper door sweep installation to actually create a solid barrier.

Key Things to Know

Key Things to Know: weatherstripping materials.

Before you dive in, you need to realize that not all seals are created equal. If you just grab the first roll of foam you see at the hardware store, you might end up with a door that’s harder to close or looks totally janky. There are various types of weatherstripping materials out there—like silicone, rubber, or even foam—and the “best” one really depends on where the air is actually escaping. For instance, if you’re seeing light peeking through the sides, you want something flexible that compresses well. But if the gap is at the very bottom, you’re looking at a different beast entirely.

Don’t forget the floor. A lot of people focus so much on the frame that they completely ignore the gap between the door and the threshold. A proper door bottom seal installation is usually the MVP when it comes to reducing heating and cooling loss in a room. If you notice a literal breeze hitting your ankles, a simple door sweep is going to be your best friend. It’s a small tweak, but it makes a massive difference in how much your HVAC system has to work to keep you comfortable.

Pro-tips to keep you from doing this twice

  • Don’t skip the cleaning step. If you just slap new foam over a layer of old dust and grime, it’s not going to stick, and you’ll be back here re-doing the whole thing in two weeks. Wipe the frame down with some rubbing alcohol first so it’s actually clean.
  • Test the “light leak” before you commit. Turn off the lights in your hallway and have someone stand on the other side of the door with a flashlight. Wherever you see light peeking through is exactly where your draft is coming from—that’s your roadmap.
  • Avoid the “over-stuffing” trap. It’s tempting to use the thickest, fluffiest stripping you can find, but if you compress it too much, the door won’t actually latch properly. You want a snug seal, not a struggle every time you try to get inside.
  • Check your door sweep too. People often obsess over the sides of the door but completely ignore the gap at the bottom. If there’s a visible canyon between your door and the floor, all that side weatherstripping is basically useless.
  • Buy a little more than you think you need. There is nothing more frustrating than being 90% done with a project only to realize you’re two inches short because of a weird corner or a measurement error. Just grab an extra roll.

The TL;DR on keeping the drafts out

Don’t overcomplicate the shopping trip; just identify if you need adhesive foam, V-strip, or a door sweep before you head to the hardware store so you aren’t wandering the aisles aimlessly.

Prep is everything—if you don’t clean that door frame with rubbing alcohol first, your new weatherstripping is going to peel off in a week and you’ll be right back where you started.

You don’t need to be a pro to do this, but do take your time with the alignment; if the seal is uneven, you’re basically just leaving money on the table.

The Bottom Line

The Bottom Line: easy weatherstripping benefits.

At the end of the day, weatherstripping isn’t some complex home renovation project that requires a massive budget or a specialized crew. It’s really just about taking thirty minutes to clean your surfaces, measure your gaps accurately, and applying the right adhesive foam or V-strip to the frame. Once you’ve actually done the work, you’ll notice the difference immediately—the weird whistling sounds stop, the temperature stays consistent, and you aren’t basically throwing money out the window every time the AC kicks on. It’s one of those small, high-impact wins that makes your living space feel significantly more controlled and comfortable.

I know that looking at a pile of hardware store supplies can feel a little overwhelming when you just want to relax, but I promise you can handle this. Adulthood is really just a series of these tiny, manageable systems that prevent bigger headaches down the road. Don’t let a drafty door make your home feel like it’s working against you; just grab your multi-tool, get it done, and reclaim your space. Once this is off your to-do list, you’re going to wonder why you didn’t just do it months ago.

Frequently Asked Questions

How do I know if I need the adhesive foam strips or the actual rubber tension seals?

Honestly, it depends on how much effort you want to put in versus how much of a draft you’re actually feeling. If you just want a quick, cheap fix for a gap that isn’t too massive, go with the adhesive foam. It’s super easy to slap on. But if you’re dealing with a door that slams or a gap that feels like a literal canyon, get the rubber tension seals. They last way longer and actually create a real seal.

Can I still close my door properly if I pick a strip that’s a little too thick?

Honestly? It’s a gamble. If the strip is only slightly thicker, you might just feel a bit more resistance when you latch it, which is fine. But if it’s too chunky, you’ll end up fighting the door every single time you walk through, or worse, you’ll put constant pressure on the latch and eventually warp the frame. If you find yourself having to shoulder-check the door to get it shut, the strip is definitely too thick.

Do I need to strip off the old, crusty weatherstripping first, or can I just layer the new stuff right on top?

Definitely strip off the old stuff first. I know it’s a pain and feels like an extra chore, but layering new adhesive over crusty, decaying foam is a recipe for disaster. It won’t bond properly, and you’ll end up with a peeling mess within a week. Take five minutes to peel the old layer off and give the surface a quick wipe with some rubbing alcohol so the new stuff actually stays put.

Tips on how to focus better.

Staying Focused in an Age of Constant Distractions

I spent three hours last Tuesday staring at a blank Google Doc, my phone buzzing with notifications that felt like tiny electric shocks to my brain. I had the $30 ergonomic keyboard, the “aesthetic” desk setup, and a curated lo-fi playlist, yet I still couldn’t get through a single paragraph without my mind drifting toward a random Wikipedia rabbit hole. It’s incredibly frustrating how the internet tries to sell us these expensive, complicated solutions for how to focus better, as if the secret is just one more productivity app or a specific type of expensive candle. Most of that stuff is just noise designed to make you feel like you’re failing when, in reality, your brain is just reacting to a world built to distract you.

I’m not here to sell you on a lifestyle overhaul or a subscription to a premium meditation app. Instead, I want to share the actual, unpolished systems I’ve built to stop my brain from feeling like it’s in a constant state of crisis. We’re going to skip the gatekeeping and look at the small, repeatable habits that actually work when you’re tired, overwhelmed, or just plain stuck. This is about stripping away the fluff and giving you the practical tools to reclaim your attention, one functional system at a time.

Table of Contents

Stop Treating Your Brain Like an Emergency How to Focus Better

Stop Treating Your Brain Like an Emergency How to Focus Better

The problem is that most of us approach our to-do lists like we’re responding to a 911 call. We jump from a Slack notification to an urgent email, then to a random TikTok scroll, leaving our brains in a state of permanent, frantic high alert. This constant switching isn’t just annoying; it’s actually killing your ability to do anything meaningful. If you want to actually get stuff done, you have to stop chasing the dopamine hit of “busy-ness” and start investing in deep work techniques that actually respect your attention span.

I’ve found that the best way to combat that heavy, midday brain fog is to stop trying to “willpower” your way through the chaos. Instead, build a physical environment that does the heavy lifting for you. This means minimizing digital distractions by literally putting your phone in another room—not just face down on the desk, but out of sight. When you remove the visual cue of the device, you stop the subconscious urge to check it every thirty seconds. It’s not about being a productivity robot; it’s just about creating a space where your brain finally feels safe enough to settle down.

Cutting Through the Noise Minimizing Digital Distractions for Good

Cutting Through the Noise Minimizing Digital Distractions for Good

Let’s be real: your phone is designed to hijack your attention. Every ping, red notification bubble, and “just one quick scroll” is a tiny fracture in your ability to actually get things done. I used to think I just had a short attention span, but I realized I was just living in a state of constant digital interruption. If you want to actually improve your cognitive performance enhancement, you have to stop treating your notifications like urgent messages and start treating them like the interruptions they are.

My go-to system is ruthless: if it’s not a human being calling me for an actual emergency, it doesn’t get to buzz in my pocket. I’ve moved almost all my non-essential apps to a secondary device or buried them in deep folders so I don’t see them the second I unlock my screen. This isn’t about being a hermit; it’s about minimizing digital distractions so you can actually enter a flow state without feeling like your brain is being pulled in ten different directions. Once you reclaim that space, the mental fog starts to lift almost immediately.

Real Systems for Deep Work Techniques Without the Fluff

Real Systems for Deep Work Techniques Without the Fluff

Look, we need to stop pretending that “grinding” for eight hours straight is a sustainable way to live. It’s not. If you try to force your brain into high gear without a system, you’re just going to end up staring at a blinking cursor while your anxiety spikes. Instead of chasing vague productivity hacks for attention, I’ve started using time-blocking with built-in buffer zones. I set a timer for 90 minutes of intense, single-tasking work, but—and this is the part people miss—I schedule a mandatory 15-minute “system reset” immediately after. No scrolling, no emails; just walking away from the screen to let my brain breathe.

This isn’t about some magical cognitive performance enhancement pill; it’s about managing your actual energy levels. I’ve found that the most effective deep work techniques are the ones that respect your natural rhythms. If I feel that heavy, sluggish sensation creeping in, I don’t push through it. I treat it as a signal to switch to a low-stakes administrative task rather than fighting a losing battle against my own biology. It’s about working with your brain, not against it.

Clearing the Static Brain Fog Remedies for Daily Mental Clarity

Sometimes, you can do all the right things—you’ve silenced your phone, you’ve set your timer, and your desk is spotless—but your brain still feels like it’s wading through thick, grey sludge. That’s the brain fog no amount of “hustle culture” can fix. I’ve realized that you can’t just willpower your way through a mental haze; you have to actually address the physiological static. For me, the most effective brain fog remedies aren’t complicated supplements, but rather aggressive resets. This usually means stepping away from every single screen for fifteen minutes or doing a quick bout of movement to get my blood actually circulating.

If you’re feeling that heavy, disconnected sensation, stop trying to force the output. Instead, try a few simple mental clarity exercises like a physiological sigh—two quick inhales through the nose followed by a long, slow exhale through the mouth. It sounds a little woo-woo, but it’s a legitimate way to signal to your nervous system that you aren’t actually under threat. Stop fighting the fog and start clearing the path. Once the internal static dies down, the focus usually follows naturally.

Unpolished Productivity Hacks for Attention and Cognitive Performance Enhan

Look, I’m not going to tell you to meditate for an hour or buy a $500 ergonomic chair to fix your brain. Most of the stuff you see online about cognitive performance enhancement feels like it was written for robots, not people trying to manage a freelance career and a messy apartment. For me, it’s about the low-lift stuff that actually moves the needle. I’ve found that my focus follows my physical environment; if my desk is a graveyard of half-empty coffee mugs and tangled charging cables, my brain stays in a state of low-grade chaos.

Instead of chasing perfection, I lean into micro-adjustments. If I feel my attention slipping, I don’t fight it with sheer willpower—that just leads to burnout. I use a simple “reset” system: I grab my multi-tool, fix whatever small thing is broken in my immediate space, or just step outside for five minutes of sunlight. These aren’t fancy productivity hacks for attention, but they act as a manual override for when my mental clarity starts to tank. It’s about building a life that supports your brain, rather than constantly fighting against it.

Small Systems to Stop the Mental Drift

  • Use a “Brain Dump” list before you start working. If a random thought—like needing to buy milk or an email you forgot to send—pops up while you’re focusing, don’t follow it. Just write it down on a physical notepad and get back to the task. It clears the mental tab without breaking your flow.
  • Set a “Physical Boundary” for your workspace. Even if you live in a tiny studio, your brain needs a signal that “work mode” has started. This could be as simple as putting on a specific pair of headphones or clearing everything off your desk except your laptop. When the headphones are on, the world is off.
  • Try the “Single-Tasking Sprint.” Forget multitasking; it’s just a recipe for feeling scattered. Pick one specific, tiny task—like “format this spreadsheet” rather than “work on project”—and set a timer for just 20 minutes. It’s much easier to commit to a sprint than a marathon.
  • Manage your “Decision Fatigue” by prepping the night before. I’ve realized that if I spend my morning deciding what to wear or what to eat, I’ve already used up half my focus before I even open my laptop. Lay out your clothes and prep your lunch the night before so your morning brain can stay focused on the hard stuff.
  • Implement “Scheduled Scrolling.” Instead of checking your phone every time you feel a micro-second of boredom, give yourself specific times to be “unproductive.” Tell yourself you can check social media at 11:00 AM and 4:00 PM. It turns distraction from a reflex into a planned break.

The TL;DR on Keeping Your Head in the Game

Stop waiting for “motivation” to strike; focus is a muscle you build through small, repeatable systems, not a sudden burst of inspiration.

Protect your mental bandwidth by aggressively minimizing digital noise and clearing out the brain fog before you even sit down to work.

Ditch the overcomplicated productivity frameworks and stick to unpolished, functional habits that actually reduce the friction of your daily tasks.

Stop Chasing Perfection and Start Building Systems

Look, we’ve covered a lot of ground here—from cleaning up your digital workspace and managing brain fog to actually implementing deep work sessions that don’t feel like a chore. The biggest takeaway I want you to hold onto is that focus isn’t some magical gift you’re either born with or you aren’t; it’s a byproduct of the environment you build for yourself. You don’t need a $500 productivity planner or a complete lifestyle overhaul to see results. You just need to stop fighting your biology and start implementing small, repeatable systems that protect your mental energy instead of draining it.

At the end of the day, please don’t beat yourself up if you have a day where your brain feels like a browser with fifty tabs open and half of them are playing music you can’t find. Adulthood is messy, and your attention span will fluctuate. The goal isn’t to become a productivity robot; it’s to build a toolkit that helps you navigate the chaos without feeling like you’re constantly drowning. Start with one small tweak today—maybe it’s putting your phone in another room or clearing your desk—and just see how it feels. You’ve got this.

Frequently Asked Questions

How do I actually stay focused when my job requires me to be constantly reactive to Slack and emails?

This is the ultimate modern struggle. If you’re constantly pinged, you’re not working; you’re just reacting. I stopped trying to “ignore” Slack and started batching it instead. I set specific windows—say, 10 minutes every hour—to clear my inbox and messages. Outside of those windows, I close the tabs entirely. It feels terrifying at first, like you’re missing something huge, but the world won’t end if you reply in forty minutes instead of forty seconds.

Is it possible to fix my attention span if I've spent years scrolling through short-form video content?

Honestly? Yes, but you have to stop expecting an overnight fix. You’ve essentially trained your brain to crave a dopamine hit every fifteen seconds, so you can’t just flip a switch and suddenly enjoy a three-hour deep work session. It’s about retraining your attention through small, intentional friction. Start by reclaiming tiny pockets of “boredom”—like sitting in line without pulling out your phone. It feels itchy at first, but that’s just the rewiring happening.

What do I do on the days when these systems just don't work and my brain feels completely fried regardless?

Look, I’ve been there. Some days, the systems just fail and your brain feels like it’s running on 1% battery. When that happens, stop fighting it. Pushing through only creates more friction and burnout. Instead, pivot to “maintenance mode.” Do the bare minimum, tackle the low-stakes tasks like laundry or deleting emails, and call it a day. Sometimes the most productive thing you can do is actually rest so you can reset.

Productivity and remote work tips for home.

Staying Productive and Balanced While Working From Home

I’m so tired of seeing those “aesthetic” desk setups on TikTok—you know, the ones with the $300 ergonomic chairs, three different monitors, and a perfectly curated succulent collection that somehow makes working from home look like a spa day. Let’s be real: most of those influencers are selling a fantasy, not a workflow. When you’re actually trying to hit a deadline while your neighbor is mowing their lawn and your laundry is staring you down from the corner, you don’t need a lifestyle overhaul; you just need some actual, functional remote work tips that don’t require a massive budget or a degree in interior design.

I’m not here to give you a lecture on “optimizing your professional output” or some other corporate nonsense. Instead, I want to share the unpolished systems I’ve built as a freelancer to keep my brain from melting by 2:00 PM. We’re going to talk about the small, repeatable habits that actually reduce the friction of your day—things like managing your digital clutter and setting boundaries that actually stick. My goal is to help you stop feeling like you’re constantly in a state of work-from-home emergency and finally get your life back on track.

Table of Contents

Stop the Chaos Realistic Remote Work Tips for Actual Sanity

Stop the Chaos Realistic Remote Work Tips for Actual Sanity.

First off, let’s talk about your physical space. I used to think I could work from my bed or the couch, but that was a massive mistake. When your workspace is also where you sleep or binge-watch Netflix, your brain never actually enters “work mode,” and you never truly exit it. You don’t need a massive, expensive studio to make this work; just some simple home office setup ideas like a dedicated desk and a decent chair can change everything. Even if it’s just a specific corner of the dining table, having a designated “zone” helps signal to your brain that it’s time to focus.

Beyond the desk, you have to be aggressive about setting boundaries. Without a commute to act as a buffer, the lines between “employee” and “human being” get incredibly blurry. I’ve had to learn the hard way that if I don’t intentionally close my laptop and walk away, I’ll just keep scrolling through emails until 9 PM. Prioritizing remote work burnout prevention isn’t just a luxury; it’s a survival tactic. Set a hard stop time, put your phone in another room, and actually live your life once the clock hits five.

Ditch the Clutter With High Functioning Home Office Setup Ideas

Ditch the Clutter With High Functioning Home Office Setup Ideas

Look, I’m a firm believer that your environment dictates your headspace. If your desk is a graveyard of half-empty coffee mugs and tangled charging cables, your brain is going to feel just as messy. I used to think I could just “power through” the clutter, but it turns out that visual noise is a massive drain on your focus. One of my favorite home office setup ideas is the “one-in, one-out” rule for my desktop: if I bring a new notebook or gadget into my workspace, something else has to be tucked away in a drawer.

To really level up, you need to prioritize ergonomics over aesthetics, even if it means sacrificing that perfectly curated Instagram look. Invest in a decent monitor riser or even just a stack of sturdy books to get your screen at eye level. It’s a small tweak, but it’s a total game-changer for remote work burnout prevention because it stops that mid-afternoon neck ache from ruining your flow. Keep your essential tools—like my trusty multi-tool and a dedicated power bank—within arm’s reach, but keep everything else out of sight.

Unpolished Remote Work Productivity Hacks That Actually Stick

Unpolished Remote Work Productivity Hacks That Actually Stick

Let’s be real: most productivity advice feels like it was written by someone who has never actually sat on a couch trying to answer emails in sweatpants. I’ve tried the rigid “hustle culture” schedules, and they always fail by Tuesday. Instead, I’ve leaned into remote work burnout prevention by using a “low-stakes” approach to my task list. Rather than a massive, intimidating to-do list, I pick three non-negotiables for the day. If I hit those, I’m done. It stops that constant, low-grade anxiety that you should always be doing more.

Another thing that actually changed the game for me was setting physical boundaries for my brain. Since I don’t have a commute to signal the end of the day, I started a “shutdown ritual.” This might be as simple as closing every single tab on my laptop or putting my work charger in a drawer. It sounds small, but it’s a vital part of maintaining work-life balance for remote employees because it tells my brain, “Hey, we aren’t on the clock anymore.” It’s about creating those tiny, repeatable systems that keep the job from bleeding into your actual life.

How to Master Managing Remote Team Communication Without the Noise

The biggest trap with remote work is the feeling that you have to be “on” every single second just to prove you’re actually working. If your Slack notifications are pinging every thirty seconds, you aren’t being productive—you’re just being interrupted. I’ve learned that managing remote team communication isn’t about more meetings; it’s about setting boundaries on how we use our tools. If it isn’t an emergency, it probably doesn’t need a direct message right this second.

I’m a huge advocate for “asynchronous-first” communication. Instead of jumping into a frantic Zoom call every time a question pops up, try documenting your thoughts in a shared doc or a project management tool. This gives everyone space to breathe and actually process information before responding. It’s one of those small remote work productivity hacks that prevents that constant, low-grade anxiety of feeling like you’re falling behind a live chat thread. By creating these intentional pauses, you aren’t just getting more done; you’re actively practicing remote work burnout prevention by reclaiming your focus.

Real Systems for Remote Work Burnout Prevention and Balance

The biggest lie we’re told about working from home is that it’s all pajamas and zero stress. In reality, without a physical commute to act as a buffer, the lines between “living” and “working” don’t just blur—they completely disappear. I used to find myself answering Slack messages at 9 PM just because my laptop was sitting right there on the coffee table. To fix this, I had to implement actual remote work burnout prevention systems rather than just “trying harder” to relax. One thing that changed everything for me was a hard digital sunset; at a specific time, the laptop goes into a drawer, and the notifications stay silenced.

It’s not about being a productivity robot; it’s about protecting your energy so you don’t end up hating your job by Tuesday. You need to create psychological boundaries that mimic a commute. Even if it’s just a ten-minute walk around the block or making a specific cup of tea to signal the end of the day, these small rituals are essential for maintaining work-life balance for remote employees. If you don’t intentionally close the office, the office will never leave you.

The "low-friction" toolkit for your workday

  • Stop relying on your brain to remember everything; if it’s not in a digital task manager or a physical notebook, it doesn’t exist. I stopped trying to “remember” my to-do list months ago, and my anxiety levels dropped instantly.
  • Create a “shutdown ritual” to signal to your brain that the workday is over. Whether it’s closing all your tabs, tidying your desk, or just physically walking away from your laptop, you need a hard boundary so you don’t end up doom-scrolling work emails at 9 PM.
  • Use the “one-touch” rule for small tasks. If an email or a Slack message takes less than two minutes to handle, do it immediately instead of letting it sit in your inbox and cluttering your mental space.
  • Batch your deep work. I try to block out specific chunks of time where my notifications are completely muted. Constant pings are the fastest way to kill your momentum and make a two-hour task take all afternoon.
  • Dress for the vibe, not the Zoom call. You don’t need a blazer, but getting out of your pajamas and into actual clothes helps shift your mindset from “resting” to “working,” which makes it way easier to actually focus.

The bottom line: making it work for you

Stop trying to replicate a 9-to-5 office vibe; instead, build custom systems that work with your actual energy levels and lifestyle.

Your physical space and your digital boundaries are your best defense against the feeling that you’re “always on.”

Forget perfectionism—focus on small, repeatable habits that keep your workflow steady without turning your home into a high-stress zone.

Final Thoughts on Making It Work

Look, we’ve covered a lot of ground here, from fixing your physical workspace to actually protecting your mental bandwidth. The reality is that remote work isn’t about finding one magical app or a perfect standing desk; it’s about the small, unglamorous systems you put in place every single day. Whether you’re refining your communication style to cut through the Slack noise or setting hard boundaries so your living room doesn’t feel like a permanent office, the goal is the same: reducing friction. If you can master your environment and your schedule, you stop reacting to your job and start actually managing it.

At the end of the day, don’t feel like you have to implement every single one of these hacks by Monday morning. Adulthood is already heavy enough without trying to build a perfect, Pinterest-worthy lifestyle overnight. Just pick one thing—maybe it’s clearing your desk at 5 PM or turning off notifications during lunch—and see how it feels. Systems are meant to serve you, not become another chore on your to-do list. You’ve got this, and I promise that once you start building these small habits, the chaos will slowly start to feel a lot more like control.

Frequently Asked Questions

How do I actually separate my "work brain" from my "home brain" when my desk is literally five feet from my bed?

Honestly, when your office is basically your bedroom, you have to create “sensory boundaries” since you don’t have a commute to reset. I use a specific desk lamp that stays on only during work hours; when it’s off, my brain knows the shift is over. I also swap my “work” headphones for something else the second I clock out. If you can’t move the desk, change the vibe. Trigger the shift through ritual.

What do I do when my manager expects me to be online 24/7 just because they can see my Slack status?

Look, the “green dot anxiety” is real, but you can’t let a Slack status dictate your nervous system. First, stop apologizing for being away. Set clear, predictable boundaries in your status—like “Focus Mode until 2 PM” or “Offline for Lunch.” If they push, have a direct conversation: “I’ve noticed an expectation to respond instantly; I find I’m actually much more productive when I have dedicated deep-work blocks without notifications.” Protect your time like it’s your job.

I've tried all the productivity apps, but they just feel like more digital clutter—is there a way to stay organized without needing a complex tech stack?

Honestly, I get it. I used to spend more time “organizing” my Notion boards than actually doing my work. If an app feels like a chore, it’s not a tool—it’s just more digital noise. Try going analog for a bit. A single physical notebook or even just a stack of post-its for your top three daily tasks can be way more effective. If you can’t see it or touch it, it’s easy to ignore. Keep it tactile, keep it simple, and stop overcomplicating your brain.

Tips on how to look better on video calls.

How to Master Your Next Video Conference

I used to think that looking professional on screen meant spending a fortune on a ring light or a high-end DSLR setup that would probably just end up gathering dust in my closet. Honestly, the “tech guru” advice on how to look better on video calls is usually just a way to gatekeep looking put-together behind a paywall. I spent way too much time stressing over expensive gear, only to realize I still looked like a grainy, shadowy ghost in my own living room because I was sitting in a dark corner. It’s exhausting to feel like you need a film studio just to participate in a Tuesday morning sync.

I’m over the hype, and I know you are too. Instead of suggesting you go out and buy a whole new ecosystem of gadgets, I want to show you how to use what you actually have. I’ve spent months refining a few simple, repeatable systems to fix my lighting, framing, and background without breaking the bank. This isn’t about being perfect; it’s about reducing the friction of digital meetings so you can just show up, look like a human, and get back to your actual life.

Table of Contents

Stop the Panic How to Look Better on Video Calls

Stop the Panic How to Look Better on Video Calls

First, let’s talk about the physical setup, because looking like a grainy shadow in a dark room is a bad look. You don’t need a studio-grade professional webcam lighting setup to fix this; honestly, just facing a window during the day does 90% of the heavy lifting. If you’re working at night, grab a cheap desk lamp and position it behind your monitor so the light hits your face directly rather than coming from above, which creates those weird, ghostly shadows under your eyes.

Next, stop the “laptop-on-the-couch” habit. When your camera is looking up your nose, it’s uncomfortable for everyone involved. I always stack a few thick textbooks under my laptop to get the lens at eye level—it’s one of the easiest ways to master the best camera angles for remote work without spending a dime. Finally, do a quick sweep of your space. You don’t need a minimalist showroom, but minimizing background distractions like a pile of laundry or a messy bed helps people focus on what you’re actually saying instead of your chores.

The Lighting Cheat Code a Professional Webcam Lighting Setup

The Lighting Cheat Code a Professional Webcam Lighting Setup

Look, you don’t need to drop a paycheck on a studio ring light to stop looking like a grainy ghost in a basement. Most of the time, your struggle is just physics. If the main light source in your room is behind you, you’re basically just a dark silhouette, and frankly, it’s hard to build rapport when no one can see your face. The easiest fix? Face a window. Natural light is the ultimate hack for improving webcam resolution without buying a single piece of gear. If it’s nighttime, grab a desk lamp, pull it slightly in front of you, and aim it toward a wall or a white surface to bounce the light back. This softens the shadows so you don’t look like you’re auditioning for a noir film.

If you’re serious about a permanent professional webcam lighting setup, aim for a three-point approach but keep it low-maintenance. A small LED panel or even a cheap clip-on light can work wonders if it’s positioned at eye level. Whatever you do, avoid overhead ceiling lights—they create those weird, heavy shadows under your eyes that make you look like you haven’t slept since 2022. Just keep the light in front of you, and you’re halfway there.

Fixing Your View Best Camera Angles for Remote Work

Fixing Your View Best Camera Angles for Remote Work

The biggest mistake I see people making is the “chin view.” If your laptop is sitting flat on your desk, you’re essentially giving everyone on the call a view looking straight up your nose. It’s awkward, it’s unflattering, and it’s definitely not the vibe you want for a client meeting. To find the best camera angles for remote work, you need to get that lens at eye level. Grab a couple of thick textbooks or a dedicated laptop stand to prop your device up. You want the camera to feel like it’s meeting you eye-to-eye, not looking up from your lap.

Once you’ve fixed the height, take a second to check your framing. You don’t need to be a cinematographer, but you should avoid having a massive amount of dead space above your head. Aim for a shot where your head and shoulders are centered, leaving just a little breathing room at the top. While you’re at it, try minimizing background distractions by tilting the camera slightly away from any messy laundry piles or open closet doors. A clean, intentional frame makes you look way more composed, even if you’re actually wearing pajama bottoms.

Clearing the Chaos Minimizing Background Distractions Once and for All

Once you’ve nailed the lighting and the angles, you have to deal with the literal mess behind you. I used to think a little bit of “lived-in” charm was fine, but there is a massive difference between a cozy bookshelf and a pile of laundry that’s been sitting on a chair for three days. If your background is a visual rollercoaster, people aren’t actually listening to your pitch; they’re wondering when you’re going to do your chores. Minimizing background distractions is less about having a Pinterest-perfect home and more about removing the visual noise that pulls focus away from you.

If you’re renting or stuck in a cramped studio, don’t sweat it. You don’t need a dedicated home office to look professional. A simple, clean wall or even a strategically placed room divider does the trick. If all else fails, lean on technology: use a high-quality blur effect or a subtle virtual background. Just a heads-up though—if you go the digital route, make sure you have a decent professional webcam lighting setup so your edges don’t look glitchy and weird. Keep it simple, keep it clean, and let your words do the heavy lifting.

The Unpolished Guide to Improving Video Call Audio Quality

Here’s the thing: you can have the most professional webcam lighting setup and the perfect camera angle, but if you sound like you’re broadcasting from inside a wind tunnel, no one is going to listen to a word you say. Bad audio is a massive energy drain for everyone on the call. It forces people to lean in, strain, and work twice as hard to process your sentences, which kills the flow of any productive meeting.

If you want to start improving video call audio quality without spending a fortune on studio gear, start with your environment. I’ve learned the hard way that a big, empty room with hard floors is an acoustic nightmare. If you can’t move to a carpeted space, even just throwing a rug down or sitting near a bookshelf can help dampen that annoying echo. Most importantly, stop using your laptop’s built-in mic if you can help it. Even a cheap pair of wired earbuds with a decent mic will beat your computer’s internal hardware every single time. It’s a tiny tweak that makes a massive difference in how you’re perceived.

The Final Polish: 5 Small Tweaks for a Better Presence

  • Stop staring at your own face. It’s a total distraction and makes you look like you’re checking yourself out. Find a tiny post-it note, draw an arrow on it, and stick it right next to your camera lens. Train yourself to look at that arrow instead of your own thumbnail; it makes you look engaged and actually makes eye contact with everyone else.
  • Ditch the overhead lights. If you have a bright light directly above your head, you’re going to end up with dark shadows under your eyes that make you look exhausted. Turn off the ceiling light and stick to a lamp at eye level or natural light from a window. It softens everything and makes you look way more human.
  • Check your color palette before you hit ‘Join.’ If you’re wearing a shirt that’s the exact same color as your background, you’re basically going to look like a floating head. Pick a color that actually pops against your wall so there’s a clear distinction between you and the room.
  • Fix your “resting face.” We’ve all been there—staring blankly at the screen while someone else talks, looking like we’re buffering. You don’t need a massive, fake grin, but just a slight lift in your expression or a small nod goes a long way in showing you’re actually present and not just zoning out.
  • Master the “quick-fix” grooming kit. Keep a small kit near your desk—maybe some oil-blotting sheets or a decent moisturizer. If you realize halfway through a meeting that your forehead is looking a little too shiny under the ring light, a quick 10-second fix can save you from feeling self-conscious for the rest of the call.

The TL;DR: Your Video Call Cheat Sheet

Stop overthinking the tech; just face a window for light, prop your laptop on a stack of books to hit eye level, and make sure your mic isn’t muffled by a sweater.

Focus on the “friction points”—if your background is a mess or your lighting makes you look like a ghost, fix those first so you can actually focus on the meeting instead of your appearance.

Build a repeatable setup so you aren’t scrambling five minutes before a call; once you have your lighting and angle dialed in, it becomes a 30-second habit rather than a morning crisis.

Stop Overthinking It and Just Start

Look, we’ve covered a lot of ground here, and I know it might feel like a lot to manage before your next 9:00 AM. But if you strip everything back, it really just comes down to a few high-impact tweaks: get some decent light on your face, raise that laptop so you aren’t staring up your nose, and make sure your audio doesn’t sound like you’re underwater. You don’t need a studio-grade setup or a professional-grade background to look competent. Once you have these basic systems in place, you stop wasting mental energy worrying about how you appear and start focusing on the actual work you’re there to do.

At the end of the day, the goal isn’t to look like a polished influencer; it’s about removing the friction that makes you feel self-conscious. When you control your environment, you reclaim your confidence. You aren’t just “fixing your camera,” you’re building a sustainable way to show up as your best self without the constant low-level anxiety of a messy room or bad lighting. So, grab a lamp, fix your angle, and go kill it. You’ve got this.

Frequently Asked Questions

I don't have a fancy ring light or a studio setup—can I actually make this work with just my phone and whatever is in my living room?

Honestly, you don’t need a studio setup to look decent. I’ve done plenty of calls using nothing but a window and a stack of books. If you’re using your phone, just prop it up on a shelf or a pile of books at eye level—don’t let it peek up your nostrils. For light, just face a window during the day. If it’s dark, grab a desk lamp, take the shade off, and point it at the wall behind your screen to bounce soft light back onto your face. It’s low-tech, but it works.

What do I do if my internet connection is trash and makes my video look like a pixelated mess regardless of my lighting?

Look, if your bandwidth is trash, no amount of fancy lighting is going to save you from looking like a Minecraft character. When the connection dips, your computer prioritizes audio over video to keep you from dropping the call entirely. My hack? Turn off your camera for a few minutes to let the signal stabilize, or go into your settings and manually lower your video resolution. It’s better to be a slightly blurry human than a frozen, pixelated mess.

How do I stop looking like a total zombie when I'm stuck on back-to-back calls from 9 to 5?

Honestly, the “zombie look” is usually just a combination of dehydration and bad lighting. If you’re stuck in back-to-back meetings, keep a heavy moisturizer and some eye drops at your desk—it’s a total game changer for that tired, crusty skin vibe. Also, try to step away from the screen for even five minutes between calls. If you don’t reset your eyes and grab some water, you’re going to look drained by noon.

Delicious healthy snack ideas for everyone.

Deliciously Healthy Snacks That Don’t Taste Like Diet Food

We’ve all been there: it’s 3:30 PM, your brain feels like it’s running on a low battery, and suddenly that bag of processed chips in the pantry looks like the only thing that can save your life. I used to treat my afternoon hunger like a total emergency, which usually resulted in a massive sugar crash that ruined my entire evening. The problem isn’t your willpower; it’s that you don’t have a system for healthy snack ideas that actually satisfy you without requiring a culinary degree. When you’re staring down a deadline or a long commute, you need food that works as hard as you do, not something that just fills the void for twenty minutes.

I’m done with the gatekeeping and the overly complicated “superfood” recipes that take an hour to prep. In this post, I’m breaking down five of my personal go-to snacks that are genuinely low-effort and easy to keep on hand. These aren’t just random suggestions; they are functional fuel systems designed to keep your energy stable and your brain sharp. Let’s get into the actual, unpolished ways I keep myself fed so I can stay focused on what actually matters.

Table of Contents

The "No-Brainer" Greek Yogurt Bowl

The "No-Brainer" Greek Yogurt Bowl.

I used to think healthy snacking meant something complicated, like making a smoothie bowl from scratch every morning. In reality, I just keep a big tub of plain Greek yogurt in the fridge and grab a handful of whatever is in the pantry. The key is the protein-to-fiber ratio; if you just eat yogurt alone, you’ll be hungry again in twenty minutes, so you have to add some texture.

Adult Lunchables (The Charcuterie Hack)

Adult Lunchables (The Charcuterie Hack) snack tray.

There is something deeply satisfying about eating off a little tray, and honestly, it’s the easiest way to hit multiple food groups without actually “cooking.” I call these my emergency kits. I prep a container with some sliced deli turkey or hard-boiled eggs, a handful of almonds, and some cucumber slices. It’s basically a deconstructed meal that you can graze on while you’re working through your inbox.

Apple Slices with a Nut Butter Buffer

Apple Slices with a Nut Butter Buffer.

If you’re like me and you crave something sweet and crunchy when you’re stressed, apples are your best friend. But eating an apple by itself is a mistake—it’s mostly just sugar and water, which leads to a quick spike and an even quicker crash. You need a fat source to slow down that digestion. I always keep a jar of almond or peanut butter right on my desk for this exact reason.

The Savory Roasted Chickpea Fix

Sometimes you just need something salty and savory, and I refuse to believe that “healthy” has to mean “bland.” I started roasting chickpeas in my oven because it’s a massive batch job that lasts all week. You just toss them in olive oil and whatever spices you have—sea salt, smoked paprika, or even garlic powder—and let them get crispy. They are the ultimate replacement for greasy potato chips.

Edamame for Easy Protein

If you haven’t tried keeping a bag of frozen edamame in your freezer, you are seriously missing out on the easiest snack on the planet. You don’t even need to “prep” them in the traditional sense; you just microwave a bowl for a couple of minutes and you’re good to go. It’s one of those minimalist food wins that requires almost zero mental load.

The bottom line

Stop waiting for a “hunger emergency” to happen; the goal is to have your snacks ready before your brain starts spiraling.

Focus on high-protein, low-effort combinations so you actually stay full instead of just chasing a quick sugar high.

Build a system that works for your actual life, not some aesthetic Pinterest version of eating healthy that takes an hour to prep.

The Bottom Line

At the end of the day, having a snack system isn’t about being a health guru or following some rigid, aesthetic meal plan you saw on TikTok. It’s just about reducing the friction between you and feeling human again. Whether you’re grabbing a handful of almonds when you’re stuck in a meeting or keeping Greek yogurt in the fridge for those post-gym crashes, the goal is to have something ready so you don’t end up face-first in a bag of chips at 9 PM. If you can keep even just two of these options stocked in your pantry or bag, you’ve already won half the battle against the mid-afternoon slump.

Don’t feel like you have to overhaul your entire kitchen overnight to make this work. Start small—maybe just pick one snack from this list and make sure it’s always part of your weekly rotation. Adulthood is basically just a long series of small decisions, and choosing to fuel yourself properly is one of the easiest ways to stop the chaos before it starts. You don’t need a perfect diet; you just need a system that actually fits into your real, messy, busy life. You’ve got this.

Frequently Asked Questions

How do I prep these snacks ahead of time without them getting soggy or gross by Wednesday?

The trick is to stop thinking about “prepping” as one big bowl of mush. For anything crunchy, keep the wet and dry stuff separate until the moment you eat it—I swear by those tiny reusable condiment containers. If you’re doing veggie sticks, put a little hummus at the bottom of a jar and stand the veggies upright in it. It keeps them crisp and prevents that sad, soggy texture by mid-week.

Are there any budget-friendly swaps if I can't find all these specific ingredients at my local grocery store?

Look, I totally get it. Not everyone has a boutique grocery store around the corner, and honestly, some of these “superfoods” are just overpriced marketing. If a specific nut or seed is too pricey, don’t sweat it. Swap expensive almonds for peanuts or sunflower seeds—the protein hit is basically the same. If organic berries are breaking your budget, just grab whatever fruit is on sale. The goal is the system, not the specific brand name.

What should I do if I'm a sweet tooth person—can I still stick to these systems without constantly craving sugar?

Look, I’m a sucker for something sweet too, so I get it. You don’t have to white-knuckle your way through life without sugar, you just need a better system for it. Instead of fighting the craving, lean into “smart sweets.” Keep things like dark chocolate, frozen grapes, or Greek yogurt with a drizzle of honey in your rotation. It satisfies the itch without that massive glucose spike and crash that ruins your productivity.

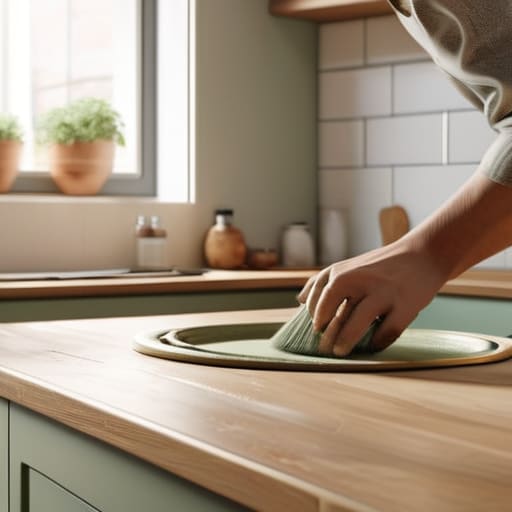
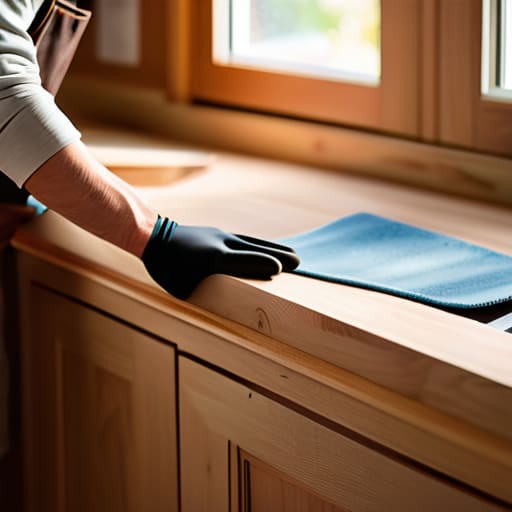
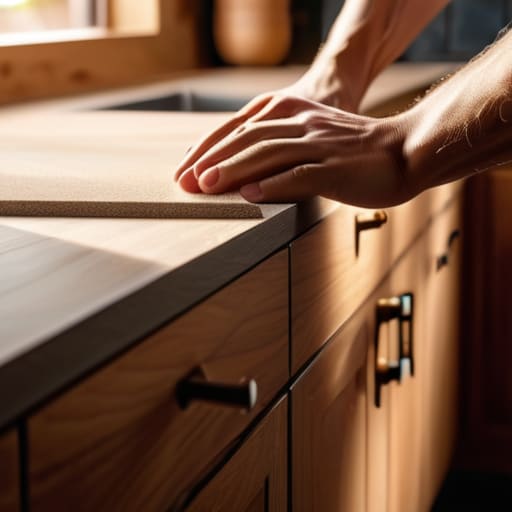
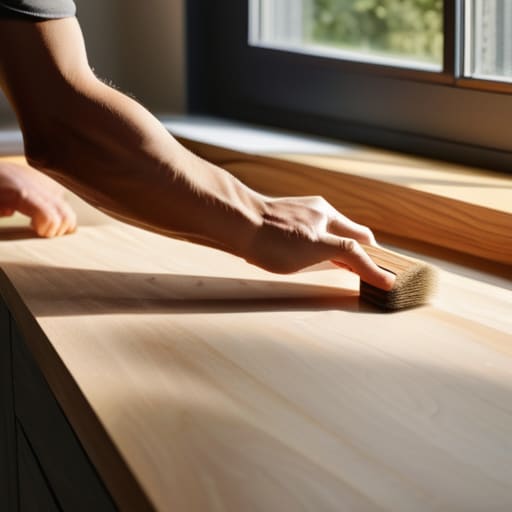
Tips on how to refinish furniture.

Transforming Old Furniture Through Simple Refinishing Techniques

I was halfway through a massive, dusty pile of thrifted mid-century sideboards when I realized something: most people make furniture restoration way more complicated than it actually needs to be. I used to think you needed a professional-grade workshop and a decade of carpentry experience just to fix a scratched tabletop, but that’s honestly just gatekeeping. Learning how to refinish furniture isn’t about mastering complex woodworking; it’s about having a reliable system so you don’t end up with a sticky, uneven mess that looks worse than when you started.

In this guide, I’m stripping away the fluff and giving you the actual, unpolished steps to transform your tired old pieces without losing your mind. We aren’t going to talk about expensive, specialized machinery that takes up half your apartment; instead, I’m focusing on the essential tools and the repeatable workflow I use in my own space. You’ll learn how to prep surfaces properly, choose the right finishes, and avoid the common mistakes that turn a fun weekend project into a total headache. Let’s get into it.

Table of Contents

Guide Overview

Total Time: 1-2 days
Estimated Cost: $40-80
Difficulty: Beginner

Tools & Supplies

  • Sandpaper (various grits for smoothing)
  • Screwdriver (for removing hardware)
  • Paintbrush or foam roller (for application)
  • Microfiber cloth (for dust removal)
  • Wood filler (small container for cracks)
  • Primer (1 quart for base coat)
  • Paint or stain (1 quart for finish)
  • Degreaser or TSP (small amount for cleaning)

Step-by-Step Instructions

  • 1. First, you need to clear your space and get your gear ready. I’m talking about a well-ventilated area—ideally a garage or a spot near an open window—because the fumes from strippers and stains are no joke. Grab some drop cloths to protect your floors, a few different grits of sandpaper (start with 80 and work your way up to 220), some tack cloths, and your chosen finish. Having everything laid out before you start prevents that mid-project panic where you realize you’re missing a crucial tool.
  • 2. Next, you have to strip the old finish. If the piece has layers of thick, old varnish or paint, don’t even bother trying to sand it all off immediately; you’ll just burn out your sander and waste your afternoon. Use a chemical stripper to melt away the old gunk. It’s a bit messy, but it’s the most efficient way to get down to the raw wood without doing a mountain of manual labor. Just follow the product instructions carefully and scrape the residue off with a putty knife once it starts bubbling.
  • 3. Now comes the sanding phase, and this is where most people try to cut corners. Don’t. You need to sand in the direction of the wood grain, not across it, or you’ll leave these permanent swirl marks that will show up even more once you apply the stain. Start with a coarser grit to level everything out and gradually move to finer grits. By the time you hit 220, the surface should feel as smooth as silk.
  • 4. Once you’re done sanding, you have to clean the hell out of the piece. Even a tiny bit of dust left behind will turn your final finish into a sandpaper-textured mess. Use a vacuum first, then wipe the whole thing down with a tack cloth or a microfiber cloth dampened with mineral spirits. I always do a double check here; if you see a single speck of dust, keep wiping until it’s spotless.
  • 5. Now you can apply your stain or your new topcoat. If you’re using a stain, apply it with a lint-free rag or a foam brush, working in even strokes. If you want a darker look, you can do multiple light coats rather than one heavy, gloopy one. If you’re going for a more modern, natural look, you might skip the stain and go straight to a clear wax or poly. Just remember to work quickly to avoid lap marks where the wet edges meet.
  • 6. Finally, let it cure. This is the hardest part for me because I want to see the finished product immediately, but patience is literally the most important tool in your kit. If you apply a topcoat too soon or start using the piece before the finish has actually hardened, you’ll end up with sticky spots or a ruined surface. Give it at least 24 to 48 hours in a dust-free environment before you even think about putting a lamp or a book on it.

Understanding How to Refinish Furniture

Understanding How to Refinish Furniture: Wood Prep

Before you dive into the actual labor, you need to understand that you aren’t just changing a color; you’re essentially performing surgery on the piece. The biggest mistake I see people make is rushing the prep work because they want to get to the “fun” part of seeing a new color. If you don’t prioritize wood grain preparation, you’re going to end up with a finish that looks blotchy and amateur. You have to respect the material. If the piece has layers of heavy, old-school buildup, you might need to look into specific wood stripping techniques rather than just trying to sand through it all. Sanding through thick layers of old finish is a recipe for a burnt-out arm and a ruined project.

Think of this stage as setting the foundation for your entire system. If you’re working with a piece that has a deep, beautiful pattern, your goal is to strip away the damage without erasing the character. Whether you’re removing old varnish or dealing with a stubborn shellac, the goal is a clean, naked surface. Take your time here. If the base isn’t smooth, no amount of expensive stain is going to save you from a mediocre result.

Key Things to Know

Key Things to Know: Wood Stripping.

Before you dive in, let’s talk about the stuff people usually gloss over until it’s too late. First, you need to be realistic about what you’re actually working with. If you’re dealing with a piece that has layers of thick, heavy-duty buildup, don’t try to brute-force it with just sandpaper. You’ll end up exhausted and with a finish that looks patchy. This is where wood stripping techniques actually save your sanity; using a chemical stripper to get the bulk of that old gunk off first makes the subsequent sanding much more manageable.

Also, please, for the love of all things functional, pay attention to your abrasives. I see so many people grab one random sheet of sandpaper and call it a day, but you really need a solid furniture sanding grits guide to follow. You can’t just jump from a coarse grit straight to a fine one and expect a smooth surface. If you skip the middle steps, you’ll see swirl marks under your final coat that will drive you crazy. Lastly, keep an eye on your environment—dust is the ultimate enemy of a clean finish, so try to work in a space where you can actually control the airflow.

Five things I wish I knew before my first project

  • Don’t cheap out on sandpaper. I used to think a basic pack from the grocery store would do the trick, but you’ll end up fighting the wood for hours. Invest in a decent variety of grits—you’re going to need them.
  • Test your finish on a hidden spot first. Seriously. I once finished an entire thrifted nightstand only to realize the stain turned out a weird muddy purple because of how it reacted to the original sealant. Check a corner or the underside first so you aren’t blindsided.
  • Prep your workspace like your sanity depends on it. This is messy work. If you aren’t covering your floors with drop cloths and taping off your walls, you’re going to be finding wood dust in your coffee for the next three weeks.
  • Work in small, controlled sections. It’s tempting to try and slap the stain or paint on all at once to get it over with, but that’s how you get those annoying lap marks and uneven patches. Take your time and do one side at a time.
  • Embrace the “ugly” phase. There is a middle point in every project where the piece looks absolutely trashed—the old finish is half-gone and the wood looks raw and weird. Don’t panic and quit; just keep going, because the final result is worth the mid-project crisis.

The Bottom Line

Don’t rush the prep work; spending extra time sanding and cleaning now is the only way to avoid a finish that looks like a DIY disaster later.

Invest in decent tools rather than the cheapest options you can find, because bad equipment just turns a simple project into a frustrating, long-winded mess.

Accept that it won’t be perfect on the first try, and focus more on building a repeatable process than obsessing over every tiny imperfection.

The Final Polish

Applying The Final Polish to furniture.

At the end of the day, refinishing furniture isn’t about achieving some Pinterest-perfect, magazine-ready masterpiece on your very first try. It’s about the system: prepping the surface properly, staying patient through the drying phases, and not cutting corners on the sanding. If you follow the steps—even when you’re tempted to skip the primer or rush the topcoat—you’re going to end up with a piece that actually lasts. Remember, the goal is to build something durable that fits your space, rather than just slapping some paint over old mistakes and hoping for the best.

I know it can feel overwhelming when you’re staring at a stripped-down piece of wood and a messy workspace, but trust me, the payoff is so worth the chaos. There is something incredibly grounding about taking something that was headed for a landfill and giving it a second life through your own hands. Don’t let the fear of a little dust or a failed stain stop you from starting. Once you get that first successful project under your belt, you’ll realize that mastering these small systems is what actually makes adulthood—and DIY—feel manageable. Now, go grab your multi-tool and get to work.

Frequently Asked Questions

Is it actually worth the effort to refinish cheap particle board or IKEA furniture, or should I just stick to solid wood?

Honestly? For particle board or IKEA pieces, don’t bother with a full refinish. It’s usually just a thin veneer or laminate, and once you sand it, you’re basically hitting raw sawdust. It’s a massive headache that rarely looks good. Instead, skip the heavy lifting and just use chalk paint or contact paper. Save your energy and your multi-tool for the solid wood pieces—that’s where the real payoff actually lives.

How do I know if I'm dealing with real wood veneer or if the whole piece is solid, and does that change my approach?

This is the million-dollar question, and honestly, it changes everything. To check, look at the edges or the underside. If you see a seam or a thin layer meeting a different wood grain, it’s veneer. If the grain pattern wraps perfectly around the corner, you’re likely looking at solid wood. If it’s veneer, be incredibly careful with sanding—you can sand right through that thin layer in seconds, which is a total nightmare to fix.

What’s the best way to deal with that weird, lingering smell of chemical strippers or strong stains in a small apartment?

Honestly, that chemical funk is the absolute worst, especially when your living room is also your bedroom. First, crack every window you have—airflow is your best friend. If you can, set up a box fan facing out to pull the air through. For the lingering scent, skip the fake floral sprays; they just make it smell like “chemical flowers.” Instead, set out bowls of white vinegar or activated charcoal. They actually absorb the odor rather than masking it.

How to clean up your digital life.

A Weekend Plan to Declutter Your Digital World

I was sitting at my desk last Tuesday, staring at a desktop screen so cluttered with random screenshots and “final_v2_FINAL” files that I actually felt a physical sense of anxiety. It wasn’t just a messy screen; it was a digital weight that made me want to close my laptop and never open it again. We’re constantly told that “going digital” makes us more efficient, but nobody talks about the mental tax of managing a thousand unorganized tabs and a bloated inbox. If you’re looking for a way to learn how to clean up your digital life without spending six hours on a complicated productivity app you’ll never use, I get it.

I’m not here to sell you on a $50-a-month subscription or some aesthetic “minimalist” lifestyle that requires a total personality transplant. Instead, I’m going to give you the unpolished, actual steps I use to keep my own freelance chaos under control. We’re going to build some small, repeatable systems that actually stick—stripping away the fluff so you can finally stop fighting your devices and start actually using them.

Table of Contents

Stop the Digital Bleed How to Clean Up Your Digital Life

Stop the Digital Bleed How to Clean Up Your Digital Life

First, we have to address the immediate leak: your desktop and your phone. We all do it—we download a PDF, leave it on the desktop, and then wonder why we can’t find anything three days later. Start by aggressively cleaning up smartphone clutter; if you haven’t opened an app in three months, delete it. It’s not just about aesthetics; it’s about reducing the mental noise every time you unlock your screen. Move your “must-have” tools to the home dock and hide everything else in folders or the app library.

Next, let’s tackle the heavy hitters: your files and your inbox. I’m not a fan of the “inbox zero” cult, but I am a huge advocate for a functional email inbox zero strategy that actually works. Instead of trying to hit zero every single day, aim for systematic triage. Use filters to automatically move newsletters to a “Read Later” folder so they don’t hit your primary view. Once your inbox is under control, apply those same principles to your files. Stop using “Final_v2_REAL_final” as file names; create a simple folder hierarchy based on year or project type. It’s about building a structure that actually holds up when things get busy.

Taming the Chaos Managing Digital Overwhelm Without the Burnout

Taming the Chaos Managing Digital Overwhelm Without the Burnout

The biggest mistake I see people make is trying to fix everything in one frantic Sunday afternoon. You sit down with high hopes, realize you have 4,000 unread emails, and end up closing your laptop in a state of total defeat. That’s not a system; that’s a recipe for burnout. Real managing digital overwhelm isn’t about a massive, one-time purge. It’s about micro-habits. I like to treat my digital space like my physical apartment: you wouldn’t try to deep-clean a whole house in twenty minutes, so don’t expect to fix your entire cloud presence in one sitting.

Instead, pick one “zone” per week. One week, focus entirely on cleaning up smartphone clutter—delete the apps you haven’t opened since 2022 and clear out those 500 identical screenshots. The next week, tackle your desktop files. If you try to do it all at once, you’ll just end up paralyzed by the sheer scale of the mess. Consistency beats intensity every single time. Keep the sessions short, keep them focused, and most importantly, keep them sustainable.

The Real Email Inbox Zero Strategy for Busy Humans

The Real Email Inbox Zero Strategy for Busy Humans

Look, I used to think “Inbox Zero” was some mythical productivity cult thing that only people with zero lives could achieve. I’d stare at those little red notification bubbles and feel my heart rate spike. But after years of treating my inbox like a junk drawer, I realized the mistake wasn’t the volume of mail—it was my lack of a system. A real email inbox zero strategy isn’t about deleting everything; it’s about making sure every single email has a designated “home” or a specific action attached to it.

If an email requires a response that takes under two minutes, do it immediately. If it’s just information you need to reference later, move it to a dedicated folder and archive the thread. Stop letting your primary inbox act as a permanent to-do list. By aggressively using filters and unsubscribing from every single newsletter that doesn’t actually add value to your life, you’re essentially automating your mental bandwidth. It’s less about being a perfectionist and more about managing digital overwhelm so that when you actually open your laptop, you aren’t immediately greeted by a mountain of noise.

No More Lost Files Cloud Storage Organization Tips That Stick

We’ve all been there: you’re staring at a “Storage Full” notification for the third time this week, frantically deleting blurry screenshots of memes just to make room for a single PDF. Most of us treat our Google Drive or iCloud like a digital junk drawer, tossing files in wherever they fit and praying we can find them later. But if you want actual cloud storage organization tips that don’t feel like a second job, you have to stop organizing by file type and start organizing by project or life stage. Instead of a massive “Documents” folder, try creating high-level buckets like “Career/Freelance,” “Personal/Finance,” and “Archive [Year].”

The secret to making this stick is the one-in, one-out rule. Every time you upload a new batch of photos or important documents, take sixty seconds to prune the dead weight. This is a massive part of cleaning up smartphone clutter and ensuring your digital footprint doesn’t become a graveyard of useless data. If you haven’t opened a file in two years, move it to a “Deep Archive” folder or just let it go. Keep your active workspace lean, and you’ll stop wasting mental energy hunting for things that should have been easy to find.

Reclaiming Your Focus by Minimizing Screen Time and Smartphone Clutter

We need to talk about the black hole in your pocket. Most of us treat our phones like a junk drawer—a messy collection of apps we haven’t opened in six months and notifications that trigger a tiny spike of cortisol every time the screen lights up. Cleaning up smartphone clutter isn’t just about aesthetics; it’s about reclaiming the mental bandwidth you’re currently losing to mindless scrolling. Start by ruthlessly auditing your home screen. If an app doesn’t serve a daily purpose or a specific, intentional function, move it to an app library or just delete it.

Once the visual chaos is gone, focus on the sensory overload. Go into your settings and turn off every single non-human notification. You don’t need a buzz to tell you someone liked a photo or that a sale is happening at a store you rarely visit. By minimizing screen time through these small, structural changes, you stop being reactive to your device and start using it as a tool again. It’s about moving from constant distraction back to intentionality.

The Digital Deep Clean: 5 Low-Effort Wins for a Smoother Workflow

  • Audit your notification settings once a week. If an app isn’t essential for your actual job or an immediate life update, turn off its ability to buzz in your pocket. Every “ping” is just a tiny tax on your focus.
  • Implement a “one-in, one-out” rule for your desktop. If you download a new file for a project, move an old, finished one into a permanent folder or the trash. A cluttered desktop is just visual noise that makes you feel behind before you’ve even started working.
  • Unsubscribe from the noise. Don’t just delete those marketing emails; actually hit the unsubscribe link. If you haven’t opened a newsletter in three weeks, it’s not “information,” it’s just digital clutter waiting to distract you.
  • Set up a “Downloads” purge ritual. Every Friday afternoon, clear out your downloads folder. It’s usually a graveyard of PDFs and random screenshots that you only needed for five minutes. Moving them to their proper homes (or deleting them) prevents that end-of-month panic.
  • Standardize your naming conventions. Stop saving things as “final_v2_REAL_final.pdf.” Pick a simple format—like YYYY-MM-DD_ProjectName—and stick to it. It feels tedious for ten seconds, but it saves you hours of frantic searching later.

The TL;DR: Making it Stick

Don’t try to overhaul your entire digital existence in one Saturday; pick one system—like your inbox or your desktop—and get it stable before moving to the next.

Automation is your best friend, so use tools that do the heavy lifting for you instead of trying to manually organize every single file and notification.

Aim for “functional,” not “perfect”—your digital space just needs to be a tool that serves you, not a curated museum that takes more energy to maintain than it saves.

The Long Game

Look, I’m not going to pretend that one afternoon of deleting old emails and organizing your cloud storage is going to magically fix your entire life. Digital clutter is a living thing; it grows back the second you stop paying attention. But by implementing these systems—taming your inbox, setting boundaries with your phone, and actually filing your documents instead of letting them rot in your “Downloads” folder—you’ve built a defensive perimeter around your focus. You’ve moved from being reactive to being proactive, and that shift is everything. The goal isn’t to have a perfectly aesthetic, empty desktop every single day, but to ensure that when you actually need to get work done, the tools you need are right where they belong.

At the end of the day, this isn’t about being a productivity robot or achieving some unattainable state of digital perfection. It’s about reclaiming your headspace. Your devices should be tools that serve your life, not chaotic black holes that suck away your time and sanity. If you feel overwhelmed, just pick one small thing to fix today—maybe it’s just unsubscribing from those five annoying newsletters—and start there. You don’t need to do it all at once to make a massive difference in how you feel. Just build the systems, keep them simple, and let your digital life finally start working for you instead of against you.

Frequently Asked Questions

I’ve already gone through all this, but how do I actually stop the clutter from creeping back in after a month?

The secret is that “cleaning” isn’t a one-time event; it’s just maintenance. If you don’t schedule it, the chaos will definitely win. I personally set a recurring “Digital Reset” calendar invite for the last Sunday of every month. It’s just thirty minutes to clear my desktop, empty the trash, and unsubscribe from those junk emails I accidentally clicked on. Treat it like doing the dishes—if you let them pile up, the kitchen becomes unusable.

What do I do with all those old, random files that I’m too scared to delete but know I’ll never actually use again?

The “fear of deleting” is real—it’s basically digital hoarding under the guise of being prepared. Here’s my system: create one folder named “The Vault” or “Archive [Year].” Dump everything you’re scared to lose in there, then move it to a cheap external hard drive or a secondary cloud tier. Get it off your active desktop and out of your sight. If you don’t touch it in six months, you’ve officially given yourself permission to let it go.

Is there a way to do this without spending an entire, soul-crushing weekend staring at a screen?

Honestly? Yes. If you try to do it all in one sitting, you’re going to burn out by noon and end up scrolling TikTok instead. My rule is the “15-minute micro-burst.” Set a timer, tackle one tiny thing—like unsubscribing from five junk emails or clearing your desktop icons—and then walk away. It’s about building momentum through tiny, repeatable wins rather than one massive, soul-crushing marathon. Small systems beat big marathons every time.

Learn how to make coffee at home.

Brew Better Coffee at Home Than Your Local Barista

I’m so tired of seeing $80 pour-over kits and “essential” espresso machines that take up half your counter space just to tell you that you need a PhD in fluid dynamics to get a decent cup. Honestly, the gatekeeping in the specialty coffee world is exhausting; you don’t need a laboratory setup to figure out how to make coffee at home that actually tastes good. Most of those influencers are just selling you a lifestyle of complicated gadgets, but for the rest of us who just want to function before 9:00 AM, that’s just unnecessary friction.

I’m not here to lecture you on bean acidity or the precise atmospheric pressure of your kitchen. Instead, I’m going to give you the actual, unpolished systems I’ve spent years testing to make my morning routine seamless. We’re going to skip the hype and focus on the low-effort, high-reward setups that actually work when you’re running late. My goal is to help you master the basics so you can stop overthinking it and start enjoying a better cup of coffee without the constant state of emergency.

Table of Contents

Understanding How to Make Coffee at Home

Understanding How to Make Coffee at Home

Before we get into the actual steps, we need to clear something up: making great coffee isn’t about owning a $1,000 espresso machine or mastering some complex science experiment. It’s really just about managing a few variables so you don’t end up with a cup that tastes like battery acid. Most of the time, when people struggle, it’s because they’re treating the process like a chore rather than a simple system.

The first thing you need to realize is that your gear matters less than your ingredients. If you aren’t using freshly ground coffee beans, you’re essentially fighting a losing battle from the start. Once those beans sit in a bag for months, they lose the oils that actually make them taste good.

Beyond the beans, you’ll want to look into the best coffee brewing methods that actually fit your lifestyle. Are you someone who wants a quick pour-over while checking emails, or do you prefer the slow ritual of a French press? Once you pick a method, we’ll focus on the small tweaks—like water temperature and grind size—that actually move the needle on flavor without making it feel like a second job.

Key Things to Know

Key Things to Know: beginner coffee equipment.

Before you go out and drop two hundred dollars on a fancy espresso machine, let’s get one thing straight: you don’t need a lab-grade setup to avoid a mediocre cup. The biggest mistake I see people make is overcomplicating the gear before they even understand the basics. If you’re just starting out, focus on coffee brewing equipment for beginners that actually serves a purpose—think a simple French press or a pour-over dripper. These are low-maintenance, easy to clean, and they won’t take up your entire kitchen counter.

The real secret to improving your coffee flavor profile isn’t actually the machine; it’s the ingredients. If you’re using pre-ground, stale stuff from a grocery store tin, you’re fighting a losing battle. You really want to invest in freshly ground coffee beans and grind them right before you brew. It’s a tiny extra step in your morning routine, but it’s the single most effective way to stop your coffee from tasting like burnt cardboard. Once you nail the beans, everything else just falls into place.

Practical Tips and Steps

Practical Tips and Steps for coffee brewing.

If you’re just starting out, don’t feel like you need to drop a paycheck on a professional espresso machine. Honestly, the best way to begin is by focusing on the basics of coffee brewing equipment for beginners, like a simple French press or a pour-over dripper. The real secret, though, isn’t the gear—it’s the freshness. I can’t stress this enough: buy whole beans and grind them right before you brew. Using freshly ground coffee beans is the single fastest way to stop your morning cup from tasting like bitter cardboard.

Once you have your gear, it’s all about the workflow. If you’re using a pour-over, pay attention to your water; if it’s boiling hot, you’ll scorch the grounds, but if it’s too cool, you won’t get any flavor out of them. Aiming for a perfect coffee water temperature—usually around 195°F to 205°F—is a total game changer. It’s a small tweak, but it makes the difference between a drink that’s just “fine” and one you actually look forward to.

Common Mistakes to Avoid

The biggest mistake I see people make—and I’ve definitely been guilty of this—is treating coffee like an afterthought. If you’re using pre-ground, stale stuff that’s been sitting in your pantry for three months, you’re basically fighting a losing battle. To actually see a difference, you need to invest in freshly ground coffee beans and grind them right before you start. It sounds like an extra step, but it’s the single most effective way to stop your morning cup from tasting like bitter sawdust.

Another thing that trips people up is getting too obsessed with expensive gear before they even know what they like. You don’t need a $500 espresso machine to get started; you just need to understand the basics of coffee brewing equipment for beginners, like a decent French press or a pour-over dripper. Also, watch your water. If you’re using boiling water straight off the stove, you’re likely scorching the grounds. Aiming for that perfect coffee water temperature—just off the boil—is the difference between a smooth cup and one that tastes like burnt rubber.

Final Thoughts

At the end of the day, don’t let the gear or the “science” of it all intimidate you. You don’t need a kitchen full of expensive gadgets to get started; honestly, some of the best coffee brewing methods are the ones that require almost zero setup. My biggest piece of advice is to just start experimenting. If your cup tastes a little off, don’t scrap the whole routine—just tweak one thing, like the grind size or the water temp, and see what happens.

The real secret to improving your coffee flavor profile isn’t some gatekept secret; it’s usually just the basics. Using freshly ground coffee beans and paying attention to your water temperature will do more for your morning ritual than any high-tech machine ever could. Adulthood is chaotic enough as it is, so treat your coffee routine as a small, reliable win rather than another chore on your to-do list. Get your system down, find what works for your palate, and just enjoy the quiet moment before the day gets loud.

5 Small Tweaks for a Much Better Morning Brew

  • Stop using pre-ground coffee if you can help it. I know, it’s an extra step, but grinding your beans right before you brew is the single biggest way to stop your coffee from tasting like bitter cardboard.
  • Get a decent scale. You don’t need a lab-grade setup, but eyeballing scoops is how you end up with a cup that’s either way too watery or way too intense. Consistency is everything.
  • Watch your water temperature. If you’re using boiling water straight off the stove, you’re basically scalding the beans and ruining the flavor. Let it sit for about a minute after it boils before you pour.
  • Clean your gear like you actually mean it. Old coffee oils build up in your carafe or French press and start tasting rancid. A quick rinse with soap after every use saves your next batch from being gross.
  • Store your beans in a cool, dark spot—not the freezer. I see people doing this all the time, but the moisture fluctuations in a freezer can actually mess with the beans. A simple airtight container in the pantry is plenty.

The TL;DR of your new morning routine

Stop overcomplicating it—you don’t need a $500 espresso machine to enjoy a good cup; you just need fresh beans and a consistent method.

Focus on the variables you can actually control, like water temperature and grind size, rather than stressing over expensive gear.

Build a system that works for your actual life, whether that’s a quick pour-over or a reliable French press, so you aren’t fighting your kitchen every morning.

Final Thoughts on Your Morning Routine

At the end of the day, making better coffee isn’t about owning a thousand-dollar espresso machine or mastering complex extraction ratios that require a lab coat. It’s really just about the basics: getting decent beans, using the right water temperature, and actually following a consistent process instead of just winging it every morning. We talked about everything from avoiding those bitter mistakes to setting up a workflow that doesn’t feel like a chore. If you can nail those few core pillars, you’ve already bypassed 90% of the struggle. You don’t need to be a professional barista to have a cup that actually tastes like something worth waking up for; you just need to stop treating your morning caffeine like an afterthought.

I know that when life feels chaotic, even a simple kitchen task can feel like one more thing on an endless to-do list. But that’s exactly why I’m so obsessed with these little systems. When you master your coffee routine, you aren’t just making a drink; you’re reclaiming a small, predictable moment of peace before the world starts demanding things from you. Don’t feel pressured to be perfect right out of the gate. Just pick one thing to improve tomorrow—maybe it’s just buying fresher beans or timing your pour—and build from there. You’ve got this, and honestly, your future, well-caffeinated self will definitely thank you.

Frequently Asked Questions

Is it actually worth buying a burr grinder, or can I just stick to the cheap blade ones for now?

Look, I get the temptation to save a few bucks with a blade grinder, but if you’re serious about the ritual, the burr grinder is non-negotiable. Blade grinders basically just smash your beans into uneven chunks—some powder, some boulders—which makes your coffee taste both bitter and sour at the same time. It’s frustrating. If you can swing it, get a burr grinder. It’s the single biggest way to stop wasting good beans.

How do I know if my water is actually the problem if my coffee still tastes weird?

If your coffee tastes “off,” your water is a huge suspect. Here’s the quick test: grab a glass of filtered water and brew a cup using a different, high-quality bottled water (like spring water) just once. If the taste shifts from “weird” to “actually good,” your tap water is likely too hard or chlorinated. It’s a frustrating variable, but honestly, if your water tastes like a swimming pool, your expensive beans won’t save you.

What’s the easiest way to clean my equipment without spending an hour scrubbing it every single morning?

Honestly, the secret is to stop treating cleaning like a weekend chore and start treating it like a quick reset. Don’t let the grounds sit; rinse your carafe and filter immediately after you pour your first cup. If you use a French press, a quick swirl with hot water and a drop of soap takes ten seconds. If you clean as you go, you’re looking at a 30-second rinse, not an hour of scrubbing.

Achieving peak performance through deep work.

The Art of Deep Work: How to Achieve Peak Cognitive Performance

I was sitting at my desk last Tuesday, surrounded by three half-empty coffee mugs and the frantic, rhythmic ping of Slack notifications, feeling like my brain was being slowly sanded down by a thousand tiny distractions. I had a massive content strategy due, but instead of actually writing, I spent forty minutes spiraling through emails and checking my phone like it was an emergency. We’ve been sold this lie that being “busy” is the same as being productive, but let’s be real: most of us aren’t working, we’re just performing work. We treat every single notification like a 911 call, making it physically impossible to ever enter a state of deep work without feeling like we’re breaking some unwritten rule of digital availability.

I’m not here to sell you a $50 productivity planner or tell you to move to a monastery in the mountains. I want to give you the actual, unpolished systems I use to shut out the noise and get my best stuff done without burning out by noon. This is about building a repeatable workflow that protects your focus, strips away the performative busyness, and actually lets you finish your day feeling like you accomplished something real.

Table of Contents

Stop the Constant Emergency Why Your Brain Needs Deep Work

Stop the Constant Emergency Why Your Brain Needs Deep Work

The problem is that most of us spend our entire day in a state of “reactive mode.” You check an email, glance at a Slack notification, and suddenly your brain is trying to juggle ten different things at once. This is where attention residue explained becomes a real nightmare; every time you switch from a task to a quick scroll or a text, a piece of your focus stays stuck on that distraction. You think you’re being productive by multitasking, but you’re actually just forcing your brain to constantly reboot, which is incredibly draining.

When you constantly jump between tabs, your cognitive load management goes straight out the window. It’s like trying to run a high-end software program on a laptop that has fifty other useless apps open in the background—eventually, the whole system just starts lagging. To actually produce something meaningful, you have to stop the mental whiplash. You need to cultivate a space where you can lean into flow state productivity, allowing your mind to actually settle into a rhythm instead of constantly redlining just to keep up with the noise.

The Real Cost of Attention Residue Explained

The Real Cost of Attention Residue Explained.

Here’s the thing about that “quick check” of your email or a five-second glance at a Slack notification: it’s never actually just five seconds. When you jump from a complex task to a trivial one, your brain doesn’t just instantly switch gears. A part of your focus stays stuck on what you were doing before. This is attention residue explained in its simplest, most annoying form. It’s like trying to run a heavy software program on your laptop while you have fifty other tabs open in the background; eventually, the whole system starts to lag.

This constant context switching creates a massive amount of mental friction. Instead of actually making progress, you’re spending all your energy just trying to reorient yourself every time you look back at your original project. It makes monotasking vs multitasking a very clear battle, because multitasking is essentially just a polite way of saying you’re sabotaging your own brain. By failing to protect your focus, you’re inadvertently spiking your cognitive load, leaving you feeling absolutely fried by 3:00 PM without having actually accomplished anything meaningful.

Mastering Cognitive Load Management Without the Fluff

Mastering Cognitive Load Management Without the Fluff

Here’s the deal: your brain isn’t a supercomputer with infinite RAM. Every time you jump from a complex spreadsheet to a quick Slack check, you’re forcing your mind to reload a massive amount of data. This is where cognitive load management actually matters. If you’re constantly switching gears, you’re essentially running too many heavy apps in the background of your consciousness, which eventually leads to that mid-afternoon brain fog where you’re staring at a screen but nothing is actually happening.

To fix this, you have to stop treating monotasking vs multitasking like a debate and start treating it like a survival strategy. I’ve found that the most effective way to protect my mental energy is to aggressively curate my environment before I even sit down. This means more than just putting my phone in another room; it means eliminating digital distractions at the source—closing unnecessary tabs, silencing non-urgent notifications, and setting a singular, clear intention for the next 90 minutes. When you stop the constant context-switching, you finally give your brain the breathing room it needs to actually sink into a productive rhythm.

Ditching Multitasking for Real Flow State Productivity

We’ve been sold this lie that being a “multitasker” is a superpower, but in reality, it’s just a fast track to burnout. When you’re jumping between a client email, a Slack notification, and a half-finished spreadsheet, you aren’t actually doing three things at once; you’re just rapidly degrading the quality of all of them. This constant switching is the enemy of flow state productivity. Instead of trying to juggle everything, I’ve started leaning heavily into monotasking vs multitasking—basically, picking one single, meaty task and refusing to look at anything else until it’s done.

It sounds intimidating at first, especially when your phone is buzzing in your pocket, but the shift is massive. When you commit to one lane, you stop fighting your own brain for focus. By eliminating digital distractions—and I mean actually putting my phone in another room, not just flipping it face down—I’ve found that I can finish in two hours what used to take me an entire afternoon of distracted “busy work.” It’s not about working harder; it’s about finally giving your brain the permission to actually settle in.

Unpolished Systems for Eliminating Digital Distractions Forever

Look, I’m not going to tell you to delete all your apps and move to a cabin in the woods. That’s not realistic for anyone trying to maintain a career in the real world. Instead, I focus on building friction. If my phone is sitting face-up on my desk, I’ve already lost. I’ve started using a “phone jail” (basically just a drawer in another room) during my most intense hours. It sounds dramatic, but eliminating digital distractions isn’t about willpower; it’s about removing the temptation before your brain even has a chance to crave that hit of dopamine.

I also swear by a “digital minimalist” desktop setup. I clear every single icon off my computer screen except for the tools I actually need for the task at hand. When your workspace is a cluttered mess of random files and open browser tabs, your cognitive load management goes straight out the window. By keeping my digital environment stripped back and intentional, I can actually slide into a rhythm without getting pulled into a rabbit hole of “just one quick email” that ends up costing me forty minutes of focus.

My Low-Friction Blueprint for Actually Hitting Flow

  • Stop relying on willpower and start using “time blocking” as a hard rule. Don’t just say you’ll work in the morning; physically carve out a two-hour chunk on your calendar and treat it like a doctor’s appointment you can’t reschedule.
  • Create a physical “deep work” ritual to signal to your brain that the shift has started. For me, it’s putting on a specific pair of noise-canceling headphones and clearing everything off my desk except my laptop and a glass of water—no clutter, no distractions.
  • Use a “shutdown ritual” to close out your brain’s open loops. Before you stop working, write down exactly where you left off and what the very first step is for tomorrow. It stops that nagging feeling of unfinished business from bleeding into your downtime.
  • Curate a “distraction-free” digital environment before you even sit down. This means turning on ‘Do Not Disturb,’ closing every single browser tab that isn’t essential to the task at hand, and putting your phone in another room entirely—not just face down, but actually out of sight.
  • Embrace the “boring” periods of your day. If you’re standing in line or waiting for a coffee, resist the urge to reflexively pull out your phone for a hit of dopamine. Learning to be okay with a little bit of mental stillness makes it way easier to transition into intense focus later.

The TL;DR: How to Actually Protect Your Brain

Stop treating your focus like an infinite resource; you have to aggressively guard your deep work blocks like they’re non-negotiable appointments, because if you don’t schedule them, your inbox will schedule them for you.

Accept that “context switching” is a lie that makes you feel busy while actually draining your battery—pick one task, commit to the friction of getting started, and let the attention residue clear before you move on.

Build systems that work for your real life, not some idealized version of yourself; use digital boundaries and physical cues to signal to your brain that it’s time to stop reacting and start actually producing.

Getting Real With Your New System

Look, I’m not saying you need to go live in a cabin in the woods and throw your smartphone into a lake to be productive. That’s not realistic for anyone with a job or a social life. But we’ve spent this whole time breaking down why you can’t just keep “winging it” while your brain is constantly redlining from attention residue and digital noise. We talked about managing your cognitive load, ditching the multitasking myth, and actually building unpolished, functional systems that protect your focus. At the end of the day, deep work isn’t about some magical productivity hack; it’s about reclaiming your agency from a world that is literally designed to steal your attention every five seconds.

If you feel overwhelmed right now, just start small. Don’t try to schedule eight hours of monk-like silence tomorrow morning. Just try thirty minutes. Try one hour. Build the system bit by bit, like I do with my DIY projects, until it becomes second nature. You deserve to have a brain that isn’t constantly fried by the end of the workday. Once you stop reacting to every single ping and start intentionally directing your energy, you’ll realize that adulthood doesn’t have to feel like a chaotic emergency. You’ve got this.

Frequently Asked Questions

How am I supposed to find deep work blocks if my job literally requires me to be responsive on Slack all day?

Look, I get it. The “always-on” Slack culture feels like a trap. But being “responsive” doesn’t have to mean being instant. Try setting two or three specific “office hours” blocks in your status where you’re actively checking messages, then go dark for 90 minutes. Communicate it clearly: “Deep work mode until 2 PM; if it’s a literal house fire, call me.” Most people respect boundaries once you actually signal them.

Is it actually possible to get into a flow state if I'm working in a loud coffee shop or a shared apartment?

Honestly? It’s possible, but you can’t just wing it. If you’re in a loud cafe or a chaotic apartment, you have to build a sensory barrier. I rely heavily on noise-canceling headphones and a specific “focus” playlist to signal to my brain that it’s time to lock in. You aren’t trying to eliminate the noise—that’s impossible—you’re just trying to create a predictable, controlled environment that drowns out the unpredictability of your surroundings.

How do I stop the "brain itch" or the urge to check my phone the second a task gets even slightly difficult?

That “brain itch” is just your dopamine-seeking brain trying to escape discomfort. When a task gets hard, your brain views it as a threat and looks for an easy exit—usually your phone. To fight this, I use a “micro-buffer.” Instead of reaching for your device, tell yourself you’ll sit with the frustration for just two minutes. Usually, once you push past that initial friction, the itch fades and you actually find your flow.

Page 6 of 16

Powered by WordPress & Theme by Anders Norén