Category: Food Page 3 of 4

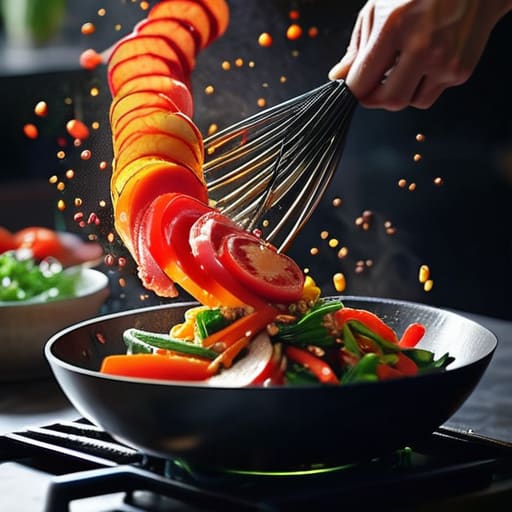
Learn how to make a stir fry.

The Art of the Improvisational Stir-fry

Can we please stop pretending that you need a professional-grade carbon steel wok and a literal flame ritual just to get a decent meal on the table? I see these recipe blogs acting like you need twenty different specialized sauces and a degree in culinary arts just to figure out how to make a stir fry that doesn’t end up as a soggy, sad mess in a bowl. Honestly, the gatekeeping around “authentic” techniques is exhausting, especially when you’re just trying to eat something nutritious after a ten-hour workday without losing your mind.

I’m not here to give you a lecture on high-heat physics or sell you a $200 pan you’ll never use. Instead, I’m giving you the actual, unpolished system I use to get dinner done in under twenty minutes using whatever is currently wilting in my crisper drawer. I’ll show you the exact order of operations to keep your veggies crisp and your protein juicy, stripping away the fluff so you can master how to make a stir fry that actually works for your life.

Table of Contents

Understanding How to Make a Stir Fry

Understanding How to Make a Stir Fry.

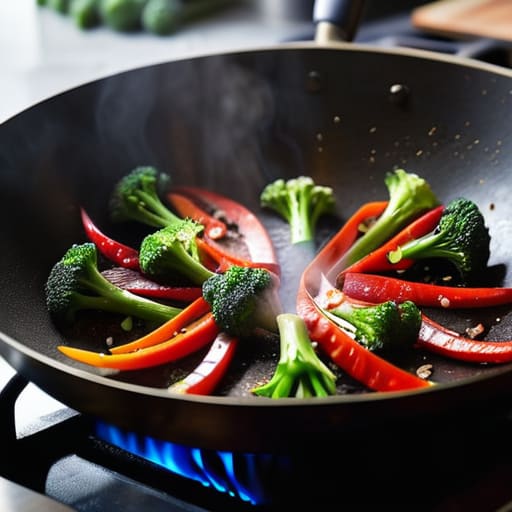
Before you even touch a burner, you need to understand that stir frying isn’t just “fast cooking”—it’s about managing heat and timing so nothing turns into a soggy mess. The whole point is to achieve that slightly charred, crisp-tender texture that makes the dish feel professional. To get there, you have to master high heat cooking methods; if your pan isn’t screaming hot, your veggies will just steam in their own juices, and nobody wants a sad, grey pile of broccoli.

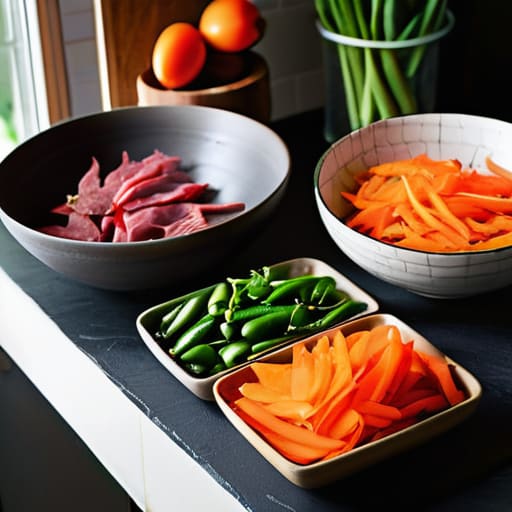
The real secret, though, is that 90% of the work happens before the heat is even on. I’m a huge believer in extreme prep. Because everything moves so fast once the oil hits the pan, you need your vegetable prep for stir fry to be completely finished—chopped, measured, and organized in bowls next to the stove. You also can’t forget the aromatics. Getting your garlic, ginger, and scallions ready to go means you won’t be frantically peeling things while your protein is literally burning in the pan. It’s all about building a system that keeps up with the flame.

Key Things to Know

Key Things to Know: Stir Fry Prep

Before you even turn on the stove, there are two things that will either make this a success or a total kitchen disaster: your prep and your heat. First, let’s talk about vegetable prep for stir fry. You cannot be chopping carrots while your garlic is already burning in the pan. Everything needs to be sliced, measured, and sitting in bowls next to you. If you’re working with protein, I highly recommend looking into the velveting meat technique. It sounds fancy, but it’s basically just a quick marinade with cornstarch that keeps your chicken or beef from turning into rubbery bits once it hits the pan.

The second thing is the temperature. This isn’t a low-and-slow braise; you need to embrace high heat cooking methods. If your pan isn’t screaming hot, you’re just steaming your food, which leads to that sad, soggy texture we’re all trying to avoid. Also, don’t forget your essential stir fry aromatics. A little bit of fresh ginger and smashed garlic goes a long way in making your kitchen smell like a legitimate takeout spot instead of just a random Tuesday night.

Practical Tips and Steps

Practical Tips and Steps for stir fry.

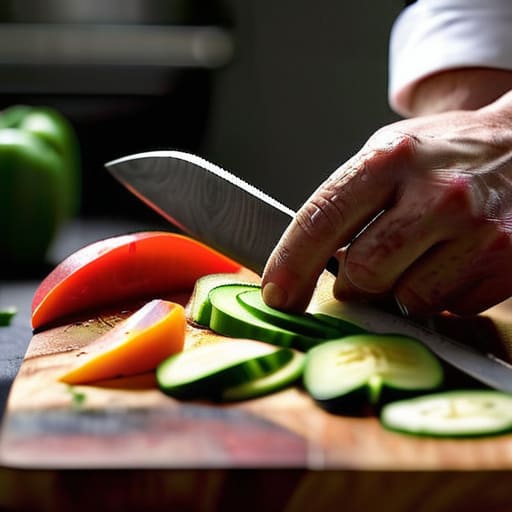
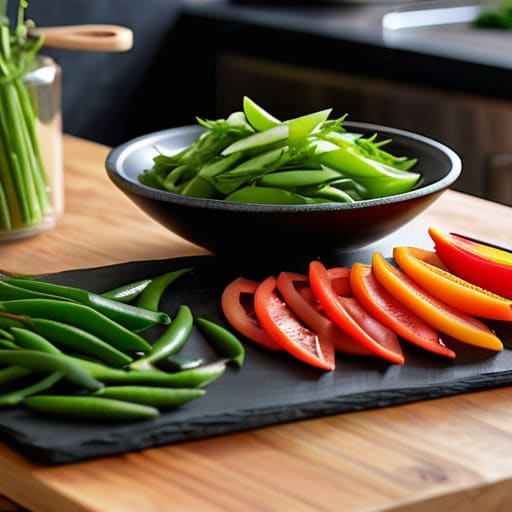
The biggest mistake I see people make is trying to cook while they’re actually standing at the stove. If you wait until the oil is smoking to start chopping, you’ve already lost. You need to nail your vegetable prep for stir fry before you even turn on the burner. Get everything sliced, diced, and organized into little bowls. I’m talking about your proteins, your greens, and those essential stir fry aromatics like garlic and ginger. Once that heat hits the pan, things move incredibly fast, and you won’t have time to hunt for a knife.

When you’re ready to actually cook, remember that this is all about high heat cooking methods. You want that sizzle the second the food hits the pan. If you’re working with chicken or beef and want that restaurant-quality texture, look into the velveting meat technique—it’s a total game-changer for keeping things tender. Just toss your prepped ingredients in, hit them with your sauce, and keep everything moving. It’s not about being a chef; it’s just about having a solid workflow so you aren’t scrambling mid-meal.

Common Mistakes to Avoid

The biggest mistake I see people make is treating a stir fry like a slow-simmered stew. If you crowd your pan with too much stuff at once, the temperature drops, and instead of a crisp sear, you end up with a sad, watery mess. You really need to embrace high heat cooking methods to get that signature char. If you aren’t working in small batches, you’re basically just boiling your vegetables in their own juices, and nobody wants that.

Another thing that trips people up is the “prep panic.” If you’re chopping garlic while your oil is already smoking, you’ve already lost the battle. You need to have all your vegetable prep for stir fry finished and your sauces pre-mixed before you even turn on the stove. I also see a lot of people skipping the aromatics or using low-quality oils that burn too fast. Don’t skimp on the ginger or garlic; those essential stir fry aromatics are what actually make the dish taste like restaurant quality rather than just a pile of warm veggies.

Final Thoughts

At the end of the day, don’t let the fear of a messy kitchen or a ruined meal stop you from trying this. Cooking isn’t about achieving Michelin-star perfection every single night; it’s about having a reliable system that feeds you when you’re tired. Whether you’re mastering high heat cooking methods or just throwing together whatever is left in your crisper drawer, the goal is to make dinner feel less like a chore and more like a win.

If you find yourself getting overwhelmed, just come back to the basics. Focus on your vegetable prep for stir fry ahead of time so you aren’t scrambling while the pan is smoking, and keep your pantry stocked with the essentials. Once you get the rhythm of the heat and the timing down, it becomes muscle memory. You don’t need a fancy culinary degree to make something delicious—you just need a hot pan and a bit of confidence. You’ve got this.

My Non-Negotiable Rules for Stir Fry Success

  • Prep everything before you even touch the stove. Seriously. Once that pan gets hot, you won’t have time to chop a carrot or find the soy sauce while your garlic is burning. Have every single ingredient in little bowls ready to go.
  • Don’t overcrowd the pan. If you dump a mountain of veggies in at once, the temperature drops, they start steaming instead of searing, and you end up with a soggy mess instead of that nice char we’re actually looking for. Work in batches if you have to.
  • Cut everything into uniform, bite-sized pieces. It’s not just about aesthetics; it’s about physics. If your broccoli florets are huge and your snap peas are tiny, one will be raw and the other will be mush by the time you’re done.
  • Dry your proteins and veggies. Excess moisture is the enemy of a good stir fry. If your shrimp or sliced chicken is still dripping with water, it’s going to boil in the pan. Pat them dry with a paper towel first to ensure you get that golden-brown crust.
  • Master the heat. You want your pan screaming hot. If you’re using a standard non-stick pan, keep a close eye on it, but if you’ve got a wok or cast iron, let it get to that point where it’s almost smoking. That high heat is what creates that specific “restaurant” flavor.

The Quick Cheat Sheet

Prep everything before you touch the stove—once that pan gets hot, there’s no turning back, so have your veggies chopped and your sauce mixed.

Don’t crowd the pan; if you dump too much in at once, you’ll end up steaming a soggy mess instead of getting those crispy, delicious edges.

High heat is your best friend, but keep things moving constantly so nothing burns while you’re trying to manage the different textures.

The Bottom Line

At the end of the day, a great stir fry isn’t about following a rigid, complicated recipe from a cookbook; it’s about mastering the rhythm of the pan. Just remember to prep everything before you even turn on the heat, keep your sauce components ready to go, and don’t be afraid to crank up the temperature to get that essential sear. If you manage your ingredients and your heat, you’ve already won half the battle. It’s really just a system of preparation that prevents the mid-cook panic and ensures you aren’t staring at a pile of raw broccoli while your garlic burns in the pan.

I know that sometimes the idea of “cooking from scratch” feels like just another chore on an already overflowing to-do list, but once you have this system down, it becomes a massive time-saver rather than a drain. Stop looking at dinner as a high-stakes performance and start seeing it as a way to fuel yourself without the burnout. You don’t need to be a professional chef to make something that tastes incredible and actually nourishes you. Just trust your instincts, keep your tools handy, and remember that even a slightly charred veggie is better than a takeout bag that leaves you feeling sluggish. You’ve got this.

Frequently Asked Questions

Can I use a regular non-stick skillet if I don't own a wok?

Look, if you don’t own a wok, don’t panic. You can absolutely use a regular non-stick skillet. Just keep in mind that a wok is designed to distribute intense heat quickly, so with a flat pan, you’ll need to work in smaller batches. If you crowd the skillet with too many veggies at once, they’ll steam and get mushy instead of getting that nice sear. Small batches = better texture. You’ve got this.

How do I stop my veggies from turning into a mushy mess?

The secret is all about timing and heat management. Stop throwing everything into the pan at once. Hard veggies like carrots or broccoli need a head start, while leafy greens or peppers only need a minute. Also, don’t crowd the pan—if you pile it too high, the veggies steam in their own moisture instead of searing. Keep the heat high, work in batches if you have to, and pull them off the heat while they still have a bit of a crunch.

What’s the best way to prep everything ahead of time so I'm not scrambling while the pan is smoking hot?

The secret is “mise en place”—which is just a fancy chef way of saying “get your life together before you turn on the stove.” Seriously, don’t even touch the heat until every single thing is in its own little bowl. Chop your veggies, slice your protein, and whisk your sauce in a separate container first. If you’re chopping while the oil is smoking, you’ve already lost the battle. Prep everything, then just execute.

Beginner guide on how to cook fish.

A Beginner’s Guide to Cooking Fish Without the Stress

I used to think that learning how to cook fish meant I needed a culinary degree, a $100 cast-iron skillet, and a level of zen I simply didn’t possess. I remember standing in my kitchen last Tuesday, staring at a piece of salmon like it was a ticking time bomb, terrified that one wrong move would leave me with something that tasted like wet cardboard or, worse, a salmonella-filled disaster. There is so much gatekeeping in the food world, acting like if you aren’t poaching something in a specialized broth, you’re doing it wrong. Honestly? It’s exhausting, and it’s why most of us just default to chicken every single time.

I’m over the intimidation factor, and I think you are too. In this guide, I’m stripping away the chef-speak to give you a repeatable system for getting it right every time, regardless of the species. We aren’t going to obsess over fancy gadgets or impossible techniques; instead, I’m sharing the actual, unpolished steps to ensure your protein is flaky, seasoned, and completely stress-free. Let’s get into the mechanics of how to cook fish without turning your kitchen into a chaotic mess.

Table of Contents

Stop Overcomplicating It the Low Stress System for How to Cook Fish

Stop Overcomplicating It the Low Stress System for How to Cook Fish

First off, let’s get one thing straight: you don’t need a culinary degree or a set of expensive copper pans to pull this off. Most people freeze up because they think they need to master complex techniques, but the secret is actually just reducing the variables. If you’re just starting out, stick to the easy types of fish for beginners like salmon or tilapia. These are much more forgiving when you’re still figuring out your timing.

To keep things from turning into a kitchen disaster, my go-to system starts with the prep. I always pat my fillets bone-dry with a paper towel before they even touch the heat; this is the absolute best way for preventing fish from sticking to the pan and ensuring you actually get that crispy skin instead of a sad, gray mess. Once the pan is hot and the oil is shimmering, don’t be afraid to be aggressive with your spices. Finding the best way to season fish usually just means a heavy hand with kosher salt, cracked pepper, and maybe a squeeze of lemon at the very end. Keep it simple, keep it clean, and stop overthinking the process.

Ditch the Decision Fatigue With These Essential Types of Fish for Beginners

Ditch the Decision Fatigue With These Essential Types of Fish for Beginners

The biggest mistake I see people make is walking into the grocery store and staring blankly at the seafood counter like they’re trying to solve a calculus equation. If you’re feeling overwhelmed, ignore the exotic, expensive stuff for now. You want to focus on reliable types of fish for beginners that are forgiving and don’t require a culinary degree to master. Salmon is my absolute go-to because it’s fatty enough to stay juicy even if you slightly overcook it, and tilapia is incredibly cheap and neutral, making it a perfect blank canvas for whatever spices you have in the pantry.

If you want to keep things even simpler, look for cod or halibut. These white fish are sturdy and hold their shape well, which is a lifesaver when you’re still figuring out the mechanics of preventing fish from sticking to the pan. Once you have your protein picked out, don’t stress about complex sauces. Focus on a simple salt, pepper, and lemon combo; honestly, that is often the best way to season fish without masking the flavor or making a mess of your kitchen. Keep your lineup consistent, and the decision fatigue disappears.

The Real Secret to the Best Way to Season Fish Every Time

The Real Secret to the Best Way to Season Fish Every Time

Look, I used to think seasoning fish meant following some complicated spice rub recipe from a cookbook, but that’s just more mental clutter we don’t need. The best way to season fish is actually much more minimalist: salt, pepper, and maybe a squeeze of lemon or a hit of garlic powder. The trick isn’t adding a million ingredients; it’s about not drowning the natural flavor of the seafood. If you pile on too much heavy seasoning, you’re just masking the fact that you might have overcooked it.

My personal system is to pat the fillets bone-dry with a paper towel before you even touch the spices. If the surface is wet, the seasoning won’t stick, and you’ll end up with a soggy mess instead of that crispy skin we’re all after. This is also your first line of defense for preventing fish from sticking to the pan. Once you’ve got that dry surface and a light coating of seasoning, you’re ready to hit the heat. Keep it simple, keep it dry, and let the quality of the fish do the heavy lifting.

No More Kitchen Chaos My Strategy for Preventing Fish From Sticking to Pan

There is nothing that kills my vibe faster than a beautiful piece of fillet turning into a shredded, crusty mess stuck to the bottom of a pan. It’s frustrating, it looks unappealing, and it makes you feel like you’ve failed at a basic skill. But honestly? Most of the time, it’s not your cooking—it’s your physics. The absolute key to preventing fish from sticking to pan is patience and temperature control. You have to let the fish actually release itself. When you first drop it in the pan, it’s going to want to cling to the surface. Resist the urge to poke at it or try to flip it prematurely. If it’s fighting you, it’s not ready.

Once you see those edges turning opaque and slightly golden, it will naturally lift away. I also swear by patting my fish bone-dry with paper towels before it even touches the oil. Moisture is the enemy of a good sear; if there’s water on the surface, you’re essentially steaming it instead of crisping it. If you follow this, you’ll move past the panic and actually start enjoying the process.

Precision Over Guesswork Knowing the Internal Temperature for Cooked Fish

Look, I get it. The “poke it with a fork and hope for the best” method is how you end up with either a piece of salmon that’s basically a leather belt or something so underdone it’s actually concerning. If you want to stop guessing, you need to invest in a digital instant-read thermometer. It is the single most effective tool for how to tell if fish is done without the frantic guesswork.

When you’re working through different types of fish for beginners, like cod or trout, the goal is consistency. For most flaky white fish, you’re aiming for an internal temperature for cooked fish of about 145°F (63°C). However, if you prefer your salmon a little more tender and medium-rare, you can pull it off the heat at 135°F and let the carryover cooking do the rest of the work while it rests. It takes the anxiety out of the process and turns a high-stakes kitchen moment into a simple, repeatable system. No more staring at the pan in a state of panic—just hit the number and move on with your life.

The "Don't Mess This Up" Cheat Sheet: 5 Tiny Habits for Better Fish

  • Pat it dry like your life depends on it. I know, it sounds extra, but if your fish is damp when it hits the pan, you’re basically steaming it instead of searing it. Grab a paper towel and get that moisture off before you even think about seasoning.
  • Stop treating the pan like a crowded elevator. If you crowd the fillets, the temperature drops instantly and you end up with a soggy, sad mess. Give each piece some breathing room so the heat can actually do its job.
  • Invest in a cheap digital thermometer. I used to try and “feel” the firmness of the fish, but that’s how I ended up eating rubbery salmon. Just check the internal temp; it takes two seconds and removes all the guesswork.
  • Let it rest, even if it’s just for a minute. You don’t need to wait twenty minutes like a steak, but letting the fish sit off the heat for a moment helps the juices redistribute so it doesn’t dry out the second you take a bite.
  • Don’t touch it. Seriously. Once you put the fish in the pan, leave it alone. If you keep poking at it or trying to flip it too early, it’s going to tear apart. Wait until it naturally releases from the pan—that’s your signal that it’s ready.

The Cheat Sheet for Stress-Free Fish

Stop guessing and start measuring—use a thermometer to hit that internal temperature so you aren’t stuck choosing between raw and rubbery.

Simplify your grocery run by sticking to beginner-friendly, forgiving fish types until you feel more confident in the kitchen.

Master the prep, not just the cook: get your pan hot, season aggressively, and use the right oil to prevent the dreaded “stuck-to-the-pan” panic.

The Bottom Line

At the end of the day, cooking fish isn’t about mastering some complex culinary art form; it’s just about having a repeatable system that works. We covered how to pick the right beginner-friendly fillets, how to season them without getting lost in a spice cabinet, and most importantly, how to manage your heat so you aren’t fighting a sticking pan or staring at a piece of salmon that’s either raw or rubbery. Once you stop treating every meal like a high-stakes exam and start relying on temperature and technique, the anxiety just evaporates. If you can manage your pan temperature and trust your thermometer, you’ve already won half the battle.

I know that for a lot of us, the kitchen can feel like a place where things just go wrong, especially when you’re trying to eat better on a budget or a tight schedule. But remember, even my mom—who is a literal chef—had to learn the basics before she could make it look easy. Don’t let the fear of a ruined dinner keep you from trying something new. Adulthood is a lot easier when you realize that failure is just part of the system. So, grab a piece of white fish, get that pan hot, and just go for it. You’ve got this.

Frequently Asked Questions

Is it actually safe to buy frozen fish, or should I only ever go for the fresh stuff?

Honestly? Frozen is totally fine. In fact, if you’re looking to reduce friction, frozen is actually better. Most “fresh” fish has spent days in transit, whereas frozen is usually flash-frozen at peak quality right after being caught. It’s cheaper, lasts longer in my freezer, and eliminates that mid-week panic of realizing your protein is expired. Just make sure you thaw it properly in the fridge—don’t leave it on the counter like a rebel.

How do I get rid of that "fishy" smell in my kitchen (and my hands) after I'm done?

The smell is the absolute worst part of cooking fish, but you don’t need fancy scented candles to fix it. For the kitchen, just simmer a small pot of water with lemon slices or a splash of vinegar on the stove—it neutralizes the air instantly. For your hands, skip the harsh soap; rub them with a little lemon juice or stainless steel (like your kitchen sink) under cold water. It breaks down the oils so the scent actually vanishes.

What’s the best way to store leftovers so they don't turn into a rubbery mess the next day?

The biggest mistake is just tossing it in a Tupperware and hoping for the best. To avoid that rubbery, sad texture, let your fish cool slightly before sealing it—trapped steam is the enemy of moisture. I always use airtight glass containers to keep things fresh, and when I reheat, I do it low and slow. A splash of water or a tiny bit of butter in the microwave helps steam it back to life.

Healthy make ahead meals for busy weeknights.

Weeknight Survival: Make-ahead Meals to Save Time

I used to think that “meal prepping” meant spending my entire Sunday afternoon in a frantic, flour-dusted trance, assembling twenty identical plastic containers of bland, steamed broccoli and unseasoned chicken. If I see one more aesthetic TikTok of someone spending six hours making “gourmet” mason jar salads that turn into soggy mush by Wednesday, I’m going to lose it. Real life isn’t a Pinterest board, and honestly, most of those complicated recipes are just a recipe for burnout. I’ve learned the hard way that the goal of make ahead meals shouldn’t be to become a part-time chef; it should be to stop that 6 PM panic where you end up staring blankly into a fridge full of ingredients you’re too tired to actually use.

I’m not here to sell you on a lifestyle overhaul or a complicated grocery list that costs more than my monthly utility bill. Instead, I want to show you how to build a sustainable system of food that actually works with your schedule, not against it. I’m talking about low-effort, high-reward basics that you can mix and match so you don’t feel like you’re eating the same thing every single day. We’re stripping away the gatekeeping and focusing on actual efficiency so you can reclaim your week.

Table of Contents

Stop the Chaos Why Make Ahead Meals Are Non Negotiable

Stop the Chaos Why Make Ahead Meals Are Non Negotiable

Let’s be real: the “emergency” version of my Tuesday usually involves me staring blankly into a fridge full of random ingredients, eventually giving up and ordering expensive takeout. It’s exhausting, it’s expensive, and it’s a total drain on my mental bandwidth. I used to think I didn’t have time for this, but I realized that the time I “save” by not cooking is actually lost to the decision fatigue and the stress of trying to figure out what to eat when I’m already running on fumes.

That’s where a solid system comes in. Implementing actual weekly meal planning strategies isn’t about being a Pinterest perfectionist; it’s about reclaiming your evening. When you have a plan, you aren’t negotiating with your hunger at 7 PM. You’re just executing a system. It’s one of those small, repeatable wins that keeps your life from feeling like a constant scramble. Beyond just saving time, it’s probably the most effective way to stick to a budget without feeling deprived, because you’re actually using what you bought instead of letting it rot in the crisper drawer.

Mastering Weekly Meal Planning Strategies Without the Overwhelm

Mastering Weekly Meal Planning Strategies Without the Overwhelm

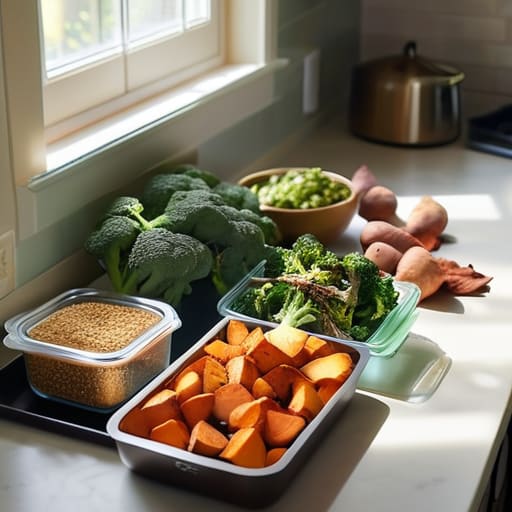
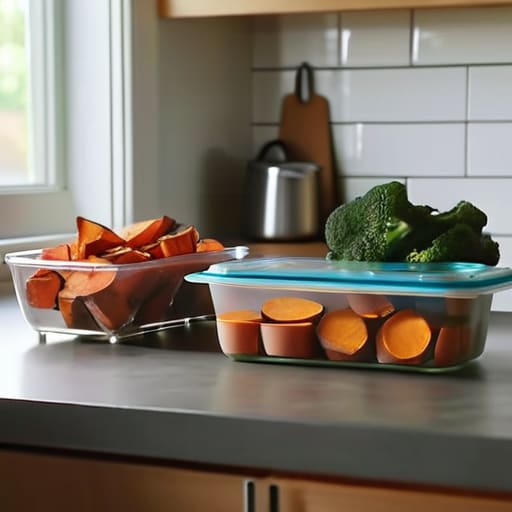
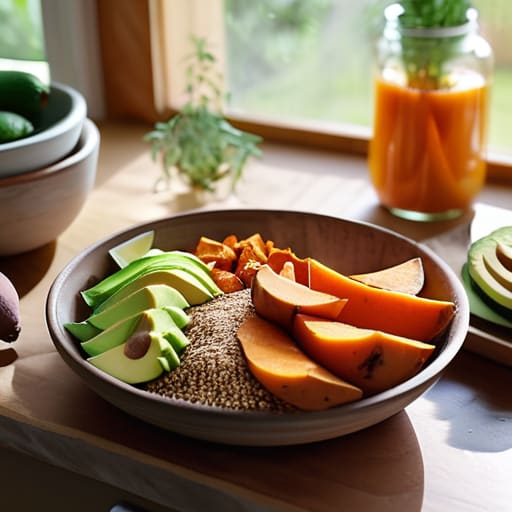
The biggest mistake I see people make is trying to plan a seven-day, five-course menu like they’re auditioning for a cooking show. That is a fast track to burnout. Instead, I swear by simple weekly meal planning strategies that focus on components rather than rigid recipes. Think of it as building a modular kit: roast a big batch of sweet potatoes, cook a mountain of quinoa, and prep two different proteins. If you have these building blocks ready, you can pivot from a grain bowl to a taco salad in about three minutes without needing a new recipe.

Once you have your components, the real magic happens in how you store them. Don’t just throw everything into random Tupperware; invest in some decent meal prep containers for freezing so you can build a “library” of back-up meals for those nights when your brain is totally fried. I also highly recommend the “cook once, eat twice” rule. If you’re making chili on Sunday, make double. It takes almost no extra effort, but it buys you an extra evening of freedom later in the week.

Real World Healthy Meal Prep Ideas for Actual Human Lives

Real World Healthy Meal Prep Ideas for Actual Human Lives

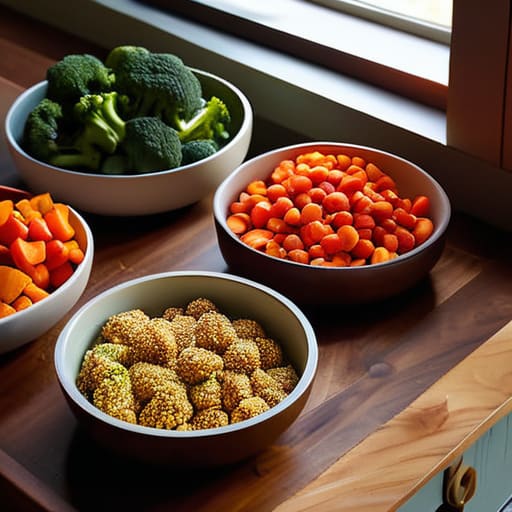
Let’s be real: most “meal prep” content online features aesthetic glass jars filled with perfectly arranged quinoa and kale that no one actually wants to eat by Thursday. My approach is a bit more chaotic but way more sustainable. Instead of trying to cook five different recipes, I focus on building blocks. I’ll roast two sheet pans of seasonal veggies, cook a massive batch of grains, and prep a protein like shredded chicken or seasoned chickpeas. Once you have these components, you can mix and match them all week so you aren’t staring at the same sad salad every single day.

If you’re working with a tight schedule or a tighter budget, lean into batch cooking basics. Think hearty soups, stews, or heavy chili—stuff that actually tastes better after sitting in the fridge for a day. For those of us who occasionally forget we even cooked, investing in decent meal prep containers for freezing is a total game changer. You can portion out extra servings and toss them in the freezer for those “I can’t even deal with cooking tonight” moments. It’s about creating a safety net, not a chore.

Budget Friendly Meal Prep and Time Saving Cooking Hacks

Let’s be real: the biggest barrier to staying on track isn’t a lack of willpower; it’s usually just being broke or being exhausted. If you’re trying to do budget friendly meal prep without spending your entire paycheck on organic microgreens, you have to get strategic. I’ve learned that buying staples in bulk—think grains, dried beans, and frozen veggies—is a total game changer. Frozen produce is just as nutritious as the fresh stuff, but it won’t rot in your crisper drawer if you have a chaotic week.

To save your sanity during the actual cooking process, I swear by a few specific time saving cooking hacks. For example, don’t chop every single vegetable individually; use a food processor or just buy the pre-cut stuff if it’s on sale. Also, if you’re prepping things like stews or chili, invest in some decent meal prep containers for freezing. There is nothing more satisfying than pulling a pre-portioned, homemade meal out of the freezer when you’re too tired to even look at a stove. It turns a potential takeout disaster into a five-minute win.

Pro Systems for Portion Control Meal Planning and Freezing

If you’ve ever pulled a massive, frozen block of spaghetti out of the freezer only to realize it’s enough to feed a small village, you’ve missed a crucial step in your system. To make this actually sustainable, you need to stop thinking in “batches” and start thinking in individual servings. I swear by using specific meal prep containers for freezing—the glass ones are great for reheating, but if you’re tight on space, high-quality silicone bags are total game changers. When you portion everything out immediately, you eliminate that mid-week decision fatigue where you end up ordering takeout because you can’t figure out how much of a dish you actually have left.

The real secret to long-term success is the “component method.” Instead of freezing full meals, try freezing portions of proteins or grains separately. This gives you way more flexibility; you can pivot from a grain bowl to a stir-fry in minutes. It’s one of those time saving cooking hacks that actually works when life gets messy. Just label everything with a piece of masking tape and a sharpie—date, contents, and portion size. It feels a little extra, but trust me, your future, exhausted self will thank you.

My Cheat Sheet for Not Failing at Meal Prep

  • Don’t try to cook five new recipes at once. That’s how you end up with a kitchen full of expensive, untouched ingredients and a massive sense of defeat. Pick one “base” protein or grain and just make a huge batch of it to use in different ways throughout the week.
  • Invest in a decent set of uniform glass containers. I know, it feels like a “lifestyle influencer” thing, but it actually matters. When everything fits perfectly in your fridge and stacks neatly, you can actually see what you have, which stops you from buying a third jar of salsa because you forgot the first two were hiding in the back.
  • Use the “component method” instead of full meals. Sometimes a pre-assembled container of pasta feels heavy or boring by Thursday. Instead, prep roasted veggies, a cooked grain, and a protein separately. It gives you the flexibility to mix and match so you don’t get “flavor fatigue.”
  • Label everything with a piece of masking tape and a sharpie. It sounds extra, but knowing exactly when that chili went into the freezer saves you from the dreaded “is this still safe to eat?” mental spiral.
  • Embrace the “semi-homemade” shortcut. If you’re having a brutal week, don’t feel guilty about using a rotisserie chicken or a bag of pre-washed salad greens. The goal is to eat well with minimal friction, not to win a Michelin star in your own kitchen.

The Bottom Line: Making It Stick

Don’t aim for perfection or a Pinterest-worthy fridge; just aim to have one or two reliable “emergency” meals ready so you aren’t defaulting to expensive takeout when your brain is fried.

Build systems, not just recipes. Whether it’s prepping a big batch of grains or using your freezer strategically, the goal is to reduce the number of decisions you have to make during the week.

Start small and scale up. You don’t need to spend your entire Sunday in the kitchen; even prepping just one protein or one vegetable can be the difference between a chaotic Tuesday and a manageable one.

The Bottom Line

At the end of the day, meal prepping isn’t about becoming a Pinterest-perfect chef or spending your entire Sunday hovering over a stove. It’s about the systems we talked about—the smart grocery lists, the batch-cooking basics, and the freezing hacks that actually save you time. Whether you’re just starting with one big batch of grains or you’re diving deep into full-week portion control, the goal is the same: to stop the constant decision fatigue that hits when you’re hungry and exhausted. You don’t have to do everything at once; just pick one strategy from this guide and start there.

Adulthood is messy, and some weeks are going to feel like a total whirlwind regardless of how many Tupperware containers you have lined up in your fridge. That’s okay. The point of these systems isn’t perfection—it’s about building a safety net for when life gets loud. When you have a solid foundation of make-ahead meals, you aren’t just feeding yourself; you’re buying back your own peace of mind. So, grab your multi-tool, clear some counter space, and let’s make this week a little less chaotic. You’ve totally got this.

Frequently Asked Questions

How do I keep my prepped meals from tasting like soggy leftovers by Thursday?

The “soggy leftover” vibe is usually a texture issue, not a flavor one. First, let your food cool completely before sealing the containers; trapping steam is how you get mushy veggies. Second, stop mixing everything in one bowl. Keep your proteins, grains, and greens in separate compartments so they don’t marinate in each other’s juices. Finally, keep your sauces on the side. Reheating is way less depressing when you add the dressing right before eating.

Is it actually safer to freeze everything, or am I going to end up with freezer burn after a week?

Honestly, it’s a bit of both. If you’re eating something within 3–4 days, the fridge is your best friend. But if you’re prepping for the long haul, freezing is the only way to stop the “what’s for dinner” panic. To avoid that nasty freezer burn, just make sure your containers are airtight or use heavy-duty freezer bags with all the air squeezed out. Think of it as protecting your investment so you don’t waste money.

What’s the best way to prep if I only have a tiny kitchen and zero counter space?

Honestly, the “everything on the counter” approach is a lie. If you’re working with a tiny kitchen, you have to treat it like a high-efficiency workstation. Stop trying to prep everything at once. Instead, use the “one-in, one-out” rule: clear a spot, chop, then move everything immediately into the fridge or a single bin. Invest in nesting bowls to save space, and honestly? Use your cutting board as your only real real estate.

Quick and easy dessert recipes for cravings.

Quick and Easy Desserts for Sudden Sweet Cravings

Let’s be real: most of the time, my craving for something sweet hits right when my brain is completely fried from a day of client calls and spreadsheets. I used to think that making a proper dessert required a pantry full of niche ingredients and a level of patience I simply didn’t possess after 7:00 PM. But honestly? Chasing those overly complicated, aesthetic recipes you see on TikTok is a recipe for burnout, not bliss. I’ve spent way too much time cleaning up flour messes just to end up with something mediocre, which is why I’ve finally curated a collection of easy dessert recipes that actually respect my time and my sanity.

I’m not here to give you a lecture on pastry techniques or demand you buy a stand mixer you’ll only use once. Instead, I’ve narrowed it down to five specific, low-effort systems that deliver high-reward results every single time. You’re going to learn how to satisfy that sugar craving using minimal tools and even fewer dishes. These are the reliable, go-to treats I keep in my back pocket for when I want something delicious but have absolutely zero energy to perform culinary gymnastics.

Table of Contents

The Three-Ingredient Pantry Hero

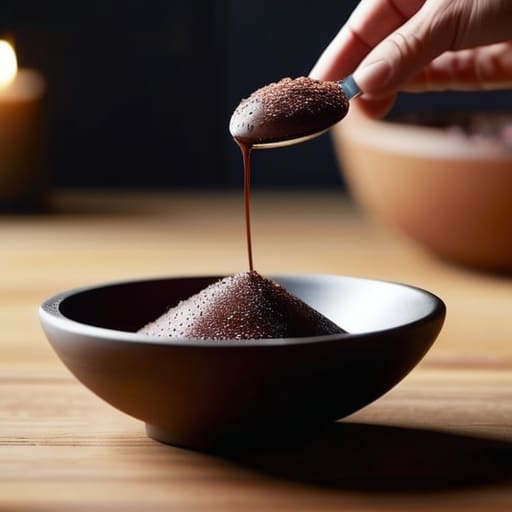
The Three-Ingredient Pantry Hero chocolate ganache.

We’ve all had those nights where the kitchen feels like a foreign country and you don’t have the mental bandwidth to read a recipe with twenty steps. This is my go-to when I’m staring at a nearly empty pantry: chocolate, heavy cream, and a pinch of salt. You just melt them together, let it chill, and suddenly you have a ganache that tastes like it came from a high-end boutique. It’s all about minimizing the friction between wanting something sweet and actually having it.

No-Bake Energy Bites (But Make Them Dessert)

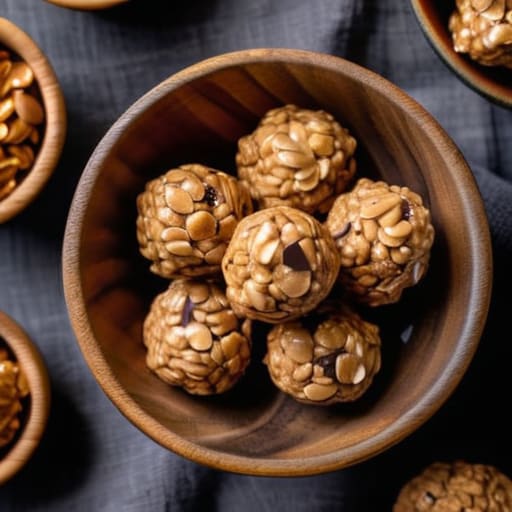
No-Bake Energy Bites (But Make Them Dessert)

If the thought of turning on the oven makes you want to nap, this is the system you need. I call these my “emergency sweets” because they require zero heat and almost zero cleanup. You just toss oats, peanut butter, a bit of honey, and some chocolate chips into a bowl and smash them together until they’re cohesive. It’s essentially a low-effort hack for when you need a sugar fix but also want to feel like you’re eating something somewhat substantial.

The Microwave Mug Cake Reality Check

The Microwave Mug Cake Reality Check.

Look, I know there’s a stigma around microwave desserts, but let’s be real: sometimes you just need a cake right now. This isn’t about winning a baking competition; it’s about satisfying a craving in under two minutes. You just mix a little flour, cocoa powder, sugar, and milk in a mug, pop it in for about a minute, and you’re done. It’s the ultimate efficiency play for the late-night snackers among us.

Affogato: The Sophisticated Lazy Person’s Dream

This is my favorite way to trick people into thinking I have my life together when I’m actually running on caffeine and sheer willpower. An affogato is literally just a scoop of vanilla ice cream with a shot of hot espresso poured over it. There is zero cooking involved, yet it feels like a legitimate culinary event. It’s the perfect bridge between “I need caffeine to function” and “I need sugar to survive.”

Greek Yogurt Fruit Parfait

Sometimes “dessert” needs to feel a little more like “fuel,” especially if you’ve had a heavy lunch. This is my version of a deconstructed cheesecake that actually keeps you from crashing an hour later. You just layer some thick Greek yogurt with a drizzle of honey, some frozen berries, and a handful of granola. It’s a functional dessert that satisfies the sweet tooth without the heavy sugar slump.

The Low-Effort Dessert Strategy

Stop aiming for perfection; the goal here is a quick hit of dopamine without the mountain of dishes.

Keep a few “emergency” staples—like good chocolate or high-quality sea salt—on hand so you can level up even the simplest pantry snacks.

Focus on systems, not recipes; once you know the ratio for a basic crumble or a mug cake, you can stop searching for instructions and just start making things.

Low-Stakes Sweet Success

At the end of the day, these recipes aren’t about achieving some Michelin-star aesthetic or spending three hours cleaning flour off your counters. Whether you’re leaning into the five-minute microwave mug cake for a solo midnight snack or prepping a batch of easy cookies to have on hand for guests, the goal is the same: removing the barrier between you and a little bit of comfort. You don’t need a pantry full of specialty ingredients or a high-end stand mixer to make something that actually tastes good. Just pick one of these systems, keep the ingredients you need on hand, and stop overthinking the process.

I know that sometimes, even something as simple as deciding what to eat can feel like another overwhelming task on an endless to-do list. But treating dessert as a low-stakes ritual rather than a formal production changes the whole vibe. It’s about giving yourself permission to enjoy something sweet without the guilt of a massive cleanup or a failed experiment. Life is messy enough as it is; your kitchen time shouldn’t be. So, grab a spoon, find your favorite cozy spot, and just enjoy the win. You’ve earned it.

Frequently Asked Questions

Can I actually make these if I don't have a full set of baking tools or a fancy stand mixer?

Honestly, please don’t let a lack of equipment stop you. I’m the queen of making things work with whatever is in the drawer. If a recipe calls for a whisk, use a fork. No stand mixer? A sturdy spoon and some elbow grease work just fine. Most of these are designed to be low-friction, so if you have a bowl, a spoon, and a microwave, you’re basically halfway there. Just dive in.

What are the best ways to swap out ingredients if I'm trying to keep things a bit healthier or avoid dairy?

Look, you don’t need to overhaul your entire pantry to make these recipes work. If you’re dodging dairy, oat milk is my go-to for creaminess without the weird aftertaste, and coconut oil is a solid swap for butter in most bakes. If you’re trying to cut back on refined sugar, try a bit of maple syrup or even mashed bananas. It’s all about finding the substitution that fits your specific vibe.

How long can I realistically store these if I make a big batch for the week?

Honestly, it depends on what you’re making, but here’s the rule of thumb I use for my own meal prep. Most of these will stay fresh in an airtight container in the fridge for about 4 to 5 days. If you’re making something with fruit, aim for the earlier side of that window so it doesn’t get mushy. If you want to go bigger, most of these freeze beautifully for up to three months.

Quick and healthy breakfast ideas.

Nutritious Breakfasts You Can Whip Up in Minutes

I used to think that “eating healthy” meant spending my entire Sunday afternoon in a kitchen-induced trance, prepping elaborate meals that I’d eventually forget about in the back of the fridge. But let’s be real: most of us are just trying to survive the morning rush without crashing by 11 AM. When you’re running on caffeine and pure adrenaline, finding actual healthy breakfast ideas feels less like a wellness goal and more like an impossible chore. I realized that if my breakfast system was too complicated, I was just going to skip it entirely and end up grabbing a sugary pastry on the way to work, which is a recipe for a mid-morning burnout.

I’ve spent a lot of time refining my own morning systems to favor efficiency over aesthetics, and I want to share that with you. In this post, I’m breaking down five specific, low-friction options that actually keep you full and focused. These aren’t those overly curated, “aesthetic” recipes you see on Pinterest; these are real-world solutions designed for people who have actual lives to lead. By the end of this, you’ll have a handful of go-to moves to help you stop treating your mornings like a crisis.

Table of Contents

The Overnight Oats System

Preparing breakfast with The Overnight Oats System.

If you’re the type of person who hits snooze four times and then realizes you have zero time to actually eat, overnight oats are going to be your new best friend. I started doing this when I was juggling freelance clients and realized that a morning spent frantically searching for a granola bar was a morning wasted. You just grab a mason jar, throw in some oats, milk of your choice, and a spoonful of chia seeds, then let it sit in the fridge overnight. It’s essentially a set-it-and-forget-it breakfast that requires zero effort once you’re actually awake.

Savory Egg Bites for Busy Mornings

Savory Egg Bites for Busy Mornings

I used to think that “healthy” breakfast meant sweet, but I quickly realized that a sugar crash at 10:00 AM is the absolute worst for my productivity. Now, I lean into savory egg bites that I bake in a muffin tin once a week. You just whisk up some eggs, toss in whatever veggies are looking sad in your crisper drawer—spinach, peppers, or onions work great—and add a little feta or goat cheese. Once they’re baked and cooled, you can keep them in a container and just pop them in the microwave for thirty seconds whenever you’re hungry.

The High-Protein Smoothie Hack

The High-Protein Smoothie Hack prep bags.

We’ve all been there: you want a smoothie, but by the time you’re washing the blender and chopping fruit, you’re already late for your first call. To fix this, I started using the “smoothie pack” method. I pre-portion my frozen fruit, spinach, and even a scoop of protein powder into individual silicone bags. When it’s time to eat, you just dump the bag into the blender, add your liquid, and blend it in seconds. It turns a chore into a thirty-second task.

Toast with a Strategy

Let’s be real: toast is the ultimate low-effort food, but if you’re just eating plain white bread, you’re going to be hungry again in twenty minutes. To make toast a legitimate breakfast system, you need to focus on the toppings. I usually go for sourdough because it’s easier on the gut, and I always pair it with a fat and a protein. Think avocado with a hard-boiled egg, or almond butter with sliced banana and hemp seeds. It’s about layering nutrients so you don’t crash mid-morning.

Greek Yogurt Bowls

If you want something that feels a little more “aesthetic” but requires almost no actual cooking, Greek yogurt bowls are the way to go. I love these because they are incredibly customizable depending on what you have on hand. The key is to stick to plain, unsweetened Greek yogurt to avoid the hidden sugars that most commercial brands cram into their fruit flavors. You get a massive hit of protein, which is the secret weapon for staying focused during a busy workday.

The Bottom Line

Stop aiming for a five-star brunch every morning; the goal is just to have something fuel-efficient ready so you aren’t running on caffeine and vibes alone.

Systems beat willpower every single time—if you have to make a decision at 7:00 AM, you’ve already lost the battle.

Keep it low-friction. If a “healthy” breakfast takes twenty minutes of prep you don’t have, it’s not a sustainable system, it’s just another chore.

Stop Overcomplicating Your Mornings

At the end of the day, these breakfast ideas aren’t about achieving some impossible level of culinary perfection or posting a curated aesthetic on your story. Whether you’re leaning into the low-maintenance vibe of overnight oats, grabbing something quick like Greek yogurt, or prepping savory egg bites for the week, the goal is the same: removing the decision fatigue that usually hits you the second you wake up. You don’t need a gourmet kitchen or an hour of free time to eat well; you just need a few reliable, repeatable systems that prevent you from reaching for a sugary granola bar or skipping the meal entirely.

I know how easy it is to let your morning routine slide into a chaotic mess of missed alarms and empty stomachs, but I promise you that small, consistent wins change everything. When you stop treating your breakfast like an afterthought and start treating it like a tool for your productivity, the rest of your day starts to feel a lot more manageable. You don’t have to overhaul your entire life overnight. Just pick one of these methods, try it out this week, and see how much better it feels to actually be fueled instead of just caffeinated and running on fumes.

Frequently Asked Questions

I’m not really a morning person—is there a way to prep these even further so I don't have to touch a stove at all?

Honestly, I feel that. I’m definitely not a “sunrise yoga” person. If you want to avoid the stove entirely, lean into the “grab and go” method. Make your overnight oats in mason jars the night before, or prep chia seed puddings. You can even make breakfast burritos (using pre-cooked protein), wrap them in foil, and just grab them from the fridge. No heat, no mess, just zero friction before your first coffee.

How do I make sure these quick options actually keep me full until lunch without crashing by 10 AM?

The secret is avoiding the sugar spike. If you just grab a piece of toast or a granola bar, your blood sugar will tank by 10 AM and you’ll be reaching for caffeine or pastries. You need to pair your carbs with protein or healthy fats. Think: adding an egg to that toast, or throwing some chia seeds into your oats. It’s all about that slow burn to keep your energy steady.

Can I swap out some of these ingredients if I have specific dietary restrictions, or will it totally mess up the prep system?

Absolutely. The whole point of a system is that it’s flexible, not a prison. If you’re dairy-free, swap the yogurt for coconut or soy; if you’re gluten-free, use certified oats. Just try to keep the “prep logic” the same—you’re still prepping a base and adding toppings. As long as the texture and timing work for you, the swaps won’t mess up the system at all. Don’t let a strict recipe stop you from actually using it.

Tips on how to reduce sugar in your diet.

Simple Hacks to Reduce Sugar in Your Diet

I used to think that cutting back meant buying those $14 “superfood” protein bars that taste like sweetened chalk, or spending my entire Sunday meal-prepping complex, sugar-free recipes that felt more like a chore than a lifestyle. Honestly, the wellness industry makes it feel like you need a PhD and a massive budget just to figure out how to reduce sugar in your diet without losing your mind. It’s exhausting, and frankly, it’s gatekeeping. You don’t need a complete pantry purge or a radical lifestyle overhaul to see a difference in your energy levels; you just need a better system.

I’m not here to sell you on a detox tea or some impossible standard of perfection. Instead, I want to give you the actual, unpolished steps I used to stabilize my own energy and stop the mid-afternoon crashes. We’re going to look at small, repeatable swaps—the kind that actually fit into a busy freelance schedule—and how to spot the hidden sugar lurking in your “healthy” snacks. No hype, no expensive supplements, just practical systems to make the transition feel less like an emergency and more like a habit.

Table of Contents

Understanding How to Reduce Sugar in Your Diet

Understanding How to Reduce Sugar in Your Diet.

Before we get into the actual “how-to,” we need to address the elephant in the room: sugar isn’t just that obvious white powder in your pantry. It’s sneaky. Most of the trouble comes from hidden sugars in processed foods—the kind tucked away in your “healthy” yogurt, jarred pasta sauce, or even your favorite salad dressing. If you aren’t actively looking for them, they’ll bypass your willpower every single time.

To actually make progress, you have to stop guessing and start investigating. This means learning how to read nutrition labels for sugar like a pro. I used to think a product was safe just because the front of the box looked clean and minimalist, but once I started checking the ingredient list for things like maltodextrin or high fructose corn syrup, my entire perspective shifted. It’s not about being perfect or cutting everything out overnight; it’s about developing the awareness to see what’s actually being added to your plate. Once you spot the patterns, the chaos starts to settle, and you can actually start making intentional choices instead of just reacting to cravings.

Key Things to Know

Key Things to Know: Reading nutrition labels.

Before you start swapping out your snacks, you need to realize that sugar isn’t just the stuff you sprinkle on your oatmeal. The real culprits are the hidden sugars in processed foods that hide behind fancy names like maltodextrin or high fructose corn syrup. I spent way too much time thinking I was being “healthy” by grabbing flavored yogurts or granola bars, only to realize I was basically eating dessert for breakfast. Learning how to read nutrition labels for sugar is probably the single most important skill you can develop here; if you can’t decode the ingredient list, you’re just playing a guessing game with your energy levels.

Another thing to keep in mind is that your body is going to fight you at first. When you start cutting back, you’ll likely deal with some intense urges for a quick fix. This is where reducing sugar cravings becomes a game of strategy rather than just willpower. Instead of white-knuckling it, I’ve found that leaning into natural sugar alternatives—like whole fruit or even a bit of dark chocolate—makes the transition feel less like a punishment and more like a manageable shift in your daily routine.

Practical Tips and Steps

Practical Tips and Steps for sugar reduction.

Instead of trying to quit everything at once, I like to focus on one small swap at a time. Start by mastering how to read nutrition labels for sugar; most people are shocked to see how much sweetener is packed into “healthy” items like yogurt or granola bars. Once you spot those hidden sugars in processed foods, you can start looking for natural sugar alternatives like berries or a bit of real honey to satisfy that sweet tooth without the massive crash.

I also swear by the “addition method” rather than just subtraction. If you’re feeling a massive energy slump, don’t just reach for a candy bar—try adding more protein or healthy fats to your meal. This is one of my favorite blood sugar management tips because it keeps you feeling full and actually helps with reducing sugar cravings in the long run. It’s much easier to stay consistent when you aren’t constantly fighting your own biology. Just build a system that works for your actual schedule, not some idealized version of a diet.

Common Mistakes to Avoid

The biggest mistake I see people make is going scorched earth. You wake up on Monday, swear off everything sweet, and try to live on kale and water. By Wednesday, you’re staring at a bag of gummy bears like they’re the holy grail. This “all-or-nothing” mentality is a recipe for burnout. Instead of a total purge, focus on reducing sugar cravings by making gradual, sustainable swaps. If you try to do too much at once, your brain is going to rebel, and you’ll end up right back where you started.

Another trap is assuming that if a food is labeled “healthy” or “organic,” it’s automatically safe. This is where the real damage happens. There are so many hidden sugars in processed foods—like flavored yogurts, granola bars, and even some pasta sauces—that you wouldn’t expect. You really have to learn how to read nutrition labels for sugar rather than just glancing at the front of the box. Don’t let clever marketing trick you into thinking a “fruit smoothie” is anything more than a liquid sugar bomb.

Final Thoughts

Look, I’m not here to tell you that you need to live on kale smoothies and steamed chicken for the rest of your life. That’s not a system; that’s a recipe for burnout. The goal here isn’t perfection—it’s just about building enough awareness so that you aren’t accidentally sabotaging yourself. Once you get the hang of how to read nutrition labels for sugar, you’ll start seeing that “healthy” granola bar is basically just a candy bar in disguise. It takes a second to adjust, but once you stop the constant spikes and crashes, you’ll actually feel the benefits of a low sugar lifestyle in your energy levels throughout the day.

Don’t try to overhaul your entire pantry overnight. Just pick one thing—maybe it’s swapping your afternoon soda for something else or being more mindful of the hidden sugars in processed foods during your grocery runs. Small, repeatable wins are what actually stick. If you slip up and eat a box of cookies, don’t throw the whole week away. Just reset and keep moving. That’s the only way to make this actually sustainable.

My Low-Friction Strategy for Cutting Sugar

  • Stop drinking your sugar. It sounds harsh, but liquid calories from sodas, sweetened lattes, and even “healthy” fruit juices hit your bloodstream like a freight train and leave you crashing an hour later. Switch to sparkling water with a squeeze of lime or plain iced tea; it’s a much easier system to maintain than trying to quit sweets cold turkey.
  • Become a label detective, but don’t get bogged down in the math. You don’t need to calculate grams every time you shop, just look for the “hidden” culprits like high fructose corn syrup, maltodextrin, or cane sugar in things that aren’t even desserts—like pasta sauce or salad dressings. If sugar is in the first three ingredients, put it back.
  • Prioritize protein and healthy fats at every single meal. When I’m running low on energy, I used to reach for a granola bar, which is basically just a candy bar in disguise. Now, I make sure I have eggs, avocado, or Greek yogurt first. If you’re actually satiated, those sugar cravings don’t have nearly as much power over you.
  • Audit your “convenience” foods. Most of the stuff we buy to save time—like pre-packaged snack packs or flavored yogurts—is loaded with sugar to make them shelf-stable and addictive. I’ve started buying the plain versions (like plain yogurt or raw nuts) and adding my own fruit. It takes an extra thirty seconds, but it keeps the sugar spikes away.
  • Don’t aim for perfection; aim for a better baseline. If you try to go zero-sugar overnight, you’re going to burn out by Wednesday. Instead of banning everything, just focus on one swap a day. Once that feels like a normal part of your routine, add another. It’s about building a sustainable habit, not a temporary restriction.

The TL;DR Version

Stop aiming for perfection; focus on small, sustainable swaps like trading soda for sparkling water rather than trying to cut everything out overnight.

Audit your pantry and labels religiously, because most of the “hidden” sugar is hiding in the stuff you think is healthy, like yogurt or granola.

Build a system of preparation, like meal prepping or keeping easy snacks on hand, so you aren’t making impulsive, high-sugar decisions when you’re hungry and tired.

The Long Game

At the end of the day, cutting back on sugar isn’t about some massive, overnight transformation or punishing yourself with a restrictive diet that leaves you miserable by Tuesday. It’s really just about the small, tactical shifts we talked about: reading those sneaky nutrition labels, swapping out the sugary morning ritual for something more stable, and being mindful of the hidden stuff in processed snacks. Remember, the goal isn’t perfection; it’s about building a more sustainable system for how you fuel your body. If you slip up and grab a dessert at a friend’s house, don’t throw the whole plan out the window. Just get back to your baseline at the next meal and keep moving.

I know that changing how you eat can feel like a lot of mental friction, especially when sugar is literally engineered to be addictive. But I promise you, once you move past that initial adjustment period, the steady energy levels and the lack of those mid-afternoon crashes are completely worth the effort. You aren’t depriving yourself of joy; you’re actually gaining more control over how you feel every single day. Think of this as a small upgrade to your internal operating system. Once you get these habits running in the background, life just feels a little bit smoother.

Frequently Asked Questions

How do I deal with those intense sugar cravings when they hit in the middle of the afternoon?

The afternoon slump is real, and usually, that craving is just your brain screaming for a quick dopamine hit. Instead of reaching for the candy jar, try a “bridge snack.” I always keep almonds or a Greek yogurt in my fridge; the protein and fat stabilize your blood sugar so you don’t crash harder later. If you need something sweet, go for berries. It’s about managing the spike, not just fighting the urge.

Are there any specific "healthy" snacks that are actually just hidden sugar bombs I should watch out for?

Honestly, the “health food” aisle is a minefield. I used to grab granola bars and flavored yogurt thinking I was being productive, but most of them are basically dessert in disguise. Watch out for low-fat yogurts (they add sugar to fix the texture), protein bars that read like candy bars, and those “natural” fruit juices. If the label says “organic cane sugar” or “agave,” it’s still a sugar bomb. Stick to whole foods whenever you can.

Do I need to cut out fruit entirely, or is that okay to keep in my diet?

Please, do not cut out fruit. That’s a one-way ticket to a sugar crash and a very grumpy mood. Fruit comes with fiber, which is basically the “buffer” your body needs to process natural sugars without the massive insulin spike you get from a candy bar. Think of it as a slow-release energy source rather than a sudden hit. Just stick to whole fruit instead of juices, and you’re golden.

Tips on how to stock a healthy kitchen.

How to Build a Kitchen That Supports Healthy Eating

I’m so over the “aesthetic” wellness influencers who act like you need a $400 grocery haul of organic dragon fruit and artisanal sea salt just to claim you’re eating well. Honestly, that kind of gatekeeping is exactly why so many of us end up ordering takeout by Tuesday. If you’re looking for a guide on how to stock a healthy kitchen that involves a massive budget and a pantry that looks like a Pinterest board, you’re in the wrong place. I don’t care about the hype; I care about actually having something edible to cook when you’re exhausted after a ten-hour workday.

I’m not here to give you a list of superfoods you’ll never use. Instead, I want to show you how to build a functional, low-friction system using basics that actually last. We’re going to talk about the essential staples, the smart swaps, and the minimalist inventory that keeps you fed without the constant stress of a grocery run. This is about making your kitchen work for you, not the other way around.

Table of Contents

Stop the Emergency Meals How to Stock a Healthy Kitchen

Stop the Emergency Meals How to Stock a Healthy Kitchen.

We’ve all been there: it’s 7:30 PM, you’re exhausted, and the only thing in your fridge is a half-empty jar of pickles and some wilted spinach. This is usually when the expensive, salt-heavy takeout orders happen. To break this cycle, you need to stop viewing grocery shopping as a chore and start seeing it as building your personal defense system. Instead of chasing every viral recipe, focus on gathering nutritious pantry staples that can be thrown together in under fifteen minutes. I’m talking about things like canned chickpeas, quinoa, and high-quality olive oil—items that don’t expire the second you look away.

The goal isn’t to have a gourmet kitchen; it’s to have a functional one. I always keep a small collection of essential healthy spices—think smoked paprika, garlic powder, and cumin—on hand so that even the most basic grain bowl feels intentional rather than accidental. If you have a solid foundation of grains, legumes, and spices, you’re never truly stuck. You aren’t just buying food; you’re buying yourself time and mental energy for the days when life gets messy.

The Foundation Building Your Nutritious Pantry Staples

The Foundation Building Your Nutritious Pantry Staples.

Instead of trying to overhaul your entire diet overnight, I like to think of this as setting up your base layer. You want a collection of nutritious pantry staples that can be thrown together in fifteen minutes when you’re too tired to actually “cook.” Think of things like quinoa, canned chickpeas, lentils, and various nut butters. These aren’t just random items; they are the building blocks that keep you from reaching for the takeout menu when your energy hits zero.

I also swear by keeping a rotation of low sugar pantry items—like oats, chia seeds, and unsweetened dried fruit—to make breakfasts feel less like a chore. To keep things from tasting like cardboard, you absolutely need to invest in a few essential healthy spices. A good smoked paprika, cumin, and some high-quality sea salt can transform a basic bowl of beans and rice into something that actually feels intentional. The goal isn’t to have a gourmet chef’s kitchen; it’s to have a toolkit that makes healthy choices the path of least resistance.

Real Talk Navigating Your Whole Food Grocery List

Real Talk Navigating Your Whole Food Grocery List

Look, I get it. Walking into a grocery store with a massive, intimidating list can feel like a chore, especially when you’re trying to avoid the processed trap. The secret isn’t about buying every “superfood” on the shelf; it’s about building a whole food grocery list that focuses on versatility. I always tell myself: if I can’t turn this ingredient into at least three different meals, it probably doesn’t deserve a spot in my cart. Stick to the perimeter of the store where the fresh stuff lives, and don’t let the colorful packaging in the middle aisles distract you.

When you’re actually in the aisles, keep your eyes peeled for meal prepping essentials like hearty greens, versatile proteins, and complex carbs. I try to shop with a “modular” mindset—buying ingredients that play well together rather than specific, rigid recipes. This way, if my plans change, I’m not stuck with a random bunch of cilantro that’s just going to wilt in the crisper drawer. It’s all about creating a system that works for your actual life, not some idealized version of it.

Flavor Without the Chaos Essential Healthy Spices

If you rely solely on salt and pepper, I promise your meals are going to start feeling like a chore pretty quickly. The secret to making those nutritious pantry staples actually taste like something you want to eat is having a solid rotation of essential healthy spices. You don’t need a massive, expensive spice rack that takes up half your counter; you just need the heavy hitters that can pivot between savory, spicy, and earthy.

I always keep garlic powder, smoked paprika, and cumin on hand. These are my absolute meal prepping essentials because they add depth to a boring batch of roasted sweet potatoes or a simple chicken breast without adding extra calories or hidden sugars. If you’re working through your whole food grocery list and feeling uninspired by a pile of plain lentils or quinoa, a quick sprinkle of dried oregano or crushed red pepper can completely change the vibe. Think of spices as the low-effort hack for flavor—they do all the heavy lifting so you don’t have to spend an hour simmering complex sauces every single night.

Systems That Stick Healthy Food Storage Tips

Honestly, the best way to prevent your produce from turning into a science experiment in the back of the fridge is to stop treating your crisper drawer like a graveyard. I’ve learned the hard way that if I just toss everything in a bag and hope for the best, I end up wasting money and food. Instead, I treat my fridge like a mini-system. I use clear, stackable containers for my pre-cut veggies and keep my leafy greens in a container with a paper towel to soak up excess moisture. These little healthy food storage tips might seem extra, but they are the difference between a crisp salad and a wilted mess by Wednesday.

Once you’ve mastered the fridge, you have to look at your dry goods. I like to transfer my nutritious pantry staples—think quinoa, lentils, and oats—into airtight glass jars. Not only does it look way more aesthetic and organized, but it actually keeps things fresh and helps me see exactly when I’m running low. It turns “checking the pantry” from a guessing game into a quick visual scan, which is a total game-changer for my weekly workflow.

5 Small Shifts to Keep Your Kitchen System Running

  • Shop your own shelves first. Before you even touch a grocery app, do a quick sweep of what you actually have. It sounds tedious, but it stops that cycle of buying a third jar of cumin when you already have two hiding in the back of the cabinet.
  • Think in “component meals” rather than recipes. Instead of buying specific ingredients for one complex dish, stock up on versatile building blocks—like a bag of quinoa, a jar of chickpeas, and some frozen spinach—that can be thrown together in five different ways.
  • Use the “One In, One Out” rule for perishables. To avoid the dreaded “science experiment” corner of your fridge, try to finish or use up one older produce item before you let a new haul take over the crisper drawer.
  • Keep a “low-effort” stash for your worst days. We all have those nights where even boiling pasta feels like too much. Keep a few high-quality, healthy frozen meals or canned soups on hand so you don’t default to expensive, salty takeout.
  • Label your bulk stuff. If you’re buying grains or seeds in bulk to save money, don’t just toss them in a jar and hope for the best. A quick piece of masking tape and a Sharpie with the date it was opened will save you from a lot of “is this still good?” anxiety later.

The TL;DR on a Smoother Kitchen

Stop treating grocery shopping like a scavenger hunt; build a reliable base of pantry staples and whole foods so you’re never making decisions from a place of hunger or stress.

Invest in your “flavor toolkit” with versatile spices and proper storage containers to keep your food fresh and your meals from tasting like cardboard.

Focus on repeatable systems rather than perfection—the goal isn’t a Pinterest-worthy pantry, it’s just making sure you actually have something edible ready to go when life gets messy.

The Bottom Line

At the end of the day, stocking a healthy kitchen isn’t about achieving some impossible standard of aesthetic perfection or having a gourmet pantry that looks like a Pinterest board. It’s really just about building a reliable safety net for your future, tired self. We covered the basics: grabbing those versatile pantry staples, keeping your fridge stocked with real whole foods, and making sure you have enough spices to actually make the food taste like something. By setting up these small systems—from how you store your produce to how you organize your spices—you’re essentially removing the decision fatigue that usually leads to those expensive, last-minute takeout orders.

Please don’t feel like you have to overhaul your entire kitchen in a single weekend. If that feels overwhelming, just start with one thing—maybe it’s just buying three different types of grains or finally getting a decent set of storage containers. Adulthood is a lot easier when you stop treating every meal like a high-stakes crisis and start treating your kitchen like a functional tool that works for you. You don’t need to be a chef to have a smooth-running home; you just need a little bit of a plan. You’ve got this.

Frequently Asked Questions

I’m on a tight budget—how do I stock these staples without my grocery bill spiraling out of control?

Look, I get it. Trying to eat well while watching every cent feels like a losing battle. The trick is to stop buying “convenience” versions of things. Instead of pre-cut veggies or individual snack packs, buy the big bags of grains, beans, and frozen produce. They’re way cheaper per serving and last longer. Also, shop your own pantry before you hit the store—it’s easy to buy duplicates of stuff you already have.

How do I know when things are actually going bad so I'm not just throwing money in the trash?

The “sniff test” is a classic for a reason, but don’t rely on it for everything. For produce, look for sliminess or deep bruising—if it’s soft and weeping, it’s done. For dairy, trust the expiration date as a guide, but if it smells even slightly sour, toss it. Honestly, the best way to stop wasting money is to stop buying in bulk before you actually know your habits. If it’s turning, it’s already too late.

What’s the best way to organize everything so I can actually see what I have when I'm tired after work?

The secret is visibility. If you have to dig through a dark pantry to find the quinoa, you’re going to end up ordering takeout. I’m a huge fan of clear, airtight containers for grains and pasta—it’s satisfying and makes inventory a breeze. Also, try “zoning” your space. Group things by use, like a “breakfast station” or a “quick snack bin.” If you can see it at a glance, you’ll actually use it.

Nutritious and healthy kid friendly meals.

Nutritious Kid-friendly Meals Beyond the Nuggets

Let’s be real: the 5:00 PM panic is a very specific kind of chaos. You’re exhausted from work, the house is a mess, and suddenly you’re staring at a fridge full of ingredients that feel completely useless because you know your kids won’t touch them. I used to think that being a “good” parent meant serving elaborate, Pinterest-worthy dinners, but I quickly learned that survival is much more important than aesthetics. Finding reliable kid friendly meals shouldn’t feel like a high-stakes negotiation or a battle of wills every single night.

I’ve spent way too much time trial-and-erroring my way through dinner to realize that the secret isn’t fancy recipes; it’s about building a repeatable system of “safe” foods. In this post, I’m breaking down five specific meal frameworks that I swear by to keep the peace at the table. These aren’t gourmet masterpieces, but they are low-effort, high-reward wins that actually get eaten. If you’re ready to stop the dinner-time drama and reclaim your evening, these five staples are about to become your new best friends.

Table of Contents

The Deconstructed Taco Bar

The Deconstructed Taco Bar for kids.

I used to think making dinner meant serving a finished, cohesive dish, but with kids, that’s often a recipe for a meltdown. Instead, I’ve leaned into the deconstructed approach. By putting out small bowls of shredded cheese, mild salsa, avocado, and protein, you’re letting them take control of their own plate. It removes the “I don’t like that it’s touching” argument before it even starts.

Sheet Pan Sausage and Veggies

Roasted Sheet Pan Sausage and Veggies.

When my brain is fried from a long day of freelance client calls, the last thing I want to do is stand over a stove. This is my ultimate low-effort win. You just chop up some mild sausages, some bell peppers, and maybe some broccoli, toss them in olive oil and a little salt, and let the oven do the heavy lifting. It’s basically a hands-off system for a decent meal.

The "Breakfast for Dinner" Pivot

The "Breakfast for Dinner" Pivot meal.

We’ve all been there—it’s 6:00 PM, the fridge looks depressing, and nobody is in the mood for chicken nuggets for the third time this week. This is when I pull the breakfast card. Scrambled eggs, whole-grain toast, and some sliced fruit is a nutritional powerhouse that takes about ten minutes to whip up. It feels like a treat to them, but it’s just a strategic pivot for you.

Muffin Tin Snack Trays

Sometimes, a formal dinner is just too much pressure. If you’re having a particularly chaotic week, I highly recommend the muffin tin method. You fill the various compartments with small portions of different things: cubes of cheese, cucumber slices, crackers, grapes, and maybe a few deli meat rolls. It turns eating into a sort of tactile, grazing experience that kids absolutely love.

Homemade "Lunchable" Style Plates

I’m a big believer in using what works, and if that means mimicking a store-bought snack pack, then so be it. I like to prep these miniature charcuterie boards for kids using simple, whole ingredients. Think turkey slices rolled up, some mild cheddar, and a handful of pretzels. It’s predictable, it’s easy to chew, and it hits those salt/protein/carb notes that keep them satisfied.

The Bottom Line

Stop aiming for culinary perfection; the goal here is just to get a decent meal on the table without a meltdown from anyone involved.

Build a “rotation” of these meals so you aren’t reinventing the wheel every single Monday night.

Keep the ingredients simple and the prep minimal—if it takes an hour to make, it’s probably not a sustainable system for a busy week.

Less Stress, More Dinner

At the end of the day, the goal isn’t to become a Michelin-star chef or to force a plate of kale down a toddler’s throat. It’s about building a predictable rotation of meals that you know will land, so you aren’t spending your precious evening energy negotiating with a tiny human over a slice of toast. Whether you’re leaning into the simplicity of breakfast-for-dinner or the modularity of a DIY taco bar, the real win is the mental bandwidth you reclaim. When the menu is already decided and the ingredients are easy to grab, the “what’s for dinner” panic simply disappears from your nightly routine.

Please remember that perfection is the enemy of a functional kitchen. There will be nights when the system breaks, the kids refuse everything, and you end up eating cereal over the sink—and honestly? That is perfectly fine. Adulthood is messy, and parenting is even messier, but you don’t have to do it all with a gourmet spread. Focus on the small, repeatable wins that keep your household running smoothly. Once you stop chasing the ideal version of a family meal and start embracing these low-friction systems, you’ll realize that a peaceful dinner is worth way more than a perfect one.

Frequently Asked Questions

How do I handle it when they suddenly decide they hate a meal that worked perfectly last week?

Honestly, it’s the ultimate test of your patience. When a “safe” meal suddenly becomes “gross,” don’t take it personally—it’s usually just sensory overload or a developmental phase. My system for this is the “Deconstructed Pivot.” Instead of fighting over the dish, pull the components apart. If they hate the pasta, serve the noodles plain with cheese on the side. It feels like a failure, but it’s actually just a quick way to avoid a kitchen meltdown.

Are there ways to sneak more veggies into these recipes without making it obvious and starting a food war?

Honestly, the “stealth health” approach is a total lifesaver when you’re trying to avoid a dinner-table standoff. My go-to is the blender method: if you’re making a pasta sauce or a smoothie, just toss in some steamed cauliflower or spinach and blend it until it’s completely smooth. It adds bulk and nutrients without changing the texture or flavor enough for them to notice. It’s low-effort, high-reward, and keeps the peace.

What’s the best way to prep these meals ahead of time so I’m not spending my entire Sunday in the kitchen?

The secret is “component prepping” rather than full meal assembly. Don’t spend four hours making five complete dishes; you’ll burn out. Instead, spend one hour roasting a massive tray of veggies, boiling a batch of pasta, and prepping your proteins. Store them in separate, clear containers. That way, when the weekday chaos hits, you’re just playing assembly line with pre-made building blocks instead of starting from scratch every single night.

How to cook rice perfectly guide.

The Ultimate Guide to Cooking Flawless Rice

I used to think I needed one of those $150 high-tech induction cookers just to avoid turning my dinner into a gummy, starchy disaster. Honestly, the sheer amount of gatekeeping around something as basic as a grain of rice is exhausting. I spent way too many nights staring at a pot of mushy, overcooked sadness, wondering why every “expert” tutorial made it sound like I needed a chemistry degree just to get through a Tuesday night meal prep. If you’ve been searching for how to cook rice perfectly only to end up with a sticky mess that ruins your entire vibe, I promise you, it isn’t your fault—it’s just a lack of a solid system.

I’m not here to sell you on fancy gadgets or complicated culinary techniques that take an hour to prep. Instead, I’m stripping everything back to the actual, unpolished steps that work every single time, regardless of what equipment you have in your kitchen. I’m going to give you the precise, repeatable method I use to ensure every batch is fluffy, separate, and totally reliable. We’re cutting through the noise to give you a no-nonsense workflow that actually sticks.

Table of Contents

Stop the Kitchen Chaos How to Cook Rice Perfectly Every Time

Stop the Kitchen Chaos How to Cook Rice Perfectly Every Time

First things first: we need to talk about the prep work, because most people skip the most important part. If you’re just dumping dry grains into a pot, you’re basically asking for a gummy mess. I’ve learned the hard way that rinsing white rice until the water runs clear is non-negotiable. It gets rid of that excess surface starch that turns your dinner into a bowl of paste. Once you’ve rinsed it, let it drain well in a fine-mesh strainer. This small, five-minute step is the difference between a fluffy grain and a texture nightmare.

Once the prep is out of the way, it all comes down to the math. Forget those vague “one cup to two cups” rules you see in random recipes; you need a consistent rice to water ratio that actually works for your specific brand. I always use a standard 1:1.5 ratio for long-grain white rice when cooking rice in a pot. Keep the heat low, don’t peek under the lid, and let the residual heat do the heavy lifting. Consistency is everything when you’re trying to build a system that works every single time.

The Rinsing Ritual Why Rinsing White Rice Changes Everything

The Rinsing Ritual Why Rinsing White Rice Changes Everything

If you’ve ever ended up with a bowl of sticky, gummy clumps that look more like paste than actual grains, I promise you, it isn’t your fault—it’s just the starch. Most people skip this step because it feels like an extra chore, but rinsing white rice is the single most important thing you can do to fix your texture. When rice is packaged, it’s coated in a fine, powdery surface starch. If you don’t wash that off, that starch turns into a literal glue the moment it hits the boiling water.

I used to be lazy about this too, but once I started using a fine-mesh strainer, everything changed. You aren’t looking for perfection here; you just want to run cold water over the grains until the water running out the bottom goes from milky and opaque to mostly clear. It only takes about sixty seconds, but it’s the ultimate hack for avoiding mushy rice and ensuring every single grain stays distinct and fluffy. Think of it as prepping your canvas before you start painting—it’s just good groundwork.

Mastering the Math Finding Your Ideal Rice to Water Ratio

Mastering the Math Finding Your Ideal Rice to Water Ratio

Look, I know the temptation to just “eyeball it” is real, especially when you’re hungry and just want to get dinner on the table. But if you want to stop the cycle of either eating crunchy pebbles or a bowl of glue, you have to respect the math. The golden rule for most standard long-grain white rice is a 1:2 ratio—one cup of rice to two cups of water. However, if you’re working with jasmine or basmati, you might want to lean slightly lighter on the water to keep those grains distinct and fragrant.

The real trick to avoiding mushy rice isn’t just the amount of liquid, but how you handle the heat. Once your water hits a boil, drop it to the lowest setting possible and put a tight lid on it. Don’t peek. Every time you lift that lid to check on things, you’re letting out the steam that’s actually doing the work. If you’re cooking rice in a pot rather than using a machine, patience is your best friend; let it sit, off the heat, for at least ten minutes before you even think about touching a fork.

No More Mush Real Systems for Avoiding Mushy Rice

If you’ve ever pulled a pot of gummy, overcooked grains from the stove, you know the frustration. It’s not just a minor fail; it’s a wasted meal. Most of the time, the culprit isn’t your stove, it’s the heat management. When you’re cooking rice in a pot, the biggest mistake is leaving the lid off too long or cranking the heat to “high” because you’re in a rush. That extra heat creates uneven evaporation, leaving the bottom scorched and the top a soggy mess.

To fix this, you need to respect the “off” phase. Once the water is absorbed and the grain is tender, turn off the heat entirely but do not touch the lid. I rely on a strict ten-minute resting period where the pot sits undisturbed. This allows the residual steam to redistribute evenly through the grains, which is one of my favorite steaming rice tips for achieving that distinct, fluffy texture. If you skip this part, you’re basically asking for mush. Let the physics do the work for you.

Pot or Machine Best Rice Cooker Settings and Steaming Rice Tips

If you’re like me and value efficiency over everything, a rice cooker is your best friend—but only if you actually know how to use it. Most people just hit “start” and hope for the best, but if you want to master the best rice cooker settings, you need to treat it like a system. Once you’ve mastered the rinsing white rice step, let the machine do the heavy lifting. If your cooker has a “Quick Cook” mode, skip it; it usually results in unevenly cooked grains. Stick to the standard cycle to allow the steam to circulate properly.

Now, if you’re strictly cooking rice in a pot because you don’t own a machine, the stakes are a little higher. The biggest mistake I see is lifting the lid too early to “check” on it. Every time you peek, you lose precious heat and pressure. Instead, once the water is absorbed, turn off the heat and let it sit, lid on, for at least ten minutes. This final resting period is one of my favorite steaming rice tips because it allows the moisture to redistribute, ensuring you’re avoiding mushy rice and getting that perfect, fluffy texture every single time.

Small Tweaks for Big Wins: My Pro-Tips for the Perfect Batch

  • Don’t touch the lid. I know it’s tempting to peek when you’re hungry, but every time you lift that lid, you’re letting out the steam that’s actually doing the work. Just leave it alone and let the system do its thing.
  • The “Resting Period” is non-negotiable. Once the heat is off, let the pot sit covered for at least 10 minutes. This allows the moisture to redistribute so you don’t end up with a pot of gummy rice at the bottom and dry grains at the top.
  • Use a fork, not a spoon. When you’re finally ready to fluff the rice, use a fork to gently lift and separate the grains. A heavy spoon tends to smash the grains together, which is a fast track to a mushy mess.
  • Upgrade your water. If your tap water tastes like chlorine, your rice is going to taste like a swimming pool. Use filtered water if you can; it’s a tiny extra step that makes a massive difference in the final flavor.
  • Season as you go. If you’re making something savory, don’t just rely on salt at the end. Throw a tiny bit of salt or even a drop of sesame oil into the water before you start cooking to infuse the flavor deep into the grain.

The Cheat Sheet for Better Rice

Stop skipping the rinse; washing your rice until the water runs clear is the single easiest way to prevent that sticky, gluey mess.

Pick your ratio and stick to it—whether you’re using a pot or a machine, consistency is what stops the guesswork.

Let it rest after the heat is off; giving the rice five minutes to steam in its own residual heat is the secret to that perfect, fluffy texture.

The Bottom Line on Perfect Grains

At the end of the day, cooking great rice isn’t about some secret culinary magic or owning a $300 smart cooker; it’s just about following a few reliable systems. If you remember to rinse that starch away until the water runs clear, nail your water-to-rice ratio, and actually give the pot a few minutes to rest after the heat is off, you’ve already won half the battle. Stop treating it like a guessing game and start treating it like a repeatable process. Once you stop winging it and start using these specific steps, you’ll realize that those mushy, gummy clumps were entirely preventable.

I know that when you’re staring at a pile of mail or a chaotic work schedule, a single pot of rice might feel like the least important thing in your world. But I also know that small, consistent wins—like a perfectly fluffy bowl of jasmine rice—can actually change the entire energy of your evening. Adulthood is heavy enough as it is; don’t let your dinner be another source of unnecessary friction. Master these little systems now, and you’ll find that everything else starts to feel a bit more manageable. You’ve got this.

Frequently Asked Questions

Can I use the same water-to-rice ratio for brown rice, or do I need a whole new system for that?

Short answer: No, don’t use the same ratio. If you try to cook brown rice with the white rice math, you’re going to end up with something crunchy and unpleasant. Brown rice has that tough outer bran layer, so it needs way more hydration and time to actually soften up. I usually bump my water up by about an extra half-cup per grain and let it simmer longer. It’s a different rhythm, but worth the wait.

What’s the deal with that "resting" period—does it actually matter, or is it just something people say?

It’s not just some culinary myth; it’s actually a crucial part of the system. When the heat turns off, the rice is still finishing its cooking process via residual steam. If you go straight for the scoop, you’ll likely end up with unevenly cooked grains or a mushy mess at the bottom. Let it sit, lid on, for about 10 minutes. It allows the moisture to redistribute so every grain stays fluffy and separate.

If I accidentally make a batch that's too sticky, is there a way to save it for something else instead of just tossing it?

Don’t toss it. Seriously. If you’ve ended up with a bowl of sticky, clumped-together rice, stop trying to eat it as a side dish and pivot. That texture is actually a goldmine for fried rice—the starch helps it fry up instead of turning into a gummy mess. You can also mash it into congee (savory rice porridge) or use it as a base for crispy rice salads. It’s not a failure; it’s just a change in plans.

Easy healthy recipes for daily routines.

Realistic Healthy Recipes for Your Daily Routine

Let’s be real: most of us treat mealtime like a high-stakes math equation we didn’t study for. You finish a long workday, your brain is fried, and suddenly the idea of chopping vegetables feels like a personal insult. We tell ourselves we’ll eat better, but then we end up staring blankly into a pantry before giving in to overpriced takeout because it’s the path of least resistance. I’ve spent way too many nights feeling that specific brand of “adulthood burnout” just because I didn’t have a plan. The truth is, finding easy healthy recipes shouldn’t feel like a second job or a lifestyle overhaul that requires a culinary degree and three hours of prep time.

I’m over the gatekeeping and the overly complicated “wellness” recipes that require ingredients you can’t find at a regular grocery store. In this post, I’m breaking down five of my go-to, low-friction meals that actually taste good and—more importantly—fit into a real schedule. These aren’t just ideas; they are repeatable systems designed to keep you fueled without turning your kitchen into a disaster zone. Get ready to reclaim your evenings and finally stop the constant cycle of decision fatigue.

Table of Contents

The "Everything in the Fridge" Grain Bowl

The "Everything in the Fridge" Grain Bowl.

I used to think meal prepping meant spending my entire Sunday staring at a pile of raw kale, but that’s just not realistic for my workflow. Now, I rely on the grain bowl system because it’s basically impossible to mess up. All you need is a base of whatever grain you have on hand—quinoa, farro, or even just pre-cooked rice—and then you just layer on whatever veggies are about to go bad in your crisper drawer.

Sheet Pan Sausage and Veggies

Roasted Sheet Pan Sausage and Veggies.

If you’re like me and hate the mental load of cleaning five different pots and pans after a long day, the sheet pan method is your new best friend. I grab a pack of high-quality chicken sausage, chop up some bell peppers, zucchini, and red onion, and toss them all on a single tray with olive oil and dried oregano. You just slide it into the oven and walk away until it’s crispy and delicious.

The Five-Minute Mediterranean Tuna Salad

The Five-Minute Mediterranean Tuna Salad bowl.

Let’s be real: sometimes you don’t even have the energy to turn on the stove. When I’m in the middle of a deep-work session and my stomach starts growling, I reach for this tuna salad because it requires zero actual cooking. I skip the heavy mayo and instead mix canned tuna with a big scoop of Greek yogurt, some diced cucumber, and a handful of chickpeas for extra protein.

One-Pot Pesto Pasta with Greens

I’ve learned that “healthy” doesn’t have to mean “salad only,” and this one-pot pasta is proof. I throw dried pasta, a jar of good pesto, some frozen peas, and a massive amount of baby spinach into a pot with just enough water or broth to cover it. As the pasta cooks, the spinach wilts into the sauce, making it feel like you’ve actually put in effort when you really just waited for a timer to go off.

Overnight Oats for the Non-Morning Person

I am definitely not a morning person, so the concept of “cooking breakfast” at 7:00 AM feels like a personal attack. My solution is to prep overnight oats in small mason jars the night before. You just mix oats, milk of your choice, and a spoonful of chia seeds in a jar, let it sit in the fridge, and you have a grab-and-go breakfast waiting for you the next day.

The Bottom Line

Stop aiming for culinary perfection; the goal is just to get decent, nourishing food into your system without the mental burnout.

Build your meals around “modular” ingredients—things you can prep once and swap around all week to keep things from getting boring.

If a recipe requires a specialized tool or an hour of cleaning, skip it. The best system is the one you actually have the energy to follow.

The Bottom Line

At the end of the day, the goal isn’t to become a gourmet chef or spend your entire Sunday hovering over a stove. It’s about building a system where you can grab something nutritious without having to perform a mental marathon. Whether you’re leaning on the one-pan roasted veggies, prepping a massive batch of grains, or just keeping high-quality canned beans on hand, the key is removing the decision fatigue that usually leads to a takeout order. If you can master these five low-effort pivots, you’ve already won half the battle against the chaos of a busy week.

Don’t feel like you have to implement all of this at once. If you try to overhaul your entire kitchen in twenty-four hours, you’re probably going to burn out by Tuesday. Just pick one recipe from this list and try it this week. Small, repeatable wins are what actually stick. Adulthood is messy enough as it is, so let’s stop treating mealtime like another high-stakes chore and start treating it like a simple, manageable part of your routine. You’ve got this.

Frequently Asked Questions

How do I keep these meals from tasting like "sad desk salads" after a few days in the fridge?

The secret is keeping the “wet” stuff away from the “dry” stuff. If you toss dressing directly onto greens on Sunday, you’re basically eating compost by Wednesday. I always use small glass jars or even just tiny reusable silicone containers for my dressings and sauces. Keep the crunch—like seeds, nuts, or croutons—in a separate little snack bag. When you’re ready to eat, combine everything fresh. It takes ten extra seconds, but it’s the difference between a meal and a chore.

I’m on a tight budget—can I swap out the expensive ingredients for cheaper alternatives without ruining the recipes?

Absolutely. Most of these recipes are just frameworks, not strict rules. If a recipe calls for organic kale and it’s $6 a bunch, grab whatever leafy green is on sale instead. Swap fresh berries for frozen ones (they’re actually better for smoothies anyway), or use canned beans if the dried ones feel like too much work. The goal is to eat well, not to go broke. Just keep the ratios similar and you’ll be fine.

What’s the best way to prep these if I only have about an hour on a Sunday?

If you’ve only got sixty minutes, stop trying to cook everything from scratch. It’s a trap. Instead, focus on “component prepping.” While your grains are simmering, chop all your raw veggies at once. Use that time to roast one big tray of protein and another of veggies simultaneously. Don’t worry about individual meals; just get the building blocks ready in containers. It’s way more efficient than assembly-line cooking and saves your sanity.

Page 3 of 4

Powered by WordPress & Theme by Anders Norén