Month: February 2026 Page 2 of 3

Overcoming setbacks when dealing with job rejection.

Turning Job Rejection Into Fuel for Your Next Move

I still remember sitting on my floor, surrounded by half-disassembled vintage radios and a lukewarm cup of coffee, staring at that one specific email that felt like a physical punch to the gut. It wasn’t just a “no”; it was the third one in a week, and suddenly, my carefully curated freelance life felt like it was unraveling at the seams. We’ve all been told to “just stay positive” or “embrace the journey,” but let’s be real: when you’re actually dealing with job rejection, those platitudes feel incredibly condescending. They don’t help you pay your rent or stop the late-night spiral of questioning your entire career path.

I’m not here to give you a motivational speech or a list of toxic positivity affirmations. Instead, I want to give you a functional framework for processing the sting so you can get back to work without feeling like a failure. We’re going to build a repeatable system for analyzing feedback, managing the emotional fallout, and refining your outreach so that every “no” actually becomes useful data for your next “yes.”

Table of Contents

Stop the Spiral Dealing With Job Rejection Without Losing Your Mind

Stop the Spiral Dealing With Job Rejection Without Losing Your Mind

When that “thanks, but no thanks” email hits your inbox, the immediate urge is to close your laptop and stare at the ceiling for three hours. I get it. That initial sting is physiological; your brain treats a professional setback like a literal threat. But the goal isn’t to pretend it doesn’t hurt—it’s to prevent that sting from turning into a week-long slump. To practice true resilience in job searching, you have to create a physical buffer between the news and your reaction. I call this the “24-hour moratorium.” Give yourself one full day to be annoyed, eat something decent, and vent to a friend. Do not touch your resume, do not look at LinkedIn, and definitely do not send a passive-aggressive reply.

Once the dust settles, we shift from emotion to systems. This is where you turn overcoming career disappointment into a tactical advantage. Instead of just moving on blindly, I treat every “no” as a data point. This might mean sending a short, polite note to ask for specifics, or it might mean realizing your portfolio needs a refresh. The key is to move from a state of passive waiting to active refinement so you aren’t just repeating the same cycle.

The Emotional Decompression Overcoming Career Disappointment and Unemployme

The Emotional Decompression Overcoming Career Disappointment and Unemployme

Let’s be real: the mental toll of a “no” is often heavier than the actual logistical struggle of finding work. When you’re stuck in the cycle of applications and silence, it’s incredibly easy to let your self-worth get tangled up in your employment status. Overcoming career disappointment isn’t about forcing a smile and pretending you aren’t gutted; it’s about acknowledging that the sting is valid so it doesn’t turn into a permanent cloud. I’ve found that if I don’t build a literal “buffer zone” between a rejection and my next task, I end up paralyzed by the stress.

To manage this, you need a way of coping with unemployment stress that doesn’t involve scrolling through LinkedIn and comparing your “behind-the-scenes” to everyone else’s highlight reel. I treat my mental energy like a battery—if I spend it all mourning a role I didn’t get, I won’t have the charge left for the next interview. Set a timer for your frustration. Give yourself twenty minutes to be annoyed, vent to a friend, or just sit in the suck. Once that timer goes off, we pivot back to the system.

Building Resilience in Job Searching Through Systematic Recovery

Building Resilience in Job Searching Through Systematic Recovery

Once the initial sting fades, you have to shift from “why did this happen?” to “what is the data telling me?” I like to treat my job search like a freelance project—it’s all about the iterative process. Instead of letting a “no” sit in your inbox like a heavy weight, try to turn it into a diagnostic tool. This is where true resilience in job searching actually comes from; it’s not about being bulletproof, it’s about having a protocol to process the data and move on.

One of the most effective ways to do this is to figure out exactly where the leak in your system is. If you’re getting interviews but no offers, the issue is likely your delivery, which means you can focus on improving interview performance through targeted mock sessions. If you aren’t even getting the first call, your resume needs a structural overhaul. If you’re feeling brave, send a short, low-pressure note asking how to ask for interview feedback without sounding desperate. Most recruiters won’t respond, but the ones who do can give you the exact roadmap you need for your next attempt.

The Feedback Loop How to Ask for Interview Feedback Effectively

Here is the reality: most recruiters are going to ghost you, even after you ask. It’s frustrating, but if you want to actually turn a “no” into something useful, you have to change your approach. Instead of sending a desperate, “Why didn’t I get it?” email, try a low-pressure request focused on improving interview performance. You want to position yourself as someone who is looking for data, not someone who is looking for a pity party. Keep it brief, acknowledge that they’re busy, and ask if there was one specific area where your experience didn’t quite align with their current needs.

When you frame it this way, you aren’t just asking for a critique; you’re practicing professional growth after failure. Even if they only give you a one-sentence answer, that tiny bit of intel is gold for your next round. It helps you stop guessing what went wrong and starts building the resilience in job searching that keeps you from hitting a wall every time a door closes. Treat every rejection like a failed beta test—it’s just more information to help you optimize the next version of yourself.

The Pivot Protocol Improving Interview Performance and Professional Growth

Once you’ve processed the initial sting, it’s time to stop treating every “no” like a personal indictment and start treating it like data. This is where you shift from passive waiting to active improving interview performance. I like to think of this as a post-game film review. Instead of just closing your laptop and feeling defeated, I sit down with a notebook and audit the session. Where did the conversation stall? Which question made me stumble into a “word salad” response? By documenting these friction points, you turn a vague sense of failure into a concrete checklist for your next round.

This phase is really about professional growth after failure—taking the awkwardness of a bad interview and distilling it into a refined strategy. If you realized your technical explanations were shaky or your “tell me about yourself” pitch felt clunky, don’t just hope it won’t happen again. Build a system to fix it. Practice those specific answers out loud, record yourself on your phone, or run them by a friend. The goal isn’t to become a perfect, robotic candidate; it’s to ensure that the next time you walk into that virtual room, you feel prepared rather than panicked.

The Post-Rejection Toolkit: 5 Ways to Keep Your Momentum

  • Set a “Rejection Window.” Give yourself exactly 30 minutes to feel the sting—vent to a friend, listen to a sad playlist, or just stare at a wall. Once the timer goes off, the mourning period is over, and you move back into system mode.
  • Audit your application data. Instead of wondering “why” you didn’t get it, look at the numbers. Are you getting interviews but no offers? That’s an interviewing problem. Are you not even getting calls? That’s a resume/keyword problem. Treat it like a data set, not a personality flaw.
  • Automate your “Next Step” triggers. Don’t wait for motivation to strike after a bad email. Have a pre-set list of three small tasks—like updating one bullet point on your LinkedIn or reaching out to one networking contact—that you do automatically regardless of how you feel.
  • Create a “Win Folder.” Keep a digital doc of every compliment, successful project, or “thank you” email you’ve ever received. When a rejection makes you feel unqualified, open that folder to remind yourself that your skills actually exist.
  • Diversify your “Identity Portfolio.” If your entire sense of self-worth is tied to your job title, a rejection will feel like an identity crisis. Make sure you have small, non-career wins happening—like finishing a DIY project or hitting a personal fitness goal—to keep your ego stable.

The TL;DR: Your Rejection Survival Kit

Separate your worth from your inbox; a “no” from a recruiter is a data point about a specific role, not a verdict on your entire career or value as a human.

Build a repeatable recovery system—give yourself a set window to vent, then switch from emotional processing to tactical adjustments so you don’t get stuck in a loop.

Turn every rejection into a micro-audit by asking for feedback and refining your approach, because the goal isn’t just to get a job, it’s to build a process that actually works for you.

The Long Game

At the end of the day, navigating job rejection isn’t about having a perfect, unshakeable ego; it’s about having a reliable system to catch you when you fall. We’ve covered a lot—from the immediate emotional decompression needed to stop a spiral, to the tactical side of building feedback loops and refining your pivot protocol. The goal isn’t to stop feeling the sting of a “no,” but to make sure that sting doesn’t derail your entire momentum. By treating every rejection as data rather than a personal indictment, you turn a frustrating setback into a necessary component of your professional evolution.

Please remember that your worth as a human being is entirely separate from your employment status or your ability to nail a specific interview. I know it feels heavy right now, but this is just one chapter in a much longer, much more interesting story. Keep your systems running, keep your head up, and trust the process you’ve built. You aren’t just waiting for a job to happen to you; you are actively constructing the foundation for the career you actually want. You’ve got this, and I’ll see you in the next one.

Frequently Asked Questions

How do I keep applying for new roles without feeling completely burnt out by the constant "no's"?

Honestly, the “apply-to-everything” grind is a fast track to burnout. To keep going, you have to stop treating job hunting like a marathon and start treating it like a controlled experiment. Set a hard “stop time” every day so your life doesn’t become just one long rejection loop. Limit yourself to a specific number of quality applications rather than aimless scrolling. If you hit your quota, you’re done. Protect your energy; it’s your most valuable asset.

Is it actually worth the effort to follow up with a recruiter after a rejection, or does it just make me look desperate?

Honestly? It’s worth it, but only if you do it right. There’s a massive difference between a desperate “Please reconsider me” and a strategic “Thanks for the update; I’d love to stay on your radar for future roles.” If you keep it brief and professional, you aren’t looking desperate—you’re looking like someone who actually knows how to manage a professional relationship. It’s about planting a seed, not begging for a seat.

How can I tell if the rejection was actually due to my skills or if I just wasn't the right "culture fit" for that specific team?

Honestly, the “culture fit” line is often just corporate shorthand for “we couldn’t quantify why you weren’t the vibe we wanted.” To tell the difference, look at the interview itself. If they grilled you on technical scenarios and you stumbled on the logic, it was likely a skill gap. But if the technical part went smoothly and you just felt a weird, unspoken tension during the “get to know you” phase? That’s usually a sign of a mismatch in working styles, not your actual ability.


Simple steps for a digital declutter.

Simple Steps to Declutter Your Digital World

I was sitting in a coffee shop last Tuesday, trying to pull up a single freelance contract, when my phone let out that dreaded, frantic “storage full” notification. I stared at the screen, paralyzed, realizing I had 4,000 unorganized screenshots, three different cloud subscriptions I don’t use, and a desktop that looked like a digital landfill. It hit me that my attempt at a digital declutter wasn’t just about making things look pretty for an aesthetic Instagram feed; it was about the fact that my actual brain felt heavy because my tools were broken.

I’m not here to sell you on some expensive, high-concept productivity app or a “zen” lifestyle overhaul that takes three weeks to implement. We don’t have time for that. Instead, I’m going to give you the exact, unpolished systems I use to strip away the noise and keep my files from turning into a disaster zone. We’re going to build a repeatable workflow that actually works for your real, messy life, so you can stop fighting your devices and start actually using them.

Table of Contents

Stop the Digital Bleed a No Nonsense Guide to Your Digital Declutter

Stop the Digital Bleed a No Nonsense Guide to Your Digital Declutter

First, we need to address the immediate leak: your notifications. If your phone buzzes every time a random app wants to tell you about a sale you’ll never use, you’re constantly being pulled out of your flow. I started managing notification fatigue by going into my settings and nuking everything that wasn’t a human being trying to reach me. If it’s an app, it’s muted. Period. This isn’t about being antisocial; it’s about reclaiming your focus so you aren’t reacting to your screen all day.

Next, let’s talk about the mess hiding in your cloud and desktop. Most of us treat our file storage like a junk drawer, just tossing everything into “New Folder (2)” and hoping for the best. To fix this, you need actual digital hygiene practices that stick. I recommend a “one-in, one-out” rule for your downloads folder and a strict naming convention for your project files. If you can’t find a document in under thirty seconds, your system is broken. Stop letting the clutter pile up until it feels like a second job just to find one PDF.

Taming the Chaos Organizing Digital Files Without the Mental Meltdown

Taming the Chaos Organizing Digital Files Without the Mental Meltdown

The biggest mistake I see people make is trying to organize everything at once. You sit down with a massive pile of unsorted PDFs and three years of “Untitled” screenshots, and suddenly, you’re paralyzed. To avoid that mental meltdown, you have to stop treating your files like a junk drawer. Start by implementing basic digital hygiene practices that prioritize visibility. I personally use a “Current/Archive” system: if I haven’t touched a file in three months, it goes into a deep-storage folder. This keeps my active workspace clean and prevents that frantic, heart-racing search when a client asks for a document you know you saved somewhere.

Once the files are tucked away, focus on your device interface. Most of us are drowning in visual noise, which is why I swear by specific smartphone organization tips to reclaim my focus. Move your most addictive apps—the ones that trigger mindless scrolling—off your home screen and into a folder on the second page. If an app doesn’t serve a functional purpose in your daily workflow, delete it. It’s not about being a perfectionist; it’s about reducing the friction between you and the tasks that actually matter.

Kill the Noise Managing Notification Fatigue to Reclaim Your Focus

Kill the Noise Managing Notification Fatigue to Reclaim Your Focus

Let’s be real: your phone shouldn’t be a slot machine that pays out in anxiety every time it buzzes. If you’re constantly jumping every time your screen lights up, you aren’t actually “connected”—you’re just being hijacked. Part of building better digital wellness habits is realizing that most of those pings are completely irrelevant to your immediate life. I started by going into my settings and nuking every single non-human notification. If it’s not a text or a call from a real person, it doesn’t get to interrupt my flow. Period.

Once you’ve cleared the immediate clutter, you need to look at your home screen. I’m a big fan of aggressive minimalism here. If an app is designed to keep you scrolling endlessly, move it off your first page or hide it in a folder deep in your library. This isn’t about being a tech hermit; it’s about managing notification fatigue so that when you do pick up your device, it’s because you actually intended to, not because an algorithm nudged you.

Building Better Digital Hygiene Practices That Actually Stick

The problem with most advice is that it treats organization like a one-time event, like cleaning your room once a year. But if you don’t build actual digital hygiene practices into your weekly routine, you’re just setting yourself up for another massive meltdown in three months. I stopped trying to do “big cleans” and started doing “micro-maintenance.” Every Sunday night, while I’m winding down, I spend ten minutes just clearing my desktop and deleting those random screenshots that serve zero purpose. It’s not about perfection; it’s about preventing the pile-up before it starts.

You also need to be ruthless about your phone. If an app hasn’t been opened in a month, kill it. If it’s a constant source of low-level anxiety, mute it. I’ve found that implementing a few simple smartphone organization tips—like moving all my “distraction apps” into a single, hidden folder on the last page—makes a huge difference in how often I mindlessly scroll. It’s about creating friction between you and the chaos so that staying focused becomes the default, not a chore.

Beyond the Screen Unplugging From Technology to End the Emergency

Here’s the thing: you can organize every folder on your desktop and silence every single red bubble, but if you’re still reflexively reaching for your phone the second you feel a hint of boredom, you haven’t actually solved the problem. We’ve become so conditioned to the constant dopamine loop that we treat being “offline” like it’s some radical, scary lifestyle change. But unplugging from technology isn’t about moving to a cabin in the woods; it’s about setting boundaries so your brain can finally exit that high-alert, fight-or-flight mode.

I’ve started implementing a “tech sunset” in my own routine—no screens after 9 PM—and honestly, it’s been a game changer for my mental clarity. It’s less about a total ban and more about intentionality. If you’re constantly checking emails or scrolling through feeds just to fill the gaps in your day, you’re never actually resting. Developing solid digital wellness habits means recognizing when the tool is serving you and when you’ve become the tool’s servant. Let’s aim for a life where we use our devices to facilitate our goals, rather than letting them dictate our entire sense of peace.

My Low-Friction Cheat Sheet for Staying Digitally Sane

  • The “One-In, One-Out” App Rule: Every time you download a new app that promises to “optimize” your life, you have to delete an old one that’s just sitting there collecting digital dust. It stops the bloat before it starts.
  • The Desktop Zero Method: Treat your computer desktop like a physical kitchen counter. If it’s covered in random scraps, you can’t work. At the end of every Friday, clear everything into folders or the trash so you start Monday with a clean slate.
  • Aggressive Unsubscribe Sprints: Don’t just delete those promotional emails; actually hit the unsubscribe link. Spend ten minutes once a week nuking the newsletters you haven’t opened in a month. If you aren’t reading it, it’s just noise.
  • The “Ghost File” Purge: We all have those “Untitled” documents and random screenshots floating around. Set a recurring monthly alarm to hunt down and kill these files. If you haven’t looked at it in thirty days, you probably don’t need it.
  • Audit Your Cloud Storage: Stop paying for extra storage just to house blurry photos and accidental screen recordings. Once a quarter, go through your cloud drive and dump the junk so your digital footprint stays lean and searchable.

The Bottom Line: Making It Stick

Stop trying to fix everything in one weekend; digital decluttering is about small, repeatable systems—like a weekly 10-minute file sweep—not a massive, exhausting overhaul.

Your tools should serve you, not the other way around, so if an app or a notification setting is adding more friction to your day than it’s solving, kill it immediately.

The goal isn’t a perfect, aesthetic desktop; it’s about building enough digital hygiene that your tech stops feeling like a constant, low-grade emergency.

The Bottom Line

Look, we’ve covered a lot of ground, from scrubbing your file directories to finally silencing those soul-crushing notifications. The point isn’t to reach some mythical state of perfect, sterile organization where every single pixel is in its place—that’s just another form of burnout. It’s about building a sustainable framework that prevents the chaos from creeping back in. Whether you’re finally clearing out that mountain of unread emails or setting boundaries for when you actually put the phone down, the goal is to reduce the friction between you and your actual life. You don’t need a total digital overhaul every weekend; you just need a few reliable systems that work for you, not against you.

At the end of the day, your technology should be a tool that serves your goals, not a relentless source of background noise that keeps you in a state of constant emergency. If you feel overwhelmed right now, just pick one thing from this list and do it today. Don’t wait for a “perfect” time to reset, because that time doesn’t exist. Just start small, keep it functional, and remember that you deserve to own your attention rather than letting your devices lease it from you. You’ve got this.

Frequently Asked Questions

What if I’m afraid of deleting something important—how do I know what’s actually "trash" and what’s a "just in case" file?

I totally get it—the “just in case” fear is real. I used to hoard every random screenshot like it was a sacred relic. Here’s my rule: if you haven’t opened it in six months and it doesn’t have a legal or financial name attached to it, it’s likely clutter. For the stuff you’re truly nervous about, dump it into one “Archive [Year]” folder on a cloud drive or external hard drive. Get it out of your sight, but keep it accessible. If you don’t search for it in a year, delete the whole folder.

I don't have a whole weekend to do this; is there a way to declutter in just 10 or 15 minutes a day without it feeling overwhelming?

Honestly, I get it. I don’t have the bandwidth for a “digital deep clean” weekend either. The trick is to stop treating it like a project and start treating it like brushing your teeth. Pick one tiny micro-task: spend 10 minutes deleting old screenshots, or 15 minutes unsubscribing from junk emails while you drink your coffee. If you do one small thing daily, you’re building a system, not a chore list.

Once I finally get my files and notifications under control, how do I stop myself from sliding right back into the same chaotic habits?

Honestly, the “slide back” happens because we treat decluttering like a one-time spring cleaning instead of a maintenance task. You wouldn’t wash your dishes once and expect your kitchen to stay clean forever, right? You need a “low-friction” system. Set a recurring 15-minute timer every Sunday to clear your desktop and inbox. If the system feels like a chore, it’s too complicated. Keep it tiny, keep it repeatable, and just keep the momentum.

Essential tools for DIY projects.

Must-have Tools for Anyone Starting Out in Diy

I still remember the exact moment I realized I was being lied to. I was twenty-two, standing in the middle of a big-box hardware store, staring at a $300 “professional grade” starter kit that looked more like a collection of shiny, useless plastic than actual equipment. I had a leaky kitchen faucet and a sense of impending doom, but that kit wasn’t going to help me fix it. The truth is, the industry loves to gatekeep by making you think you need a massive, expensive workshop just to handle basic home maintenance. You don’t. Most of the stuff they try to upsell you on is just clutter that takes up space in your closet. I’ve spent years figuring out which essential tools for diy actually earn their keep and which ones are just expensive distractions.

I’m not here to give you a shopping list of everything you could possibly use if you were a professional contractor. Instead, I want to give you the actual, unpolished blueprint for a toolkit that works. My goal is to help you build a setup that reduces the friction of adulthood, focusing on a few reliable pieces that will actually stop your house from falling apart. We’re going to strip away the hype and focus on functional, high-impact gear that fits into a real life.

Table of Contents

The No Panic Starter Kit Essential Tools for Diy Success

The No Panic Starter Kit Essential Tools for Diy Success

Look, you don’t need a garage full of heavy machinery to start fixing things around your apartment. Most of the time, you’re just trying to tighten a loose screw or hang a heavy mirror without it crashing into your floor. I always tell people to start with a solid maintenance tool checklist rather than running to the hardware store and grabbing everything that looks shiny. You really just need the basics: a decent multi-bit screwdriver, a hammer that doesn’t feel like it’s going to snap in half, and a high-quality tape measure.

When you’re deciding between hand tools vs power tools, my rule of thumb is to master the manual stuff first. There’s no point in buying a high-end cordless drill if you haven’t even learned how to use a level properly. If you’re on a tight budget, focus on getting one really good version of a tool rather than a cheap five-piece set that breaks the second you apply pressure. Investing in a few reliable pieces of budget friendly diy gear early on saves you so much frustration (and money) in the long run.

Hand Tools vs Power Tools Choosing Your Fighting Style

Hand Tools vs Power Tools Choosing Your Fighting Style

When you’re first starting out, the debate of hand tools vs power tools can feel a little overwhelming, like you’re choosing a side in a war you didn’t sign up for. Here’s the truth: you don’t need a garage full of heavy machinery to be “handy.” Hand tools are your bread and butter. They’re precise, they’re quiet, and they don’t require a dedicated charging station. If you’re just tightening a loose cabinet handle or assembling flat-pack furniture, a solid screwdriver and a hammer are your best friends. They’re the foundation of any budget friendly diy gear collection because they’re reliable and easy to control.

That said, power tools are the “cheat codes” of adulthood. If you’re looking into beginner woodworking equipment or even just hanging a heavy floating shelf, a cordless drill is going to save you a massive amount of physical frustration. I used to think I could manual-labor my way through everything, but once I invested in a decent drill, my DIY speed tripled. The goal isn’t to own every gadget on the shelf; it’s about knowing when a bit of extra torque is worth the investment to keep your projects from becoming a headache.

Your Budget Friendly Diy Gear Stop Overspending on Fluff

Your Budget Friendly Diy Gear Stop Overspending on Fluff

Look, I get it. You walk into a big-box hardware store and suddenly feel like you need a $500 professional-grade drill set just to hang a floating shelf. That is a total trap. Most of those massive, pre-packaged home improvement starter kit bundles are actually just a way to sell you twenty mediocre tools when you really only need five good ones. My rule of thumb? Buy for the project you have today, not the imaginary workshop you think you’ll own in three years.

Instead of dropping a fortune on everything under the sun, focus on building a curated collection of budget friendly diy gear that actually lasts. I’m a huge advocate for hitting up thrift stores or Facebook Marketplace for high-quality, vintage hand tools—they often have better weight and durability than the cheap plastic stuff sold today. If you’re just starting out, prioritize quality over quantity. It’s much better to own one solid, reliable screwdriver that won’t strip your screws than a massive set of flimsy junk that ends up in a landfill by next month.

Beyond the Basics Building Your Beginner Woodworking Equipment

Once you’ve mastered the basics of fixing a loose cabinet hinge or tightening a screw, you’ll probably feel that itch to actually make something. I remember my first attempt at a simple floating shelf; I thought I could wing it with just a screwdriver and some luck, but I quickly realized that beginner woodworking equipment requires a bit more intentionality. You don’t need a massive, expensive workshop to start, but you do need a few things that go beyond a standard home improvement starter kit.

Start by investing in a decent combination square and a decent set of wood chisels. These aren’t just for show; they are the difference between a joint that fits perfectly and one that looks like a toddler hacked at it with a butter knife. If you’re leaning toward the electric side of things, a small orbital sander is a total game-changer for smoothing out surfaces without spending hours doing it by hand. My advice? Don’t rush into buying every gadget on the shelf. Focus on quality over quantity so you aren’t stuck with a drawer full of cheap plastic that breaks the first time you hit a knot in the wood.

The Maintenance Tool Checklist to End the Home Emergencies

Look, there is a massive difference between having a collection of tools for a hobby and having a maintenance tool checklist that actually saves your sanity when something breaks at 10 PM. I’m not talking about setting up a full-blown workshop; I’m talking about the stuff that prevents a minor drip from turning into a flooded kitchen. You need a dedicated “emergency kit” mindset. This means having a high-quality adjustable wrench, a set of screwdrivers that won’t strip your screws, and a reliable flashlight always within reach.

When you’re building this out, don’t feel pressured to jump straight into heavy-duty beginner woodworking equipment or expensive machinery. Most home emergencies are actually pretty small and boring—a loose cabinet handle, a wobbly chair, or a slow drain. Focus your energy on gathering essential workshop supplies that handle these quick fixes. If you have these basics tucked away in one organized spot, you stop reacting to your house like it’s a crisis and start managing it like a pro. It’s all about reducing that friction before the chaos starts.

5 Ways to Keep Your Gear From Becoming Junk

  • Stop buying the “all-in-one” kits. They usually promise the world but give you ten mediocre versions of the same thing. I’ve learned the hard way that it’s much better to buy one high-quality screwdriver that actually grips than a 50-piece set where half the bits strip the moment you touch a screw.
  • Learn the “One-Project Rule” before you hit the hardware store. Don’t go in thinking, “I might need this someday.” That’s how you end up with a drawer full of random hex keys and specialized wrenches you’ll never touch again. Only buy what your current project—or the very next one—demands.
  • Treat your tools like they’re actually worth something. I know it sounds extra, but wiping down a metal surface or oiling a hinge after you use it takes ten seconds and prevents that annoying rust that ruins everything. A little bit of upkeep means you aren’t fighting your own equipment halfway through a job.
  • Organize by frequency of use, not by “type.” I don’t care if all the hammers go together; I care that the stuff I grab every single week is right at the front of my kit. If you have to dig through a heavy plastic bin to find your measuring tape, you’re going to lose momentum and probably end up frustrated.
  • Don’t be afraid to borrow or rent. If you need a heavy-duty power drill for a one-off weekend project, don’t drop $200 on a professional model. Ask a neighbor, check a local tool library, or rent one. Your goal is to finish the task, not to own every piece of machinery on the planet.

The TL;DR on Not Stressing Your Wallet or Your Sanity

Don’t fall for the “complete set” trap; buy what you actually need for the specific problem you’re solving right now.

Prioritize quality over quantity—one decent screwdriver you can actually rely on is better than a 50-piece kit of junk that breaks the first time you use it.

Maintenance is your best defense; keeping your tools clean and organized means you won’t be scrambling for a working hammer when something actually breaks.

The Bottom Line

Look, we’ve covered a lot of ground, from picking your first set of hand tools to figuring out when it’s actually worth dropping cash on power equipment. The biggest takeaway I want you to hold onto is that you don’t need a professional-grade workshop or a massive budget to start fixing things yourself. Whether you’re building a basic woodworking kit or just trying to maintain a functional living space so nothing breaks at 2 AM, the goal is the same: building a system that works for you. Start small, buy quality over quantity, and focus on the tools that solve your immediate problems rather than the ones that just look cool in a catalog.

At the end of the day, having these tools isn’t about becoming a master craftsman or spending every weekend covered in sawdust. It’s about the quiet confidence that comes from knowing you can handle whatever your environment throws at you. There is a specific kind of peace that settles in when you realize you don’t have to call a professional for every minor hiccup. So, grab that multi-tool, build your kit one piece at a time, and stop letting small repairs feel like massive emergencies. You’ve totally got this.

Frequently Asked Questions

I really want to start, but is it better to buy one high-quality drill or a cheap set that has everything included?

Honestly? Buy the one high-quality drill. I know the “all-in-one” kits look tempting when you’re staring at your bank account, but those cheap sets are usually a trap. You’ll end up with a motor that burns out halfway through a project and bits that strip every screw you touch. It’s way less frustrating to have one reliable tool that actually works than a box full of junk that makes you want to quit.

How do I know if a tool is actually worth the investment or if it's just some overpriced brand name I'm paying for?

Honestly, it’s a trap. I used to think buying the most expensive brand meant I was “doing it right,” but I was just paying for the logo. My rule of thumb? If you’re using it once a year, buy the cheap version. If you’re using it every weekend, invest in quality. Check the weight—cheap tools feel hollow and flimsy. If it feels like it’ll snap the first time you apply pressure, leave it on the shelf.

Where do I even store all this stuff so my apartment doesn't just look like a construction zone?

Look, I get it. The second you buy a drill, your living room starts looking like a hardware store exploded. To keep your space from feeling like a construction zone, stop thinking about “storage” and start thinking about “zones.” I swear by a sleek, rolling tool chest that tucks into a corner or a heavy-duty clear bin system inside a closet. If it’s out of sight, the mental clutter disappears too.

How to cook rice perfectly guide.

The Ultimate Guide to Cooking Flawless Rice

I used to think I needed one of those $150 high-tech induction cookers just to avoid turning my dinner into a gummy, starchy disaster. Honestly, the sheer amount of gatekeeping around something as basic as a grain of rice is exhausting. I spent way too many nights staring at a pot of mushy, overcooked sadness, wondering why every “expert” tutorial made it sound like I needed a chemistry degree just to get through a Tuesday night meal prep. If you’ve been searching for how to cook rice perfectly only to end up with a sticky mess that ruins your entire vibe, I promise you, it isn’t your fault—it’s just a lack of a solid system.

I’m not here to sell you on fancy gadgets or complicated culinary techniques that take an hour to prep. Instead, I’m stripping everything back to the actual, unpolished steps that work every single time, regardless of what equipment you have in your kitchen. I’m going to give you the precise, repeatable method I use to ensure every batch is fluffy, separate, and totally reliable. We’re cutting through the noise to give you a no-nonsense workflow that actually sticks.

Table of Contents

Stop the Kitchen Chaos How to Cook Rice Perfectly Every Time

Stop the Kitchen Chaos How to Cook Rice Perfectly Every Time

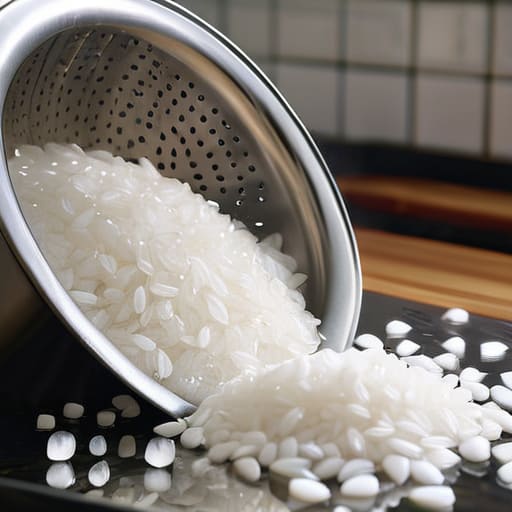
First things first: we need to talk about the prep work, because most people skip the most important part. If you’re just dumping dry grains into a pot, you’re basically asking for a gummy mess. I’ve learned the hard way that rinsing white rice until the water runs clear is non-negotiable. It gets rid of that excess surface starch that turns your dinner into a bowl of paste. Once you’ve rinsed it, let it drain well in a fine-mesh strainer. This small, five-minute step is the difference between a fluffy grain and a texture nightmare.

Once the prep is out of the way, it all comes down to the math. Forget those vague “one cup to two cups” rules you see in random recipes; you need a consistent rice to water ratio that actually works for your specific brand. I always use a standard 1:1.5 ratio for long-grain white rice when cooking rice in a pot. Keep the heat low, don’t peek under the lid, and let the residual heat do the heavy lifting. Consistency is everything when you’re trying to build a system that works every single time.

The Rinsing Ritual Why Rinsing White Rice Changes Everything

The Rinsing Ritual Why Rinsing White Rice Changes Everything

If you’ve ever ended up with a bowl of sticky, gummy clumps that look more like paste than actual grains, I promise you, it isn’t your fault—it’s just the starch. Most people skip this step because it feels like an extra chore, but rinsing white rice is the single most important thing you can do to fix your texture. When rice is packaged, it’s coated in a fine, powdery surface starch. If you don’t wash that off, that starch turns into a literal glue the moment it hits the boiling water.

I used to be lazy about this too, but once I started using a fine-mesh strainer, everything changed. You aren’t looking for perfection here; you just want to run cold water over the grains until the water running out the bottom goes from milky and opaque to mostly clear. It only takes about sixty seconds, but it’s the ultimate hack for avoiding mushy rice and ensuring every single grain stays distinct and fluffy. Think of it as prepping your canvas before you start painting—it’s just good groundwork.

Mastering the Math Finding Your Ideal Rice to Water Ratio

Mastering the Math Finding Your Ideal Rice to Water Ratio

Look, I know the temptation to just “eyeball it” is real, especially when you’re hungry and just want to get dinner on the table. But if you want to stop the cycle of either eating crunchy pebbles or a bowl of glue, you have to respect the math. The golden rule for most standard long-grain white rice is a 1:2 ratio—one cup of rice to two cups of water. However, if you’re working with jasmine or basmati, you might want to lean slightly lighter on the water to keep those grains distinct and fragrant.

The real trick to avoiding mushy rice isn’t just the amount of liquid, but how you handle the heat. Once your water hits a boil, drop it to the lowest setting possible and put a tight lid on it. Don’t peek. Every time you lift that lid to check on things, you’re letting out the steam that’s actually doing the work. If you’re cooking rice in a pot rather than using a machine, patience is your best friend; let it sit, off the heat, for at least ten minutes before you even think about touching a fork.

No More Mush Real Systems for Avoiding Mushy Rice

If you’ve ever pulled a pot of gummy, overcooked grains from the stove, you know the frustration. It’s not just a minor fail; it’s a wasted meal. Most of the time, the culprit isn’t your stove, it’s the heat management. When you’re cooking rice in a pot, the biggest mistake is leaving the lid off too long or cranking the heat to “high” because you’re in a rush. That extra heat creates uneven evaporation, leaving the bottom scorched and the top a soggy mess.

To fix this, you need to respect the “off” phase. Once the water is absorbed and the grain is tender, turn off the heat entirely but do not touch the lid. I rely on a strict ten-minute resting period where the pot sits undisturbed. This allows the residual steam to redistribute evenly through the grains, which is one of my favorite steaming rice tips for achieving that distinct, fluffy texture. If you skip this part, you’re basically asking for mush. Let the physics do the work for you.

Pot or Machine Best Rice Cooker Settings and Steaming Rice Tips

If you’re like me and value efficiency over everything, a rice cooker is your best friend—but only if you actually know how to use it. Most people just hit “start” and hope for the best, but if you want to master the best rice cooker settings, you need to treat it like a system. Once you’ve mastered the rinsing white rice step, let the machine do the heavy lifting. If your cooker has a “Quick Cook” mode, skip it; it usually results in unevenly cooked grains. Stick to the standard cycle to allow the steam to circulate properly.

Now, if you’re strictly cooking rice in a pot because you don’t own a machine, the stakes are a little higher. The biggest mistake I see is lifting the lid too early to “check” on it. Every time you peek, you lose precious heat and pressure. Instead, once the water is absorbed, turn off the heat and let it sit, lid on, for at least ten minutes. This final resting period is one of my favorite steaming rice tips because it allows the moisture to redistribute, ensuring you’re avoiding mushy rice and getting that perfect, fluffy texture every single time.

Small Tweaks for Big Wins: My Pro-Tips for the Perfect Batch

  • Don’t touch the lid. I know it’s tempting to peek when you’re hungry, but every time you lift that lid, you’re letting out the steam that’s actually doing the work. Just leave it alone and let the system do its thing.
  • The “Resting Period” is non-negotiable. Once the heat is off, let the pot sit covered for at least 10 minutes. This allows the moisture to redistribute so you don’t end up with a pot of gummy rice at the bottom and dry grains at the top.
  • Use a fork, not a spoon. When you’re finally ready to fluff the rice, use a fork to gently lift and separate the grains. A heavy spoon tends to smash the grains together, which is a fast track to a mushy mess.
  • Upgrade your water. If your tap water tastes like chlorine, your rice is going to taste like a swimming pool. Use filtered water if you can; it’s a tiny extra step that makes a massive difference in the final flavor.
  • Season as you go. If you’re making something savory, don’t just rely on salt at the end. Throw a tiny bit of salt or even a drop of sesame oil into the water before you start cooking to infuse the flavor deep into the grain.

The Cheat Sheet for Better Rice

Stop skipping the rinse; washing your rice until the water runs clear is the single easiest way to prevent that sticky, gluey mess.

Pick your ratio and stick to it—whether you’re using a pot or a machine, consistency is what stops the guesswork.

Let it rest after the heat is off; giving the rice five minutes to steam in its own residual heat is the secret to that perfect, fluffy texture.

The Bottom Line on Perfect Grains

At the end of the day, cooking great rice isn’t about some secret culinary magic or owning a $300 smart cooker; it’s just about following a few reliable systems. If you remember to rinse that starch away until the water runs clear, nail your water-to-rice ratio, and actually give the pot a few minutes to rest after the heat is off, you’ve already won half the battle. Stop treating it like a guessing game and start treating it like a repeatable process. Once you stop winging it and start using these specific steps, you’ll realize that those mushy, gummy clumps were entirely preventable.

I know that when you’re staring at a pile of mail or a chaotic work schedule, a single pot of rice might feel like the least important thing in your world. But I also know that small, consistent wins—like a perfectly fluffy bowl of jasmine rice—can actually change the entire energy of your evening. Adulthood is heavy enough as it is; don’t let your dinner be another source of unnecessary friction. Master these little systems now, and you’ll find that everything else starts to feel a bit more manageable. You’ve got this.

Frequently Asked Questions

Can I use the same water-to-rice ratio for brown rice, or do I need a whole new system for that?

Short answer: No, don’t use the same ratio. If you try to cook brown rice with the white rice math, you’re going to end up with something crunchy and unpleasant. Brown rice has that tough outer bran layer, so it needs way more hydration and time to actually soften up. I usually bump my water up by about an extra half-cup per grain and let it simmer longer. It’s a different rhythm, but worth the wait.

What’s the deal with that "resting" period—does it actually matter, or is it just something people say?

It’s not just some culinary myth; it’s actually a crucial part of the system. When the heat turns off, the rice is still finishing its cooking process via residual steam. If you go straight for the scoop, you’ll likely end up with unevenly cooked grains or a mushy mess at the bottom. Let it sit, lid on, for about 10 minutes. It allows the moisture to redistribute so every grain stays fluffy and separate.

If I accidentally make a batch that's too sticky, is there a way to save it for something else instead of just tossing it?

Don’t toss it. Seriously. If you’ve ended up with a bowl of sticky, clumped-together rice, stop trying to eat it as a side dish and pivot. That texture is actually a goldmine for fried rice—the starch helps it fry up instead of turning into a gummy mess. You can also mash it into congee (savory rice porridge) or use it as a base for crispy rice salads. It’s not a failure; it’s just a change in plans.

Understanding systems vs goals for success.

Forget Goals: Why Building Systems Is the Real Secret to Success

I remember sitting on my kitchen floor three years ago, surrounded by half-finished freelance projects and empty coffee mugs, feeling like a total failure because I hadn’t hit my “dream income” milestone. I had all these massive, shiny visions of success, but my actual daily life was a disorganized disaster of missed deadlines and frantic, last-minute scrambles. I was obsessed with the destination, but I had absolutely no map for the journey. That’s when I realized that the entire internet’s obsession with big achievements is actually a trap; if you’re constantly chasing outcomes without understanding systems vs goals, you’re just setting yourself up for a cycle of burnout and perpetual inadequacy.

I’m not here to sell you a $500 productivity masterclass or some aesthetic Notion template that looks pretty but does nothing. Instead, I want to give you the unpolished, actual steps to building the repeatable structures that make progress feel automatic rather than forced. We’re going to strip away the hype and look at how to build functional, low-friction habits that actually stick. By the end of this, you’ll know exactly how to stop living in a constant state of emergency and start building a life that actually runs itself.

Table of Contents

Stop Chasing Outcomes Why Systems vs Goals Keep You Exhausted

Stop Chasing Outcomes Why Systems vs Goals Keep You Exhausted

The problem with being goal-obsessed is that it turns your life into a series of “not yet” moments. You tell yourself, I’ll finally be happy/productive/successful once I hit this specific milestone, but that milestone is just a finish line that keeps moving. When you focus solely on the result, you’re essentially living in a state of constant deficiency. It’s exhausting because you’re ignoring the reality of your current situation to chase a version of yourself that doesn’t exist yet. This is where the trap of goal setting vs system building becomes so obvious; one is a destination that offers a fleeting dopamine hit, while the other is the actual road you have to walk every single day.

If you want to actually stick to something, you have to shift toward a process vs outcome orientation. Instead of obsessing over losing ten pounds or landing a massive freelance contract, focus on the repeatable actions that make those things inevitable. This is the core of the James Clear atomic habits philosophy—focusing on the tiny, incremental wins that build momentum. When you prioritize the system, you stop punishing yourself for not being “there” yet and start finding stability in the work itself.

The Trap of Goal Setting vs System Building Every Day

The Trap of Goal Setting vs System Building Every Day.

The problem with setting massive, sweeping goals is that they exist entirely in a future that hasn’t happened yet. You tell yourself, “I’m going to lose ten pounds” or “I’m going to launch my side hustle by June,” and suddenly, you’re living in a state of constant deficit. You feel like a failure every single day that you haven’t reached that finish line. This is the fundamental flaw in a pure outcome orientation; it treats your current self as a placeholder for a “better” version of you that only exists once the goal is checked off.

Instead of living for a distant milestone, I’ve learned to lean into daily routine optimization. This is where the real magic happens. When you shift your focus toward the small, repeatable actions—the kind of stuff you see in the James Clear atomic habits philosophy—the pressure starts to lift. You aren’t white-knuckling your way toward a finish line; you’re just showing up for the process. It’s about building a lifestyle that actually feels sustainable rather than one that requires a massive burst of willpower every single morning.

Applying James Clears Atomic Habits Philosophy to Your Chaos

Applying James Clears Atomic Habits Philosophy to Your Chaos

If you’ve ever felt like you’re constantly sprinting toward a finish line that keeps moving, you’ve probably stumbled upon the James Clear atomic habits philosophy. The core idea is simple, but it’s a total game-changer for anyone currently living in chaos: stop focusing on the massive, intimidating result and start obsessing over the tiny, repeatable action. Instead of telling yourself you’re going to “write a whole book” (the goal), focus on the system of “sitting in this chair for twenty minutes every morning” (the habit).

When we shift from an outcome-driven mindset to a process vs outcome orientation, the pressure starts to lift. It’s the difference between staring at a mountain and just focusing on where your foot lands with the next step. I used to think I needed massive bursts of motivation to get things done, but that’s a lie. Real, long-term behavioral change doesn’t come from one heroic effort; it comes from these small, almost invisible wins that eventually stack up into something substantial. It’s about building a framework that works even on the days when you have zero willpower left.

Ditching the Emergency Shifting to Process vs Outcome Orientation

When we live entirely for the “win”—that promotion, that specific number on the scale, or finally finishing a massive project—we’re essentially putting our happiness on layaway. We tell ourselves we’ll relax once we get there, but the reality is that the “there” is always moving. This is where the shift toward process vs outcome orientation becomes a literal lifesaver. Instead of obsessing over the finish line, I’ve started focusing on the actual mechanics of the day. If I focus on the quality of my workflow rather than just the deadline, the anxiety of “not being enough” starts to fade because I’m actually doing the work instead of just worrying about the result.

This transition is the foundation of any sustainable productivity framework. It’s about moving away from that frantic, “all-or-nothing” energy and toward something much more predictable. When you prioritize the process, you’re building a rhythm that can survive a bad day or a sudden crisis. You stop viewing a missed goal as a total failure and start seeing a broken system as something you can simply tweak and repair. It turns life from a series of high-stakes sprints into a manageable, steady walk.

Building Sustainable Productivity Frameworks for Long Term Behavioral Chang

If you want to actually stick to something without burning out by week three, you have to stop looking for a “magic pill” and start looking at sustainable productivity frameworks. The problem with most of us is that we try to overhaul our entire lives overnight, which is basically a recipe for a mental breakdown. Instead, I’ve found that the most effective way to foster long-term behavioral change is to design small, frictionless loops that fit into the life you actually have, not the idealized version of yourself you see on Pinterest.

This is where the shift from goal setting vs system building becomes your best friend. Instead of saying “I’m going to write a book” (the goal), your system is “I sit at my desk with a coffee at 8:00 AM for twenty minutes” (the process). By focusing on daily routine optimization, you take the decision-making out of the equation. You aren’t relying on willpower or some fleeting burst of inspiration; you’re just following the tracks you’ve already laid down. When the system is easy, the progress becomes inevitable.

How to Actually Build a System (Without Losing Your Mind)

  • Audit your “friction points” before setting new rules. Instead of saying “I’m going to work out more,” look at why you aren’t. Is it because your gym bag is always buried under laundry? Fix the bag situation first. A system is just a way to remove the tiny annoyances that stop you from starting.
  • Use the “Two-Minute Rule” to bypass the intimidation factor. If your goal is to write a massive content strategy, your system is just opening your laptop and typing one sentence. If you can’t do it in two minutes, your system is too heavy. Scale it back until it feels almost too easy to fail.
  • Build “Decision-Free Zones” into your week. Decision fatigue is real, and it kills systems. If you’re trying to eat better, don’t decide what’s for dinner at 6 PM when you’re exhausted; decide on Sunday. Automate the small stuff so you save your brainpower for the big stuff.
  • Focus on “Environment Design” over willpower. Willpower is a finite resource, and mine is usually gone by 3 PM. If you want to stop scrolling, put your phone in a different room. If you want to drink more water, put a carafe on your desk. Make the right behavior the easiest one to execute.
  • Track the process, not the progress. Stop checking the scale or your bank account every single day to see if you’re “winning.” Instead, track whether you actually followed your routine. Did you do the meal prep? Did you clear your inbox? If the system is running, the results will eventually catch up.

The TL;DR on Systems Over Goals

Stop treating your life like a series of high-stakes deadlines; when you focus on the daily process instead of the finish line, you stop living in a constant state of “emergency mode.”

Goals are just destinations, but systems are the actual engine—build the repeatable, messy habits that make progress inevitable rather than relying on a burst of temporary motivation.

Aim for sustainable friction reduction; the best system isn’t the most complex one, it’s the simplest, most functional routine that actually fits into your real, unpolished life.

The Long Game

At the end of the day, we have to stop treating our lives like a series of high-stakes finish lines. We’ve spent so much time obsessing over the “what” (the promotion, the weight loss, the savings goal) that we completely neglected the “how.” By shifting our focus from chasing outcomes to actually building the infrastructure of our daily lives, we take the pressure off. We’ve looked at how James Clear’s principles can turn chaos into consistency and why moving from an emergency mindset to a process-oriented one is the only way to avoid burnout. It’s about realizing that the system is the actual win, not the destination it’s supposed to lead to.

I know it feels counterintuitive to stop looking at the mountain peak and start looking at your feet, but trust me, it’s the only way to keep climbing without collapsing. You don’t need more willpower; you just need better, more repeatable systems that work even when you’re feeling completely uninspired. Stop waiting for some magical moment of total perfection to arrive and just start building the small, messy, functional habits that make your Tuesday afternoons feel manageable. You’ve got this—just focus on the process, and I promise the results will eventually take care of themselves.

Frequently Asked Questions

If I stop focusing on the end goal entirely, how do I actually know if my systems are working or if I'm just busy for the sake of being busy?

That is the million-dollar question. If you’re just running on a treadmill, you’re busy, but you aren’t going anywhere. To avoid the “busy work” trap, you need a feedback loop. Don’t track the big result; track the inputs. If your system is “write 500 words a day,” your metric isn’t a finished book—it’s the streak of days you actually sat down. If the inputs are happening but the needle isn’t moving, it’s time to tweak the system, not the goal.

How do I figure out which parts of my life need a new system versus which parts just need me to set a better goal?

If you’re staring at a mess and wondering where to start, ask yourself this: Is the problem a lack of direction, or a lack of rhythm? If you don’t know what you want, you need a goal. But if you know exactly what you want and you still can’t seem to make it happen consistently, that’s a system failure. Goals get you moving; systems keep you from crashing.

Is there a way to balance the two so I don't lose my ambition while I'm busy building out these daily processes?

Think of your goals as the GPS destination and your systems as the actual driving. You definitely need the destination, otherwise, you’re just driving in circles. I don’t want you to lose that spark or ambition—that’s what keeps you moving. Just stop treating the destination like the work. Use your goals to set the direction once a month, but let your daily systems do the heavy lifting so you don’t burn out before you arrive.

Strategies on how to find a job.

Smart Strategies to Stand Out in a Crowded Job Market

I remember sitting on my bedroom floor three years ago, surrounded by half-empty coffee mugs and twenty open browser tabs, feeling like I was shouting into a void. I had followed every “expert” tip on LinkedIn, tailored my resume until it looked like a work of fiction, and still, the only response I got was automated rejection emails. The internet makes it seem like there’s some secret, expensive ritual you need to master to learn how to find a job, but most of that advice is just noise designed to sell you a course. It’s exhausting, it’s demoralizing, and frankly, it’s completely broken.

I’m not here to give you a lecture on “optimizing your personal brand” or some other corporate buzzword that sounds great but does nothing for your bank account. Instead, I want to give you the actual, unpolished systems I used to stop the frantic scrolling and start getting real interviews. We’re going to strip away the gatekeeping and focus on low-friction, repeatable steps that actually work in the real world. No fluff, no hype—just a direct roadmap to getting hired without losing your mind in the process.

Table of Contents

Stop the Panic a Realistic System for How to Find a Job

Stop the Panic a Realistic System for How to Find a Job.

The first thing we need to do is stop treating the job hunt like a frantic, all-day sprint. If you’re spending eight hours a day refreshing job boards, you’re going to burn out by Tuesday. Instead, I treat my search like a freelance project: I set specific blocks of time for deep work and then I actually close my laptop. Start by auditing your digital footprint. This means optimizing your LinkedIn profile so you aren’t just a ghost in the machine, but a searchable, professional entity. You want to make it easy for the right people to find you without you having to scream into the void.

Once your profile is solid, shift your focus from quantity to quality. Scrolling through endless online job boards and platforms feels productive, but it’s often just “productive procrastination.” A much more effective way to spend your energy is through intentional networking for employment. This isn’t about begging for favors; it’s about building genuine connections with people in the industries you actually care about. If you build a system of small, consistent touchpoints rather than a mountain of generic applications, you’ll find the process feels a lot less like a crisis and a lot more like a strategy.

Ditch the Fluff With Effective Resume Writing Techniques

Ditch the Fluff With Effective Resume Writing Techniques

Look, we’ve all been there: staring at a blank Google Doc, trying to make “answering emails” sound like a high-level strategic operation. The problem is that most people treat their resume like a diary of everything they’ve ever done, rather than a targeted tool. If you want to actually get noticed, you need to stop listing duties and start proving impact. Instead of saying you “managed social media,” tell them you grew an account by 20% in three months. This is one of those core effective resume writing techniques that separates the people who get ignored from the people who get callbacks.

Don’t fall into the trap of the “one-size-fits-all” document. I know it’s a massive pain to tweak your bullet points every single time, but if you aren’t tailoring your experience to the specific job description, you’re basically just throwing paper into a void. Think of your resume as a map that leads directly to the solution the recruiter is looking for. Once you’ve tightened that up, you can move on to optimizing your LinkedIn profile to make sure the digital version of you matches the paper version.

Optimizing Linkedin Profile and Networking for Employment Without Burnout

Optimizing Linkedin Profile and Networking for Employment Without Burnout

Let’s be real: the idea of “networking” usually sounds like forced small talk at a mixer where everyone is wearing uncomfortable shoes. It feels performative and exhausting. But if you want to actually move the needle, you have to treat optimizing LinkedIn profile settings like a background process on your laptop—set it up once, let it run, and let it work for you while you’re doing other things. Instead of scrolling aimlessly, focus on your headline and your “About” section. Don’t just list your job title; tell people what problem you actually solve. When your profile is dialed in, you aren’t just another name in a sea of applicants; you’re a searchable solution.

Once your profile is doing the heavy lifting, shift your energy toward intentional networking for employment. This isn’t about spamming recruiters with “Hi, I’m looking for a role.” It’s about finding people doing the work you want to do and asking them one specific, low-pressure question about their workflow or a tool they use. It turns a scary “job hunt” into a series of small, human connections that eventually lead to referrals.

Mastering Interview Preparation Strategies and Online Job Boards and Platfo

Once you’ve actually landed the interview, the goal shifts from hunting to performing—but please, don’t go into it winging it. Most people treat interview preparation strategies like they’re just reading through a list of “tell me about a time” questions, but it’s more about building a mental library of your own wins. I like to keep a digital “cheat sheet” of specific scenarios where I solved a problem or handled a mess. It keeps you from freezing up when they ask those tricky behavioral questions. You want to be able to talk about your work with a sense of calm authority rather than just reciting your resume.

On the flip side, don’t let the search fatigue turn you into a passive scroller. While you’re prepping for calls, you still need to be tactical with online job boards and platforms. Instead of applying to every “Easy Apply” button you see—which is basically just shouting into a void—pick two or three niche sites that actually cater to your industry. It’s much more effective to spend twenty minutes deeply researching one specific posting than two hours spamming a hundred generic ones.

No Nonsense Career Transition Advice for Your Next Big Move

If you’ve realized your current path is a dead end, don’t treat a career pivot like a mid-life crisis. It’s just a pivot in your system. The biggest mistake I see people make during a career transition is trying to pretend they aren’t changing fields. They try to force their old experience to fit a new mold, which usually ends up looking messy and dishonest. Instead, you need to translate your skills. If you were a teacher moving into project management, you aren’t “changing jobs”—you are repositioning your ability to manage complex timelines and stakeholders.

This is where most people stumble: they think they need to start from zero. You don’t. You just need to bridge the gap. While you’re busy optimizing your LinkedIn profile to reflect this new direction, focus on the transferable wins. Don’t just list what you did; list how what you did applies to where you’re going. This isn’t about reinventing yourself; it’s about curating your history so the right people see the value you actually bring to the table.

The "low-friction" toolkit for staying sane during the hunt

  • Treat your job search like a freelance gig, not a full-time identity. Set specific “office hours” for applications so you aren’t checking LinkedIn at 11 PM and feeling like a failure because you didn’t get a reply.
  • Build a “Master Document” for your bullet points. Instead of rewriting your experience from scratch every single time, keep a running list of every win, metric, and project you’ve ever had so you can just copy, paste, and tweak.
  • Automate the boring stuff with Google Alerts or specific keyword filters on job boards. You shouldn’t be manually scrolling through endless lists; let the right roles come to your inbox so you can spend your energy on actual quality applications.
  • Keep a simple tracker—a basic spreadsheet or even a Notion page—to log where you applied, who you talked to, and when to follow up. Losing track of which version of your resume you sent where is a massive, unnecessary energy drain.
  • Curate a “Small Wins” folder. Job hunting is a psychological rollercoaster, so save every nice email, positive interview feedback, or even a completed certification. You’ll need to look at it when the rejection emails start piling up.

The TL;DR on keeping your sanity while job hunting

Stop treating job hunting like a marathon you have to sprint; build a sustainable daily system of small, repeatable actions so you don’t hit a wall by Wednesday.

Focus on high-signal activities—like direct outreach and tailored resumes—rather than just shouting your name into the void of massive job boards.

Treat your career transition as a project to be managed, not an emergency to be survived, by using clear documentation and realistic boundaries.

The Finish Line is Just a System

Look, we’ve covered a lot of ground, from rebuilding your resume to actually surviving the interview without losing your mind. The takeaway here isn’t that you need to be a “hustle culture” warrior; it’s that you need a functional framework. If you stop treating the job hunt like a chaotic, emotional rollercoaster and start treating it like a series of small, repeatable tasks—updating that LinkedIn snippet, sending that one direct message, or tweaking one bullet point on your CV—the friction starts to disappear. It’s about moving away from the “apply and pray” method and moving toward a structured approach that actually respects your mental bandwidth.

At the end of the day, please remember that your worth as a person is not tied to your employment status or how quickly you can land a role. The job market is weird, loud, and often feels incredibly unfair, but you don’t have to let it break your spirit. Just keep your systems running, keep your head down, and remember that progress isn’t always linear. You aren’t just looking for a paycheck; you’re building the foundation for your next chapter. Take a breath, grab some water, and just do the next small thing on your list. You’ve got this.

Frequently Asked Questions

How do I actually keep track of all these applications without losing my mind or using a massive, complicated spreadsheet?

Honestly, don’t touch Excel. If you aren’t a spreadsheet person, a massive grid will just become another source of dread. Instead, use a simple Kanban board like Trello or Notion. Create columns for “Applied,” “First Interview,” “Followed Up,” and “Ghosted.” It’s visual, satisfying to drag cards across, and keeps everything in one view. If that feels like too much, just a dedicated Notes folder with one page per job works. Keep it low-friction.

What do I do if I’m applying for roles that don't perfectly match my previous experience?

Stop trying to pretend you’ve done the exact job before; you’re just going to get caught in a lie. Instead, pivot to transferable skills. If you were a server and want to move into project management, don’t talk about food—talk about high-volume multitasking and conflict resolution. Map your past wins directly to their job description. It’s about translating your experience into their language so they see the potential, not just the gap.

How much time should I realistically spend on this every day before I start feeling totally burnt out?

Look, if you’re treating job hunting like a 9-to-5, you’re going to crash by Tuesday. I treat it like a focused sprint: 2 to 4 hours of high-quality, intentional work is the sweet spot. Spend that time on actual applications or networking, then shut the laptop. If you spend eight hours scrolling LinkedIn, you aren’t being productive—you’re just marinating in anxiety. Protect your energy; it’s your most valuable asset.

Budget-friendly diy gift ideas for everyone.

Thoughtful Diy Gifts That Won’t Break the Bank

We’ve all been there: it’s three days before a birthday or a holiday, and you’re spiraling because you realized you have nothing to give. You end up scrolling endlessly through overpriced boutique sites, feeling that familiar pang of guilt because a generic gift card feels so impersonal. I used to think that being a good gift-giver meant having a massive budget or endless crafting skills, but honestly, that’s just a recipe for burnout. The truth is, the best diy gift ideas aren’t about spending hours on a complex project that looks nothing like the Pinterest tutorial; they are about creating something intentional that actually fits into someone’s daily rhythm.

I’m tired of the gatekeeping around “crafting,” so I’ve put together a list of five streamlined projects that are actually doable. I’m talking about high-impact, low-stress options that focus on functionality and thoughtfulness rather than just aesthetic fluff. These five ideas will help you stop the last-minute panic and start building a small, repeatable system for gifting that feels personal without costing you your entire weekend. Let’s get into it.

Table of Contents

The Curated "Survival Kit"

The Curated "Survival Kit" gift box.

Most people think DIY gifts have to be something you actually make with your hands, like a lopsided candle, but I prefer the art of the curated kit. Think of it as building a specialized survival system for someone’s specific lifestyle. If your best friend is constantly stressed about work, put together a “Sunday Reset” box with a high-quality face mask, a specific blend of loose-leaf tea, and a candle that actually smells like something real. It’s not about being a craftsman; it’s about showing you actually pay attention to what they need.

Elevated Pantry Staples

Handmade elevated pantry staples in jars.

Growing up with a chef mom, I learned that the best gifts are often the ones that actually get used up. There is nothing worse than receiving a knick-knack that just collects dust on a shelf. Instead, try making a batch of something high-end that they wouldn’t normally buy for themselves, like a small-batch infused olive oil or a jar of homemade chili crunch. It feels fancy, it looks great on a kitchen counter, and it doesn’t create long-term clutter.

The Custom Digital Archive

Curating memories with The Custom Digital Archive.

This is my favorite way to handle gifts for the people who already have everything. Since I spend so much of my time managing digital assets for work, I’ve realized how much we overlook our own memories. If you have a friend or family member with a massive, disorganized photo library, spend an afternoon curating a “Year in Review” digital album or a custom Spotify playlist that tracks the specific songs you guys listened to during a road trip.

Upcycled Vintage Finds

My hobby of thrifting vintage electronics has taught me one thing: old stuff often has more soul than anything new you can find on Amazon. If you’re feeling a little more hands-on, look for something small and sturdy at a thrift store—like a vintage brass tray, a ceramic vase, or even an old wooden box—and give it a quick refresh. You don’t need to be a master restorer; sometimes just a deep cleaning and a bit of polishing is enough to make it feel brand new.

The "Low-Stakes" Self-Care Bundle

We talk a lot about self-care, but most “spa kits” are just overpriced versions of stuff you can find at any big-box retailer. I like to take a more practical approach by building a bundle around a single, functional ritual. For example, if someone is a big reader, create a “Reading Nook” kit with a high-quality bookmark, a bag of local coffee beans, and a cozy pair of socks. It’s a system for relaxation rather than just a collection of random scents.

The Bottom Line

Don’t let the “perfect” gift get in the way of a thoughtful one; people care way more about the fact that you actually remembered them than how much you spent.

Build a little “gift kit” in your junk drawer—extra nice wrapping paper, a good pair of shears, and some blank cards—so you aren’t scrambling at 11 PM the night before a birthday.

Focus on utility. The best gifts are usually the ones that solve a tiny, annoying problem in someone’s daily routine.

The Bottom Line

At the end of the day, giving a great gift isn’t about how much money you spent or how many hours you spent obsessing over every tiny detail. It’s about the fact that you actually saw someone and took a moment to create something specifically for them. Whether you went with a customized pantry kit, a curated digital playlist, or a simple piece of restored vintage tech, the goal was to remove the generic, store-bought feeling from the exchange. You don’t need to be a professional artisan to pull this off; you just need to follow a simple system and focus on the person receiving it.

If you’re still feeling that familiar pang of “I’m not creative enough” or “this is going to look messy,” just stop. Perfection is the enemy of actually getting things done, and honestly, a slightly imperfect handmade gift is way more meaningful than a flawless, expensive gadget. My advice? Pick one idea from this list, set a timer for thirty minutes, and just start building. Adulthood is stressful enough as it is—don’t let gift-giving become another item on your anxiety checklist. You’ve got this, and the people you love will definitely feel the effort.

Frequently Asked Questions

How do I make these gifts look "expensive" or high-end without actually spending a ton on materials?

The secret isn’t the price tag; it’s the presentation. If you want things to look high-end, ditch the neon tissue paper and go for a cohesive, minimalist palette—think cream, forest green, or charcoal. Invest in heavy-weight cardstock for tags and use real linen or velvet ribbons instead of plastic ones. It sounds extra, but a heavy, textured weight communicates “luxury” instantly. When the packaging feels intentional, the gift feels curated, not just cobbled together.

I'm super short on time—are there any DIY options that don't require hours of prep or a massive learning curve?

Honestly, I get it. Some days you just don’t have the bandwidth for a three-day craft project. If you’re in a time crunch, lean into “assembly” rather than “creation.” Grab some high-quality basics—like a nice candle or a bag of local coffee—and pair them with a handwritten note and a single, thoughtful item like a curated playlist or a cute thrifted mug. It takes ten minutes, but the intentionality makes it feel personal.

What's the best way to package these so they don't just look like a random craft project I threw together?

The secret is ditching the shiny, store-bought gift bags. They look cheap and add a ton of waste. Instead, go for a cohesive, minimalist aesthetic. I love using plain brown kraft paper or even leftover fabric scraps as wraps. Tie it all together with actual twine or a single sprig of dried eucalyptus. It’s a small system, but it makes a “craft project” look like a curated, intentional gift.

Easy healthy recipes for daily routines.

Realistic Healthy Recipes for Your Daily Routine

Let’s be real: most of us treat mealtime like a high-stakes math equation we didn’t study for. You finish a long workday, your brain is fried, and suddenly the idea of chopping vegetables feels like a personal insult. We tell ourselves we’ll eat better, but then we end up staring blankly into a pantry before giving in to overpriced takeout because it’s the path of least resistance. I’ve spent way too many nights feeling that specific brand of “adulthood burnout” just because I didn’t have a plan. The truth is, finding easy healthy recipes shouldn’t feel like a second job or a lifestyle overhaul that requires a culinary degree and three hours of prep time.

I’m over the gatekeeping and the overly complicated “wellness” recipes that require ingredients you can’t find at a regular grocery store. In this post, I’m breaking down five of my go-to, low-friction meals that actually taste good and—more importantly—fit into a real schedule. These aren’t just ideas; they are repeatable systems designed to keep you fueled without turning your kitchen into a disaster zone. Get ready to reclaim your evenings and finally stop the constant cycle of decision fatigue.

Table of Contents

The "Everything in the Fridge" Grain Bowl

The "Everything in the Fridge" Grain Bowl.

I used to think meal prepping meant spending my entire Sunday staring at a pile of raw kale, but that’s just not realistic for my workflow. Now, I rely on the grain bowl system because it’s basically impossible to mess up. All you need is a base of whatever grain you have on hand—quinoa, farro, or even just pre-cooked rice—and then you just layer on whatever veggies are about to go bad in your crisper drawer.

Sheet Pan Sausage and Veggies

Roasted Sheet Pan Sausage and Veggies.

If you’re like me and hate the mental load of cleaning five different pots and pans after a long day, the sheet pan method is your new best friend. I grab a pack of high-quality chicken sausage, chop up some bell peppers, zucchini, and red onion, and toss them all on a single tray with olive oil and dried oregano. You just slide it into the oven and walk away until it’s crispy and delicious.

The Five-Minute Mediterranean Tuna Salad

The Five-Minute Mediterranean Tuna Salad bowl.

Let’s be real: sometimes you don’t even have the energy to turn on the stove. When I’m in the middle of a deep-work session and my stomach starts growling, I reach for this tuna salad because it requires zero actual cooking. I skip the heavy mayo and instead mix canned tuna with a big scoop of Greek yogurt, some diced cucumber, and a handful of chickpeas for extra protein.

One-Pot Pesto Pasta with Greens

I’ve learned that “healthy” doesn’t have to mean “salad only,” and this one-pot pasta is proof. I throw dried pasta, a jar of good pesto, some frozen peas, and a massive amount of baby spinach into a pot with just enough water or broth to cover it. As the pasta cooks, the spinach wilts into the sauce, making it feel like you’ve actually put in effort when you really just waited for a timer to go off.

Overnight Oats for the Non-Morning Person

I am definitely not a morning person, so the concept of “cooking breakfast” at 7:00 AM feels like a personal attack. My solution is to prep overnight oats in small mason jars the night before. You just mix oats, milk of your choice, and a spoonful of chia seeds in a jar, let it sit in the fridge, and you have a grab-and-go breakfast waiting for you the next day.

The Bottom Line

Stop aiming for culinary perfection; the goal is just to get decent, nourishing food into your system without the mental burnout.

Build your meals around “modular” ingredients—things you can prep once and swap around all week to keep things from getting boring.

If a recipe requires a specialized tool or an hour of cleaning, skip it. The best system is the one you actually have the energy to follow.

The Bottom Line

At the end of the day, the goal isn’t to become a gourmet chef or spend your entire Sunday hovering over a stove. It’s about building a system where you can grab something nutritious without having to perform a mental marathon. Whether you’re leaning on the one-pan roasted veggies, prepping a massive batch of grains, or just keeping high-quality canned beans on hand, the key is removing the decision fatigue that usually leads to a takeout order. If you can master these five low-effort pivots, you’ve already won half the battle against the chaos of a busy week.

Don’t feel like you have to implement all of this at once. If you try to overhaul your entire kitchen in twenty-four hours, you’re probably going to burn out by Tuesday. Just pick one recipe from this list and try it this week. Small, repeatable wins are what actually stick. Adulthood is messy enough as it is, so let’s stop treating mealtime like another high-stakes chore and start treating it like a simple, manageable part of your routine. You’ve got this.

Frequently Asked Questions

How do I keep these meals from tasting like "sad desk salads" after a few days in the fridge?

The secret is keeping the “wet” stuff away from the “dry” stuff. If you toss dressing directly onto greens on Sunday, you’re basically eating compost by Wednesday. I always use small glass jars or even just tiny reusable silicone containers for my dressings and sauces. Keep the crunch—like seeds, nuts, or croutons—in a separate little snack bag. When you’re ready to eat, combine everything fresh. It takes ten extra seconds, but it’s the difference between a meal and a chore.

I’m on a tight budget—can I swap out the expensive ingredients for cheaper alternatives without ruining the recipes?

Absolutely. Most of these recipes are just frameworks, not strict rules. If a recipe calls for organic kale and it’s $6 a bunch, grab whatever leafy green is on sale instead. Swap fresh berries for frozen ones (they’re actually better for smoothies anyway), or use canned beans if the dried ones feel like too much work. The goal is to eat well, not to go broke. Just keep the ratios similar and you’ll be fine.

What’s the best way to prep these if I only have about an hour on a Sunday?

If you’ve only got sixty minutes, stop trying to cook everything from scratch. It’s a trap. Instead, focus on “component prepping.” While your grains are simmering, chop all your raw veggies at once. Use that time to roast one big tray of protein and another of veggies simultaneously. Don’t worry about individual meals; just get the building blocks ready in containers. It’s way more efficient than assembly-line cooking and saves your sanity.

Guide on how to set up a smart home.

Building a Smart Home Without Breaking the Bank

I was standing in my kitchen at 11:00 PM, squinting through the dark because I couldn’t remember if I’d actually turned off the coffee maker or if I was just hallucinating from exhaustion. I ended up doing a full lap of my apartment, heart racing, just to check a single plug. It was a total waste of energy, and honestly, it was a symptom of a bigger problem: my living space wasn’t working for me; I was working for it. Most people think learning how to set up a smart home requires a massive budget or a background in coding, but that’s a total myth. You don’t need a futuristic mansion or a PhD to make your space more intuitive; you just need to stop overcomplicating the basics.

In this guide, I’m stripping away the tech-bro gatekeeping to show you how to build a system that actually reduces your daily friction. I’m talking about the real-world essentials—from lighting that follows your circadian rhythm to sensors that actually save you time—without the unnecessary fluff. We’re going to walk through exactly how to set up a smart home that feels seamless, functional, and, most importantly, completely low-maintenance.

Table of Contents

Guide Overview

Total Time: 3-5 hours
Estimated Cost: $200-$500
Difficulty: Beginner

Tools & Supplies

  • Smartphone (to manage apps and configuration)
  • Wi-Fi Router (to provide network connectivity)
  • Screwdriver (for mounting smart switches or cameras)
  • Smart Hub (1 unit)
  • Smart Bulbs (3-5 units)
  • Smart Plugs (2-3 units)
  • Smart Speaker (1 unit)

Step-by-Step Instructions

  • 1. First, stop and audit your current setup before you buy a single gadget. I know the urge to just grab everything on the “trending” list is real, but if you buy ten different brands that don’t talk to each other, you’re just creating a digital headache for yourself. Grab a notebook or open a memo on your phone and list the specific problems you actually want to solve—is it forgetting to turn off the lights, or is it the sheer chaos of your morning routine?
  • 2. Pick your “brain” and stick to one ecosystem. This is the most important rule if you want to avoid burnout. Whether you’re a “Hey Siri” person, an Alexa devotee, or a Google Assistant user, choose one and try to keep your hardware within that family. Mixing too many platforms is the fastest way to end up with a house that feels glitchy and fragmented rather than streamlined.
  • 3. Start with the low-hanging fruit like smart plugs and bulbs. Don’t go out and buy a smart fridge; it’s expensive and, frankly, unnecessary for most of us. Instead, get a pack of smart plugs for your coffee maker or your floor lamps. It’s the easiest way to feel the impact of automation without spending a fortune or needing a technician to show up at your door.
  • 4. Set up your “Golden Routines” immediately after the devices are plugged in. A smart home isn’t actually smart if you still have to open ten different apps to make it work. Use your ecosystem’s app to create “Scenes”—like a “Good Morning” routine that slowly raises the lights and starts your kettle. The goal is to reduce the number of decisions you have to make every single day.
  • 5. Fix your Wi-Fi dead zones before adding more tech. I learned this the hard way when I tried to install a smart doorbell only to realize my router was basically in another dimension. If you’re adding more than a handful of devices, look into a mesh Wi-Fi system. You need a stable foundation to support all these little gadgets, otherwise, they’ll just constantly drop offline and annoy you.
  • 6. Layer in your security and climate control once the basics are stable. Once you’ve mastered the lights and plugs, move on to the stuff that actually affects your utility bills, like a smart thermostat or a video doorbell. These are the high-impact systems that actually pay for themselves over time by cutting down on wasted energy and giving you a bit of peace of mind.
  • 7. Periodically audit your automations to prune the junk. Sometimes you’ll set up a routine that you realize you never actually use, or a device becomes more of a nuisance than a help. Don’t be afraid to delete a “smart” feature if it’s just adding unnecessary friction back into your life. A smart home should work for you, not the other way around.

Understanding How to Set Up a Smart Home

Understanding How to Set Up a Smart Home.

Before you go out and buy every shiny new gadget on the market, you need to understand the “brain” of your setup. Most people make the mistake of buying a random smart bulb here and a random plug there, only to realize a week later that they don’t actually talk to each other. This is where smart home ecosystem compatibility becomes your best friend. You basically need to decide if you’re a “Hey Siri,” “Alexa,” or “Google Assistant” person before you spend a single cent. If your devices aren’t playing nice within the same ecosystem, you’ll end up with ten different apps on your phone, which is exactly the kind of digital clutter I’m trying to help you avoid.

Think of it like building a wardrobe; everything needs to coordinate. I always tell my clients to start with a smart home beginner checklist that prioritizes your biggest pain points—usually things like lighting or temperature control. Don’t try to automate your entire life in one weekend. Focus on one room or one specific routine first. Once you’ve mastered the basics of getting one device to respond to a command, then you can start layering in the more complex stuff.

Key Things to Know

Key Things to Know: Smart Home Compatibility

Before you go out and buy every cool gadget on your feed, you need to talk about the “glue” that holds it all together. The biggest mistake I see people make is buying a random smart bulb here and a smart plug there, only to realize they don’t actually talk to each other. You have to prioritize smart home ecosystem compatibility from day one. If you’re an Apple person, you’ll want to stick to HomeKit; if you want more flexibility, Google Home or Alexa are your best bets. Picking a “language” for your house prevents that annoying situation where you have five different apps just to turn off your lights.

Also, let’s talk about your Wi-Fi. You can have the most expensive setup in the world, but if your router is struggling to push a signal through three walls, your devices are going to lag or just straight-up disconnect. I always recommend checking your signal strength in the rooms where you plan on automating home lighting and security before you commit to the hardware. It’s much easier to upgrade your router now than to troubleshoot a “device offline” error at 2:00 AM.

5 ways to avoid a smart home headache

  • Don’t buy everything at once. It’s tempting to go full sci-fi on your first weekend, but if you buy ten different brands that don’t talk to each other, you’re just creating a digital mess. Start with one ecosystem—like Apple Home, Google Home, or Alexa—and stick to it for a bit.
  • Check your Wi-Fi strength before you plug anything in. I learned this the hard way when I tried to put a smart camera in the hallway, only to realize my router couldn’t reach that far. If your signal is spotty, a mesh network is a better investment than a dozen fancy gadgets.
  • Prioritize things that actually solve a problem. A smart lightbulb is cool, but a smart plug that turns your coffee maker on while you’re still in bed is a life-changer. Focus on the “friction points” in your day—the stuff that’s annoying to do manually.
  • Look for the “Matter” logo. This is a bit nerdy, but it’s a new standard that helps different brands play nice together. If you see that symbol on the box, it means you’re much less likely to deal with compatibility drama down the road.
  • Keep security in mind. Every smart device is a potential entry point into your network, so don’t be lazy with your passwords. Use two-factor authentication whenever it’s offered, and if a cheap, no-name brand from a random site asks for way too much data, just skip it.

The TL;DR: My Golden Rules for a Smart Home

Start small so you don’t burn out. You don’t need to turn your entire apartment into a sci-fi movie overnight; just pick one friction point—like lighting or your morning coffee—and automate that first.

Prioritize compatibility over cool features. There is nothing more frustrating than buying a gadget that refuses to talk to the rest of your ecosystem, so always check for Matter or specific hub support before hitting “buy.”

Focus on utility, not just the “wow” factor. If a smart device doesn’t actually save you time or mental energy, it’s just another thing you have to charge and troubleshoot, which defeats the whole purpose of making life easier.

Don't Overthink the Setup

Don't Overthink the Setup for smart homes.

At the end of the day, setting up a smart home isn’t about turning your apartment into a sci-fi movie set; it’s about reclaiming your time. We’ve covered the essentials—starting with a solid Wi-Fi foundation, picking an ecosystem that actually talks to itself, and layering in devices one by one so you don’t end up with a pile of expensive, useless tech. Remember, the goal is to reduce friction, not add more digital clutter to your brain. If a smart bulb doesn’t actually make your evening routine easier, it’s okay to ditch it. Focus on the systems that work for your specific lifestyle, whether that’s automating your coffee maker or setting your lights to dim when you hit “sleep” mode.

Adulthood is heavy enough as it is, so don’t let your living space add to the mental load. You don’t need to automate every single square inch of your life by next Tuesday. Start small, be patient with the learning curve, and let your home evolve alongside you. The real win isn’t having the flashiest gadgets on the block; it’s that quiet, subtle feeling of walking into a space that actually supports your flow. You’ve got the tools and the roadmap now, so just go out there and build a space that makes your daily life feel a little more effortless.

Frequently Asked Questions

Do I really need a dedicated hub, or can I just run everything through my phone?

Honestly? For a small setup, you can totally skip the hub and just use your phone. If you’re just running a couple of smart bulbs and a plug, your phone is plenty. But, if you start adding locks, sensors, or things that need to work even when your Wi-Fi is acting up, that’s when you’ll feel the friction. Get the hub once you outgrow the “just a few gadgets” phase.

Will all these different brands actually talk to each other, or am I going to end up with ten different apps?

This is the exact moment where most people give up and go back to manual light switches, and honestly, I get it. The “app fatigue” is real. You don’t want ten different icons cluttering your home screen. The secret is to pick a “brain”—an ecosystem like Apple Home, Google Home, or Alexa—and stick to it. As long as the devices say they’re compatible with your chosen hub, they’ll play nice in one single app.

Is this going to tank my Wi-Fi speed if I add too many devices at once?

The short answer? Yes, it can. If you just start plugging in every smart bulb and plug you own, you’re going to see your Netflix stream start buffering mid-episode. It’s not necessarily the number of devices, but the bandwidth they’re hogging. My rule of thumb: if you’re going beyond ten or fifteen smart gadgets, stop relying on your basic ISP router and invest in a mesh system. It spreads the load so your laptop doesn’t suffer.

Learn how to break bad habits.

Ways to Finally Break Free From Your Worst Habits

I’m so tired of seeing those “aesthetic” productivity influencers post about how to break bad habits using nothing but expensive planners and $50 silk eye masks. It’s total nonsense. If you think a color-coded habit tracker is going to magically stop you from doomscrolling at 2:00 AM or mindlessly snacking while you work, you’re being sold a lie. Real change doesn’t happen because you bought a new notebook; it happens when you stop relying on fleeting bursts of willpower and actually start looking at the friction in your environment.

I’m not here to give you a lecture or a list of “mindset shifts” that sound good but do nothing when you’re actually stressed. Instead, I want to share the unpolished, slightly messy systems I’ve built to keep my own life from spiraling. We’re going to talk about practical, low-effort adjustments—the kind of stuff you can actually implement without needing a degree in behavioral psychology. No gatekeeping, no fluff, just the actual steps to making your daily routines work for you instead of against you.

Table of Contents

Stop Fighting Your Brain the Truth About How to Break Bad Habits

Stop Fighting Your Brain the Truth About How to Break Bad Habits.

The biggest mistake I see people make is treating their willpower like a muscle that can just be trained into submission. We’ve all been there—vowing to stop scrolling TikTok at 2 AM or cutting out caffeine entirely—only to find ourselves doing the exact same thing three days later. The reality is that you aren’t failing because you’re weak; you’re failing because you’re fighting against habit loop psychology. Your brain has spent months, maybe years, carving out these neural pathways, and expecting them to just vanish because you had a “moment of clarity” is unrealistic.

Instead of trying to delete a behavior, you have to understand that your brain is just looking for a way to regulate itself. Most of our “bad” habits are actually just outdated coping mechanisms for stress or boredom. If you want actual results, you have to focus on replacing bad habits with good ones that serve the same underlying need. If you try to leave a vacuum where a habit used to be, your brain will instinctively rush to fill it with the path of least resistance. It’s not about white-knuckling your way through the day; it’s about outsmarting your own biology.

Decoding the Habit Loop Psychology Without the Academic Gatekeeping

Decoding the Habit Loop Psychology Without the Academic Gatekeeping

Look, we don’t need a PhD to understand why you reach for your phone the second you feel a hint of boredom. At its core, habit loop psychology isn’t some mystical force; it’s just your brain trying to be efficient. It works in a cycle: you feel a trigger (stress, boredom, or even just sitting on the couch), your brain executes a routine (scrolling TikTok), and you get a tiny hit of dopamine as a reward. Once that loop is locked in, your brain starts running on autopilot, making it feel almost impossible to fight.

The trick isn’t to try and delete the loop entirely—that’s a recipe for burnout. Instead, you have to focus on overcoming subconscious triggers by intercepting the cycle before it fully kicks in. Think of it like debugging a piece of old software; you aren’t rewriting the whole operating system, you’re just identifying the specific line of code that’s causing the glitch. Once you spot the cue, you can start the slow process of replacing bad habits with good ones that actually satisfy that same underlying craving.

Mastering Behavioral Change Techniques for Real World Chaos

Mastering Behavioral Change Techniques for Real World Chaos

Here is the reality: most advice on behavioral change techniques feels like it was written for people who have zero distractions and a perfect 9-to-5. But life is messy. You’re going to have days where your car breaks down, your laptop dies, or you’re just plain exhausted. When that happens, your old impulses are going to come knocking. Instead of trying to white-knuckle your way through the chaos, you need to focus on replacing bad habits with good ones that actually fit into your actual life, not some idealized version of it.

If you try to just “delete” a habit, you’re essentially leaving a vacuum in your schedule, and your brain hates empty space. It will fill that void with the easiest, most dopamine-heavy option available. That’s why I’m such a huge advocate for building sustainable routines that account for friction. If your trigger is stress, don’t aim for a 60-minute yoga session; aim for five minutes of deep breathing or grabbing a glass of water. It’s about lowering the barrier to entry so that even on your worst days, you’re still moving the needle forward.

Overcoming Subconscious Triggers and Leveraging Neuroplasticity and Habit F

Here’s the thing: your brain is essentially a path-finding machine. Every time you repeat a behavior, you’re carving a deeper groove into your neural pathways. This is where neuroplasticity and habit formation come into play. It sounds like heavy science jargon, but it’s actually pretty empowering. It just means your brain is physically capable of rerouting itself. You aren’t “stuck” being a person who doomscrolls for three hours; your brain just has a very well-worn highway leading straight to that behavior. To change, you have to stop trying to bulldoze the old highway and instead start laying down the bricks for a new one.

The secret to doing this without losing your mind is replacing bad habits with good ones rather than just trying to delete them from existence. If you try to just “stop” a habit, you leave a vacuum, and your brain hates a vacuum. It will scramble to fill that space with the old behavior. Instead, identify what’s actually pulling the strings—the subtle environmental cues—and focus on overcoming subconscious triggers by having a pre-planned alternative ready to go. It’s about making the new path easier to travel than the old one.

Replacing Bad Habits With Good Ones Through Building Sustainable Routines

Here’s the thing: trying to just “stop” a habit is like trying to hold a beach ball underwater. It takes an insane amount of energy, and eventually, it’s going to pop back up and hit you in the face. Instead of focusing on the void you’re trying to create, you need to focus on what’s filling it. Replacing bad habits with good ones isn’t about willpower; it’s about finding a functional substitute that satisfies the same itch. If you reach for your phone every time you feel a micro-dose of boredom, your new “system” shouldn’t be “don’t touch the phone”—it should be having a Kindle app or a quick task list ready to go so the transition feels seamless.

The secret to building sustainable routines is making the new behavior so low-friction that your brain doesn’t even realize it’s working. I’ve learned through my own trial and error that if a new routine feels like a chore, it’s going to fail by Tuesday. You have to design your environment to support the swap. If you want to replace late-night snacking with reading, put the book on your pillow in the morning. You aren’t fighting your biology; you’re just re-engineering the path of least resistance.

My Low-Friction Toolkit for Actually Making Change Stick

  • Audit your environment before you audit your willpower. If you’re trying to stop scrolling on your phone at night, don’t just “try harder”—charge your phone in the kitchen instead. If you want to stop snacking on junk, stop buying it. You can’t out-discipline a pantry full of triggers; you have to engineer the temptation out of your sightline.
  • Use “Habit Stacking” to bridge the gap. Don’t try to manifest a brand new routine out of thin air. Instead, anchor your new, better habit to something you already do without thinking. If you want to start a daily meditation practice, do it immediately after you pour your first cup of coffee. The coffee is the trigger; the meditation is the new response.
  • Lower the barrier to entry until it feels stupidly easy. We often fail because we set the bar too high—like deciding to “work out for an hour” when we haven’t moved in weeks. Instead, commit to just five minutes of movement. It’s much easier to convince your brain to do something small than to tackle a massive, daunting task that feels like a chore.
  • Designate a “Recovery Protocol” for when you slip up. You are going to mess up. You’re going to have a bad day and fall right back into old patterns. The goal isn’t perfection; it’s minimizing the damage. Instead of spiraling into a “well, I already ruined the day, might as well keep going” mindset, have a pre-planned way to reset immediately.
  • Track the data, not the mood. Your brain is a liar; it will tell you that you’re “doing great” right before you relapse. Keep a simple, visual tracker—even if it’s just a physical habit tracker on your fridge or a basic note on your phone. Seeing the streak (and seeing the breaks) provides a level of objective reality that your fluctuating motivation can’t provide.

The TL;DR for Your New System

Stop relying on willpower; it’s a finite resource that’ll fail you the second you’re tired or stressed. Focus on redesigning your environment so the “bad” choice is actually the harder one to make.

You can’t just delete a habit; you have to swap it. Identify what need your bad habit is meeting (boredom, stress, hunger) and find a low-friction replacement that fills that same gap.

Progress isn’t a straight line, so stop treating a single slip-up like a total system failure. If you miss a day, just get back to your routine immediately instead of spiraling into a “well, the week is ruined” mindset.

The Long Game

Look, we’ve covered a lot of ground, from hacking your dopamine loops to actually building routines that don’t fall apart the second life gets messy. The main thing I want you to take away is that breaking a habit isn’t about a massive, cinematic overnight transformation; it’s about managing your environment and understanding your triggers so you aren’t constantly white-knuckling your way through the day. You don’t need more willpower, you just need better systems that make the “good” choice the easiest choice to make when you’re tired, stressed, or just plain over it.

Please, stop being so hard on yourself when you slip up. I’ve spent way too many hours trying to “perfect” my life only to realize that progress is rarely a straight line. Some days the system works flawlessly, and other days you’re back to square one, and that is totally fine. The goal isn’t to be a perfect, habit-free robot; it’s to reach a point where you have the tools to recover quickly. Just keep tweaking your setup, keep being intentional, and remember that consistency beats intensity every single time. You’ve got this.

Frequently Asked Questions

What do I do when I actually slip up and break my new routine?

Look, here’s the reality: you’re going to slip up. It’s not a matter of if, it’s when. When it happens, don’t pull a “well, the whole day is ruined” and spiral. That’s just more friction. Instead, treat it like a glitch in a system. Analyze the trigger, tweak your environment, and get back on track immediately. One bad day doesn’t erase your progress; your reaction to the slip-up is what actually defines the habit.

How do I know if I'm actually replacing a habit or just suppressing it until I crash?

The easiest way to tell? Look at your energy levels. If you’re “replacing” a habit, you might feel a bit tired from the effort, but you feel stable. If you’re just suppressing it, you’ll feel like a pressurized soda can. You’ll experience that weird, frantic irritability or a massive “crash” where you end up binge-watching shows for six hours or eating everything in the pantry. Suppression feels like a fight; replacement feels like a shift.

Is it possible to break a habit that's tied to a major stressor, like a job I hate or a messy living situation?

Honestly? It’s much harder, but it’s definitely possible. When your environment is a mess or your job is draining you, your brain uses bad habits as a survival mechanism to cope with the stress. You aren’t “weak”—you’re just trying to regulate. Instead of fighting the habit, focus on lowering the baseline stress. Fix one small thing in your space or set one tiny boundary at work. Solve the friction, and the habit loses its purpose.

Page 2 of 3

Powered by WordPress & Theme by Anders Norén