Month: September 2026

How to hang a picture straight.

The Secret to Hanging Pictures Straight Every Single Time

I was standing in my living room last Tuesday, staring at a massive, thrifted landscape print and a pile of random hardware, feeling that familiar wave of “adulting” paralysis. I had spent forty minutes trying to eyeball the center point, only to realize I was about to commit a crime against my own drywall. Most people think you need a professional handyman or a degree in geometry to get it right, but the truth is that knowing how to hang a picture isn’t about being a master carpenter; it’s just about having a reliable system so you don’t end up with a crooked frame and a dozen unnecessary holes in your wall.

I’m not here to give you a lecture on interior design theory or suggest you buy a $200 laser level. Instead, I’m going to walk you through the actual, unpolished steps to getting your art up there securely and straight. We’re going to cover the exact anchors you actually need, how to avoid the “eye-balling” trap, and the one trick I use to make sure everything looks intentional rather than accidental. Let’s just get this done so you can actually enjoy your space.

Table of Contents

Guide Overview

Total Time: 15-30 minutes
Estimated Cost: $5-20
Difficulty: Beginner

Tools & Supplies

  • Hammer (for driving nails or hooks)
  • Pencil (for marking placement)
  • Tape measure (for measuring distance and height)
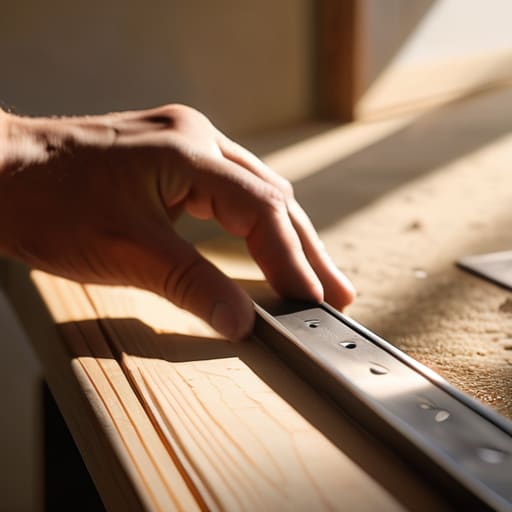
  • Level (to ensure the picture is straight)
  • Picture hanging hardware (1 pack of nails or hooks)
  • Picture frame (1 unit)

Step-by-Step Instructions

  • 1. First, grab your gear. You don’t need a massive toolkit, but don’t try to wing this with a butter knife. You’ll want a hammer, a pencil, a level (or a leveling app on your phone if you’re being lazy), and some proper wall anchors. If you’re hanging something heavy, skip the tiny finishing nails and go straight for a screw and a sturdy anchor so you aren’t constantly checking if it’s about to fall.
  • 2. Measure your frame’s hardware. This is where most people mess up. Turn the frame around and measure the distance from the top of the frame to the actual hanging point—whether that’s a wire, a sawtooth hanger, or a D-ring. Write that number down. You need to know exactly how much space to leave between the top of the frame and where your nail actually goes.
  • 3. Map it out on the wall. Instead of just guessing, use your pencil to mark the spot where the top of the frame will sit. Once you have that top line, use your measurement from step two to mark the actual hole you need to drill or nail. I usually put a tiny little dot there so I don’t lose it once I start the heavy lifting.
  • 4. Double-check your alignment. Before you commit to any holes, hold your level up to your pencil marks or use your phone app to make sure your line is actually straight. There is nothing more soul-crushing than finishing a project only to realize your art is leaning slightly to the left for the rest of eternity.
  • 5. Execute the hardware install. If you’re using an anchor, drill your pilot hole first—don’t just try to force it in or you’ll crack the drywall. If it’s just a light frame and a nail, go ahead and tap it in. Just remember to aim slightly downward if you’re using a nail; it creates a much more secure angle that resists gravity better.
  • 6. The final hang and adjustment. Slide your frame onto the hardware and give it a gentle tap to settle it. Use your level one last time to ensure it’s sitting perfectly. If it feels a little wobbly, you might need to add some small adhesive bumpers to the bottom corners of the frame to keep it from shifting every time someone walks by.

Stop the Wall Panic the Real Way How to Hang a Picture

Stop the Wall Panic the Real Way How to Hang a Picture

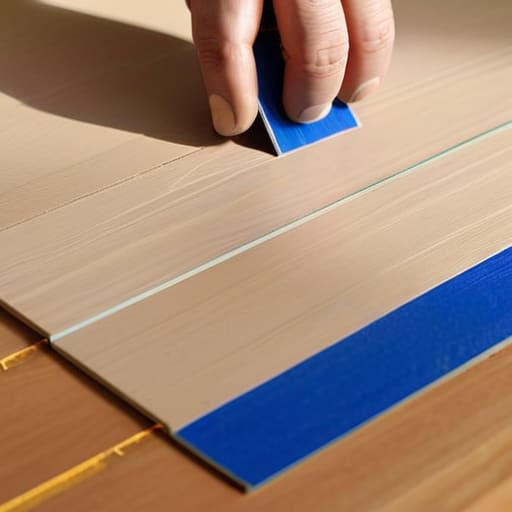
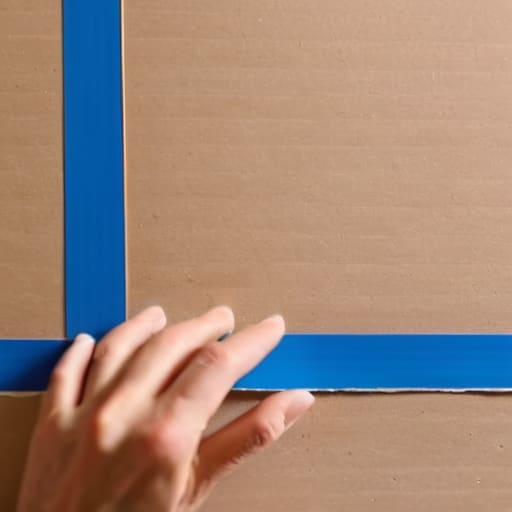
The biggest mistake I see people make is jumping straight to the hammer without actually thinking about the geometry of the room. Before you drive a single nail into your walls, you need to commit to measuring for picture placement with some actual intention. Don’t just eyeball it. Grab a piece of painter’s tape and mark out the corners of where you think the frame should go. This lets you step back, look at the scale, and realize that your “perfect” spot is actually way too high or awkwardly off-center.

Once you’ve found the sweet spot, you have to decide on your hardware strategy. If you’re dealing with a lightweight print, honestly, just go with command strips vs nails—the strips are a lifesaver if you’re renting and don’t want to spend your weekend patching holes. But if you’re attempting the heavy lifting of hanging heavy frames on drywall, don’t even think about using a tiny finishing nail. You need actual anchors or heavy-duty hooks, otherwise, you’re just asking for a midnight disaster when that frame inevitably slides down the wall.

Ditch the Guesswork a No Nonsense System for Perfect Placement

Ditch the Guesswork a No Nonsense System for Perfect Placement

The biggest mistake I see people make is treating a blank wall like a math equation instead of a living space. If you start hammering holes immediately, you’re going to end up with a Swiss cheese situation. Before you even touch a tool, grab some painter’s tape and some paper scraps. Cut them to the approximate size of your frames and tape them to the wall. This lets you visualize the scale and test different gallery wall layout ideas without the permanent commitment. It’s much easier to move a piece of tape than it is to patch a hole in your drywall.

Once you’ve found the spot, don’t just wing the height. I always follow the “eye-level rule,” which usually means the center of the piece should be about 57 to 60 inches from the floor. When you’re actually getting ready to commit, pay attention to the weight. If you’re hanging heavy frames on drywall, skip the tiny finishing nails and go for something beefier like a screw and anchor. It’s better to spend an extra thirty seconds measuring for picture placement now than to spend your entire weekend fixing a crooked, heavy disaster later.

Small Tweaks to Save Your Sanity (and Your Walls)

  • Don’t trust your eyes alone—use a level. I know, it feels like overkill, but staring at a frame for twenty minutes only to realize it’s two degrees off is a special kind of mental drain I’m not willing to deal with.
  • Grab a box of assorted wall anchors instead of just using the tiny nails that come in the frame packaging. If you’re hanging anything with actual weight, those flimsy little tacks are just going to give up on you mid-week.
  • Use painter’s tape to map out the dimensions before you even touch a drill. It’s way easier to move a piece of tape around the wall than it is to patch up five different holes because you changed your mind about the height.
  • Check your hardware before you start. There is nothing more frustrating than getting into the flow, only to realize your screwdriver is stripped or you’re missing the exact screw size you need to finish the job.
  • Keep your “command center” organized while you work. Keep your multi-tool, pencil, and level in one spot so you aren’t wandering around your apartment hunting for a pencil every time you need to mark a spot.

The TL;DR for Your Walls

Don’t wing it with the hardware—match your anchors to your wall type so you aren’t left holding a heavy frame and a handful of crumbled drywall.

Use the “eye-level” rule as a baseline, but trust your gut; if it feels too high or weirdly centered, move it before you commit to the holes.

Measure twice, drill once, and always keep a level handy so you aren’t living with a tilted masterpiece for the next six months.

The Final Check

Performing The Final Check on wall art.

At the end of the day, hanging art isn’t about being a master carpenter; it’s just about having a decent workflow. We’ve covered the essentials: grabbing the right anchors so your heavy frames don’t end up on the floor, using a level to avoid that soul-crushing crookedness, and actually measuring twice before you even think about touching a drill to the drywall. If you follow these steps, you aren’t just slapping decor on a wall—you’re building a reliable system that keeps your space looking intentional rather than cluttered. Once you have the right tools in your kit and a bit of patience, the actual physics of it becomes second nature.

I know that staring at a pile of empty frames and a bare wall can feel surprisingly overwhelming, but don’t let the small stuff stall your progress. Your home should be a reflection of your personality, not a museum of “someday I’ll get around to that.” Take the win, even if the placement isn’t 100% perfect on the first try. The goal is to reduce the friction of living in your space, not to achieve architectural perfection. So, grab your multi-tool, pick a spot, and just start. You’ve got this.

Frequently Asked Questions

What do I actually do if I’m trying to hang something heavy on drywall without it ripping right out of the wall?

Look, if you’re trying to hang something heavy, please—for the love of everything—put the tiny nails away. They’ll fail, and you’ll end up with a hole and a broken mirror. You need anchors. If you can find a stud, use a screw directly into the wood. If not, grab some heavy-duty toggle bolts. They grip the back of the drywall instead of just pulling against the surface. It’s more work upfront, but it’s better than a disaster.

I don't want to ruin my rental—are there ways to hang art that won't leave massive holes in the paint?

The rental struggle is so real. I’ve definitely lost a security deposit (or almost did) by being too aggressive with a drill. If you’re not ready to commit to a heavy-duty anchor, go for Command strips—just make sure you clean the wall with rubbing alcohol first so they actually stay. For slightly heavier stuff, try those small brass picture hooks; they leave tiny pinpricks rather than gaping wounds. It’s all about managing the damage.

How do I figure out the right height so my art doesn't look like it's floating way too high or sitting too low?

The golden rule is eye level, but “eye level” is actually a bit of a lie. Aim for the center of the piece to be about 57 to 60 inches from the floor. If you’re hanging something above a sofa or a console table, give it some breathing room—about 6 to 10 inches above the furniture. Don’t just eyeball it; grab a measuring tape so you aren’t constantly tilting your head to see it.

Mastering common job interview questions.

Mastering the Most Common Interview Questions

I still remember sitting in a cramped, windowless waiting room during my first big freelance pitch, my palms so sweaty I was terrified I’d drop my multi-tool. I had spent all night memorizing these “perfect” scripted answers I found on career blogs, but the second the recruiter asked a single follow-up, my brain just completely short-circuited. It turns out, trying to memorize a script for common job interview questions is actually the fastest way to look like a robot instead of a human being.

I’m not here to give you a list of polished, fake responses that sound like they were written by a corporate HR manual. Instead, I want to give you a repeatable system to help you organize your actual life experiences into stories that actually make sense. We’re going to strip away the performance anxiety and focus on building a framework that lets you stay calm, even when the questions get weird. My goal is to help you stop winging it and start walking into those meetings with a clear, functional plan.

Table of Contents

Understanding Common Job Interview Questions

Understanding Common Job Interview Questions guide.

Before we dive into the actual scripts, we need to talk about what’s actually happening behind the scenes. Most people think an interviewer is just checking if you’re smart or if your resume is truthful, but it’s deeper than that. They aren’t just looking for “correct” answers; they are looking for patterns in how you solve problems. This is where behavioral interview techniques come into play. Instead of asking if you’re a “team player” (which is a boring, useless question), they’ll ask about a time you actually dealt with a teammate who missed a deadline. They want to see your logic in action.

The biggest mistake I see is people treating these prompts like a pop quiz where there’s only one right answer. It’s not a test of memory; it’s a test of application. When you’re preparing for behavioral questions, you aren’t memorizing lines—you’re organizing your past experiences into digestible stories. If you go in expecting a riddle to solve, you’ll freeze. If you go in knowing you’re just presenting evidence of your workflow, the whole vibe changes.

Key Things to Know

Key Things to Know: behavioral questions.

Before you even start memorizing scripts, you need to understand the “why” behind what they’re asking. Most recruiters aren’t just looking for a correct answer; they’re looking for patterns in how you solve problems. This is where preparing for behavioral questions becomes your secret weapon. Instead of trying to guess every possible scenario, focus on identifying the core competencies the role requires—like adaptability or conflict resolution—and have a few versatile stories ready to go.

The biggest trap I see people fall into is rambling. When you’re nervous, it’s tempting to over-explain, but that’s how you lose the thread of your own point. To keep things tight, I highly recommend mastering the STAR method for interview answers. It’s a simple framework—Situation, Task, Action, Result—that acts like a mental guardrail. It keeps your responses structured and ensures you actually land on the impact you made, rather than just getting lost in the weeds of the story. If you can nail that structure, you’ll feel way more in control of the room.

Practical Tips and Steps

Practical Tips and Steps for Interviewing.

Instead of trying to memorize a script for every possible scenario, you need a framework you can actually rely on when your brain decides to fog up mid-sentence. This is where preparing for behavioral questions becomes your best friend. Rather than guessing what they want to hear, I always lean on the STAR method for interview answers. It’s a simple system: Situation, Task, Action, and Result. It keeps your stories from wandering into unnecessary tangents and ensures you actually land the punchline—which is usually how you solved the problem.

The real trick to handling difficult interview questions isn’t having a perfect, polished answer ready; it’s about the pause. If they throw something curveball-heavy at you, don’t feel pressured to fill the silence immediately. It is perfectly okay to say, “That’s a great question, let me think about the best example for that for a second.” Taking five seconds to breathe and structure your thought process actually makes you look more composed and professional, rather than desperate to please. It turns a potential panic moment into a controlled, intentional response.

Common Mistakes to Avoid

One of the biggest traps I see people fall into is the “vague answer” loop. You know that feeling where you’re talking for three minutes but realize you haven’t actually said anything? It usually happens when you’re trying to sound impressive instead of being specific. This is where most people fail at preparing for behavioral questions; they give generalities like “I’m a hard worker” instead of showing it. If you aren’t using a structured approach, you’re just rambling, and that’s a quick way to lose an interviewer’s interest.

Another huge mistake is neglecting the “why” behind your stories. It’s not enough to just list what you did; you have to explain the impact. This is exactly why I’m such a huge advocate for the star method for interview answers. If you skip the results part of the framework, you’re leaving the most important piece of evidence on the table. Also, try to avoid the “perfectionist” cliché when they ask about your weaknesses. It feels scripted and, honestly, a little dishonest. Aim for genuine self-awareness instead.

Final Thoughts

Look, at the end of the day, an interview is just a conversation with a purpose. It’s not a trial, and you aren’t under a microscope waiting to fail. The goal isn’t to memorize a script, but to build a mental framework that holds up even when you’re feeling the pressure. If you’ve spent time mastering the star method for interview answers, you’ll find that you aren’t just guessing anymore—you’re actually communicating your value with intention.

Don’t let the fear of a single awkward moment derail your confidence. Even if you stumble while preparing for behavioral questions, just take a breath, reset, and get back to your system. Adulthood is mostly just managing these tiny moments of friction, and an interview is no different. If you show up with a clear structure and a bit of genuine personality, you’re already ahead of most people. You’ve got the tools; now you just have to trust the process and show up as yourself.

My Go-To Systems for Nailing the Tough Questions

  • Build a “Story Bank” instead of memorizing scripts. Pick 5 versatile work stories from your past that cover different vibes—like a time you messed up, a time you led, or a time you solved a crisis. When a question hits, you just reach into your bank and pull out the story that fits best.
  • Use the STAR method to stop rambling. When you’re explaining a situation, follow the sequence: Situation, Task, Action, and Result. It keeps you from getting lost in the weeds and ensures you actually answer the question instead of just telling a long, winding story.
  • Prepare your “Why” in advance. You will 100% be asked why you want this job or why you’re leaving your current one. Don’t wing this. Have a clear, one-sentence reason that connects your skills to their specific needs so you don’t sound like you’re just desperate for a paycheck.
  • Turn the tables with intentional questions. An interview is a two-way street, and “I don’t have any questions” is a massive red flag. Have three specific things ready to ask—about the team culture, how they measure success, or the biggest challenge the department is facing right now.
  • Practice out loud, not in your head. Thinking about an answer is easy; actually saying the words is where the friction happens. Record yourself on your phone or talk to a mirror. It feels awkward as hell at first, but it helps you catch those “umms” and “likes” before they become a habit in the real thing.

The TL;DR

Stop trying to memorize perfect scripts; instead, build a mental library of 3-4 versatile stories that you can adapt to almost any question they throw at you.

Focus on the “why” behind their questions—they aren’t just being nosy, they’re looking for proof that you can actually do the job and won’t burn out in a month.

Preparation isn’t about being a robot; it’s about building enough of a system that you can actually relax and show your real personality once the Zoom call starts.

The Bottom Line

At the end of the day, mastering these interview questions isn’t about memorizing a script or performing some perfect, polished version of yourself that doesn’t actually exist. It’s about having a reliable system of stories ready to go so you aren’t scrambling for words when the pressure hits. We’ve covered how to dissect the questions, the importance of preparation, and the specific pitfalls that can trip you up. If you focus on structuring your real-life experiences into those frameworks we talked about, you’ll stop feeling like you’re being interrogated and start feeling like you’re just having a professional conversation.

I know how much it sucks to sit in that waiting room—or the Zoom lobby—feeling like your entire future depends on one “gotcha” question. But remember, an interview is just a two-way street to see if the fit is right for both of you. You aren’t just a candidate being judged; you’re a person looking for the right environment to thrive in. Trust the systems you’ve put in place, breathe through the nerves, and go in there with the confidence that you have actual value to offer. You’ve got this.

Frequently Asked Questions

What do I do if I get a question and my mind goes completely blank?

First, breathe. Seriously. The silence feels like an eternity to you, but to the interviewer, it just looks like you’re thinking. Don’t try to fake a genius answer; instead, buy yourself some time. Say, “That’s a great question, let me take a second to think about the best example for that.” It shows maturity and composure. If you’re still stuck, ask them to rephrase it. It’s better to clarify than to ramble.

How much "real" detail should I actually give without rambling and losing my point?

Think of your answers like a curated playlist: you want the hits, not the entire discography. Aim for the “Goldilocks zone”—about two minutes of talking. Use the STAR method (Situation, Task, Action, Result) to keep yourself on track. Focus heavily on your actions and the outcome. If you find yourself explaining the entire history of your previous company, stop. Give enough context to make the story make sense, then pivot back to the point.

Is it okay to admit I don't know something, or does that immediately disqualify me?

Honestly? It’s totally okay, as long as you don’t just leave it at “I don’t know.” That’s where the friction happens. Instead of panicking, treat it like a troubleshooting problem. Say something like, “I haven’t encountered that specific tool yet, but here is how I’d go about figuring it out.” It shows you have a system for learning. Most managers care way more about your ability to problem-solve than having every single answer memorized.

Tech tips for beginners and seniors.

Easy Tech Advice for Seniors and Absolute Beginners

I used to think that being “good with tech” meant you had to be some kind of coding wizard or spend hundreds of dollars on the latest gadget every single year. Honestly, that’s such a lie. Most of the advice you find online is just gatekeeping wrapped in fancy jargon, making you feel like you’re failing just because you can’t navigate a complex interface. I’ve spent way too many late nights hunched over a desk, frustrated by a device that refused to cooperate, only to realize the solution wasn’t a new laptop—it was just better habits. If you’re looking for tech tips for beginners that actually make sense, stop listening to the hype and start looking at your workflow.

I’m not here to give you a lecture or sell you a subscription to some productivity app you’ll never use. My goal is to strip away the noise and give you the actual, unpolished steps to making your digital life run smoother. We’re going to focus on small, repeatable systems that reduce friction, from cleaning up your digital clutter to mastering the settings that actually give you your time back. This is about practicality over prestige, and I promise to keep it real every step of the way.

Table of Contents

Stop the Digital Panic Real Tech Tips for Beginners

Stop the Digital Panic Real Tech Tips for Beginners

First, let’s talk about the constant barrage of notifications that make it feel like your phone is actually yelling at you. If you feel overwhelmed, the best way to start simplifying technology use is to go on a notification purge. Open your settings and look at every single app—if it’s not a direct message from a human or a calendar alert, turn it off. You don’t need your food delivery app or a random game pinging you while you’re trying to focus. It’s about reclaiming your attention so you aren’t constantly reacting to a buzzing pocket.

Next, if you’re feeling lost when it comes to understanding modern gadgets, stop trying to memorize every single icon. Most interfaces are designed to be intuitive, but they can feel like a foreign language at first. My rule of thumb? Long-press everything. If you aren’t sure what a button does, hold your finger down on it. Most devices will pop up a little menu explaining the options. It’s a low-stakes way to explore without the fear of “breaking” something, and honestly, it’s how I learned most of my own shortcuts.

Mastering Digital Literacy Basics Without the Gatekeeping

Mastering Digital Literacy Basics Without the Gatekeeping

Look, I know the feeling of staring at a new device and feeling like you’ve accidentally stepped into a cockpit of a fighter jet. It’s overwhelming, and honestly, most tech tutorials make it worse by using jargon that nobody actually uses in real life. To me, mastering digital literacy basics isn’t about memorizing every single button; it’s about understanding the logic behind how things work. Once you realize that most apps follow the same basic patterns, the intimidation factor starts to melt away.

If you’re feeling lost, start by focusing on simplifying technology use rather than trying to learn everything at once. Don’t worry about the advanced settings or the niche shortcuts right now. Just get comfortable with the core stuff: how to manage your files, how to navigate a menu, and how to tell the difference between a legitimate notification and a scam. Think of it like learning to cook—you don’t need to master a soufflé on day one; you just need to know how to boil water without burning the pot.

Simplifying Technology Use for a Much Calmer Life

Simplifying Technology Use for a Much Calmer Life

The biggest mistake I see people make is trying to learn everything at once. Technology feels overwhelming because we treat it like a massive, singular mountain to climb, when really, it’s just a series of small hills. If you’re feeling stuck, start with simplifying technology use by stripping your interface down to the bare essentials. You don’t need fifty apps on your home screen; you just need the five that actually serve your daily routine. If an icon makes you feel anxious or confused every time you look at it, delete it. Your digital space should feel like a clean desk, not a junk drawer.

I also think we need to stop treating “tech” like a secret club. Whether you’re looking into smartphone navigation for seniors or just trying to figure out a new laptop, the goal is utility, not mastery of every single hidden feature. Focus on building a few essential computer skills—like managing files or recognizing a suspicious link—and let the rest go. Once you realize that most gadgets are just tools designed to help you, rather than puzzles designed to trip you up, the whole vibe shifts from panic to peace.

Essential Computer Skills to Stop Feeling Overwhelmed

Honestly, a lot of the anxiety around computers comes from feeling like there’s a “correct” way to do everything, and if you miss one step, the whole system crashes. Spoilers: it rarely works like that. To really stop feeling overwhelmed, you need to focus on a few essential computer skills that act as your foundation. Start with file management. If your desktop looks like a digital junk drawer, you’re going to feel cluttered before you even start working. I’m a huge believer in creating a simple folder hierarchy—think of it like organizing a kitchen drawer. Once you know exactly where your “Important Docs” live versus your “Random Downloads,” that low-level background stress just evaporates.

Beyond organization, getting comfortable with keyboard shortcuts and basic troubleshooting is a total game-changer. You don’t need to be a coder, but knowing how to force-quit a frozen program or use a simple search function saves you from that “everything is broken” panic. It’s all about simplifying technology use by learning the shortcuts that do the heavy lifting for you. Once you realize that most “errors” are just minor hiccups you can fix in two clicks, the machine stops feeling like an adversary and starts feeling like a tool.

Smart Internet Safety for New Users and Families

Look, we’ve all seen those scary news segments about hackers and identity theft, and it’s easy to feel like you should just stay offline to be safe. But staying disconnected isn’t the answer—it’s just about building a few basic layers of defense. When it comes to internet safety for new users, I always tell people to start with the “pause” method. If an email looks urgent, asks for money, or makes you feel panicked, that is your biggest red flag. Take a breath, don’t click anything, and verify it through a different channel first.

If you’re helping out parents or grandparents, don’t just take their devices and set them up yourself; that doesn’t help them long-term. Instead, focus on simplifying technology use by setting up a password manager and enabling two-factor authentication on their most important accounts. It’s less about knowing every technical detail and more about creating a system where a single mistake won’t crash their whole digital life. Once those guardrails are in place, the internet feels a lot less like a minefield and more like the tool it’s supposed to be.

5 Low-Stress Habits to Keep Your Tech from Spiraling

  • Stop memorizing passwords. Seriously, just get a password manager like Bitwarden or 1Password. It’s one less thing to stress about, and you won’t have to do that awkward “forgot password” dance every single time you try to log in to something.
  • Treat your device storage like a messy junk drawer. Once a month, spend ten minutes deleting those blurry screenshots and random apps you haven’t touched since 2022. It keeps your phone snappy and actually makes it easier to find what you need.
  • Learn the “Undo” muscle memory. Whether it’s Ctrl+Z on a laptop or the shake-to-undo feature on an iPhone, knowing you can instantly reverse a mistake takes a massive amount of the anxiety out of clicking things.
  • Set up a “Charging Station” ritual. Don’t let your devices die mid-task—that’s how the panic starts. Pick a spot in your house where everything plugs in at the same time every night, so you wake up to a full battery and zero stress.
  • Use “Do Not Disturb” like it’s your job. You don’t need to be reachable 24/7. Set your phone to automatically silence non-urgent notifications after a certain hour so your tech actually helps you rest instead of interrupting it.

The TL;DR: How to Keep Your Sanity

Stop trying to learn everything at once; focus on mastering one specific tool or setting that actually solves a daily frustration for you.

Treat your digital space like your physical one—if your desktop is a mess and your notifications are screaming, it’s going to drain your energy before you even start your day.

Remember that tech is supposed to be a tool that serves you, not a boss you have to impress, so don’t be afraid to turn things off or skip the “latest” update if it doesn’t actually make your life easier.

One Step at a Time

At the end of the day, getting a handle on your tech isn’t about becoming a coding wizard or knowing every single shortcut on a keyboard. It’s really just about building a few small, repeatable systems that stop your devices from feeling like they’re constantly demanding your attention. We’ve covered everything from tightening up your digital security and managing those relentless notifications to mastering the basic computer skills that keep you from feeling stuck. If you can implement even just two or three of these shifts—like cleaning up your desktop or setting better privacy boundaries—you’ve already won. The goal isn’t perfection; it’s about reducing the friction between you and the tools you use every day.

I know it can feel incredibly overwhelming when it seems like the digital world is moving faster than you can keep up with, but please remember that you don’t have to learn it all by Tuesday. Adulthood is messy enough without feeling like you’re failing a tech exam every time you open a new app. Take these tips, pick the ones that actually make sense for your specific life, and ignore the rest. You’re building a toolkit, not a museum, so keep it functional and keep it simple. You’ve totally got this.

Frequently Asked Questions

I’ve heard about "the cloud," but how do I actually know if my photos and files are safe there?

Look, “the cloud” sounds mysterious and a little scary, but it’s really just someone else’s secure server. To know if your stuff is actually safe, check two things: Two-Factor Authentication (2FA) and your backup redundancy. If you have 2FA turned on, a hacker can’t just stroll in with your password. Also, don’t let the cloud be your only home; keep a physical hard drive with your most precious files too. That’s the real safety net.

Is there a way to organize all my random files and downloads without spending hours on it?

Honestly, the “folder for everything” method is a trap. Don’t try to sort every single old file; you’ll burn out in twenty minutes. Instead, start a “Current Projects” folder for what you need now, and dump everything else into an “Archive [Month/Year]” folder. It clears the visual clutter instantly. Moving forward, just set a recurring five-minute timer every Friday to clear your Downloads folder. It’s not about perfection; it’s about stopping the pileup.

How do I tell the difference between a real security alert and a scam trying to get into my accounts?

Look, the easiest way to tell is this: real companies will almost never create a sense of “immediate crisis” to force your hand. If an email or text says your account will be deleted in ten minutes unless you click a link right now, it’s a scam. Period. Don’t click. Instead, close the message, open your browser, and log in directly through the official website or app. If there’s a real issue, you’ll see it there.

How to cook pasta perfectly guide.

Master the Secrets of Authentic Italian Pasta

I used to think that mastering dinner meant buying every expensive, artisanal brand of dried noodles and following some overly dramatic recipe that required three different types of specialized salts. Honestly, it’s exhausting. I spent way too many nights staring at a pot of mushy, bland noodles, feeling like I was failing at a basic adult task just because I didn’t have a culinary degree. If you’re tired of the gatekeeping and the idea that you need a gourmet kitchen just to figure out how to cook pasta perfectly, I promise you, it’s much simpler than the food influencers make it out to be.

I’m not here to give you a lecture on Italian heritage or suggest you spend forty dollars on a single box of pasta. Instead, I want to give you a repeatable system that works every single time, even when you’re exhausted and just want to eat. I’m stripping away the fluff to give you the actual, unpolished steps—from the water-to-salt ratio to the exact moment you should pull it off the heat. Let’s stop overcomplicating dinner and just get it right.

Table of Contents

Understanding How to Cook Pasta Perfectly

Understanding How to Cook Pasta Perfectly.

Before you even touch a box of noodles, you need to understand that pasta isn’t just something you boil until it’s mushy; it’s about texture and timing. Most people fail because they treat the pot like a mindless chore rather than a system. The biggest thing to get right is the difference between al dente and soft pasta. Al dente—which literally means “to the tooth”—is that perfect middle ground where the pasta has a slight, firm bite in the center. If you wait until it feels totally soft in the pot, you’ve already lost the battle.

Another mistake I see constantly is treating the water like it’s just a medium for heat. It’s actually your first seasoning step. Salting pasta water correctly is non-negotiable; it should taste like a seasoned soup. If you don’t salt the water, the pasta will taste bland no matter how good your sauce is. Also, keep an eye on your clock. Most boxes give you a general idea, but I always treat that as a suggestion and start testing the texture a minute or two early to ensure I don’t overshoot the mark.

Key Things to Know

Key Things to Know: Salting pasta water.

Before you even reach for the pot, there are a few non-negotiables that most people skip, which is exactly why their dinner ends up tasting like bland, mushy cardboard. First, stop being stingy with the salt. You aren’t just seasoning the noodles; you’re seasoning the actual structure of the pasta from the inside out. I always tell people that salting pasta water correctly is the single biggest difference between a “home meal” and something that actually tastes like it came from a restaurant. It should taste like a lightly seasoned soup, not a swimming pool.

Also, let’s talk about the texture. Most people think they’ve failed if the pasta isn’t soft, but there is a massive difference between al dente and soft pasta. If you’re aiming for that professional bite, you want to pull the noodles out a minute before the box says they’re done. This is crucial because the pasta will continue to cook once it hits your sauce. If you want to level up, keep a small cup of that cloudy liquid before draining; using pasta water in sauces is the ultimate cheat code for getting that silky, restaurant-quality coating that sticks to every single strand.

Practical Tips and Steps

Practical Tips and Steps for salting pasta.

First, let’s talk about the actual workflow. Don’t just throw everything in a pot and hope for the best. Start by using a large enough pot so the noodles have room to move; if they’re cramped, you’re basically asking for a clump of starch. While you wait for the water to hit a rolling boil, focus on salting pasta water correctly. It should actually taste like the sea. This is your only chance to season the noodle itself, so don’t be shy with the salt.

Once the pasta is in, set a timer immediately. I always keep a mental pasta cooking time guide based on the box, but I usually check it two minutes early to test the texture. You’re looking for that specific bite—the difference between al dente and soft pasta is really just about how much resistance you feel when you bite down.

Finally, the pro move: before you drain anything, scoop out a mug of that cloudy, starchy liquid. Using pasta water in sauces is the ultimate hack for getting that silky, restaurant-quality emulsion that actually clings to your noodles instead of sliding off to the bottom of the bowl.

Common Mistakes to Avoid

The biggest mistake I see people making is treating the pot like a tiny, cramped bathtub. If you don’t use enough water, the starch gets too concentrated, and you’ll end up with a gummy, clumped mess. This is the fastest way to fail at preventing sticky pasta. Also, please stop adding oil to the water because you think it’ll stop sticking—it actually just creates a slick film that prevents your sauce from ever actually clinging to the noodles.

Another huge pitfall is ignoring the seasoning step. I see so many people wait until the pasta is on the plate to add salt, but that’s too late. You need to be salting pasta water correctly while it’s boiling so the flavor actually penetrates the dough. Finally, don’t just drain the pot and walk away. If you toss that starchy liquid down the sink, you’re throwing away your best tool. Always save a splash of that liquid; it’s the secret to emulsifying your sauce and making everything feel cohesive rather than just “noodles with stuff on top.”

Final Thoughts

At the end of the day, cooking pasta shouldn’t feel like a high-stakes chemistry experiment. It’s just one of those small, repeatable systems that, once mastered, takes the stress out of a Tuesday night dinner. You don’t need a culinary degree; you just need to trust the process and stop being afraid of a little salt. Once you get comfortable with the rhythm of it—watching the boil, checking the texture, and saving that liquid gold—you’ll realize how much easier it makes your life in the kitchen.

My biggest piece of advice is to keep experimenting. Don’t be afraid to play around with different varieties, because knowing which best pasta shapes for sauces work for your specific recipe is a total game-changer. Whether you’re aiming for that perfect bite or just trying to get a quick meal on the table, remember that the goal is efficiency, not perfection. Stop overthinking the timer and start trusting your senses. Once you nail the basics, you’re not just making dinner; you’re building a system that works for you.

My Non-Negotiable Pasta Rules

  • Salt the water like it’s part of the recipe, not an afterthought. It should actually taste like the sea; that’s the only chance your noodles have to absorb flavor from the inside out.
  • Save a mug of that cloudy pasta water before you drain it. That starchy liquid is liquid gold—it’s the secret to making your sauce actually cling to the pasta instead of sliding off to the bottom of the bowl.
  • Stop the “rinse” habit immediately. Unless you’re making a cold pasta salad, rinsing your noodles with cold water washes away all that delicious starch you need for a silky texture.
  • Aim for al dente, but remember that the pasta keeps cooking once it hits the pan. Pull it out of the pot a minute or two before the box says it’s done so it can finish absorbing the sauce in the pan.
  • Use a bigger pot than you think you need. Cramming pasta into a tiny pot leads to a gummy, clumpy mess because there isn’t enough water circulation to keep the strands separate.

The Cheat Sheet for Stress-Free Pasta

Don’t skimp on the salt; heavily salting your water is the only way to season the pasta from the inside out.

Stop draining the water down the sink immediately—save a mug of that starchy liquid to help your sauce actually stick to the noodles.

Always finish your pasta in the pan with the sauce rather than just dumping sauce on top of plain noodles in a bowl.

The Bottom Line

At the end of the day, cooking great pasta isn’t about following some sacred, complicated ritual; it’s just about respecting the basics. You don’t need a culinary degree to get this right—you just need a big pot of salted water, a bit of patience to wait for that rolling boil, and the foresight to save a splash of that starchy pasta water before you drain it. If you remember to salt the water aggressively and pull the noodles out while they still have a bit of a bite, you’ve already won half the battle. Stop stressing over the timer and start trusting your senses instead.

I know that sometimes, after a long day of work or staring at screens, the last thing you want to do is manage another “system.” But once you nail this, dinner stops being another chore on your to-do list and starts being a reliable, delicious win. Adulthood is messy, but your kitchen doesn’t have to be. Master these small, repeatable steps, and you’ll realize that even a simple box of dried noodles can feel like a properly composed meal when you actually know what you’re doing. You’ve got this.

Frequently Asked Questions

Should I actually use a massive pot of water, or is that just a waste of energy and resources?

Honestly, I get the guilt. It feels like a massive waste of water and energy, but here’s the reality: you need that extra volume. If you use a tiny pot, the water temperature crashes the second the pasta hits, and you end up with a gummy, starchy mess. Instead of skipping the big pot, just use a lid to speed up the boil and save energy. It’s a small trade-off for actually edible pasta.

Is it really okay to skip the salt, or am I going to ruin the whole meal?

Look, I get it—salt feels like one of those “rules” people gatekeep. If you’re asking if you can skip it, sure, you won’t poison anyone. But honestly? You’re going to end up with pasta that tastes… fine, but boring. Salt isn’t just for flavor; it seasons the noodle itself from the inside out. If you’re avoiding it for health reasons, just lean heavier on fresh herbs or garlic later. But if you can, salt the water. It’s worth it.

What do I do if I accidentally overcook it and it turns into mush?

Honestly, it’s a total mood, and it happens to the best of us. If it’s already mushy, don’t try to save it as a standalone pasta dish—it’s a lost cause. Instead, pivot. Lean into the texture and turn it into a baked pasta or a creamy mac and cheese. The extra sauce and cheese will mask the softness. Or, just call it a “pasta soup” and add extra broth. Crisis averted.

Guide on how to build a routine.

How to Create a Daily Routine You Can Actually Sustain

I used to think that learning how to build a routine meant buying a $40 linen planner, downloading three different productivity apps, and waking up at 5:00 AM to meditate in total silence. Honestly? That sounded less like a lifestyle and more like a full-time job I didn’t sign up for. I spent months trying to force these aesthetic, “perfect” morning rituals only to end up feeling like a total failure by Tuesday afternoon because I couldn’t keep up the act.

Here’s the deal: I’m not going to sell you on some unrealistic, Pinterest-perfect version of productivity. Instead, I want to show you how to build a routine that actually sticks because it’s designed for real life—messy mornings, unexpected deadlines, and the occasional burnt toast included. We’re going to strip away the gatekeeping and focus on small, repeatable systems that reduce the friction of your day without making you feel like you’re constantly running a marathon. This is about making your life run smoother, not adding more items to your to-do list anxiety.

Table of Contents

Stop the Chaos How to Build a Routine That Actually Sticks

Stop the Chaos How to Build a Routine That Actually Sticks

The biggest mistake I see people making is trying to overhaul their entire existence overnight. You wake up on a Monday, decide you’re a “new person,” and suddenly you’re trying to meditate for thirty minutes, run five miles, and meal prep for the week. By Wednesday, you’re burnt out and back to scrolling on your phone in bed. That isn’t a plan; it’s a recipe for failure. If you want to actually see results, you have to focus on building sustainable habits rather than chasing an impossible ideal.

Start by looking at your existing day and finding the gaps. Instead of forcing a massive shift, try “habit stacking”—attaching a new, tiny action to something you already do without thinking, like washing your coffee mug right after you finish your first cup. This is one of the most effective habit formation techniques because it removes the mental heavy lifting. You aren’t relying on willpower; you’re just piggybacking on a system that already exists. Keep it small, keep it boring, and most importantly, make it easy to start.

Ditch the Perfectionism and Master Real Habit Formation Techniques

Ditch the Perfectionism and Master Real Habit Formation Techniques

The biggest mistake I see people make is trying to overhaul their entire existence overnight. You see those aesthetic “morning routine examples” on TikTok—the 5:00 AM wake-ups, the journaling, the matcha, the yoga—and you think that’s the standard. It’s not. If you try to go from zero to sixty, you’re going to burn out by Wednesday. Real habit formation techniques aren’t about being perfect; they’re about being stubbornly consistent. I’d much rather you commit to just five minutes of tidying every night than promise a three-hour deep clean that you’ll inevitably skip when you’re tired.

Instead of aiming for a flawless execution, focus on building sustainable habits that actually fit into your messy, real-world schedule. If your day goes sideways, don’t scrap the whole plan. Just pivot. The goal is to maintain productivity and consistency even when life gets loud. Think of it like a pilot light: even if the main flame goes out for a bit, you want to make sure the spark is still there so you can easily reignite it the next day.

Beyond the Aesthetic Morning Routine Examples for Real Life

Beyond the Aesthetic Morning Routine Examples for Real Life

We’ve all seen those “aesthetic” morning routines on TikTok—the ones where someone wakes up at 5:00 AM, journals by candlelight, and makes a perfect matcha latte without a single hair out of place. Honestly? It’s exhausting just watching them. If you try to copy a routine that doesn’t fit your actual life, you’re just setting yourself up for failure. Real morning routine examples aren’t about looking perfect for a camera; they’re about lowering the barrier to entry so you don’t feel like you’re drowning by 10:00 AM.

For me, it’s about reducing decision fatigue. If I’m having a high-stress week, my routine is just: drink a glass of water, check my calendar, and get dressed. That’s it. If I have more headspace, I might add a ten-minute stretch or a quick tidy-up. The goal is building sustainable habits that work on your worst days, not just your best ones. You don’t need a twelve-step ritual to be productive; you just need a sequence that makes you feel slightly more prepared than you were ten minutes ago.

Building Sustainable Habits Without the Constant Burnout

The biggest mistake I see people make is treating a new routine like a sprint. You wake up on Monday, attempt to overhaul your entire existence, and by Wednesday, you’re staring at your to-do list feeling completely defeated. That’s not a lifestyle change; that’s a recipe for burnout. Real building sustainable habits isn’t about how much you can cram into a single day, but about how little friction you can create so the action becomes automatic. If a habit feels like a massive chore every time you try to do it, your system is broken.

Instead of aiming for a perfect overhaul, try “habit stacking.” This is one of my favorite habit formation techniques because it removes the mental heavy lifting. You take something you already do—like making your morning coffee—and tether a new, tiny habit to it. Suddenly, you aren’t “trying to be productive,” you’re just doing something new while the kettle boils. The goal is to prioritize low-effort consistency over high-intensity bursts that leave you exhausted by noon. Keep the bar low enough that even on your worst days, you can still clear it.

Proven Time Management Strategies for Overcoming Procrastination

If you’re like me, you probably spend more time thinking about the work you need to do than actually doing it. We’ve all been there—staring at a mounting to-do list until it feels less like a plan and more like a threat. The trick to overcoming procrastination isn’t some magical burst of willpower; it’s about lowering the barrier to entry. I’ve found that the “Two-Minute Rule” is a total lifesaver. If a task takes less than two minutes, do it immediately. If it’s bigger, just commit to doing two minutes of it. Usually, the hardest part is just breaking the seal of inertia.

Once you’ve actually started, you need a way to keep that momentum without hitting a wall. This is where time management strategies like time-blocking come in. Instead of a vague list, I carve out specific chunks of my afternoon for deep work. It’s not about being a robot; it’s about creating a container for your focus so you don’t feel like you’re constantly chasing your tail. When you pair these blocks with intentional rest, you’re actually building something that lasts rather than just burning through your mental battery by noon.

My Non-Negotiable Rules for Keeping the Chaos at Bay

  • Stop trying to overhaul your entire life in one Monday morning. If you try to start a 5 AM workout, a meal prep system, and a deep-cleaning schedule all at once, you’re going to crash by Wednesday. Pick one small thing—like making your bed or clearing your inbox—and get that solid before you even think about adding a second layer.
  • Use “habit stacking” to make new routines feel less like a chore. Instead of trying to remember to meditate, just do it immediately after you brush your teeth. By anchoring a new habit to something you already do on autopilot, you’re using your existing brain wiring instead of fighting against it.
  • Build in “buffer zones” for when life inevitably goes sideways. I used to schedule my day down to the minute, and the second a client call ran long, my whole system collapsed. Now, I leave 15-30 minute gaps between major tasks. It’s much easier to stay on track when you have a little breathing room for the unexpected.
  • Audit your energy, not just your time. There is no point in scheduling your most brain-heavy freelance work for 3 PM if that’s when you usually hit a massive afternoon slump. Figure out when you’re actually sharp and protect that time for the hard stuff, then save the mindless admin tasks for when you’re running on low battery.
  • Prepare your environment the night before to reduce friction. This is a huge one for me. If I want to work out in the morning, my clothes are already laid out. If I need to write, my laptop is charged and my desk is clear. The less “setup” you have to do in the moment, the less likely you are to talk yourself out of it.

The TL;DR on Keeping Your Life Together

Forget the “perfect” routine you saw on TikTok; build a system based on your actual energy levels and real-world constraints, not an aesthetic.

Small, repeatable wins beat massive, unsustainable overhauls every single time—start with one tiny habit and let it stabilize before adding more.

When things inevitably go sideways (and they will), don’t scrap the whole plan; just reset and get back to your systems as soon as you can.

The Bottom Line

At the end of the day, building a routine isn’t about achieving some flawless, Pinterest-worthy aesthetic where you wake up at 5:00 AM and drink green juice in perfect silence. It’s about the messy, practical stuff we actually talked about: ditching the perfectionism that leads to burnout, using time management to stop the procrastination spiral, and creating small, repeatable systems that act as a safety net when life gets chaotic. You don’t need a complete life overhaul by Monday morning; you just need to start small and focus on those tiny, sustainable wins that keep your head above water.

Please remember that your routine should serve you, not the other way around. If a system starts feeling like a cage or a constant source of stress, tweak it, break it, or toss it entirely. Life is unpredictable, and some days are going to be total dumpster fires regardless of how many habits you’ve stacked. That’s okay. The goal isn’t to be a robot; it’s to build enough structure so that when the unexpected happens, you have the mental bandwidth to handle it without spiraling. You’ve got this.

Frequently Asked Questions

What do I do when my routine gets completely wrecked by an unexpected life event or a busy work week?

Honestly? You pivot. Don’t try to force your “perfect” routine back into a week that clearly doesn’t have space for it—that’s just a fast track to burnout. I call it “low-power mode.” Strip your routine down to the absolute bare minimums: hydrate, one healthy meal, and one non-negotiable task. Once the chaos settles, you don’t restart from scratch; you just slowly plug the pieces back in. Systems are meant to bend, not break.

How do I figure out which habits are actually worth adding and which ones are just "productivity theater"?

To figure this out, ask yourself: “Does this habit solve a recurring friction point, or am I just doing it to feel busy?” If you’re color-coding a planner just to feel organized but still missing deadlines, that’s productivity theater. A real habit should be a tool, not a chore. If it doesn’t directly save you time, mental energy, or stress in the long run, it’s probably just aesthetic noise. Cut the fluff.

I struggle with consistency—how do I stop myself from quitting the second I miss a single day?

Look, the “all-or-nothing” mindset is exactly what kills progress. If you miss a day, you haven’t failed the system; you just hit a snag. I call it the “Never Miss Twice” rule. Missing one day is an accident; missing two is the start of a new habit of quitting. Don’t try to “make up” for lost time by doing double work tomorrow—that’s just a recipe for burnout. Just show up and do the bare minimum.

Learn how to reupholster a chair.

Refresh Any Chair With a Simple Reupholstery Project

I was staring at this mid-century armchair I found at a thrift store last weekend, covered in a questionable mustard-colored velvet that looked like it had seen too many decades of spilled coffee. Most people would have told me it was destined for a landfill, but I knew that learning how to reupholster a chair was actually much less about having a professional studio and more about not losing your mind during the process. I spent my entire Saturday covered in foam dust and staple remover shavings, realizing that the “expert” tutorials online make this look like a seamless, meditative art form, when in reality, it’s mostly just a messy, trial-and-error battle against stubborn fabric.

I’m not here to sell you on some Pinterest-perfect fantasy where everything goes right on the first try. Instead, I want to give you the actual, unpolished workflow I used to turn that dusty relic into something that actually fits my apartment. We’re going to skip the gatekeeping and dive straight into the essential systems—from choosing the right fabric weight to the specific stapling rhythm that keeps your corners from looking like a crumpled mess. This is the no-nonsense guide to getting it done without breaking your budget or your spirit.

Table of Contents

Guide Overview

Total Time: 4-6 hours
Estimated Cost: $40-120
Difficulty: Intermediate

Tools & Supplies

  • Staple gun and staples for securing fabric
  • Pliers for pulling old staples and fabric
  • Fabric scissors for precise cutting
  • Measuring tape for calculating fabric dimensions
  • Mallet for flattening padding
  • Upholstery fabric (1-3 yards depending on chair size)
  • High-density foam or batting for padding
  • Spray adhesive for securing foam
  • Dust cover fabric for the underside

Step-by-Step Instructions

  • 1. Before you even touch a staple gun, you need to deconstruct the chair completely. Don’t just rip the fabric off like you’re tearing a poster off a wall; pull it back carefully so you can see how the original maker tucked the edges. I like to keep the old fabric pieces as a visual template for where the new material needs to sit. If you lose the original shape, you’re basically flying blind.
  • 2. Once the frame is bare, check the padding. If the foam is crumbling into orange dust or the springs are making a sad little squeak every time you sit down, this is your moment to fix it. I usually swap out old, compressed foam for something with a bit more density and support. It’s much easier to replace the guts now than to realize your chair is uncomfortable three weeks after you’ve finished the pretty exterior.
  • 3. Now, get your new fabric ready. You want to lay it out on a clean floor and make sure it’s flat—no wrinkles allowed here. Place the chair seat face down onto the fabric, leaving enough extra material around all four sides to pull it tight. A good rule of thumb is to leave at least three to four inches of overhang; you can always trim the excess later, but you can’t magically grow more fabric if you cut it too short.
  • 4. This is where the actual work happens: stapling. Start in the center of each side to create a tension anchor. Pull the fabric taut—but not so hard that you’re distorting the pattern—and drive a staple in. Once you have one staple in the center of each of the four sides, work your way toward the corners in a cross-pattern. This keeps the fabric from bunching up and ensures the tension is even across the entire surface.
  • 5. Dealing with the corners is the part that usually makes people want to quit, but it’s actually just a logic puzzle. You need to fold the excess fabric into neat, flat pleats so it doesn’t look like a crumpled paper bag. I like to pull the fabric tight, fold the corner over itself, and then staple it down. If you do it right, the corners should look crisp and intentional, not like a DIY disaster.
  • 6. Once everything is stapled down, grab a pair of sharp fabric shears and trim away the messy bits of excess fabric hanging off the underside. If your chair has a wooden frame that’s visible, you might want to staple a piece of black landscape fabric or a “dust cover” over the bottom to hide all your hard work. It gives the whole project that polished, professional finish that makes it look like you actually bought it from a boutique rather than a thrift store.

Stop Overpaying for New Furniture How to Reupholster a Chair

Stop Overpaying for New Furniture How to Reupholster a Chair

Before you dive in, let’s talk about the “why.” We’ve all been there—scrolling through furniture sites and seeing a mid-century modern chair priced like it’s made of solid gold, when in reality, it’s just a decent frame with tired fabric. The real secret to saving money isn’t just the labor; it’s knowing when to invest in quality materials. If you’re planning on this chair being a daily driver, don’t skimp on the fabric selection for upholstery. I always suggest looking for high-rub counts if you’re choosing something for a high-traffic living room.

Also, don’t let the “DIY” label fool you into thinking you can just wing it with whatever is in your junk drawer. While you don’t need a professional studio, having the right upholstery tools and supplies—like a decent staple gun and heavy-duty fabric shears—is what separates a project that looks “shabby chic” from one that just looks shabby. If the seat feels saggy, don’t just pull the new fabric tight and hope for the best; take the time to actually replace the foam and padding so the chair feels as good as it looks.

The Unpolished Toolkit for Master Level Fabric Selection and Supplies

The Unpolished Toolkit for Master Level Fabric Selection and Supplies.

Before you even touch a staple gun, we need to talk about the stuff that actually makes or breaks the project. Most people think they can just grab whatever cute pattern they saw on Pinterest, but if you aren’t looking at upholstery fabric types and durability, you’re going to regret it in six months when the seams start fraying. I always tell people to look for high rub counts—basically, how much friction the fabric can take before it gives up. If it’s a dining chair that’s going to see constant use, steer clear of anything too delicate like silk or thin linen. Go for a heavy-duty cotton canvas or a tight weave polyester that can actually handle real life.

As for the hardware, don’t try to DIY it with a cheap craft stapler. You need a real pneumatic or heavy-duty electric tool to get those staples deep enough into the frame. While you’re at it, don’t skip the step of replacing chair foam and padding. If the old foam feels crunchy or looks like it’s disintegrating, just toss it. Adding a fresh layer of high-density foam and some batting is what turns a “homemade” project into something that actually feels professional.

5 ways to keep your DIY project from becoming a total disaster

  • Don’t you dare throw away the old fabric until the new stuff is actually on the chair. I know it feels like you’re just cleaning up, but those old scraps are your literal blueprint for where the staples go and how the tension should feel.
  • Test your fabric for “stretchiness” before you commit. If you’re using something with too much spandex or a loose weave, you’re going to end up with a sagging seat that looks like a deflated balloon within a week.
  • Work in small, incremental sections rather than trying to pull the whole fabric tight at once. Start with the center of each side and work your way toward the corners; if you try to wing it, you’ll get those annoying, unsightly wrinkles that no amount of smoothing can fix.
  • Invest in a decent staple gun, not the cheap plastic ones from the dollar store. There is nothing more frustrating than being halfway through a project and having a jam ruin your momentum or, worse, having the staples fail to catch the wood properly.
  • Use a cardboard template for any custom cushions or complex shapes. Trying to eyeball the dimensions of a curved backrest is a recipe for wasted fabric, and I’ve learned the hard way that measuring twice and cutting once is a lot better than measuring once and crying later.

The bottom line on your DIY upholstery project

Don’t let the fear of ruining a chair stop you; the goal is a functional, custom piece that fits your space, not a museum-quality masterpiece.

Invest in the right tools—specifically a decent staple gun and some heavy-duty fabric—because cutting corners on supplies is the fastest way to end up with a saggy, messy result.

Treat the process as a system of layers; if you take the time to map out your fabric tension and staple placement now, you won’t be fighting a losing battle with wrinkles later.

The Final Stitch

Completing The Final Stitch on reupholstered chair.

At the end of the day, reupholstering a chair is less about being a master craftsman and more about having a reliable workflow. You’ve gathered your tools, you’ve picked out a fabric that won’t fall apart in six months, and you’ve navigated the messy reality of staples and tension. It’s easy to get overwhelmed by the technical side, but once you realize that it’s just a series of small, repeatable steps, the intimidation factor disappears. Just remember: don’t be afraid to pull a staple out and start a seam again if it looks wonky. The goal isn’t perfection; it’s creating something functional and beautiful that actually serves your space instead of just taking up room.

I know that starting a DIY project can feel like a massive commitment to a potential disaster, but there is something incredibly grounding about fixing something with your own hands. We live in a world of disposable everything, where it’s often easier to just click “buy now” on a cheap replacement than to actually repair what we already own. By choosing to reupholster, you’re opting out of that cycle and building a more intentional lifestyle. So, grab your multi-tool, clear off your workspace, and just dive in. You’ve got the system down now—the rest is just practice.

Frequently Asked Questions

I found a vintage chair I love, but the frame is actually wobbly—can I still reupholster it or is it a lost cause?

Honestly? It’s definitely not a lost cause. In fact, fixing a wobbly frame is actually the most important step before you even touch the fabric. There’s no point in putting gorgeous new velvet on a chair that’s going to collapse the second you sit down. Grab some wood glue and some clamps—or even just some heavy books to hold things in place—and tighten those joints up first. Fix the bones, then do the pretty stuff.

Is there any way to do this without spending a fortune on a heavy-duty staple gun and professional upholstery tools?

Honestly, you don’t need to go full professional on day one. If you’re just tackling a dining chair or a small stool, skip the $100 pneumatic stapler. A decent manual heavy-duty staple gun from a hardware store works fine. For the rest, use what you have: pliers to pull old staples, a flathead screwdriver to pry things up, and even some heavy-duty fabric scissors. It’s about working smarter with what’s in your junk drawer.

How do I know if the foam inside is actually salvageable, or if I'm just going to be layering new fabric over old, crumbly stuff?

Honestly, this is the part everyone skips until they’re halfway through and realize they’re basically sewing a shroud for a pile of orange dust. Here’s the test: give the foam a firm squeeze. If it bounces back instantly, you’re golden. If it feels crunchy, stays compressed, or—worst of all—literally disintegrates in your hands, it’s dead. Don’t try to save it. Layering new fabric over crumbly foam is just a recipe for a lumpy, depressing seat.

Page 2 of 2

Powered by WordPress & Theme by Anders Norén