Month: August 2026

Benefits of practicing single tasking.

Why You Should Stop Multitasking and Start Single-tasking

I was sitting at my desk last Tuesday, surrounded by three half-empty coffee mugs and sixteen open browser tabs, trying to draft a content strategy while simultaneously responding to client Slacks and listening to a productivity podcast. I felt like I was winning at life, but in reality, I was just spinning my wheels in a massive, exhausting circle. We’ve been sold this lie that being “busy” is a personality trait and that multitasking is a superpower, when in reality, it’s just a fast track to a constant state of emergency. I realized that my brain wasn’t actually processing anything; it was just vibrating with anxiety. That’s when I finally stopped the madness and leaned into single tasking to see if it actually worked for someone with a chaotic freelance schedule.

I’m not here to sell you on some expensive, aesthetic planner or a complex “flow state” ritual that takes forty minutes to set up. I want to give you the actual, unpolished steps to making your focus work for you without the burnout. I’m going to share the specific, low-friction systems I use to shut out the noise and actually get things done. No gatekeeping, no fluff—just real ways to reclaim your brain.

Table of Contents

Stop the Chaos Why Single Tasking Ends the Constant Emergency

Stop the Chaos Why Single Tasking Ends the Constant Emergency

We’ve been sold this lie that being “busy” means being everywhere at once. I used to pride myself on having twenty tabs open and responding to Slack messages while drafting a client proposal, thinking I was a productivity god. In reality, I was just spinning my wheels. Every time you jump from an email to a spreadsheet and then back to a text, you’re hitting a massive wall of mental fatigue from multitasking. It’s not just tiring; it’s actually sabotaging your ability to do anything well.

The science behind it is pretty blunt: our brains aren’t wired to actually do two things at once. What we’re really doing is rapid-fire task switching, which creates a massive spike in cognitive load reduction needs because your brain is constantly struggling to recalibrate. Instead of flowing through your to-do list, you’re stuck in a loop of starting and stopping. When you finally commit to one thing, the chaos starts to settle. You stop reacting to every little ping and actually start making progress instead of just feeling busy.

The Real Cost of Mental Fatigue From Multitasking

The Real Cost of Mental Fatigue From Multitasking

We’ve all been there: you’re halfway through a project, a Slack notification pings, and suddenly you’re checking an email while trying to finish a spreadsheet. You think you’re being efficient, but you’re actually just burning through your mental fuel. The truth is, every time you pivot, you’re paying a “switching tax.” This constant oscillation between tasks messes with your brain function and task switching abilities, leaving you feeling totally fried by 3:00 PM even if you haven’t actually finished anything meaningful.

It isn’t just about being “distracted”; it’s about the heavy mental fatigue from multitasking that settles in your bones. When you force your brain to juggle too many open loops, your cognitive load skyrockets. You end up in this weird, hazy state where you’re physically present but mentally lagging. I used to think this was just part of the freelance grind, but it’s actually just a recipe for burnout. By trying to do everything at once, we end up doing nothing well, and that’s exactly how we end up feeling like we’re constantly running on empty.

Unmasking Brain Function and Task Switching Realities

Unmasking Brain Function and Task Switching Realities.

Here is the reality of what’s happening under the hood: your brain isn’t actually wired to do two things at once. When you think you’re multitasking, you’re really just performing rapid-fire context switching. Every time you jump from a spreadsheet to a Slack notification, your brain has to “reboot” to understand the new rules of the task. This constant toggling creates a massive spike in cognitive load reduction—or rather, a total lack of it. Instead of flowing through work, you’re stuck in a loop of starting and stopping, which drains your battery faster than an old iPhone.

Understanding brain function and task switching is the first step to stopping the cycle. When we force our attention to splinter, we aren’t being “efficient”; we are actually inducing a state of mental friction. By leaning into monotasking benefits, you allow your prefrontal cortex to actually settle into a rhythm. It’s about moving away from that frantic, jittery energy and toward a state where you can actually finish a thought without feeling like your head is spinning.

Cognitive Load Reduction the Secret to Reclaiming Your Focus

Think of your brain like a laptop with too many browser tabs open. You know that feeling when the fan starts spinning loudly and everything starts lagging? That’s exactly what happens when you try to juggle a dozen different streams of information at once. By focusing on cognitive load reduction, you’re essentially closing those unnecessary tabs to free up RAM. When you stop trying to process everything simultaneously, you stop draining your mental battery before lunch even hits.

Instead of constantly reacting to every ping and notification, I’ve started leaning into deep work techniques to protect my headspace. It’s not about being a robot; it’s about realizing that my ability to actually produce something good is directly tied to how much mental clutter I can clear out. When I commit to one thing, the friction disappears. You aren’t just getting more done; you’re actually reclaiming your focus so you don’t end the day feeling like a hollowed-out shell of a human. It’s the difference between running a marathon through mud and actually having the breath to enjoy the view.

Real Deep Work Techniques to Protect Your Attention Span

If you want to actually protect your focus, you have to stop treating your attention like an infinite resource. I’ve learned that the best way to implement deep work techniques isn’t by suddenly becoming a monk, but by creating physical and digital boundaries. Start with “time blocking“—literally carving out 60 to 90 minutes on your calendar where your phone is in another room and your browser tabs are stripped down to the absolute essentials. When you remove the constant ping of notifications, you’re actively practicing cognitive load reduction, which keeps your brain from hitting that wall of exhaustion halfway through the day.

Another thing that changed the game for me was the “environment reset.” Before I sit down to tackle a heavy project, I clear my desk of everything except what I need for that specific task. It sounds extra, but it prevents that subconscious urge to drift toward something else. By leaning into these monotasking benefits, you aren’t just getting more done; you’re actually training your brain to stay in the zone longer. It’s about building a system that makes it harder to fail than it is to succeed.

How to Actually Do It: My Low-Friction Single Tasking Toolkit

  • Use the “One Tab” rule. I know, it sounds extreme, but if you have twenty browser tabs open, your brain is constantly scanning for something else to do. Close everything except the one thing you are working on right now. If you’re scared of losing a page, use a bookmark folder, but get those tabs out of your sight.
  • Set a timer for “micro-sprints.” Instead of telling yourself you’re going to work for three hours straight (which is a lie we tell ourselves), set a timer for 25 minutes. Tell yourself you only have to do one specific task until that timer dings. It makes the commitment feel way less heavy.
  • Physicalize your focus with a “Do Not Disturb” signal. Since I work from home, I use a specific lamp or even just a pair of heavy over-ear headphones. It’s a visual cue for my brain—and anyone else in the house—that I am currently in a single-tasking zone and shouldn’t be interrupted.
  • Batch your “shallow work” to protect your deep work. Don’t answer emails one by one as they pop up; that’s a trap. Instead, schedule two or three specific times a day to handle all the small, annoying stuff like admin or messages. This keeps the “quick checks” from bleeding into your actual productive time.
  • Create a “distraction pad.” Keep a physical notepad next to you while you work. When a random thought pops up—like “I need to buy more dish soap” or “I wonder if that thrift store is open late”—don’t switch tasks to handle it. Write it down on the pad and get back to what you were doing. You can deal with the list later.

The TL;DR: How to Actually Apply This

Stop treating multitasking like a flex; it’s just a fast track to burnout and half-finished projects.

Protect your focus by building physical and digital boundaries—if it’s not the task at hand, it shouldn’t be in your line of sight.

Focus on one thing at a time to lower your mental load and actually get your life back from the chaos.

Getting Your Life Back Under Control

Look, we’ve covered a lot of ground here, but the bottom line is this: multitasking is a lie we tell ourselves to feel productive while we’re actually just spinning our wheels. We talked about how task-switching nukes your cognitive load, how deep work isn’t some mystical superpower but a skill you can actually build, and why protecting your attention span is the only way to stop that constant, low-grade feeling of panic. It’s not about doing more; it’s about doing one thing well so you aren’t left staring at a screen at 9 PM wondering where the entire day went.

Transitioning to a single-tasking lifestyle isn’t going to happen overnight, and that’s fine. You’re going to feel that itch to check your notifications or open a new tab every five minutes—that’s just your brain being wired for chaos. But if you can commit to even just one hour of focused, uninterrupted work a day, you’ll start to see the friction in your life start to melt away. Stop treating your brain like a browser with fifty tabs open and start trusting your ability to focus. You deserve to finish your day feeling accomplished rather than just exhausted.

Frequently Asked Questions

How am I supposed to single task when my job literally requires me to respond to Slack and emails all day?

I hear you—the “always-on” culture makes this feel impossible. But here’s the reality: if you’re reacting to every ping instantly, you’re not actually working; you’re just performing digital triage. Try batching. Set specific windows—say, 20 minutes every hour—to blast through Slack and emails. Outside of those windows, close the tabs. You aren’t ignoring people; you’re just managing your capacity so you can actually deliver quality work.

Is there a way to transition into single tasking without feeling like I'm losing my edge or falling behind?

I totally get that fear. We’ve been conditioned to think that “busy” equals “productive,” and slowing down feels like losing your competitive edge. But honestly? You aren’t falling behind; you’re just stopping the leak. Think of it like a system update for your brain. Start with “micro-focus” windows—just 20 minutes of one thing—to prove to yourself that you can actually finish a task without the frantic multitasking haze. You’ll find you’re actually moving faster.

Does single tasking actually work for people with ADHD, or is it just another productivity myth?

Honestly, I get why it feels like a myth. When your brain is wired for constant stimulation, “just focus on one thing” sounds like a joke. But for me, it’s not about forcing a neurotypical workflow; it’s about managing the dopamine chase. Single-tasking isn’t about being a robot; it’s about using systems—like body doubling or visual timers—to prevent that paralyzing spiral when you try to do everything at once and end up doing nothing.
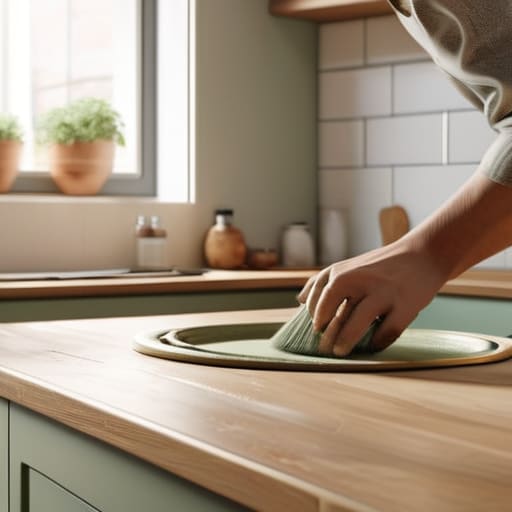
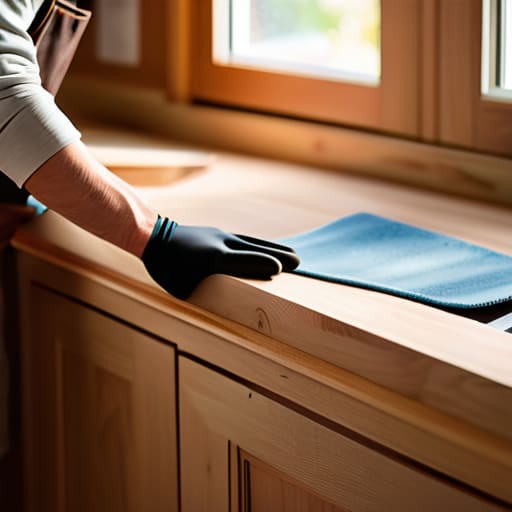
Learn how to paint kitchen cabinets.

Give Your Kitchen a Makeover by Painting Your Cabinets

I was standing in my kitchen last Tuesday, staring at these dated, honey-oak cabinets, feeling that familiar wave of “adulting overwhelm” hit me. I had spent three hours scrolling through Pinterest, convinced that learning how to paint kitchen cabinets required a professional workshop, a thousand-dollar sprayer, and a level of patience I simply do not possess. But here’s the truth: you don’t need a contractor or a massive budget to fix this; you just need a better system. Most of the tutorials online make it look like a high-stakes art project, but in reality, it’s just a series of small, manageable tasks that keep you from losing your mind halfway through.

I’m not here to give you a polished, aesthetic montage of a perfect DIY life. Instead, I’m giving you the unpolished, actual steps to get this done without the constant state of emergency. We’re going to break down the prep work, the right tools to grab from a thrift store or a hardware aisle, and how to avoid that nightmare scenario where your paint starts peeling in three months. This is my no-gatekeeping guide to transforming your space through repeatable, efficient systems that actually work for real people with real lives.

Table of Contents

Guide Overview

Total Time: 3-5 days (including drying time)
Estimated Cost: $150-$300
Difficulty: Intermediate

Tools & Supplies

  • Screwdriver or drill for hardware removal
  • Sandpaper (various grits) for surface preparation
  • High-quality brush for edges and detail
  • Small foam roller for smooth flat surfaces
  • Painter's tape for masking edges
  • Cabinet degreaser or TSP for cleaning
  • Wood filler for repairing dents or cracks
  • Primer (bonding type) 1-2 gallons
  • Cabinet-grade paint (Satin or Semi-gloss) 1-2 gallons
  • Microfiber cloths for dusting

Step-by-Step Instructions

  • 1. First things first, you need to clear the deck. Take everything out of the cabinets and set it on a table or a clean area of the floor. Don’t just shove it in a pile; you’ll regret it when you’re trying to find your favorite mug mid-project. Once they’re empty, unscrew the doors and the drawer fronts. Pro tip: Put all the screws, hinges, and hardware into labeled sandwich bags. If you just throw them in a junk drawer, you’re going to spend three hours hunting for that one specific hinge later, and nobody has time for that.
  • 2. Now for the part everyone tries to skip, but please don’t: the deep clean. Kitchen cabinets are basically magnets for grease and mystery residue. Grab a heavy-duty degreaser—something like Krud Kutter or even just a really strong dish soap—and scrub every single inch. If you paint over a layer of invisible grease, your expensive new paint is going to peel off in sheets within a month. I’m telling you, if it doesn’t feel squeaky clean, it’s not ready.
  • 3. Once they’re dry, you have to sand them down. You aren’t trying to strip them down to the bare wood like you’re doing a full restoration; you just need to “scuff” the surface so the primer has something to grab onto. Use a medium-grit sandpaper and just go over everything until the shine is gone. Wipe away every bit of dust with a tack cloth or a microfiber towel afterward. If you leave even a tiny bit of sanding dust behind, your finish will feel like sandpaper.
  • 4. This is where the “system” really matters: priming. Do not, under any circumstances, use regular wall primer. You need a high-quality, bonding primer specifically designed for cabinetry or slick surfaces. I usually go with something like Zinsser or KILZ. Apply a thin, even coat. It might look a little streaky or weird at first, but trust the process. The primer is the literal foundation of the entire project, so don’t get lazy here.
  • 5. Now we get to the fun part—the actual painting. For a smooth, professional look that doesn’t look like you used a house painter’s roller, I highly recommend using a high-quality microfiber mini-roller for the flat areas and a good synthetic brush for the corners and details. Work in small sections and try to keep your strokes consistent. Avoid the urge to keep over-working the paint while it’s drying; if you keep brushing it once it starts to set, you’ll end up with permanent texture marks that look super messy.
  • 6. Patience is your best friend during the drying phase. Let the first coat dry completely before you even think about touching it with a second coat. Once the first is set, do another thin layer. If you try to do one thick, heavy coat to “save time,” you’re going to end up with annoying drips and runs that will force you to sand everything down and start over.
  • 7. Finally, let them cure before you hang them back up. This is the hardest part of the whole system. Even if the paint feels dry to the touch after an hour, it hasn’t actually cured yet. If you put the doors back on immediately, they might stick to the frames or get dented by the first heavy pot you slide into a drawer. Give them at least 24 to 48 hours of “hands-off” time if you can manage it.

Understanding How to Paint Kitchen Cabinets

Understanding How to Paint Kitchen Cabinets guide.

Before you even crack open a can of paint, you need to get real about your expectations. Most people think this is just a weekend project, but the truth is that the kitchen cabinet refinishing process is 80% prep and 20% actual painting. If you rush the cleaning or skip the sanding, you’re basically just painting over grease and old oils, which means your new finish will start peeling off in a few months. I learned this the hard way with my first apartment; I thought I could skip the heavy lifting, and I ended up having to redo the entire kitchen by month three.

Another thing to consider is the gear you’re using. If you’re looking for that flawless, factory-smooth look, you might be debating between a cabinet paint sprayer vs brush. Honestly, if you have the budget and a steady hand, a sprayer is a game changer for avoiding texture issues. But if you’re working on a tighter budget, don’t stress—you can totally get a professional result with a high-quality brush or small foam roller, as long as you focus on preventing brush marks by not overworking the paint once it starts to set.

Key Things to Know

Key Things to Know: Cabinet Sanding Techniques

Before you dive in, let’s talk about the stuff that usually trips people up. One of the biggest mistakes I see is people skimping on the prep work because they just want to get to the fun part. If you want this to look like a professional job rather than a DIY disaster, you have to be obsessed with your cabinet sanding techniques. You don’t need to strip the wood down to the bone, but you do need to scuff that existing finish so the new layer actually has something to grab onto. If you skip this, your paint will eventually peel off in sheets, and then you’re back at square one.

Another thing: don’t just grab any old leftover latex from the garage. You really need to invest in the best paint for kitchen cabinets—specifically something formulated for high-traffic areas that can handle being wiped down constantly. Also, decide on your delivery method early. While a cabinet paint sprayer vs brush debate can go on forever, a sprayer gives that factory-smooth finish, but a high-quality brush and roller combo is much more manageable if you’re working solo in a tight space.

5 things I wish I knew before I picked up a brush

  • Don’t skip the degreaser. I know, it sounds tedious, but if you don’t get every trace of cooking grease off those surfaces, your expensive new paint is going to peel off in sheets within a month. Use TSP or a heavy-duty cleaner; don’t just wipe them with soapy water and hope for the best.
  • Invest in a decent primer, not the cheap stuff. I used to think primer was just an extra step to save money, but a high-quality, bonding primer is what actually makes the paint stick to the wood. If you use a generic brand, you’ll spend more time fixing drips and bubbles than actually painting.
  • Sanding is 80% of the work. Most people want to jump straight to the color because they’re excited, but if you don’t scuff those surfaces to create “tooth” for the paint to grab onto, you’re setting yourself up for a disaster. A quick pass with fine-grit sandpaper makes a massive difference.
  • Work in small, manageable batches. My biggest mistake early on was trying to do the whole kitchen in one weekend. You’ll end up with half-finished cabinets and a massive mess. Take one door or one drawer front at a time so you don’t lose your mind (or your ability to cook dinner).
  • Watch your environment. Dust is the absolute enemy of a smooth finish. If you’re painting in a room that isn’t totally sealed off, you’ll find tiny little grit particles stuck in your wet paint everywhere. Keep the area as clean as possible and try to time your painting for a low-dust day.

The bottom line

Don’t rush the prep. I know it’s tempting to just grab a brush and go, but 80% of your success is actually in the cleaning and sanding—if you skip this, you’re basically just painting over a mess that will peel in a month.

Invest in decent tools, not just the cheapest ones. You don’t need a professional setup, but a high-quality brush and a good roller will save you from the “orange peel” texture that makes a DIY job look amateur.

Respect the drying times. Your patience is your best tool here; trying to rush into a second coat before the first is truly set is the fastest way to ruin your entire weekend and your cabinets.

The Finish Line

Approaching the finish line with professional results.

Look, I know this process feels like a marathon, especially when you’re staring at a pile of hardware and half-finished sanding marks. But if you stick to the system—prioritizing that deep clean, not skipping the primer, and actually giving the paint enough time to cure—you’re going to avoid the nightmare of peeling edges down the road. It really just comes down to respecting the prep work more than the actual painting. If you rush the foundation, you’ll end up paying for it in frustration later. Just take it one door at a time, keep your workspace organized, and trust that the systematic approach will carry you through to a result that actually looks professional.

At the end of the day, your kitchen doesn’t need to look like a showroom in a magazine to be functional and beautiful. It just needs to feel like yours. There is something incredibly grounding about taking a space that felt outdated or “stuck” and reclaiming it with your own two hands. Don’t let the fear of making a mess stop you from making a change. You don’t need a professional crew to transform your home; you just need a little patience and a solid game plan. Now, go grab your brushes and get to it—you’ve totally got this.

Frequently Asked Questions

How long do I actually have to wait before I can start using my kitchen again without ruining the finish?

Here’s the deal: you can technically use your kitchen almost immediately, but if you want that finish to actually last, you have to play the waiting game. You can wipe down counters and use the stove after 24 hours, but please, for the love of everything, don’t touch the cabinet doors or scrub them for at least 7 to 14 days. The paint might feel dry, but it’s still curing underneath. Give it time.

Is it really worth the extra effort to sand everything down, or can I get away with just using a high-quality primer?

Look, I get the temptation to skip the sanding—it’s the most tedious part of the whole process. But if you want to avoid the heartbreak of paint peeling off in sheets in six months, you can’t just skip it. You don’t need to sand down to the bare wood, but you do need to scuff that surface so the primer actually has something to grab onto. Think of it as essential friction.

What’s the best way to deal with all the hardware and hinges so I don't end up with a pile of random screws at the end?

Honestly, this is where most people lose their minds. Don’t just toss them in a junk drawer. Grab a pack of cheap, clear plastic craft organizers or even just a muffin tin. As you take each handle and hinge off, put the screws in a specific compartment labeled for that exact door. It feels extra, but it saves you from that “where is the one tiny screw I need” meltdown halfway through the project.

Easy one pot meals for minimal cleanup.

Minimal Cleanup One-pot Meal Ideas

Let’s be real: some days, the mere thought of standing over a stove for forty minutes followed by a mountain of scrubbing is enough to make me want to just order takeout again. I get it. Between managing freelance deadlines and trying to maintain some semblance of a social life, my kitchen often feels like a battlefield of dirty pans and wasted time. I used to think that eating a “real” meal required a complex ritual, but I’ve realized that adulthood is much more manageable when you embrace easy one pot meals. It’s not about being a gourmet chef; it’s about reducing the friction of your evening so you can actually relax once the food is done.

In this post, I’m breaking down five of my absolute go-to recipes that prove you don’t need a sink full of dishes to eat something that actually tastes good. I’m sharing the exact systems I use to whip up nutritious, filling dinners in a single vessel, from savory grains to hearty proteins. By the time you finish reading, you’ll have a solid rotation of low-effort meals that will help you stop treating dinner like a daily crisis and start treating it like the simple, functional part of your routine it’s meant to be.

Table of Contents

The "Dump and Simmer" Chili

Pot of The "Dump and Simmer" Chili.

There are nights when the mere thought of chopping an onion feels like a personal insult. This is where my “dump and simmer” chili system comes in. You basically grab a can of beans, a jar of decent salsa, some ground meat (or lentils if you’re feeling plant-based), and a packet of chili seasoning, then throw it all into one heavy pot. No sautéing, no standing over a stove watching for splashes—just minimal effort for a massive payoff.

Sheet Pan Sausage and Veggies

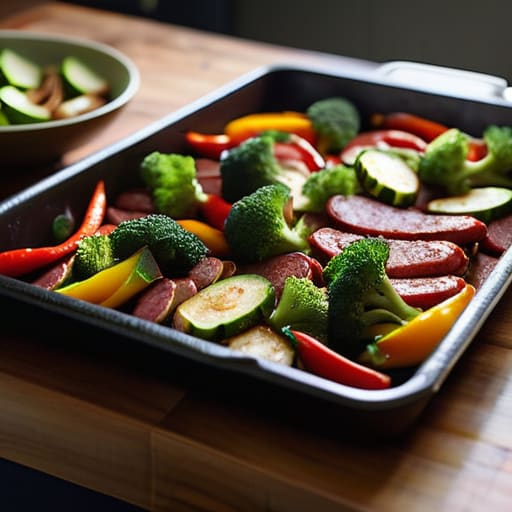
Sheet Pan Sausage and Veggies on tray.

If you want to minimize your dish pile to the absolute limit, the sheet pan method is your new best friend. I love grabbing a pack of pre-cooked smoked sausages, slicing them into rounds, and tossing them on a tray with whatever vegetables are looking slightly sad in your crisper drawer. Bell peppers, broccoli, and zucchini all work beautifully here. Just coat everything in olive oil, salt, and pepper, and let the oven do the heavy lifting.

One-Pot Creamy Pesto Pasta

One-Pot Creamy Pesto Pasta in a pot.

Most people think you need a separate pot to boil water and another to make the sauce, but that’s just adding unnecessary friction to your evening. With this method, you put your dry pasta, some vegetable broth, a splash of cream, and a handful of cherry tomatoes all in the same pot. As the pasta cooks, it releases starch into the liquid, which naturally creates a silky, built-in sauce that coats every single noodle perfectly.

The Lazy Lemon Chicken and Rice

This is my go-to when I need something that feels “adult” and nourishing but I only have about twenty minutes of actual brainpower left. You sear some chicken thighs in a pot, push them to the side, toss in some rice and chicken stock, and let it all bubble away together. I like to add a squeeze of lemon and some dried thyme halfway through to keep things from feeling too heavy or one-note.

Skillet Shakshuka for Dinner

We usually think of shakshuka as a brunch thing, but honestly, it makes for one of the most comforting, low-maintenance dinners you can whip up. You just simmer a jar of marinara (or canned crushed tomatoes if you’re feeling extra) in a skillet with some cumin and paprika, then crack a few eggs directly into the sauce. It’s a low-friction way to get protein and veggies in your system without any complicated prep work.

The Bottom Line

Stop aiming for perfection; the goal of one-pot cooking is to save your sanity and your evening, not to win a Michelin star.

Invest in one decent, heavy-bottomed pan so you aren’t fighting uneven heat or scorched ingredients halfway through.

Use these meals as a baseline system—once you master the basic formula, you can swap proteins and veggies without needing a new recipe every time.

The Bottom Line

At the end of the day, these one-pot meals aren’t about being a gourmet chef; they’re about protecting your peace. Whether you’re leaning on a hearty pasta bake to get through a Tuesday or using a single sheet pan to avoid a sink full of dishes, the goal is the same: efficiency. By focusing on recipes that require minimal prep and even less cleanup, you’re essentially building a buffer against burnout. You don’t need a pantry full of exotic ingredients or an hour of free time to eat something that actually tastes good and keeps you fueled.

I know how it feels when the “adulting” part of the day starts to feel heavy, and the last thing you want to do is face a complicated recipe. But once you start implementing these small, repeatable systems in your kitchen, you’ll realize that cooking doesn’t have to be another chore on your to-do list. It can just be a way to take care of yourself without the stress. So, pick one of these methods, try it out this week, and remember that consistency beats perfection every single time. You’ve got this.

Frequently Asked Questions

How do I make sure my food doesn't turn into a mushy mess when everything is cooking in the same pot?

The “mush factor” usually happens because everything is hitting the heat at the exact same time. To avoid a texture nightmare, think in layers. Start with your dense stuff—like potatoes or carrots—and let them get a head start. Add your proteins next, and save the delicate greens or soft veggies for the last few minutes. It’s all about timing your additions so nothing gets overcooked into oblivion.

Can I actually use these same recipes if I only have a small electric skillet instead of a massive Dutch oven?

Short answer: Yes, absolutely. Honestly, a small electric skillet is kind of my secret weapon for one-pot cooking when I’m working in a tiny kitchen. Just don’t try to crowd the pan—if you pile everything in too deep, you’ll end up steaming your food instead of getting that nice sear. Keep the layers thin, maybe cook things in two quick batches if you have to, and you’re golden. It’s all about the system, not the gear.

What’s the best way to meal prep these without the leftovers getting weird or soggy by day three?

The secret is keeping your textures separate until the moment you actually eat. If you’re prepping something like a one-pot pasta or grain bowl, don’t mix the heavy sauces or “wet” ingredients with your greens or crunchy bits in the same container. Pack your sauces in tiny separate jars and keep your proteins slightly underdone so they don’t turn into mush when you reheat them. It’s a small extra step, but it saves your sanity.

Page 3 of 3

Powered by WordPress & Theme by Anders Norén