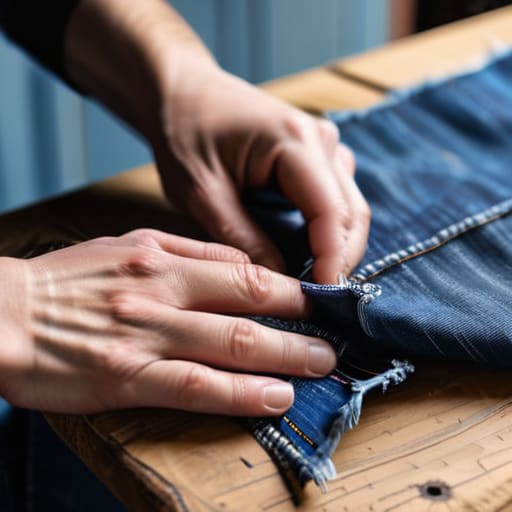
Creative diy headboard ideas for any budget.

Custom Headboard Projects for Any Style or Budget

I remember moving into my first “adult” apartment and staring at a completely bare, depressing wall behind my bed. I wanted that cozy, curated bedroom aesthetic I saw on Pinterest, but my bank account was screaming no at the $600 price tags for even basic upholstered pieces. It felt like you either had to settle for a cramped, uninspired space or go into massive debt just to make your bedroom feel finished. That’s when I realized that finding the right diy headboard ideas isn’t just about saving money; it’s about taking control of your environment without needing a professional interior designer on speed dial.

In this post, I’m breaking down five specific ways to upgrade your sleeping space using things you can actually find or build yourself. We’re skipping the gatekept, high-end decor trends and getting straight to the functional, low-stress projects that actually work for real life. Whether you’re a total beginner with zero tools or you’ve got a bit of a DIY streak, these five methods will help you create a custom look that feels completely intentional and fits your specific budget.

Table of Contents

The Scandi-Style Wooden Slat Wall

The Scandi-Style Wooden Slat Wall backdrop.

If you want that high-end, minimalist bedroom look without the massive price tag, vertical wood slats are your best friend. I actually tried this in my own studio apartment when I realized my bed was just floating against a blank, depressing wall. You basically just need some slim timber slats, a bit of wood glue, and some finishing nails to create a textured backdrop that looks like it came straight out of a design magazine.

The Thrifted Vintage Frame Hack

The Thrifted Vintage Frame Hack headboard.

This is my absolute favorite way to use my thrifting habit for something functional. Instead of hunting for a specific headboard, just head to your local charity shop and look for oversized, ornate picture frames. Even if the art inside is hideous or the wood is a little beat up, the structure is what matters. You can sand them down, paint them a moody charcoal, or even leave the gold leaf intact if you’re feeling a bit more maximalist.

The Upholstered Foam Panel System

The Upholstered Foam Panel System DIY project.

Let’s be real: sometimes you just want a soft place to lean your head when you’re scrolling on your phone at 1 AM. If you aren’t a pro at sewing, don’t even worry about it. You can buy pre-cut upholstery foam panels and wrap them in whatever fabric fits your vibe—I personally love a heavy linen or a textured boucle. It’s a much more forgiving project than trying to build something out of hard materials.

The Industrial Pipe Framework

For anyone who leans more into the industrial or loft aesthetic, black iron piping is a total game changer. It’s incredibly sturdy, and honestly, it’s one of those projects that feels very satisfying because the pieces just screw together. You don’t even need a drill for the assembly part, which is a huge plus if you’re working in a cramped rental where you can’t go wild with power tools.

The Botanical Macramé Backdrop

If you want something that feels a bit more “boho” and less “construction site,” a large-scale macramé hanging is the way to go. This is perfect if you’re someone who wants to add texture to a room without the weight of heavy furniture. You can find beautiful vintage pieces at flea markets, or if you’re feeling crafty, you can knot some cotton cord onto a piece of driftwood.

The Bottom Line

Stop waiting for a “perfect” Pinterest moment and just start with what you have; the best system is the one that actually gets finished.

Prioritize function over fluff—a headboard should be sturdy enough to lean against when you’re reading, not just look good in a photo.

Use the DIY approach to save money for the things that actually matter, rather than overspending on furniture that’s just going to end up in a landfill.

The Bottom Line

At the end of the day, building your own headboard isn’t about achieving some Pinterest-perfect, untouched aesthetic; it’s about making a choice that fits your specific lifestyle and budget. Whether you went the route of a reclaimed wood frame for that rugged, organic feel, or kept it low-maintenance with a simple upholstered panel, you’ve successfully bypassed the massive markup of big-box furniture stores. We’ve looked at how scrap materials, clever textile choices, and even some basic structural DIY can transform a bedroom from a generic sleeping space into something that feels actually intentional. You don’t need a master carpenter’s license to create something that works; you just need a solid plan and the right tools to get the job done.

I know that starting a project like this can feel a little intimidating, especially if you aren’t used to picking up a drill or a staple gun. But honestly? The most important part of any system I build is just getting started. Don’t let the fear of a crooked measurement or a wasted piece of fabric stop you from making your space your own. Your home should be a reflection of your own hands and your own effort, not just a catalog of things you bought because they were convenient. Take it one step at a time, keep your workspace organized, and remember that progress is better than perfection every single time.

Frequently Asked Questions

Do I actually need power tools for these, or can I get away with just a basic screwdriver and some command strips?

Honestly, it depends on which project you’re tackling, but you definitely don’t need a full workshop. If you’re going the lightweight route—like hanging fabric panels or lightweight foam—Command strips are a total lifesaver for renters. But if you’re actually screwing wood into a frame, a basic screwdriver will give you a serious arm workout. If you can swing it, a small cordless drill is the ultimate friction-reducer, but you can absolutely DIY it manually.

How do I make sure my DIY headboard doesn't end up looking like a middle school art project?

The secret is all in the finishing touches. If it looks like a middle school project, it’s usually because the edges are raw or the proportions are off. Don’t skip the sanding, and please, for the love of everything, use a real level. If you’re using fabric, tension is everything—if it’s saggy, it looks cheap. Stick to a tight, intentional color palette and focus on clean lines. If it looks “crafty,” you went too far.

Is it safe to attach these directly to the wall, or should I be looking at a freestanding design so I don't mess up my security deposit?

If you’re renting, please don’t go drilling holes into the drywall just for a headboard. That’s a fast track to losing your security deposit. I’m a big fan of the freestanding approach—think of it as a modular piece that moves with you. If you really want that wall-mounted look, use heavy-duty Command strips or a tension rod system. It gives you the aesthetic without the permanent damage. Keep it non-destructive.

Learn how to make a smoothie.

How to Craft a Truly Nutritious Smoothie

I am so over the “wellness influencer” version of breakfast, where you need a $600 blender and twenty different expensive superfood powders just to get started. Honestly, most of the tutorials online make learning how to make a smoothie feel like a high-stakes chemistry experiment rather than a quick morning task. You don’t need a curated aesthetic or a pantry full of exotic dragon fruit to get something decent in a glass; you just need a functional system that doesn’t leave you cleaning up a mountain of dishes before your first meeting.

I’m not here to sell you on a lifestyle overhaul or some complicated recipe book. Instead, I’m going to give you the actual, unpolished framework I use to fuel my freelance days without the morning chaos. We’re going to talk about the basic ratios, the best way to prep your ingredients for speed, and how to avoid that weird, watery texture that ruins everything. This is about making your breakfast efficient and repeatable so you can stop overthinking it and just get on with your day.

Table of Contents

Stop Guessing the No Nonsense System on How to Make a Smoothie

Stop Guessing the No Nonsense System on How to Make a Smoothie

The problem with most recipes is that they’re too rigid. If you follow a blog post to the letter and you’re out of spinach, the whole thing feels like a failure. Instead, I use a modular system. Start with your liquid base options for smoothies—I usually go with unsweetened almond milk or coconut water—and add about one to one-and-a-half cups. From there, you need your bulk. This is where the frozen fruit vs fresh fruit debate comes in: I always lean toward frozen. Using frozen berries or mango chunks acts like built-in ice, giving you a much thicker consistency without watering everything down.

Once you have your liquid and fruit, it’s time to layer in the functional stuff. I treat my smoothies like a formula: liquid + fruit + greens + a fat or protein. To avoid a grainy mess, I throw in some protein smoothie boosters like chia seeds, hemp hearts, or a scoop of collagen. If you find your drink is too thin, just toss in more frozen elements; if it’s too thick, a splash more liquid fixes it instantly. It’s about adjusting on the fly, not following a script.

Mastering Your Liquid Base Options for Smoothies Without the Chaos

Mastering Your Liquid Base Options for Smoothies Without the Chaos

The biggest mistake I see people making is treating the liquid like an afterthought. If you just splash some water in and hope for the best, you’re going to end up with a thin, watery mess that tastes like nothing. To avoid that, you need to treat your liquid base options for smoothies as the foundation of the entire flavor profile. I usually stick to unsweetened almond milk or oat milk because they add a creamy weight without a massive sugar spike. If you’re feeling a bit more indulgent, coconut water is a solid choice for hydration, especially if you’re using a lot of greens.

The real secret to getting that cafe-quality consistency, though, lies in the ratio. If you want to avoid the dreaded “brain freeze” texture or a drink that’s too thick to actually sip through a straw, keep a few smoothie texture tips in mind: always start with more liquid than you think you need. You can always add more, but you can’t exactly “un-sludge” a smoothie once it’s too thick. If you’re using heavy frozen components, lean into a slightly thinner base to keep things moving.

The Real Truth About Frozen Fruit vs Fresh Fruit

The Real Truth About Frozen Fruit vs Fresh Fruit

Here’s the deal: if you’re still buying fresh berries every single time you want a smoothie, you’re making life harder than it needs to be. In my experience, the frozen fruit vs fresh fruit debate isn’t even a contest when you’re looking for efficiency. Frozen fruit is basically a cheat code. It’s pre-chopped, it’s cheaper, and most importantly, it acts as your built-in ice replacement. Using frozen chunks gives you that thick, cafe-style consistency without having to deal with watered-down ice cubes that ruin the flavor.

That said, don’t totally abandon the produce aisle. I usually keep a stash of fresh greens or a banana on hand to mix in. Fresh fruit is great for adding specific nutrients or a hit of brightness, but if you want to master your smoothie texture tips, lean heavily on the frozen stuff. It prevents that dreaded “soup” consistency and keeps everything chilled. If you’re trying to turn a basic drink into a meal replacement, adding frozen blueberries or mangoes alongside some protein smoothie boosters is the fastest way to get a creamy, satisfying result without any extra prep work.

Unlocking Creamy Results With Pro Smoothie Texture Tips

If you’ve ever ended up with a smoothie that felt more like a chunky, icy soup than a silky treat, I’ve been there. The secret isn’t some expensive gadget, though having a decent best blender for smoothies definitely helps the process along. The real magic happens in how you layer your ingredients. I always start with my liquid base at the very bottom to create a vortex, then add my powders and frozen items on top. This prevents that annoying situation where your blades just spin in an air pocket while the frozen chunks sit stubbornly at the top.

To get that cafe-style consistency, you need to think about fats and fibers. If your mixture feels too thin, don’t just add more ice—that’ll just make it watery. Instead, lean into some smoothie texture tips like adding half an avocado or a spoonful of Greek yogurt. These act as natural emulsifiers that create a velvety mouthfeel without needing a mountain of sugar. If you’re looking for a more substantial meal, throwing in some chia seeds or hemp hearts works as great protein smoothie boosters while adding a subtle thickness that keeps you full longer.

High Efficiency Upgrades Best Blender for Smoothies and Protein Boosters

Let’s talk gear, because nothing ruins a morning vibe faster than a blender that sounds like a jet engine but leaves you with chunks of unblended kale. If you’re serious about making this a daily system, you need to find the best blender for smoothies that actually has the torque to handle frozen fruit without stalling. I used to settle for cheap, single-serve plastic cups, but I eventually upgraded to a high-speed blender with a dedicated pulse function. It’s a bit more of an investment, but it’s the difference between a gritty mess and a silky, cafe-quality texture every single time.

Once you have the hardware sorted, it’s all about the fuel. To keep things efficient, I always keep a stash of protein smoothie boosters in my pantry so I don’t have to think when I’m running late. Think collagen peptides, hemp seeds, or even a scoop of high-quality pea protein. These are easy to toss in without changing the flavor profile too much, making it simple to turn a basic fruit drink into something that actually keeps you full until lunch.

My Low-Friction Hacks for Better Smoothies

  • Stop washing your blender every single morning. As soon as you pour your smoothie into a glass, fill the blender halfway with warm water and a drop of dish soap, then pulse it for ten seconds. It’s a tiny system that saves you from scrubbing dried-on fruit chunks later.
  • Prep your “smoothie packs” on Sunday night. I use reusable silicone bags to portion out my greens, fruit, and seeds so that on a Tuesday morning when I’m running late, I just grab a bag, dump it in, and go. No measuring, no mess.
  • Layer your ingredients in a specific order to save your blender motor. Always put your liquids in first, followed by powders, then solids, and finally your frozen items on top. This prevents that annoying “air pocket” stall where the blades just spin without actually grabbing anything.
  • Don’t fear the healthy fats. If your smoothie feels like it’s just “fruit water” that leaves you hungry an hour later, add a tablespoon of chia seeds, almond butter, or half an avocado. It stabilizes your energy so you aren’t crashing by mid-morning.
  • Keep a “flavor emergency kit” in your pantry. If a smoothie tastes too much like nothing or is slightly too bitter from the greens, a tiny squeeze of lemon juice or a dash of cinnamon usually fixes the profile without needing a ton of extra sugar.

The TL;DR: Your Smoothie Cheat Sheet

Stop overthinking the recipe; just pick a liquid base, a frozen fruit, and a creamy element to create a repeatable system that actually works.

Use frozen fruit as your default—it’s cheaper, lasts longer in the freezer, and gives you that perfect texture without needing a mountain of ice.

Invest in a decent blender and keep your protein boosters on hand so you can turn a quick drink into a legitimate, meal-replacing breakfast.

The Bottom Line

At the end of the day, making a great smoothie isn’t about following some complicated, aesthetic recipe you saw on a curated social media feed. It’s about having a reliable system that works for your schedule. Once you’ve mastered the balance of a solid liquid base, the right mix of frozen versus fresh fruit, and a few texture-boosting tricks, you’ve essentially automated your breakfast. You don’t need to overthink the protein powders or the expensive gadgets every single morning; you just need to lean on the framework we’ve built here to ensure you’re getting something nutritious without the usual kitchen chaos.

I know that when life gets hectic, even something as simple as breakfast can feel like another chore on an endless to-do list. But that’s exactly why I’m such a nerd for these little systems. When you take the guesswork out of the small things, you reclaim a bit of mental energy for the stuff that actually matters. So, grab your blender, stick to the formula, and stop treating your morning nutrition like a high-stakes science experiment. You’ve got this—make it simple, make it fast, and just get after your day.

Frequently Asked Questions

How do I stop my smoothies from turning into a watery mess by the time I actually get to drink them?

The “watery mess” issue usually comes down to ice melting or using too much liquid upfront. If you aren’t drinking it immediately, stop using ice cubes—they just turn into water as they thaw. Instead, use frozen fruit as your base and swap some of your liquid for a thickener like Greek yogurt or chia seeds. If you’re prepping ahead, keep your ingredients frozen and only add the liquid right before you blend.

Is it actually worth buying expensive protein powders, or can I get the same results with regular food?

Honestly, if you’re on a budget, don’t feel pressured to drop $60 on a fancy tub of protein powder. You can absolutely get the same results using real food—think Greek yogurt, hemp seeds, or even a bit of silken tofu for texture. I usually view protein powder as a convenience tool, not a magic fix. Use it when you’re rushing, but don’t let the marketing convince you that “real food” isn’t enough.

How can I prep my smoothie ingredients ahead of time without them getting gross in the fridge?

The trick is to stop thinking about “prepping” and start thinking about “portioning.” Don’t mix everything in a big bowl; that’s how you end up with mush. Instead, use reusable silicone bags or mason jars to create individual “smoothie packs.” Toss your fruit, greens, and seeds in there, then freeze them. When you’re ready, just dump the pack in the blender, add your liquid, and you’re done. No sogginess, no waste.

Guide on how to use a drill.

Everything You Need to Know About Using a Power Drill

I was standing in my living room last Tuesday, staring at a half-assembled bookshelf and a heavy, intimidating power tool, feeling that familiar spike of “I shouldn’t be doing this.” Most people will tell you that you need a degree in engineering or a workshop full of expensive gear to get started, but that is a total lie. The truth is, learning how to use a drill isn’t about being a “handy” person; it’s just about understanding a few basic mechanics so you don’t end up with a crooked hole or a cracked wall. I grew up watching my dad tackle home repairs without a second thought, and I realized early on that the fear of the tool is usually worse than the task itself.

I’m not here to give you a lecture on every single technical specification or bore you with manual-style jargon. Instead, I’m going to give you the actual, unpolished system I use to get things done without the stress. We’re going to cover how to pick the right bit, how to keep your grip steady, and how to avoid the most common rookie mistakes. By the end of this, you’ll have a no-nonsense workflow that turns a scary piece of hardware into just another tool in your kit for making life run smoother.

Table of Contents

Guide Overview

Total Time: 30-60 minutes
Estimated Cost: $0-50
Difficulty: Beginner

Tools & Supplies

  • Power drill (cordless or corded)
  • Drill bits (assorted sizes for drilling and driving)
  • Safety goggles (1 pair)
  • Workpiece (1 unit)

Step-by-Step Instructions

  • 1. First things first, you need to pick your bit. This is where most people mess up—they grab a random one from a dusty kit and wonder why they’re stuck. If you’re drilling into wood, use a brad point bit; if it’s metal, you need a high-speed steel bit; and if you’re hitting a wall, grab a masonry bit. Don’t try to “make it work” with the wrong tool, or you’ll just end up ruining your hardware.
  • 2. Once you have the right bit, pop it into the chuck. You do this by twisting the sleeve at the front of the drill. Make sure the bit is centered in those three little “teeth” inside, otherwise, it’s going to wobble like crazy and create a mess. Tighten it until it’s firmly locked in, but don’t go absolutely feral with the force—just enough so it doesn’t slip.
  • 3. Before you even touch the trigger, mark your spot. If you just start drilling blindly, the bit will wander across your surface, and suddenly you have a giant, ugly hole in the wrong place. Use a pencil to make a small dot, or better yet, use a hammer and a nail to tap a tiny “starter” indentation. This gives the bit a physical place to sit so it doesn’t slide.
  • 4. Get your stance right and apply pressure. Hold the drill with both hands if you can—one on the handle and one on the back or the side grip—to keep things steady. Lean into it slightly, but don’t smash the tool into the surface. You want to apply consistent, even pressure so the drill does the work, not your biceps.
  • 5. Start slow. When you pull the trigger, don’t just floor it immediately. Start with a light squeeze to get the bit biting into your mark. Once you feel like you’ve established a groove, you can increase the speed. If you feel the drill starting to kick or vibrate aggressively, back off the pressure and check if the bit is getting too hot or if you’re pushing too hard.
  • 6. When you’re finished with the hole, don’t just yank the drill away. Slowly ease off the trigger to stop the spinning, and then pull the bit out while it’s still moving at a very low speed. This prevents the bit from getting “stuck” or tearing the material as you pull it out. Once you’re done, wipe the bit down—it’s a small habit that makes maintaining your tools so much easier in the long run.

Understanding How to Use a Drill

Understanding How to Use a Drill technique.

Before you actually pull the trigger, you need to get comfortable with the physics of the tool. It’s not just about pushing a button; it’s about control. I always tell my friends to focus on their proper drill grip technique first. You want one hand on the handle and your other hand supporting the back of the drill to keep it from wobbling. If you’re working with something delicate, don’t just dive in. Start by drilling pilot holes—these are tiny, shallow holes that act as a roadmap, preventing your wood from splitting or your bit from wandering off into nowhere.

Another thing that trips people up is the settings on the device itself. If you’re working on a project where you don’t want to strip a screw, you’ll need to get used to adjusting drill torque settings. Lower torque means the drill stops spinning sooner when it hits resistance, which is a total lifesaver for precision work. It’s all about reading the material and matching your settings to the task so you aren’t fighting the machine the whole time.

Key Things to Know

Key Things to Know: Drill Bit Uses

Before you actually pull the trigger, there are a few little nuances that separate a smooth project from a total disaster. One of the biggest things I learned the hard way is that you can’t just use any bit for any job. You really need to understand drill bit types and uses—using a wood bit on metal is a fast way to ruin your equipment and your mood. Also, if you’re working with anything thicker than a thin piece of plywood, please start by drilling pilot holes. It prevents the wood from splitting and keeps your screw perfectly centered, which saves you so much frustration later.

Another thing that people often overlook is the sheer amount of control you actually have over the tool. If you’re driving screws, don’t just go full blast; you’ll end up stripping the head or sinking the screw too deep. Take a second for adjusting drill torque settings to a lower number so the drill stops spinning once it hits the right depth. It’s all about that controlled precision rather than just brute force. Keeping your movements intentional makes the whole process feel way less chaotic.

Pro-tips to save you from a total DIY disaster

  • Don’t fight the machine. If you feel the drill slipping or jumping, you’re likely applying too much pressure or using the wrong speed. Let the tool do the heavy lifting; you just need to guide it.
  • Always double-check your bit. Using a masonry bit on wood or a wood bit on metal is a fast way to ruin your hardware and your mood. Match the bit to the material every single time.
  • Mark your spot with a pilot hole. Even if you’re feeling confident, drilling a tiny starter hole first prevents the bit from wandering across your project and making a mess of your alignment.
  • Watch your grip. Keep your stance steady and your non-dominant hand well away from the path of the drill. I’ve seen too many people lose focus and end up with a very close call.
  • Listen to the sound. A healthy drill has a consistent hum. If you hear high-pitched screeching or grinding, stop immediately—you’re either burning out the bit or pushing the motor too hard.

The Bottom Line

Don’t let the noise intimidate you—it’s just a tool, and once you understand the tension between your grip and the trigger, you’ll stop fighting it.

Always match your bit to your task; using the wrong one is the fastest way to ruin a project (and your mood).

Respect the physics of it—keep your body steady and your pressure consistent so the drill does the work instead of you.

Final Thoughts Before You Start Drilling

Final Thoughts Before You Start Drilling.

At the end of the day, mastering a drill isn’t about being some master carpenter; it’s just about having a repeatable process that keeps you safe and prevents you from ruining your walls. Remember to always double-check your bit type, keep a steady grip, and never skip the pilot hole if you’re working with something delicate. If you focus on the fundamentals—the right pressure, the correct speed, and a clear workspace—you’ve already won half the battle. It’s all about removing that initial friction and realizing that these tools are meant to work for you, not against you.

I know that staring at a power tool can feel a little intimidating at first, especially if you didn’t grow up with a toolbox in your hand, but I promise it gets easier. Once you get that first clean hole or hang that first shelf yourself, the sense of agency you feel is unmatched. Stop letting the fear of a mistake hold you back from fixing things around your space. Build your own systems, trust your grip, and just start creating. You’ve totally got this.

Frequently Asked Questions

Is it actually safe for me to use a drill if I'm working on something fragile, like a thin piece of wood or a wall with plaster?

It’s definitely safe, but you have to change your approach. If you go in full throttle, you’re going to crack that plaster or splinter the wood instantly. The trick is to start with a much smaller pilot hole using a fine bit. This creates a path for the bigger drill to follow without forcing it. Also, keep your pressure light—let the tool do the work rather than leaning your whole weight into it.

How do I know if I'm using the wrong drill bit and potentially ruining my project or the tool itself?

If you’re seeing smoke, smelling something burning, or hearing a high-pitched screeching sound, stop immediately. That’s your drill telling you something is wrong. Usually, it means you’re using a metal bit on wood (or vice versa) or you’re applying way too much pressure. If the bit looks like it’s glowing or the tip is rounding off, you’re definitely using the wrong one. Just take a breath, swap the bit, and reset.

What’s the deal with the different settings on the drill—when should I actually switch from driving screws to just drilling holes?

Think of it like choosing the right tool for a specific task—you wouldn’t use a chef’s knife to peel a grape, right? When you’re drilling holes, you want high speed and low torque to clear out material smoothly. But when you switch to driving screws, you need to dial that torque down. If you keep it on high while driving a screw, you’ll eventually strip the head or crack the wood. Switch it up to keep things controlled.

Achievable career goals examples for success.

Setting Career Goals That You Can Actually Achieve

I used to think that “climbing the corporate ladder” was the only way to measure success, but honestly? That mindset is just a fast track to burnout. I spent way too many years drifting through my twenties, reacting to whatever fire was burning that day instead of actually steering my own ship. When you don’t have a roadmap, you end up working incredibly hard just to stay in the same place, which is exhausting. If you’ve been staring at a blank spreadsheet trying to figure out what kind of career goals examples actually make sense for a real human life, you aren’t alone.

I’m tired of the gatekeeping and the overly polished, unrealistic advice you see on LinkedIn. You don’t need a ten-year master plan that feels like a prison sentence; you just need a few solid, actionable targets to keep you moving forward. In this post, I’m breaking down five specific career goals examples that are actually attainable and designed to build long-term stability without sacrificing your sanity. Let’s stop winging it and start building a career that actually works for you.

Table of Contents

Master a High-Value Skill Set

Master a High-Value Skill Set for career.

We’ve all been there—staring at a job description and realizing we’re missing three “essential” requirements. Instead of just feeling behind, make it a goal to deep-dive into one specific technical skill every quarter. Whether it’s learning advanced data visualization, mastering a new coding language, or finally getting the hang of complex project management software, this isn’t about collecting certificates for the sake of it. It’s about building a functional toolkit that makes you indispensable.

Build a Sustainable Professional Network

Build a Sustainable Professional Network naturally.

Networking often sounds like this terrifying, forced social event where you have to suck up to people in suits, but that’s not how I see it. To me, a real career goal is about cultivating genuine professional relationships that actually feel human. This means reaching out to people whose work you actually admire—not just because you want something from them, but because you genuinely find their perspective interesting.

Optimize Your Workflow Systems

Optimize Your Workflow Systems for productivity.

Most people think career growth is just about working harder, but honestly, that’s just a fast track to burnout. A much smarter goal is to systematize your daily output so you aren’t constantly playing catch-up. This could mean auditing how you use your email, setting up a foolproof task management system, or even just creating templates for the repetitive parts of your job.

Take Ownership of a Signature Project

If you want to move up, you can’t just be the person who checks off the boxes on a to-do list. You need to find a way to own a specific outcome from start to finish. This means identifying a gap in your current department—maybe a messy filing system or a lack of social media consistency—and stepping up to fix it. It’s about moving from “I do these tasks” to “I solved this problem.”

Establish Firm Work-Life Boundaries

This might sound weird in a list about career goals, but if you don’t protect your time, your career will eventually eat you alive. A legitimate professional goal is to define your operational hours and stick to them. This isn’t about being lazy; it’s about ensuring that you have the energy and mental clarity to actually perform when you are “on.”

The Bottom Line

Stop aiming for “perfection” and start aiming for systems; a goal without a repeatable process is just a wish that’s going to stress you out.

Keep your career goals flexible enough to evolve with you, because the version of you that sets a goal today might have much better intel six months from now.

Focus on small, sustainable wins rather than massive, overnight shifts to avoid the burnout cycle that kills most professional momentum.

The Bottom Line

Look, we’ve covered a lot of ground, from mastering that technical skill you’ve been putting off to finally setting boundaries that protect your peace. The point isn’t to check off every single one of these goals by next Tuesday; it’s about moving away from that feeling of being stuck in neutral. Whether you’re focusing on a specific certification or just trying to build a more sustainable workflow, the objective is to stop reacting to your job and start intentionally designing it. These aren’t just items on a checklist; they are the actual building blocks of a career that doesn’t leave you feeling completely drained by Friday afternoon.

At the end of the day, your career is a marathon, not a series of frantic sprints. It’s okay if your goals shift as you learn more about what actually makes you happy versus what just looks good on a LinkedIn profile. My best advice? Pick one thing—just one—and build a small, repeatable system to make it happen. Don’t wait for the “perfect” moment to start professional development or ask for that raise, because that moment is a myth. Just start where you are and keep refining your process. You’ve got this.

Frequently Asked Questions

How do I actually track these goals without it just becoming another overwhelming to-do list?

The secret is to stop treating your goals like a massive, looming mountain and start treating them like data points. Don’t just dump everything into a generic to-do list; that’s a recipe for burnout. Instead, pick one low-friction tool—maybe a simple Notion page or even just a physical notebook—and track your progress, not just your tasks. If you hit a milestone, log it. If you stall, figure out why. Systems over stress, always.

What do I do if I realize my current career goals don't actually align with what I want my daily life to look like?

First, stop gaslighting yourself. If your goals feel like a heavy weight instead of a roadmap, they’re wrong for you. Don’t just pivot the goal; pivot the lifestyle. Start by auditing your “energy leaks”—what parts of your current path drain you most? Instead of chasing a title, design a day. Aim for a role that fits the way you actually want to live, not the way you think you “should” succeed.

How often should I be revisiting or changing these goals so I don't feel stuck in a system that isn't working anymore?

Don’t treat your goals like a legal contract. If you’re checking in once a year, you’re probably waiting too long to pivot. I personally do a “pulse check” every quarter. It’s just enough time to see if a system is actually working or if you’re just white-knuckling a goal that no longer fits your life. If a goal feels like a chore rather than a roadmap, it’s time to iterate.

How to choose the right phone wisely.

Smart Ways to Buy a Great Phone Without Overspending

I’m so tired of seeing tech influencers treat every single product launch like it’s the second coming of something divine. They’ll spend twenty minutes droning on about processor clock speeds and Nits of brightness, making you feel like you need a PhD in computer science just to pick up a device for scrolling through emails and checking my calendar. Honestly, most of that hype is just noise designed to make you overspend. If you’re currently staring at a dozen different spec sheets trying to figure out how to choose the right phone, stop. You don’t need the most expensive titanium frame on the market; you just need something that doesn’t die by 2:00 PM and actually fits in your pocket.

I’m not here to sell you on a brand or push some overpriced flagship that you’ll only use 10% of its capacity for. Instead, I want to give you a functional framework based on how I actually use my tech to keep my life from falling apart. We’re going to strip away the marketing jargon and look at the three or four things that actually matter for your daily workflow. This is about finding a tool that works for you, not a status symbol that creates more friction in your day.

Table of Contents

Stop the Tech Panic How to Choose the Right Phone

Stop the Tech Panic How to Choose the Right Phone.

The biggest mistake I see people make is getting paralyzed by spec sheets. You don’t need to be a software engineer to figure this out; you just need to audit your own habits. Before you even look at a price tag, ask yourself what your phone actually does all day. Are you scrolling through TikTok for hours, or are you mostly using it for quick emails and maps? If you’re a heavy user, you need to prioritize mobile phone battery life benchmarks over almost everything else. There is nothing more draining than carrying a portable power bank everywhere just because you bought a “pretty” phone that dies by 2 PM.

Once you know your usage, stop obsessing over the most expensive flagship. For most of us, the gap between a high-end model and a mid-range device is mostly marketing fluff. Instead, focus on the camera quality vs price ratio to see if you’re actually getting value for your money. If you aren’t a professional creator, you don’t need a $1,200 setup; you just need something that takes clear photos in low light. Keep it practical.

Sorting Through the Noise a Smartphone Operating System Comparison

Sorting Through the Noise a Smartphone Operating System Comparison

This is where most people get stuck in a loop of endless scrolling and conflicting reviews. When you’re doing a smartphone operating system comparison, it’s easy to get distracted by flashy features, but you need to look at the ecosystem you actually live in. If all your friends are on iMessage and you use a Mac for work, switching to Android might feel like a massive friction point you don’t need. On the flip side, if you love customization and want more control over your files without feeling locked in, Android is your best friend.

Don’t just look at the software; think about how that software interacts with your hardware needs. For example, if you’re someone who spends all day on TikTok or editing Reels, you’ll want to consider the camera quality vs price ratio alongside how the OS handles background apps. A sleek interface doesn’t mean much if the system is poorly optimized and drains your juice by noon. I always tell my clients: pick the OS that supports your existing habits, rather than trying to force yourself into a new digital lifestyle just because a specific device looks cool.

Real World Specs Mobile Phone Battery Life Benchmarks That Matter

Real World Specs Mobile Phone Battery Life Benchmarks That Matter

Look, I’ve spent way too many afternoons sitting on a subway platform staring at a black screen because I trusted a marketing slide instead of my own habits. When you’re looking at mobile phone battery life benchmarks, please stop obsessing over the raw milliampere-hour (mAh) numbers. A massive battery doesn’t mean much if the software is a power hog or if the screen is constantly draining juice at max brightness. I’ve learned the hard way that a mid-range phone with efficient software often outlasts a flagship that’s trying to do too much at once.

Instead of getting lost in the math, I want you to think about your actual daily cycle. If you’re someone who spends hours on TikTok or navigating via GPS, you need a device that can handle heavy lifting without needing a wall outlet by 3:00 PM. I always check how the phone handles background tasks; a high-quality processor isn’t just for gaming, it’s actually crucial for managing energy efficiency so your phone doesn’t die mid-scroll. Stop chasing the biggest number and start looking for the most reliable runtime.

Budget vs Flagship Smartphones Stop Paying for Unnecessary Hype

Here is the reality: most of us are paying a “prestige tax” without even realizing it. When you look at the gap between budget vs flagship smartphones, you’ll notice that the extra thousand dollars usually goes toward things you might not even use, like professional-grade video stabilization or a titanium frame. If your daily routine consists of scrolling TikTok, answering emails, and taking casual photos of your brunch, you don’t need a device that’s built for a professional cinematographer.

Instead of getting swept up in the marketing hype, I always look at the camera quality vs price ratio. I want to know: does this mid-range phone take photos that look good on my Instagram feed, or am I paying for sensor technology that only matters if I’m shooting 4K footage at sunset? For most of us, a slightly older flagship or a high-end mid-ranger is the sweet spot. It gives you the speed and reliability you need without the unnecessary financial friction of buying into a brand’s latest hype cycle.

The Efficiency Audit Camera Quality vs Price Ratio and Storage

Let’s talk about the “camera trap.” We’ve all seen those ads where a phone promises professional-grade cinematography, but for most of us, that’s just overkill. Before you drop an extra $400 just for a better zoom lens, do a quick audit of your actual habits. If you’re mostly just snapping quick shots of your lunch or documenting a thrift haul, you don’t need a sensor that rivals a DSLR. Focus on the camera quality vs price ratio instead; look for a mid-range phone that handles natural light well and won’t lag when you’re trying to capture a candid moment.

Then, there’s the storage situation, which is where most people’s systems fall apart. I see so many people buying a phone with 64GB or 128GB thinking it’s plenty, only to spend their entire weekend deleting old screenshots just to download a single app. If you’re a heavy user, figure out your smartphone storage requirements now. If you record a lot of video or keep your entire photo library on your device, go higher. It is much cheaper to pay a little more upfront for extra space than it is to deal with the constant friction of a “storage full” notification every three days.

My Quick-Start Checklist for Avoiding Buyer’s Remorse

  • Do a “digital footprint” audit before you shop. Open your most-used apps—whether it’s Notion, Instagram, or a heavy mobile game—and check if they run better on one OS over the other. Don’t buy a phone based on what a reviewer says; buy it based on how your specific apps actually feel.
  • Ignore the “Mega-Pixel” trap. A 108MP camera doesn’t mean your photos won’t look grainy in low light. If you aren’t a professional creator, stop obsessing over the raw numbers and just go to a store to see how the actual processing looks in person.
  • Prioritize “Usability” over “Screen Size.” A massive screen looks great in ads, but if you’re constantly struggling to reach the top corner with one hand while holding a coffee, it’s a bad system. If you have smaller hands or a busy lifestyle, go for the “compact” models.
  • Check the ecosystem friction. If all your existing gear—your laptop, your tablet, your smart watch—is already built around one ecosystem, switching might feel like a “tech upgrade” but it’ll actually just create more daily friction. Stick to what works with your current setup unless you’re ready for a total overhaul.
  • Look at the repairability and longevity, not just the launch date. Check if the brand actually supports software updates for 4-5 years. There’s no point in buying a “budget” phone if it becomes a paperweight in eighteen months because the security updates stopped.

The Bottom Line: Making Your Decision Stick

Stop chasing the highest numbers on a spec sheet; instead, audit your actual daily habits—like how often you’re actually low on battery or how much storage your photo library really eats up—and buy for your reality.

Don’t let brand loyalty or marketing hype dictate your budget; if you don’t need a professional-grade camera or a super-powered processor for your freelance work or social life, save your money and stick to a mid-range device that does the job.

Choose an ecosystem (iOS vs. Android) based on the friction it removes from your life, not which one is “cooler,” because once you’re in a system, the ease of your daily workflow matters way more than the logo on the back of the phone.

The Bottom Line

At the end of the day, picking a phone shouldn’t feel like you’re studying for a final exam. We’ve covered a lot—from cutting through the OS hype and ignoring useless spec sheets to realizing that a flagship price tag doesn’t always mean a better life. The goal was to help you audit what you actually need, whether that’s a battery that survives your longest days or a camera that just works without needing a professional setup. Just remember: buy for your actual daily habits, not for the version of yourself that lives in a tech enthusiast’s dream world. Once you strip away the marketing fluff, you’re left with a tool that should simply serve you without adding more digital clutter to your plate.

My biggest piece of advice is to stop letting the “next big thing” anxiety dictate your spending. Technology is meant to be a frictionless part of your routine, not a source of constant upgrade stress. If your current setup gets you from point A to point B without a headache, you’re already winning. When you do decide to switch, do it because your current system is actually breaking down, not because a shiny new ad told you to. Focus on building a life that runs smoothly, and let your tech be the quiet engine in the background that just works.

Frequently Asked Questions

Should I prioritize getting a brand new phone or is buying a refurbished model actually a smart move for my budget?

Honestly, if you’re looking to save money without feeling like you’re using a brick, go refurbished. I’m a huge fan of buying used or certified pre-owned—it’s way more sustainable and keeps your bank account from screaming. Just don’t go random on eBay; stick to reputable sites that offer a warranty. If you can get a last year’s flagship refurbished, you’re getting better tech for way less than a brand-new mid-range model.

How much storage do I really need so I'm not constantly deleting photos and apps every two weeks?

Look, I used to be the person constantly deleting old screenshots just to take one new photo, and it’s a massive productivity killer. If you’re a casual user, 128GB is your baseline. But if you’re anything like me—recording video, downloading massive playlists for commutes, or hoarding apps—go for 256GB. Honestly, the jump to 256GB is the best “peace of mind” investment you can make to stop the constant storage anxiety.

If I switch from Android to iPhone (or vice versa), how much of a headache is it going to be to move all my stuff over?

Honestly? It’s a bit of a headache, but it’s manageable if you prep. If you’re moving to iPhone, use the “Move to iOS” app—it handles the heavy lifting for contacts and photos. Switching to Android is similar with Google Drive. The real friction isn’t the files; it’s the apps you’ve paid for and your WhatsApp chats. My advice: back everything up to a cloud service first. Don’t wing it, or you’ll regret it.

Reaching goals with an accountability partner.

The Power of Accountability Partners in Reaching Your Goals

I used to think that if I just bought the right aesthetic planner or downloaded one more productivity app, I’d finally become that person who actually follows through on their goals. It was a total lie. I spent months trying to white-knuckle my way through freelance projects, only to end up staring at a blank cursor at 2 AM, feeling like a complete fraud. I realized that willpower is a finite resource, and relying on it alone is a recipe for burnout. The missing piece wasn’t a better calendar; it was finding a solid accountability partner to actually keep me honest when the initial motivation inevitably fizzled out.

I’m not here to sell you on some high-level “mastermind group” or some expensive coaching program that promises to change your life overnight. Instead, I want to give you the actual, unpolished mechanics of how to find—and more importantly, how to maintain—an accountability partner relationship that doesn’t feel like a chore. We’re going to skip the toxic positivity and focus on building a functional system that works for your real, messy life.

Table of Contents

Stop Relying on Willpower Alone the Power of an Accountability Partner

Stop Relying on Willpower Alone the Power of an Accountability Partner

Look, I used to think that if I just “tried harder” or stared at my to-do list with enough intensity, I’d finally become that person who hits every deadline. I was wrong. Willpower is a finite resource—it’s like the battery on my phone; it drains faster the more you use it, and eventually, you’re just running on empty. Relying solely on your own mental grit is a recipe for burnout. Instead of white-knuckling your way through every single task, you need to lean into peer support systems that take the pressure off your internal monologue.

When you bring someone else into the loop, the dynamic shifts from a mental struggle to a social commitment. It’s much harder to ghost your own goals when you know someone is actually expecting an update by 5:00 PM. This isn’t about having a boss breathing down your neck; it’s about maintaining motivation through social support so that when your initial excitement inevitably dips, the system keeps you moving. It turns a lonely, uphill battle into a shared rhythm, making the whole process feel significantly less heavy.

Moving Beyond Solo Goal Setting Strategies to Real Social Support

Moving Beyond Solo Goal Setting Strategies to Real Social Support.

The problem with most solo goal setting strategies is that they exist entirely inside your own head. You can buy all the aesthetic planners and download every productivity app on the market, but when you’re staring at a blank screen at 11 PM, those tools don’t actually care if you finish. That’s where the shift happens—moving from internal discipline to building actual peer support systems. It’s about realizing that your brain is wired for social connection, and you can actually hijack that instinct to keep yourself on track.

I used to think I needed a high-level professional coach to fix my life, but honestly, that’s often overkill for everyday consistency. While professional coaching vs accountability partner is a valid debate for high-stakes career moves, for most of us, we just need someone who understands our specific daily friction. You don’t need a formal lecture; you need someone to check in and ask, “Hey, did you actually do that thing you said you’d do?” It’s about maintaining motivation through social support so that your progress isn’t just dependent on how much caffeine you’ve had.

Building Peer Support Systems That Actually Keep You on Track

Building Peer Support Systems That Actually Keep You on Track

The trick isn’t just finding a random person to text; it’s about constructing peer support systems that actually function when you’re feeling uninspired. You don’t need a formal committee, but you do need a structure. I like to think of it as a “low-stakes check-in.” This could be a monthly coffee date with a friend who is also trying to level up, or a dedicated Discord channel where you drop your weekly wins. The goal is to move away from vague “I’ll try harder” promises and toward a system where you have a specific person expecting a status update by Friday at 5:00 PM.

If you’re looking for something more structured, you might consider maintaining motivation through social support by joining a niche community or a local hobby group. This is where you distinguish between casual encouragement and real, actionable feedback. While some people might jump straight to looking for professional coaching vs accountability partner scenarios, I’ve found that a peer who is actually in the trenches with you—dealing with the same burnout or time-management struggles—is often much more effective for long-term consistency.

Professional Coaching vs Accountability Partner Choosing Your Right System

It’s easy to get these two confused, but choosing the wrong one is a fast track to wasted time and money. Think of it this way: a professional coach is like hiring a specialist to overhaul your entire engine, while an accountability partner is more like having a co-pilot to make sure you don’t drift off course during the flight. When you’re looking at professional coaching vs accountability partner options, you have to decide if you need deep, psychological restructuring or just someone to check in on your weekly progress.

Coaching is an investment in expertise; it’s about uncovering the “why” behind your roadblocks. It’s high-level and often expensive. On the other hand, a peer-based system is much more about the “how.” If you’re already clear on your direction but just struggle with the daily grind, you don’t need a high-priced consultant—you need someone to help with maintaining motivation through social support. Sometimes, the best system isn’t a formal expert, but a friend who will actually call you out when you skip your habit tracking for the third day in a row.

Using Habit Tracking Techniques to Maintain Motivation Through Social Suppo

Once you’ve actually found your person, you need a way to make the progress visible. This is where habit tracking techniques move from being a solo obsession to a shared ritual. Instead of just texting “I did it” every day—which gets old fast—try using a shared digital dashboard or even a simple, shared Google Sheet. There is something weirdly satisfying about seeing a streak grow in real-time, and when you know someone else is looking at that same spreadsheet, it adds a layer of social stakes that a private app just can’t replicate.

The goal isn’t to turn your friendship into a performance review, though. It’s about maintaining motivation through social support by celebrating the small wins together. If you’re using these peer support systems to tackle something big, like a career pivot or a fitness goal, use your check-ins to troubleshoot the friction points. If you miss a day, don’t ghost them; instead, use that moment to figure out why the system broke. It’s much easier to fix a bad habit when you have someone helping you audit the process.

How to actually make this work (without it becoming a chore)

  • Pick someone who matches your energy, not just your schedule. If you’re a “let’s crush this goal” person and they’re a “let’s grab coffee and vent” person, the system is going to fail within two weeks. You need someone who is actually going to hold you to the standard you set.
  • Set a specific cadence and stick to it. Don’t just say “we’ll check in sometime.” Decide right now if it’s a Sunday night text or a quick Tuesday morning FaceTime. If it’s vague, it’s not a system; it’s just a wish.
  • Keep the updates short and actionable. I don’t need a play-by-play of your entire week. Just report the win, the loss, and the plan for the next seven days. If your check-ins take an hour, you’ll both start avoiding them.
  • Establish a “no-judgment” clause upfront. The whole point is to be honest about when you slip up. If you feel like you have to perform or pretend you’re doing great when you’re actually struggling, you’re just wasting your time and theirs.
  • Use a shared digital space to lower the friction. Whether it’s a simple shared Notion page, a dedicated Slack channel, or even just a pinned thread in your DMs, having a central spot to drop your progress makes the “work” part of accountability feel much lighter.

The TL;DR: Making it stick

Stop treating willpower like a bottomless well; it’s a finite resource that will fail you when you’re tired or stressed, so build a social safety net instead.

Choose your partner based on the specific system you need—get a coach for high-level professional strategy, but find a peer for the day-to-day grit of staying on track.

Don’t just talk about your goals; use concrete tools like habit trackers to turn your social support into a measurable, repeatable system that actually works.

Final Thoughts on Building Your Support System

At the end of the day, finding an accountability partner isn’t about adding more pressure to your plate; it’s about building a safety net for when your motivation inevitably dips. We’ve looked at why willpower is a finite resource, how to distinguish between a professional coach and a peer, and why tracking your habits is way more effective when someone else is actually looking at the data with you. Whether you choose a high-stakes professional setup or a low-key check-in with a friend, the goal is the same: removing the friction between who you are and who you’re trying to become.

Please stop treating your personal growth like a solo mission that you have to conquer through sheer grit. Adulthood is messy, and trying to navigate your biggest goals without a system in place is just asking for burnout. You don’t need to have everything figured out by Monday, but you do need to stop white-knuckling your way through every single habit. Find your person, set your systems, and give yourself the grace to realize that asking for support is actually a power move.

Frequently Asked Questions

How do I actually bring this up to a friend without making things awkward or sounding like I'm assigning them homework?

The key is to frame it as a mutual exchange, not a chore you’re dumping on them. Instead of saying, “Can you check in on me?”, try something like, “I’m trying to get better at [goal] and I know you’re working on [their goal] too. Want to be accountability buddies? We can just text each other a quick update once a week.” It turns it into a shared system rather than a one-sided favor.

What do I do if my partner starts being too intense or if they're the one constantly flaking on our check-ins?

Look, this is where most people let their systems fall apart. If they’re being too intense, you need to set a boundary immediately—remind them you want a partner, not a drill sergeant. But if they’re the one constantly flaking, it’s time to face the facts: they aren’t a reliable part of your system. Don’t waste energy chasing them. Just pivot, find someone who actually respects the check-ins, and keep moving.

Is it better to find someone who is already where I want to be, or someone who is struggling through the same exact phase as me?

Honestly, it’s not an either/or situation—you actually need both, but for different reasons. If you want someone ahead of you, you’re looking for a mentor to show you the blueprint and keep your standards high. But if you want someone in the trenches with you, you’re looking for a peer to keep you sane when things get messy. Use the “expert” to guide your direction and the “peer” to survive the daily grind.

Tips on how to spot a fake website.

How to Verify a Website’s Legitimacy Before Shopping

I’ll never forget the sinking feeling in my gut last year when I realized I’d just handed my credit card info to a site that looked exactly like my favorite vintage lamp shop. I was sitting at my desk, mid-task, thinking I’d found the ultimate deal, only to realize the URL was off by just one single letter. It’s that specific, hollow kind of frustration that makes you want to just close your laptop and stay off the internet entirely. Most “experts” will tell you that you need expensive security software or a degree in cybersecurity to stay safe, but honestly? That’s just gatekeeping. Learning how to spot a fake website shouldn’t be this complicated or expensive; it’s really just about developing a few gut-check systems that work in real-time.

I’m not here to give you a lecture on digital encryption or throw a bunch of tech jargon at you that you’ll never use. Instead, I want to share the actual, unpolished ways I vet every single link before I click “buy.” I’m going to walk you through the simple, repeatable steps I use to verify a site’s legitimacy so you can shop with confidence. My goal is to give you a no-nonsense toolkit that turns your skepticism into a superpower, making sure you never have that “oh no” moment again.

Table of Contents

Stop the Panic My No Nonsense System for How to Spot a Fake Website

Stop the Panic My No Nonsense System for How to Spot a Fake Website.

First, let’s talk about the URL, because that’s usually where the most obvious slip-ups happen. I always tell my friends to slow down and actually read the address bar before they even think about typing in a password. Scammers are getting better at mimicking big brands, but they almost always mess up the spelling or add a weird suffix. You’re identifying suspicious URLs by looking for those tiny typos—like “amaz0n” instead of “amazon.” If the domain looks like a random string of gibberish or doesn’t match the brand you’re looking for, just close the tab. It’s not worth the risk.

Next, I do a quick health check on the site’s security. I’m not saying you need to be a cybersecurity expert, but checking SSL certificate authenticity is a non-negotiable part of my routine. Look for that little padlock icon in the browser bar; it’s a basic indicator that your connection is encrypted. If a site claims to be a major retailer but shows “Not Secure” in the corner, that is a massive red flag. I treat my digital data like my vintage electronics—I don’t let just anyone touch the wiring.

Decoding the Deception Identifying Suspicious Urls and Phishing Website Red

Decoding the Deception Identifying Suspicious Urls and Phishing Website Red

First things first, we need to talk about the address bar. Most people just glance at the name and click, but that’s exactly how you get caught. When you’re identifying suspicious URLs, look for those tiny, intentional typos that scammers love. They’ll swap an “m” for an “rn” or add an extra letter to a brand name to make it look legitimate at a glance. If the URL looks like a random string of gibberish or uses a weird domain extension you’ve never seen before, trust your gut and get out of there.

Next, let’s look at the security side of things. I used to think that seeing a little padlock icon meant a site was 100% safe, but it’s a bit more nuanced than that. While checking SSL certificate authenticity is a huge part of your defense, remember that scammers can get certificates too. Instead, look at the context of the site. Does the layout feel broken? Are the images low-res or stretched? If you’re browsing an online shop and the “About Us” page is blank or the contact info is just a generic Gmail address, those are massive phishing website red flags that something is off.

The Real Security Check Checking Ssl Certificate Authenticity Without the J

The Real Security Check Checking Ssl Certificate Authenticity Without the J

Okay, let’s talk about that little padlock icon in your browser bar. You’ve probably been told that seeing it means a site is “safe,” but honestly, that’s a bit of a half-truth that leads to a lot of confusion. All that padlock actually tells you is that the connection between your computer and the site is encrypted. It doesn’t automatically mean the person on the other end isn’t a total scammer. Most modern phishing sites have gone through the trouble of getting their own encryption just to look legitimate.

To actually practice checking SSL certificate authenticity without feeling like you’re back in a high school computer lab, just click that padlock icon. A little menu will pop up—don’t let the technicality scare you. Look for the part that says “Connection is secure” and then click “Certificate is valid.” If it’s a massive, well-known retailer, the details should look clean and professional. If you’re on a random site and the certificate looks expired, issued to a weird, unrelated entity, or just plain broken, that is your signal to close the tab immediately. It’s one of the easiest ways to catch signs of a fraudulent online store before you even think about entering your card info.

Dont Get Burned How to Verify Domain Ownership in Seconds

Once you’ve moved past the basic visual cues, it’s time to pull back the curtain on who actually owns the site you’re browsing. I used to think a professional-looking homepage meant a business was legit, but that’s just good design masking a bad intention. One of my favorite quick hacks for how to verify domain ownership is using a WHOIS lookup tool. It sounds techy, but it’s literally just a public database that shows when a domain was registered and by whom.

If you’re browsing a site that claims to be a massive retailer but the domain was only registered three weeks ago? That is a massive red flag. Legitimate companies don’t just pop into existence overnight, especially not the ones selling high-end gear or designer clothes. When you’re applying online shopping safety tips to your daily routine, checking the age of a domain is a total game-changer. It takes about thirty seconds, but it can save you from the headache of a drained bank account and a lost package that was never actually coming.

Smart Shopping Habits Signs of a Fraudulent Online Store You Cant Ignore

Even if you’ve already checked the URL and confirmed the SSL certificate, a site can still feel “off” once you actually start browsing. One of the biggest signs of a fraudulent online store is a price point that feels too good to be true. If you’re looking at a pair of designer sneakers or a high-end tech gadget and the price is 70% lower than anywhere else on the internet, your gut is probably right—it’s a trap. These sites often use high-pressure tactics, like countdown timers or “only 2 left in stock” pop-ups, to make you bypass your logic and rush to checkout.

Beyond the pricing, take a second to look at the actual shop layout. I always look for clunky design elements, broken links, or weirdly phrased product descriptions that look like they were run through three different translators. If the “About Us” page is generic or the contact information is just a suspicious web form with no physical address or real customer service number, back away. These are classic online shopping safety tips for a reason: if they aren’t willing to be transparent about who they are, they probably aren’t worth your money.

The Quick-Check Checklist: 5 ways to vet a site before you hit 'buy'

  • Trust your gut on the design. If a site looks like it was built in 2004 or the images are all weirdly blurry and pixelated, it’s probably a red flag. Real brands invest in their aesthetic; scammers just want your data and they don’t care how messy the site looks.
  • Reverse-image search the product photos. If you’re looking at a “designer” bag on a random site and the photo is the exact same one used on a high-end luxury site, you’re being played. Scammers just grab photos from Google and hope you don’t notice.
  • Check the “Contact Us” page for actual human connection. If there’s no physical address, no phone number, or just a generic contact form that feels like a black hole, walk away. A legitimate business wants you to be able to reach them if something goes wrong.
  • Look for the “Too Good to Be True” pricing. If you find a brand new PlayStation or a pair of $200 sneakers for $29.99, it’s not a steal—it’s a trap. Scammers use high-demand items at impossible prices to trigger that impulse-buy dopamine hit.
  • Read the social proof (the real kind). Don’t just look at the testimonials on their own website—those are easy to fake. Go to Reddit, TikTok, or even Google Reviews to see what actual people are saying about their experience with that specific URL.

The TL;DR: Your Quick Cheat Sheet for Staying Safe

Trust your gut and your eyes—if a URL looks like a typo-ridden mess or a store’s layout feels “off,” it probably is.

Don’t just look for the padlock icon; actually take two seconds to verify the domain and the SSL certificate before you type in your card info.

Build a habit of skepticism; treating every unsolicited link or “too good to be true” deal with a little bit of healthy doubt is your best defense.

Staying One Step Ahead

At the end of the day, spotting a fake website isn’t about being a tech genius or having a degree in cybersecurity; it’s just about slowing down. We’ve gone over the essentials: squinting at those URLs to find the typos, checking for that SSL padlock, verifying domain ownership, and trusting your gut when a “too good to be true” sale pops up. If you can remember to do even just two of these things before you hit enter on your credit card info, you’re already ahead of most people. It’s all about building those small, mental checkpoints that stop a scammer in their tracks before they even get a chance to try.

I know it can feel overwhelming to navigate the internet when it feels like there’s a new scam every single week, but please don’t let it turn into digital paranoia. You don’t need to live in a state of constant suspicion; you just need to live with a little bit of intentional friction. By implementing these tiny systems, you’re taking the power back from the scammers and putting it back into your own hands. Adulthood is messy enough without having to worry about your bank account being drained by a shady pop-up. Stay sharp, stay skeptical, and keep your systems running smooth.

Frequently Asked Questions

What should I do if I realize I've already entered my credit card info on a site that looks sketchy?

First, take a breath—panicking won’t un-send the data, but acting fast will. Immediately call your bank or open your banking app to freeze that card. Don’t wait for a transaction to show up; just kill the card now. Then, scan your statements for any weird micro-charges. If you used the same password for that site as your email or bank, change those immediately. It’s a massive pain, but it’s better than a drained account.

Is it actually safe to use public Wi-Fi to shop, or am I just asking for trouble?

Honestly? It’s a massive gamble. If you’re just scrolling TikTok, you’re fine, but pulling out your credit card on public Wi-Fi is asking for trouble. Those open networks are basically playgrounds for hackers to intercept your data. If you absolutely have to shop while you’re out, please just use your cellular data or fire up a VPN. It’s a small extra step that saves you from a massive headache later.

If a site has the little padlock icon in the URL bar, can I 100% trust that it's not a scam?

Short answer: Absolutely not. This is probably the biggest misconception out there, and it’s exactly how people get burned. That little padlock just means your connection is encrypted—it means no one is eavesdropping on your data while it travels. It doesn’t mean the person on the other end isn’t a total scammer. A thief can definitely buy an SSL certificate just as easily as a legitimate business can. Don’t let the icon lower your guard.

Tips on how to be more disciplined.

How to Maintain Self-discipline When You’ve Lost Motivation

I used to think that learning how to be more disciplined meant waking up at 5:00 AM, drinking a green smoothie, and following some grueling, aesthetic morning routine I saw on a productivity influencer’s TikTok. Honestly? That approach is a total scam. It’s all about the performative productivity and none of it actually sticks when real life happens—like when your laptop dies mid-deadline or you’re just plain exhausted. I spent years trying to force myself into these rigid, impossible molds, only to end up feeling like a failure every time I slipped up.

I’m done with the gatekeeping and the “just grind harder” nonsense. In this guide, I’m stripping everything back to show you how to build actual, sustainable systems that work even when your motivation inevitably hits zero. We aren’t going to talk about willpower like it’s some magical superpower; instead, I’m going to give you the unpolished, practical steps to reduce the friction in your daily routine. Let’s stop reacting to our chaos and start building a life that actually runs itself.

Table of Contents

Stop Living in Emergency Mode How to Be More Disciplined

Stop Living in Emergency Mode How to Be More Disciplined

Most of us treat discipline like a muscle we need to flex all at once, waiting for some sudden burst of motivation to strike. We wait until the deadline is screaming in our faces, and then we scramble. That’s not discipline; that’s just survival mode. If you’re constantly white-knuckling your way through tasks, you aren’t actually building discipline—you’re just burning out. Real discipline isn’t about a massive, heroic effort; it’s about developing willpower and self-control through small, boring, repeatable actions that don’t require a pep talk every single morning.

To break this cycle, you have to stop relying on “feeling like it” and start leaning into habit formation strategies. Instead of trying to overhaul your entire personality overnight, look at your environment. If your phone is the reason you can’t focus, put it in another room. If you struggle to start, commit to just five minutes. When you shift the focus from sheer grit to building a reliable daily routine for productivity, you stop reacting to life and start actually running it.

Ditch the Motivation Myth for Real Habit Formation Strategies

Ditch the Motivation Myth for Real Habit Formation Strategies.

We’ve been sold this lie that discipline is about waiting for a lightning bolt of inspiration to strike. We think if we just feel “ready” or “inspired,” the work will happen. But honestly? Motivation is a fickle friend. It shows up when you’re caffeinated and feeling good, and it absolutely disappears the second you’re tired, stressed, or just plain bored. If you rely on it, you’re essentially building your life on sand.

Instead of chasing that high, you need to focus on habit formation strategies that work when you’re at your lowest. This is where you stop negotiating with yourself. When I’m staring at a project and my brain is screaming to scroll TikTok instead, I don’t wait for a mood shift; I rely on the system I’ve already built. It’s about lowering the barrier to entry so much that it becomes harder to skip than to just do it. We aren’t looking for grand gestures of willpower; we’re looking for a daily routine for productivity that feels so automatic you don’t even have to think about it.

Mastering Your Daily Routine for Productivity Without the Burnout

Mastering Your Daily Routine for Productivity Without the Burnout

The biggest mistake I see people making is trying to overhaul their entire existence overnight. You wake up at 5:00 AM, hit the gym, and drink a green smoothie, only to crash by noon because your nervous system is screaming. That’s not discipline; that’s a recipe for burnout. Instead of trying to force a personality transplant, focus on a daily routine for productivity that actually respects your energy levels. I like to use “anchor tasks”—small, non-negotiable actions that happen at the same time every day, like clearing my inbox or prepping my workspace. These anchors act as guardrails, making it easier to stay on track without needing constant mental effort.

When you build these small loops, you aren’t just managing time; you’re developing willpower and self-control through repetition rather than sheer force. It’s about lowering the barrier to entry. If you want to tackle a daunting project, don’t aim for four hours of deep work; aim for fifteen minutes of focused effort. By breaking things down, you’re essentially using overcoming procrastination techniques to trick your brain into starting. Once the momentum kicks in, the friction disappears.

Overcoming Procrastination Techniques for a Life That Actually Runs

We need to stop treating procrastination like a moral failing and start seeing it for what it actually is: a glitch in our systems. When I used to sit there staring at a blank screen for three hours, I thought I just lacked character. Turns out, I just didn’t have a way to lower the barrier to entry. One of my favorite overcoming procrastination techniques is the “five-minute rule.” I tell myself I only have to work on the task for five minutes—just enough time to break the seal. Usually, once the friction of starting is gone, the momentum carries me through.

If you’re constantly fighting yourself, you aren’t failing at discipline; you’re just exhausted from the mental tug-of-war. Instead of relying on raw grit, focus on developing willpower and self-control by removing the triggers that make you want to scroll TikTok instead. Clear your workspace, put your phone in another room, and design your environment to make the “right” choice the easiest one. It’s not about being a robot; it’s about building a setup where you don’t have to fight your own brain every single morning.

Building Mental Toughness Training and Goal Setting for Consistency

Here’s the thing about discipline: it’s not a personality trait you’re either born with or you aren’t. It’s more like a muscle that gets stronger every time you do the thing you actually don’t want to do. I used to think I just lacked “grit,” but really, I just hadn’t started any actual mental toughness training. Instead of waiting for a lightning bolt of inspiration, I started treating small, uncomfortable tasks like reps in a gym. Whether it’s choosing to finish a project instead of scrolling for an hour or sticking to a meal prep plan when I’m exhausted, these micro-decisions are what actually build your capacity for the big stuff.

To make this stick, you have to move past vague dreams and get specific with your goal setting for consistency. If your goal is “to be more productive,” you’re going to fail because that’s too blurry to track. You need targets that are so granular they feel almost boring. I don’t aim to “master my career”; I aim to “clear my inbox by 4 PM every Tuesday.” When your goals are bite-sized and repeatable, you stop relying on fleeting bursts of willpower and start building a life that runs on reliable, automated momentum.

Low-Friction Systems: 5 Ways to Stop Negotiating With Yourself

  • Design your environment to win by default. If you want to stop scrolling at 11 PM, put your phone in the kitchen. If you need to work out, lay your clothes out the night before. Don’t rely on willpower; rely on making the “bad” habits harder to reach and the “good” ones impossible to miss.
  • Use the “Two-Minute Rule” to kill decision fatigue. If a task takes less than two minutes—answering a quick email, putting a dish in the dishwasher, or filing a document—just do it immediately. It stops the tiny, nagging chores from piling up into a mountain of mental clutter.
  • Schedule your “Deep Work” blocks like non-negotiable appointments. Treat your focus time with the same respect you’d give a meeting with your boss. Put it in your digital calendar, set your status to “away,” and stop expecting yourself to be productive while your notifications are screaming at you.
  • Audit your “Energy Leaks.” Discipline isn’t just about doing more; it’s about not wasting what you have. If you’re trying to tackle a complex project right after a heavy lunch or late at night when your brain is fried, you’re setting yourself up to fail. Match your hardest tasks to your highest energy windows.
  • Build in “Grace Periods” so you don’t spiral. Perfectionism is the enemy of discipline. If you miss a day or slip up on a habit, don’t throw the whole week away. Just get back on the system at the next available opportunity. The goal is consistency, not a flawless streak.

The TL;DR for a Smoother Life

Stop waiting for a “burst of motivation” to strike; discipline is just about building boring, reliable systems that work even when you’re feeling zero energy.

Protect your mental bandwidth by automating your daily decisions—the less you have to think about how to start, the more likely you are to actually do it.

Consistency isn’t about being perfect every single day; it’s about having a recovery plan for when things go sideways so one bad day doesn’t wreck your entire system.

The Long Game

Look, we’ve covered a lot of ground here, from ditching the toxic idea that you need “motivation” to actually building the systems that carry you when you’re feeling zero energy. We talked about mastering your routine, tackling procrastination head-on, and building that mental toughness required to stay consistent. The takeaway isn’t that you need to become a productivity robot overnight; it’s that you need to stop relying on willpower and start relying on your architecture. When you have your environment, your schedule, and your habits working for you, discipline stops feeling like a heavy lift and starts feeling like just what you do.

At the end of the day, I want you to remember that discipline isn’t about punishing yourself for being human. It’s actually the ultimate form of self-care. It’s about making promises to yourself and actually keeping them so you can stop living in that constant state of reactive chaos. You don’t have to get everything perfect by Monday morning. Just pick one system, one small tweak, and start there. Life is way too messy to wait for the “perfect” moment to get your act together. Build your systems, find your flow, and finally give yourself some breathing room.

Frequently Asked Questions

How do I stay disciplined when my environment is constantly distracting me?

Look, you can’t white-knuckle your way through a messy room or a loud cafe forever; you’ll just burn out. Instead of fighting your surroundings, redesign them. I use “sensory gating”—noise-canceling headphones for the audio chaos and a dedicated “focus zone” where my phone literally doesn’t exist. If you can’t change your room, change your visual field. Clear the clutter in your immediate line of sight. Control the friction, and the discipline follows.

What do I do if I mess up my routine one day—do I just scrap the whole system?

Absolutely not. Please, for the love of everything, do not scrap the whole thing just because you missed a beat. That’s exactly how you end up in a spiral of “all-or-nothing” thinking, which is the ultimate productivity killer. Think of it like a leaky faucet—one drip doesn’t mean the whole plumbing system is broken. You just tighten the valve and keep going. Just reset at the next scheduled block. One bad day isn’t a failure; it’s just data.

How can I tell the difference between being disciplined and just being a workaholic?

The difference is your “why” and your “how.” Discipline is about intentionality—you’re following a system to reach a specific goal, and once the work is done, you actually stop. It feels controlled. Workaholism, on the other hand, feels like an escape or a compulsion. It’s reactive, chaotic, and usually leaves you feeling burnt out rather than accomplished. If your “productivity” is actually just running away from rest, you’re not being disciplined; you’re just spinning your wheels.

How to fix scratched wood furniture.

How to Easily Repair Scratches in Wood Furniture

I was halfway through a much-needed iced coffee when my keys slipped, dragging a jagged, ugly white line right across my favorite thrifted mid-century coffee table. My first instinct was to panic and assume I’d just ruined a piece of history, but honestly? That’s exactly why I love learning the actual mechanics of things. Most people will tell you that you need to sand down the entire surface or hire a professional restorer, but if you’re looking for how to fix scratched wood without turning your living room into a construction zone, you don’t need to go that far. Most surface damage is just a temporary setback that can be solved with a few smart systems and the right supplies.

In this guide, I’m stripping away the intimidating jargon to give you a realistic, step-by-step workflow for different types of damage. Whether it’s a light scuff that just needs a little walnut magic or a deeper gouge that requires a bit more elbow grease, I’ll show you how to handle it. No gatekeeping, no expensive specialized tools—just the straightforward methods I use to keep my own furniture looking seamless so you can get back to your life.

Table of Contents

Guide Overview

Total Time: 1-3 hours
Estimated Cost: $20-50
Difficulty: Beginner

Tools & Supplies

  • Sandpaper (various grits for smoothing)
  • Microfiber cloth (for cleaning dust)
  • Soft brush (for applying finishes)
  • Wood filler or wax sticks (depending on scratch depth)
  • Wood stain or touch-up marker (to match color)
  • Furniture polish or wax (for final protection)

Step-by-Step Instructions

  • 1. First things first, you need to assess the damage to see if we’re dealing with a surface-level nuisance or a full-on structural crisis. Take a damp cloth and wipe down the area to get rid of any dust or oils; if the scratch is just a light scuff, you might be able to buff it out with a bit of walnut or a specialized wood balm. But if you can actually feel the indentation with your fingernail, we’re going to need to move into actual repair mode.
  • 2. Grab some fine-grit sandpaper—I usually keep a pack of 220-grit in my toolkit for stuff like this—and start lightly sanding the area around the scratch. The goal here isn’t to sand the whole piece of furniture down, but to smooth out the jagged edges of the wood fibers so the repair material can actually sit flush. Just be careful not to go overboard, or you’ll end up with a divot that’s harder to fix than the original scratch.
  • 3. Once the area is smooth and clear of debris, it’s time to fill the gap. If you want to keep it low-effort, a wooden filler stick works wonders, but if you’re looking for a more permanent fix, grab a small tub of wood putty that’s a close match to your furniture’s stain. Use a small putty knife to press the filler into the scratch, making sure you pack it in tight so there aren’t any air pockets hiding underneath.
  • 4. Now, here is where most people mess up: they leave the filler too thick. You want to swipe the putty across the scratch so it sits slightly higher than the surrounding wood, because as it dries, it’s naturally going to shrink a little bit. Let it sit for whatever time the packaging suggests—usually a couple of hours—and don’t try to rush this part, or your finish will look wonky.
  • 5. Once the filler is completely dry and hard, grab that sandpaper again (go even finer this time, like 320 or 400-grit) and sand the patch until it is perfectly level with the rest of the surface. Run your hand over it; if you can feel a bump or a dip, keep sanding until it feels seamless. You want the transition between the wood and the filler to be practically invisible to the touch.
  • 6. If the color looks a little off after sanding, don’t panic—this is totally normal. You can use a furniture touch-up marker or even a tiny bit of wood stain on a Q-tip to blend the repair back into the original color. Just do a test run on a hidden spot, like the underside of the table, to make sure you aren’t making things worse before you commit to the actual scratch.
  • 7. Finally, you need to seal the deal so the repair actually lasts. Apply a thin layer of furniture wax or a clear matte finish over the area to protect the new filler and restore the original sheen. This step is what turns a “patch job” into a properly maintained piece of furniture that won’t just peel or flake off in a month.

Understanding How to Fix Scratched Wood

Understanding How to Fix Scratched Wood.

Before you grab your tools, you need to do a quick triage on the damage. Not all scratches are created equal, and treating a light scuff like a deep canyon is a one-way ticket to a ruined finish. I always start by running my fingernail across the area; if it catches, you’re likely looking at something that needs more than just a quick buff. For those shallow, annoying marks that just ruin the visual flow, you can often get away with buffing out surface scratches using a bit of fine-grit sandpaper or even a specialized polishing compound.

If the damage is deeper, that’s when the real strategy comes in. You have to decide if you’re just masking the issue or actually restoring furniture finish to its original glory. For those nasty, structural dents, I usually recommend a solid wood filler application guide approach—don’t just glob it on. You want to work with the grain and keep it level. If you’re dealing with a dark piece and don’t have fancy supplies on hand, I’ve actually found the old walnut trick for wood scratches to be a total lifesaver for a quick, temporary fix.

Key Things to Know

Key Things to Know: wood stain matching.

Before you dive into the actual repair, there are a few things I’ve learned the hard way so you don’t have to. First, always do a test run on an inconspicuous spot—like the underside of a table or the back of a chair leg. This is non-negotiable if you’re attempting any wood stain matching techniques, because even if the color looks right in the bottle, it might react totally differently once it hits your specific piece of furniture. You want to make sure you aren’t accidentally making a small eyesore into a permanent disaster.

Also, pay attention to the depth of the damage. There is a massive difference between a light scuff and a structural dent. If you’re just buffing out surface scratches with a bit of wax or a fine-grit sandpaper, you’re golden. But if you’re staring at a canyon in your coffee table, you’re going to need to be much more intentional with your materials. Taking ten minutes to assess the severity now will save you from the frustration of a half-finished job later.

Pro-Tips to Save Your Sanity (and Your Furniture)

  • Don’t go full power-tool mode immediately. Always start with the gentlest method possible—like a walnut or a specialized wax stick—before you even think about reaching for the sandpaper. You can always add more material, but you can’t put wood back once you’ve sanded it away.
  • Test your color match on a hidden spot first. I know, it’s annoying, but testing a stain or a marker on the underside of a table or inside a cabinet leg is the only way to make sure you don’t accidentally turn your oak table into a mahogany mess.
  • Sand with the grain, always. I’ve seen so many people go across the grain and end up with permanent swirl marks that look way worse than the original scratch. Think of it like smoothing out a wrinkle in a shirt; you want to follow the natural lines.
  • Keep your workspace clean of dust. If you’re sanding, wipe the area down with a tack cloth or a slightly damp microfiber before applying any finish. If you trap tiny bits of sawdust under your repair, the texture will feel gritty and look uneven under the light.
  • Match your finish to your lifestyle. If this is a coffee table that’s going to see constant spills and heavy use, don’t skimp on the sealant. A quick fix looks great for a day, but a solid topcoat is what actually keeps the repair from disappearing the next time you move a coaster.

The TL;DR on Saving Your Furniture

Don’t overthink it—most surface scratches only need a quick fix like a walnut or a wood marker, so don’t reach for the heavy-duty sandpaper unless you absolutely have to.

Match your tools to the depth of the damage; light scratches need color, while deep gouges need actual filler to prevent them from looking like scars.

Always test your solution on a hidden spot first, because the last thing you want is to “fix” a scratch only to realize you’ve accidentally stained the entire tabletop.

The Bottom Line

The Bottom Line: fixing scratched wood.

At the end of the day, fixing scratched wood isn’t about achieving some impossible, factory-perfect finish; it’s about stopping the damage before it gets worse. Whether you ended up using a simple furniture marker for those light surface scuffs or went the full route with sandpaper and stain for a deeper gouge, the goal was the same: restoring the integrity of the piece. Just remember to always test your materials on a hidden spot first and, most importantly, don’t rush the drying process. If you try to skip steps to save time, you’ll likely just end up creating a new mess that requires even more work to clean up later.

I know that staring at a damaged piece of furniture can feel like another thing on your “to-do” list that you just don’t have the energy for, but I promise it’s worth the twenty minutes of effort. There is something genuinely satisfying about taking something that looks broken and making it functional again through a little bit of systemized effort. Don’t let a few scratches make you feel like your home is falling apart or that you need to replace everything you own. You’ve got the tools, you’ve got the method, and now you have the confidence to maintain your space one small repair at a time.

Frequently Asked Questions

What if the scratch is actually a deep gouge that goes all the way through the wood?

Okay, if we’re talking a full-on gouge that’s actually breached the surface, we’ve moved past the “quick fix” stage. You can’t just buff this out. You’re going to need some wood filler—get a high-quality one that matches your finish—and a putty knife. Pack it in, let it dry completely, and then sand it flush. It’s a bit more work, but it’s the only way to actually level it back out.

Can I use these same methods on my vintage thrifted pieces, or will I ruin the original finish?

This is exactly why I keep my multi-tool handy—because vintage pieces are a whole different beast. Honestly? Be careful. If you’re working on a high-value antique with a delicate patina or a lacquer finish, these quick fixes might be too aggressive. For my thrifted finds, I always test a tiny, hidden spot on the underside first. If it reacts weirdly, stop immediately. Don’t let a quick repair turn into a total restoration nightmare.

How do I know if I should just try a quick fix like a furniture marker or if I actually need to sand everything down and start over?

Honestly, it’s all about the depth of the damage. If it’s just a surface-level scuff that catches your fingernail slightly, go for the furniture marker or a wax stick—it’s a five-minute fix. But if you can actually feel a groove or the wood grain is splintering, a marker won’t cut it. That’s when you need to bite the bullet, grab your sandpaper, and actually level things out. Don’t waste time on a band-aid for a deep wound.

How to cook without a recipe guide.

How to Cook Delicious Meals Without Following a Recipe

I used to think that if I didn’t have a printed list of measurements and a timer set to the exact second, I was basically asking for a kitchen disaster. I spent way too many Tuesday nights staring at a screen, paralyzed by the fear that missing one teaspoon of cumin would ruin my entire life. But honestly? The idea that you need a rigid manual for every single meal is such a gatekept myth. Learning how to cook without a recipe isn’t about being some culinary prodigy; it’s just about understanding how flavors actually interact so you can stop treating your stovetop like a high-stakes exam.

I’m not here to give you some flowery, “trust your soul” nonsense that leaves you with a burnt pan and an empty stomach. Instead, I want to give you the actual, unpolished systems I use to turn random fridge scraps into real food. We’re going to break down the logic of flavor and the basic mechanics of heat, so you can finally ditch the cookbook and actually enjoy the process. No fluff, no expensive equipment required—just the practical steps to making your kitchen run smoothly and intuitively.

Table of Contents

Stop Being a Cookbook Slave How to Cook Without a Recipe

Stop Being a Cookbook Slave How to Cook Without a Recipe

The biggest mistake people make is treating a recipe like a legal contract. If you’re staring at a list of ingredients and panicking because you’re out of shallots, you’ve already lost the battle. Instead, you need to start thinking in terms of understanding cooking ratios. Most great dishes are just a balance of components: a base (starch or protein), a fat, an acid, and a seasoning. Once you realize that a splash of vinegar or a squeeze of lime is just doing the same job as a recipe’s “lemon juice” requirement, the fear of deviating disappears.

I like to view my kitchen through the lens of pantry staple cooking. If you have an onion, some garlic, a can of chickpeas, and a tin of spices, you have a meal. The secret isn’t memorizing measurements; it’s mastering the art of balancing acid and fat. If a sauce feels heavy or dull, don’t reach for more salt—reach for something bright. This kind of kitchen improvisation is what turns cooking from a stressful chore into a repeatable, low-friction system that actually works when you’re tired.

Mastering the Math Understanding Cooking Ratios for Total Control

Mastering the Math Understanding Cooking Ratios for Total Control

If you want to stop staring blankly at a list of measurements, you have to start understanding cooking ratios. Think of it like a cheat code: once you realize that most vinaigrettes are just three parts oil to one part acid, or that a standard roux is always equal parts fat and flour, you stop needing a manual. It’s not about memorizing a thousand different recipes; it’s about learning the underlying logic that connects them. When you grasp these fundamental proportions, you move from following instructions to actually directing the process.

This is where your pantry staple cooking really levels up. Instead of worrying if you have the exact amount of heavy cream for a specific pasta sauce, you look at what you have and adjust based on the ratio of liquid to fat. If a dish feels heavy or “flat,” you don’t reach for more salt; you look at balancing acid and fat. A squeeze of lemon or a splash of vinegar can cut through richness and wake the whole pan up. It’s less about math and more about finding that sweet spot where everything just clicks.

The Pantry Staple Cooking System That Ends Decision Fatigue

The Pantry Staple Cooking System That Ends Decision Fatigue.

The biggest drain on my energy after a long day of client calls isn’t the cooking itself—it’s the “what should I eat?” loop. To kill that decision fatigue, I stopped viewing my kitchen as a collection of random items and started seeing it as a modular system. I rely on pantry staple cooking to do the heavy lifting, meaning I always have a base (grains or pasta), a protein (canned beans or frozen shrimp), and a way to make it interesting. When you have these layers ready, you aren’t “making a meal” from scratch; you’re just assembling components.

The real magic happens when you move past just adding salt and start focusing on flavor profiling techniques. Instead of following a list of ingredients, I look at what my dish is missing. If it feels heavy or dull, I’m looking at balancing acid and fat—maybe a squeeze of lemon or a splash of vinegar to cut through some olive oil. Once you understand how these elements interact, you can stop staring at the pantry door and start building meals based on what your body actually craves in the moment.

Flavor Profiling Techniques to Build Better Meals From Scratch

Once you’ve got your ratios down, the real magic happens when you start playing with flavor profiling techniques to actually make a dish taste like something. I used to think a meal was “done” just because it followed the instructions, but now I realize that’s just the baseline. To move from following a blueprint to actually cooking, you need to understand the tug-of-war between different elements. Most of the time, when a dish feels “flat” or boring, it’s not because it lacks salt; it’s usually because it’s missing an acid or a bit of heat to wake everything up.

My go-to move is always balancing acid and fat. If you’ve made a rich, creamy pasta that feels a bit too heavy or “muddy” on the palate, don’t reach for more cream—reach for a squeeze of lemon or a splash of vinegar. That brightness cuts through the weight and makes the flavors pop. Think of it like adjusting the lighting in a room; the acid provides the clarity. Learning these little tweaks is how you build true kitchen improvisation skills that allow you to fix a meal on the fly without needing to start over.

Beyond the Manual Using Kitchen Improvisation Skills and Smart Substitution

At some point, you’re going to realize you’re halfway through a sauce and realize you’re missing that one specific herb the recipe called for. This is where most people freeze up and order takeout, but this is actually where your kitchen improvisation skills should kick in. Instead of seeing a missing ingredient as a failure, view it as a prompt to pivot. If a recipe asks for lemon juice and you’re out, don’t panic—reach for apple cider vinegar or even a splash of white wine. It’s all about understanding the function of what you’re replacing, whether it’s for brightness, moisture, or texture.

The real secret to staying calm when things go sideways is having a mental substitution guide for ingredients ready to go. If you understand the core components of a dish, you can swap things out on the fly without ruining the vibe. If a dish feels “heavy” or one-note, you probably just need to work on balancing acid and fat. A squeeze of lime or a tiny drop of vinegar can cut through a rich, fatty sauce like magic. Once you stop treating ingredients like sacred relics and start seeing them as tools, the kitchen stops being a place of stress and starts feeling like a playground.

5 Small Systems to Stop the Recipe Dependency

  • Trust your nose and your eyes, not just the timer. If a sauce looks too thick, add liquid; if it smells raw, give it more time. Your senses are better sensors than any printed instruction.
  • Keep a “flavor kit” within arm’s reach. Having your acid (lemon/vinegar), salt, heat (chili flakes), and fat (olive oil/butter) right there makes it easy to tweak a dish on the fly without hunting through cupboards.
  • Learn the “base” logic. Most great meals start with the same pattern: aromatics (onion/garlic) + fat + protein + liquid. Once you recognize the pattern, you aren’t following a recipe; you’re just filling in the blanks.
  • Stop aiming for perfection and start aiming for “good enough.” If you’re improvising, don’t stress about exact measurements. A splash of soy sauce or a pinch of cumin is a low-stakes experiment, not a permanent mistake.
  • Keep a “cheat sheet” of your own wins. When you accidentally make a killer pasta sauce without looking at a book, jot down what you actually did. Building your own mental library is more useful than any cookbook.

The TL;DR on Building Your Own Kitchen Intuition

Stop treating recipes like legal documents; once you understand basic ratios and flavor profiles, you can start cooking with what you actually have on hand instead of what the book says you should have.

Build a reliable pantry system so that “making something from nothing” becomes a repeatable process rather than a stressful scavenger hunt through your cabinets.

Trust your senses over the timer—learn to taste, smell, and adjust as you go, because the most important ingredient isn’t in a jar, it’s your ability to pivot when a dish needs more acid or salt.

Trust Your Gut (And Your Pantry)

At the end of the day, cooking without a recipe isn’t about being a master chef or having some innate, magical connection to ingredients. It’s just about building a better system. Once you stop treating every meal like a high-stakes exam and start leaning on ratios, flavor profiles, and a well-stocked pantry, the anxiety starts to fade. You don’t need to memorize a thousand different instructions when you understand the fundamental logic of how salt, fat, acid, and heat interact. When you stop being a slave to the manual and start focusing on the actual mechanics of flavor, you turn a chore into something that feels intuitive and, dare I say, actually fun.

I know that the first few times you try to improvise, it might feel like you’re one wrong move away from a kitchen disaster. But here’s the secret: even the professionals mess up sometimes, and most mistakes are totally fixable with a little extra acid or a pinch of salt. Don’t let the fear of a “failed” meal keep you stuck in a cycle of decision fatigue and takeout orders. Embrace the mess, trust your senses, and remember that cooking is a skill you build, not a test you pass. You’ve got this—now go see what you can make with what’s already in your fridge.

Frequently Asked Questions

What do I do if I accidentally over-season something while I'm experimenting?

Don’t panic—it happens to the best of us. If you’ve gone overboard on salt, hit it with something acidic like lemon juice or vinegar to balance it out. If it’s too spicy, reach for dairy (think Greek yogurt or heavy cream) or something sweet to dull the heat. If the whole thing just tastes “too much,” try increasing the volume by adding more unseasoned bulk, like more grains, veggies, or broth, to dilute the intensity.

How do I know when a dish is actually "done" if I'm not following specific timing instructions?

This is where you stop looking at the clock and start using your senses. It’s honestly a game-changer. For proteins, get a digital thermometer—it’s the only way to be certain without the guesswork. For veggies, it’s all about texture; you want them tender but with a little bite left. Use your nose, too. If the smell shifts from “raw” to “fragrant,” you’re usually right on the money. Trust your gut.

Is there a specific way to practice this without wasting a bunch of expensive ingredients?

Honestly, the “trial and error” phase is where most people quit because they’re scared of wasting a $15 steak. Don’t do that. Start with your “low-stakes” ingredients—think rice, pasta, or eggs. Practice your flavor balancing on a basic bowl of noodles or a simple omelet. Once you can intuitively know if a sauce needs more acid or salt without ruining a main course, you’ll have the confidence to move on to the expensive stuff.

Page 3 of 15

Powered by WordPress & Theme by Anders Norén