I used to think that if I wanted to make something aesthetic for my apartment, I had to spend a small fortune on high-end decor or spend weeks mastering complex patterns. Then I actually tried my hand at macrame for beginners and realized I had spent way too much time watching those hyper-stylized, “perfect” tutorials that make everything look effortless while leaving you with a tangled mess of cord and zero clue what just happened. The truth is, you don’t need a dedicated studio or a dozen specialized tools to create something beautiful; you just need to understand the basic physics of a knot and stop overcomplicating the process.
In this guide, I’m stripping away the fluff and the gatekeeping to give you a repeatable system for getting started. We aren’t going to get bogged down in every single knot variation known to man; instead, I’m going to show you the only three knots you actually need to know to make a decent plant hanger. I’ll walk you through the exact cord lengths to buy, how to set up a workspace that won’t drive you crazy, and how to fix your mistakes without starting from scratch. Let’s get into it.
Table of Contents
Guide Overview
Tools & Supplies
- Scissors for cutting cord
- Measuring tape for cord length
- S-hooks or dowel for hanging
- Cotton macrame cord (3mm or 4mm) 50-100 meters
- Wooden dowel or ring 1 unit
Step-by-Step Instructions
- 1. First things first, you need to grab your supplies, and please don’t go overboard. You don’t need a $50 boutique kit to start; you just need some 3mm or 4mm cotton cord (single strand is easier to work with if you’re a total newbie) and a sturdy piece of driftwood or even a wooden dowel from a craft store. I also highly recommend getting a pair of sharp fabric scissors—the kind that actually cut through rather than just chewing on the cord.
- 2. Once you have your gear, you need to set up your workspace. This is where most people fail because they try to hold the cord in their teeth or balance it on a table. Find a command hook or a sturdy clothes hanger and secure your cord to it. This creates tension, which is the secret sauce to making your knots look intentional rather than like a tangled mess of yarn.
- 3. Now, let’s tackle the “foundation” knot, which is the Square Knot. Take four strands of cord, fold them in half, and attach them to your dowel. You’ll be working with four separate tails. To do a square knot, take the left cord, cross it over the middle two cords to form a shape like a “4,” then take the right cord, pass it over the tail of the left cord, under the middle cords, and up through the loop on the left.
- 4. To finish the square knot, you have to do the exact same thing but in reverse. Take that same right cord, cross it over the middle to make a backwards “4,” pass the left cord over it, under the middle, and up through the loop. If you do this correctly, the knot should look perfectly symmetrical. If it looks lopsided, you probably missed the “reverse” step, and that’s okay—just snip it off and try again.
- 5. If you want to add some texture without a massive learning curve, try the Spiral Stitch (or Half Knot). This is literally just doing the first half of the square knot over and over again without doing the reverse step. It creates this really cool, twisting effect that looks way more complex than it actually is. It’s my favorite way to add “intentional” chaos to a piece when I’m feeling a bit lazy.
- 6. As you move through your project, you’re going to notice your hands getting a little tired or your tension getting inconsistent. This is where the system kicks in: take breaks. If your knots start looking loose and wonky, it’s because your hands are fatigued. Step away, grab some water, and come back when you can actually feel the cord. Consistency is more important than speed.
- 7. Finally, once you’ve reached the length you want, it’s time for the “fringe phase.” This is the most satisfying part. Use your sharp scissors to trim the bottom of your cords so they are all even. If you want that trendy, boho look, you can take a fine-tooth comb and gently brush out the ends of the cotton cord to turn it into soft, fluffy fringe. It’s the easiest way to make a beginner project look like something you actually bought at a high-end shop.
Understanding Macrame for Beginners
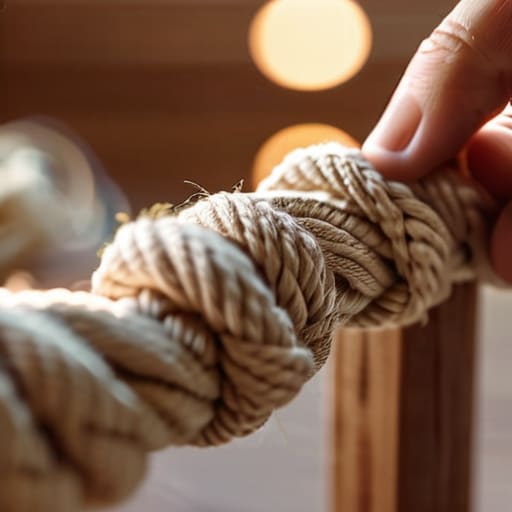
Before you dive headfirst into a massive project, you need to understand that macrame is less about “artistic talent” and more about muscle memory. It’s a series of repetitive knots that eventually become second nature, much like learning to type or cook a basic meal. The biggest mistake I see people making is trying to jump straight into complex macrame wall hanging patterns before they even understand the tension of their hands. If you pull too hard on one strand, your whole piece will look lopsided, and trust me, that is a headache you don’t need.
To keep things from getting messy, I highly recommend focusing on your essential macrame tools list early on. You don’t need a studio full of gear, but having a decent pair of sharp fabric scissors and a wooden dowel or ring makes a world of difference. Also, don’t get overwhelmed by the sheer variety of materials out there; when you’re looking at macrame cord types for beginners, stick to single-twist or braided cotton. It’s much more forgiving on your fingers while you’re still figuring out how to hold macrame cord without getting a cramp.
Key Things to Know
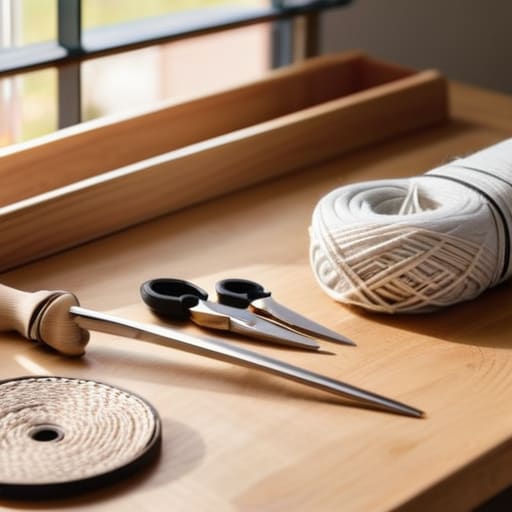
Before you dive into your first project, let’s talk about the stuff that usually trips people up. First off, don’t go overboard with the gear. You don’t need a studio full of equipment; a solid essential macrame tools list is really just a pair of sharp fabric scissors, a measuring tape, and maybe some S-hooks to keep things hanging while you work. The biggest mistake I see is people overcomplicating their setup before they even tie a single knot. Keep it simple so you can actually focus on the rhythm of the cord.
The other thing is the material. Not all string is created equal, and if you pick the wrong one, you’ll be fighting it the whole time. When looking into macrame cord types for beginners, I highly recommend starting with a 3mm or 4mm single-strand cotton cord. It’s much more forgiving and easier to manipulate than the twisted varieties. If the cord is too slippery or too stiff, you’ll end up frustrated rather than relaxed. Just pick something soft, consistent, and easy to work with so you can actually enjoy the process.
My Survival Guide for Not Losing Your Mind (and Your Cord)
- Don’t go overboard on the expensive stuff right away. I know the high-end cotton looks pretty on Pinterest, but grab some decent, mid-range single-twist cord first. You’re going to make mistakes, and it’s way less stressful to mess up a $5 roll than a $30 one.
- Invest in a real mounting board or a heavy-duty stand. I tried doing my first few pieces hanging from a command hook on my bedroom door, and let me tell you—nothing kills the vibe like your project swinging wildly every time you breathe. You need stability to get consistent tension.
- Learn to embrace the “messy” middle. Your first few knots are going to look uneven, and your tension will probably be all over the place. That’s fine. Don’t pull everything apart and start over; just keep moving. The muscle memory comes with the repetition, not by over-analyzing every single loop.
- Get a pair of sharp fabric shears, not kitchen scissors. If your scissors are dull, you’ll end up fraying the ends of your cord before you even get started, which makes the whole process way more frustrating than it needs to be.
- Use a clipboard or some painter’s tape to secure your work. If you don’t have a dedicated macrame stand yet, just tape your dowel or ring to a flat surface. It keeps your hands free to actually focus on the knots instead of fighting to keep the project upright.
The TL;DR on Starting Macrame
Don’t get paralyzed by the “perfect” aesthetic you see on Pinterest; focus on mastering three basic knots first, and everything else will eventually click.
Invest in decent cotton cord rather than the cheap, fraying stuff—it’s much less frustrating to work with when you’re still learning your tension.
Embrace the mess and the mistakes because your first few pieces are going to look a little wonky, and that’s actually part of the system.
Don't Let the Perfectionism Win
Look, if you’re feeling a little overwhelmed by all the different cord types and knot variations we just went over, that is totally normal. The most important thing to remember is that you don’t need a studio full of expensive supplies to get started; you just need some decent cotton cord, a dowel or branch, and the willingness to mess up a few knots along the way. We covered the basics of tension, the essential knots like the square knot and lark’s head, and how to keep your workspace organized so you aren’t fighting your own materials. Just focus on mastering the rhythm of the movement rather than trying to make a museum-quality piece on your very first attempt.
At the end of the day, macrame is just another way to build a system for relaxation. It’s a tactile, analog way to unplug from the digital noise and actually create something tangible with your hands. Don’t get caught in the trap of thinking your first plant hanger has to look exactly like the ones on a curated Pinterest board. The goal isn’t perfection; it’s about the process of making. So, grab your multi-tool to trim those stray ends, clear off your desk, and just start knotting. You’ve got this.
Frequently Asked Questions
Do I really need to buy a whole kit, or can I just grab some string from a craft store and start?
Honestly? Skip the pre-packaged kits. Most of them are overpriced and come with mediocre cord that’ll frustrate you before you even get started. If you want to save money and avoid the clutter, just head to a craft store and grab a spool of 3mm or 4mm cotton macrame cord. It’s much cheaper, and you can choose the exact texture you want. Just make sure it’s single-twist or 3-ply so it actually holds your knots.
How do I stop my knots from looking messy or uneven while I'm still learning the rhythm?
The secret isn’t actually “better hands”—it’s tension management. Most of us pull too hard on one side and go limp on the other, which is why your knots end up looking wonky. My trick? Use a clipboard or a heavy-duty stand to keep your work steady, and try to “count” your pulls. Don’t just yank; aim for a consistent, rhythmic tug. It’s about muscle memory, not perfection. Just keep breathing and stay steady.
What’s the best way to hang my finished piece without it falling off the wall two days later?
Honestly, there is nothing worse than finishing a piece only to watch it slide down the wall an hour later. Don’t rely on those flimsy command strips; they aren’t built for the weight of cotton cord. If you’re hanging a wooden dowel, use a sturdy sawtooth hanger or a heavy-duty picture hook. If it’s a lightweight wall hanging, a small finishing nail is your best friend. Just make sure you’re actually hitting a stud or using a proper anchor.