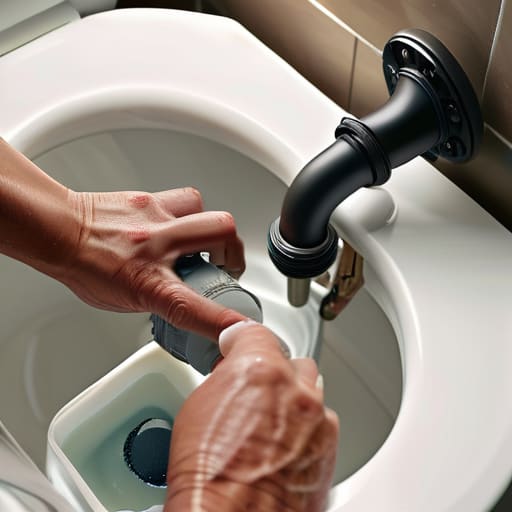
I was sitting in my living room trying to focus on a client’s content calendar when that faint, relentless hissing sound started drifting in from the hallway. It’s that specific, maddening noise that tells you your water bill is about to spike and your peace of mind is officially gone. Most people hear that sound and immediately think they need to call an expensive plumber or replace the entire unit, but honestly? That’s just unnecessary gatekeeping. Learning how to fix a running toilet is usually way less about heavy machinery and way more about just understanding a few basic parts that have probably just shifted out of place.
I’m not going to give you some overly technical manual that reads like a textbook; I want to give you the actual, unpolished steps to stop the noise. In this guide, we’re going to troubleshoot the most common culprits—from the flapper to the fill valve—without the unnecessary panic. My goal is to help you walk into that bathroom, pop the lid off, and get everything running smoothly again in under fifteen minutes. Let’s just get this sorted so you can get back to your life.
Table of Contents
Guide Overview
Tools & Supplies
- Adjustable wrench for tightening bolts
- Screwdriver for securing components
- Sponge for removing excess water
- Replacement flapper (1 unit)
- Replacement fill valve (1 unit)
- Replacement toilet tank repair kit (1 kit)
Step-by-Step Instructions
- 1. First, we need to see what we’re actually dealing with. Take the lid off the tank—carefully, because these things are heavy and if you crack it, you’re having a very bad day—and just look inside. Don’t touch anything yet, just observe. Watch where the water is going. Is it constantly trickling into the bowl? Is the water level in the tank so high it’s spilling into the overflow tube? Knowing the visual evidence tells us exactly which part is failing.
- 2. If the water is constantly running into that open tube in the middle, your float is likely the culprit. The float is that ball or cylinder that rises with the water to tell the valve to shut off. If it’s set too high, the water just keeps coming until it hits the overflow. Use the adjustment screw on top of the fill valve to lower the float level so the water stops well below the top of that tube.
- 3. If the float level looks fine but you still hear that ghostly hissing sound, it’s time to check the flapper. This is that rubber plug at the bottom that lifts up when you flush. Over time, these get old, warped, or covered in mineral buildup, meaning they won’t create a watertight seal. Reach in and feel the rubber; if it feels slimy or looks uneven, it’s time to swap it out.
- 4. Before you go running to the hardware store, do a quick “clean check.” Sometimes, a little bit of grit gets stuck under the flapper, preventing it from seating properly. Take a cloth and wipe down the rim of the flush valve seat and the underside of the flapper. If that fixes the leak, you just saved yourself a trip and a few bucks.
- 5. If the flapper is definitely shot, replacing it is surprisingly easy. Turn off the water supply valve (the little knob on the wall behind the toilet) and flush to empty the tank. Unhook the old flapper from its pegs and remove the chain. When you buy the new one, bring the old one with you to the store. There are dozens of different shapes and sizes, and “close enough” usually isn’t good enough in plumbing.
- 6. Once the new flapper is in place, reconnect the chain. You want just enough slack so that it doesn’t pull the flapper up prematurely, but not so much that it gets caught underneath the seal. If the chain is too long, it can actually interfere with the closing process, causing the exact leak you’re trying to fix.
- 7. To wrap this up, turn the water supply back on and let the tank fill. Watch it closely to make sure the water stops at the right level and that the flapper settles down firmly. If you don’t hear that constant trickle anymore, congratulations, you’re officially a DIYer and you just saved yourself a $150 plumber visit.
Understanding How to Fix a Running Toilet
Before you go diving into the tank, you need to understand that most of these issues aren’t actually “broken” in a catastrophic way; they’re usually just out of alignment. Think of it like a glitch in a system rather than a total hardware failure. Most of the time, you’re dealing with a simple toilet flush mechanism troubleshooting situation where a piece of plastic has shifted or a seal has worn down from years of use. If you can identify whether the water is escaping from the bottom of the tank or just constantly refilling from the top, you’ve already won half the battle.
If you notice the water is constantly trickling into the overflow tube, you’re likely looking at a toilet fill valve adjustment issue rather than a part that needs a full replacement. On the flip side, if you hear that ghostly hissing sound even when no one has used the bathroom, it’s usually a sign that you need to replace the toilet flapper because it’s no longer creating a tight seal. Once you recognize these patterns, the whole process feels way less intimidating.
Key Things to Know
Before you start unscrewing anything, there are a few things I’ve learned from my own trial and error that can save you a massive headache. First, don’t panic if you see water constantly trickling into the bowl; it doesn’t always mean you need a whole new toilet. Most of the time, it’s just a matter of toilet flush mechanism troubleshooting. Check the chain first. If it’s too tight, it keeps the valve open; if it’s too long, it gets caught under the seal. It’s a tiny detail, but it’s usually the culprit behind that annoying, endless sound.
Another thing to keep an eye on is the water level in toilet tank. If the water is rising so high that it’s spilling into the overflow tube, you aren’t looking at a leak, but rather a calibration issue. You can usually fix this with a quick toilet fill valve adjustment using the screw located on top of the valve. It’s much easier to tweak the float than it is to call out a professional for something that takes thirty seconds to dial in.
My quick-fix cheat sheet for when things go sideways
- Don’t touch the handle first. If the water is constantly running, the problem is almost always inside the tank, not the lever you’re pressing. Start by lifting the lid and looking at the mechanics before you start twisting anything.
- Check the chain tension. If the chain connecting the handle to the flapper is too long, it gets caught underneath and keeps the seal open. If it’s too short, it won’t let the flapper drop all the way. Aim for just a little bit of slack.
- Feel the flapper for “mushiness.” Over time, those rubber seals get old and warped. If the flapper feels slimy or doesn’t sit flat against the hole, stop trying to adjust it and just go buy a replacement. They’re cheap and take two seconds to swap.
- Watch the water level in the overflow tube. If the water is pouring into that open pipe in the middle of the tank, your fill valve is set too high or it’s just broken. You need to adjust the float so the water stops well below the top of that tube.
- Keep a basic toolkit nearby. You don’t need a professional setup, but having a pair of pliers and maybe a screwdriver handy will save you from having to run back to the garage halfway through the job.
The TL;DR Version
Most running toilets are just a symptom of a worn-out flapper or a misaligned float, so don’t assume you need a whole new tank.
Always turn off the water supply valve before you start poking around; it’s a tiny step that prevents a massive, unmanaged mess.
Think of this as a quick diagnostic check rather than a plumbing overhaul—identify the part, swap it out, and get back to your day.
The Bottom Line
At the end of the day, a running toilet is usually just a symptom of one of three things: a faulty flapper, a misaligned float, or a clogged fill valve. Most of the time, you aren’t looking at a massive plumbing disaster; you’re just looking at a piece of rubber that has reached its expiration date. By taking ten minutes to peek inside the tank and identify the culprit, you’ve already done the hardest part. You’ve saved yourself a ridiculous water bill and, more importantly, you’ve avoided that unnecessary “emergency” phone call to a plumber that ends up costing more than the actual part.
I know that facing a broken fixture can feel a little intimidating if you didn’t grow up with a toolkit in your hand, but I promise it’s much more manageable than it looks. Once you realize that these systems are just a series of simple, replaceable parts, the anxiety starts to fade. Don’t let a little bit of running water make you feel like you aren’t “handy” enough. Every small fix you tackle is just another way of building your own competence and making your space feel a little more like yours. You’ve got this.
Frequently Asked Questions
Is it worth actually replacing the whole tank assembly, or can I just swap out a single part?
Honestly? Don’t go buying a whole new tank assembly unless you’ve literally dropped the toilet or the porcelain is cracked. That’s a massive, expensive headache you probably don’t need. Most of the time, it’s just a $10 flapper or a $15 fill valve that’s gone rogue. Swap the individual part first. It’s faster, cheaper, and way less of a project. If that doesn’t fix it, then—and only then—should you consider the big overhaul.
How do I know if the problem is the flapper or if the fill valve is just acting up?
The easiest way to tell is the “dye test.” Drop a few drops of food coloring into the tank and wait about 15 minutes without flushing. If the water in the bowl starts turning that color, your flapper isn’t sealing properly and needs to be replaced. If the tank stays clear but the water is still running or won’t stop filling, the fill valve is likely the culprit.
Can I use any random parts from the hardware store, or do I need to find specific brands for my toilet model?
Honestly, don’t go buying random parts just because they look similar. While most standard flappers are pretty universal, things like fill valves or specific lever handles can be picky about their specific toilet model. To avoid a second trip to the hardware store (and more frustration), I always snap a quick photo of the inside of my tank and the brand name on the porcelain before I head out. It saves so much headache.
